Hi! Thank you for reading this talk. It means a lot to me. <3

A presentation at Web Unleashed 2019 in September 2019 in Toronto, ON, Canada by Catt Small
Hi! Thank you for reading this talk. It means a lot to me. <3
I’m Catt Small and I work as a Senior Product Designer at Etsy. I’m thankful to work at a cool place where they support my creativity and side projects. If you’re interested in working at Etsy, definitely hit me up—we have an office in Toronto as well as offices around the USA. And we support remote work. But repping Etsy is only part of why I gave this talk!
In my spare time, I make games. I also organize events and make other cool things like comics.
I’m going to talk about a game I spent 5 years of my life making.
Here’s your content warning: I talk about catcalling and street harassment, there are some cursewords in screenshots, and some of the words are gendered and abusive. If these things are triggering to you, I understand and I don’t want you to relive any trauma! They won’t show up for a few slides so you have time to CLOSE THE WINDOW~.
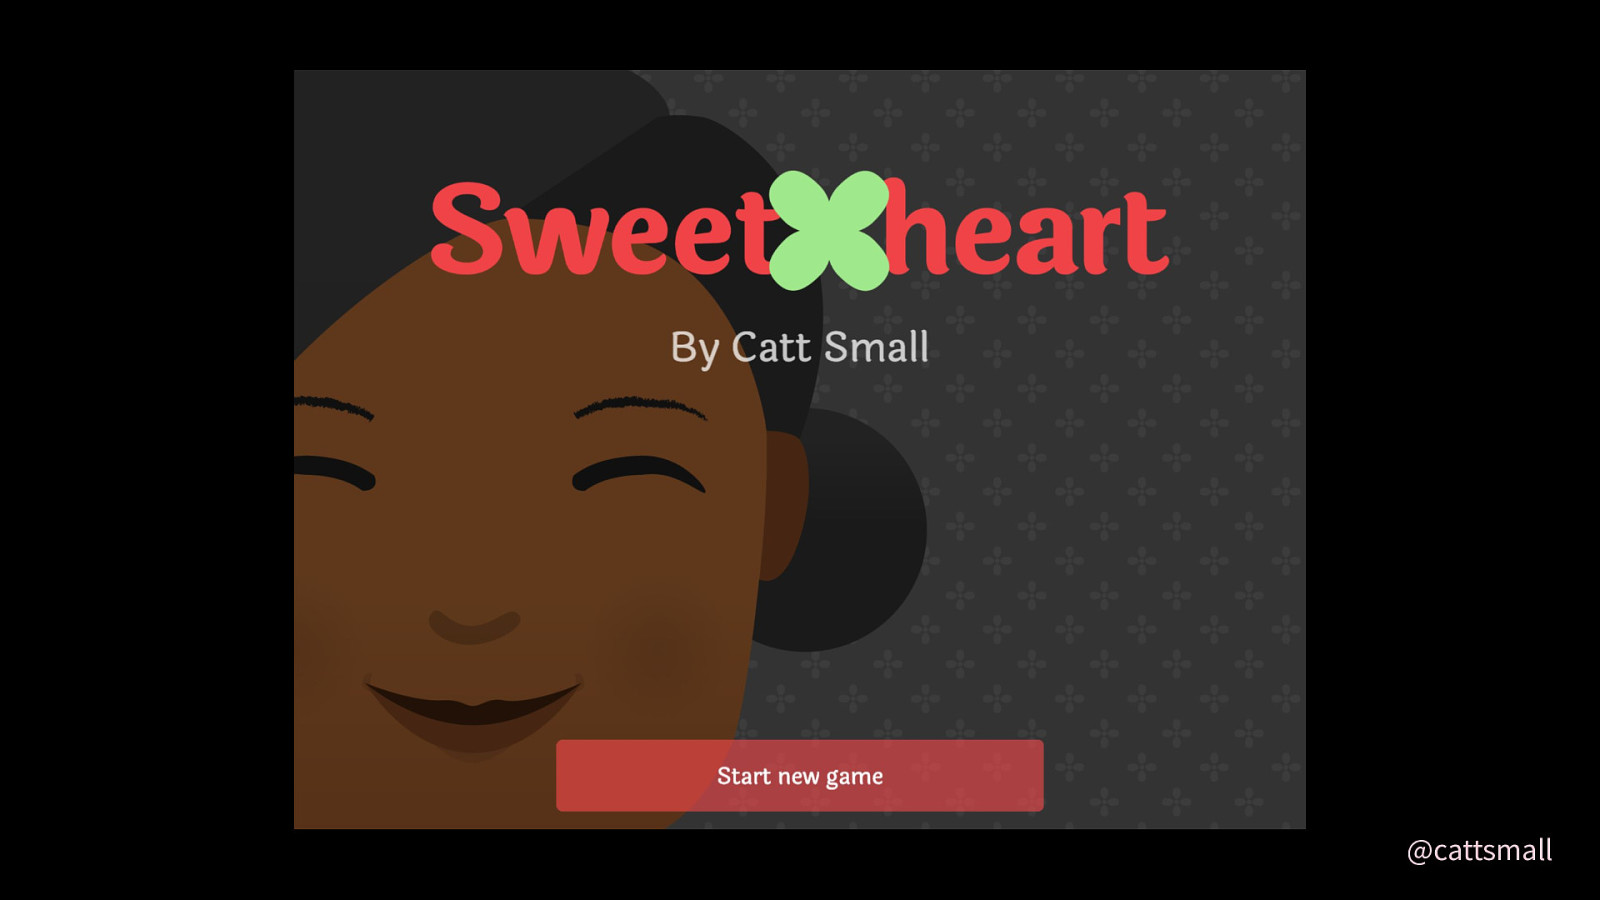
So, I made a web game called SweetXheart. In this game, you experience life as a college-age graphic designer who deals with street harassment and microaggressions.
It’s the largest game I’ve ever made; I started it in grad school and finished it way later. And as I said, it took five years to build. Surprise: it’s created using JavaScript!
If you don’t know what microaggressions are…. Wikipedia says the following:
“Brief and commonplace daily verbal, behavioural, or environmental indignities, whether intentional or unintentional.”
“They communicate hostile, derogatory, or negative prejudicial slights and insults toward any group, particularly culturally marginalized groups.”
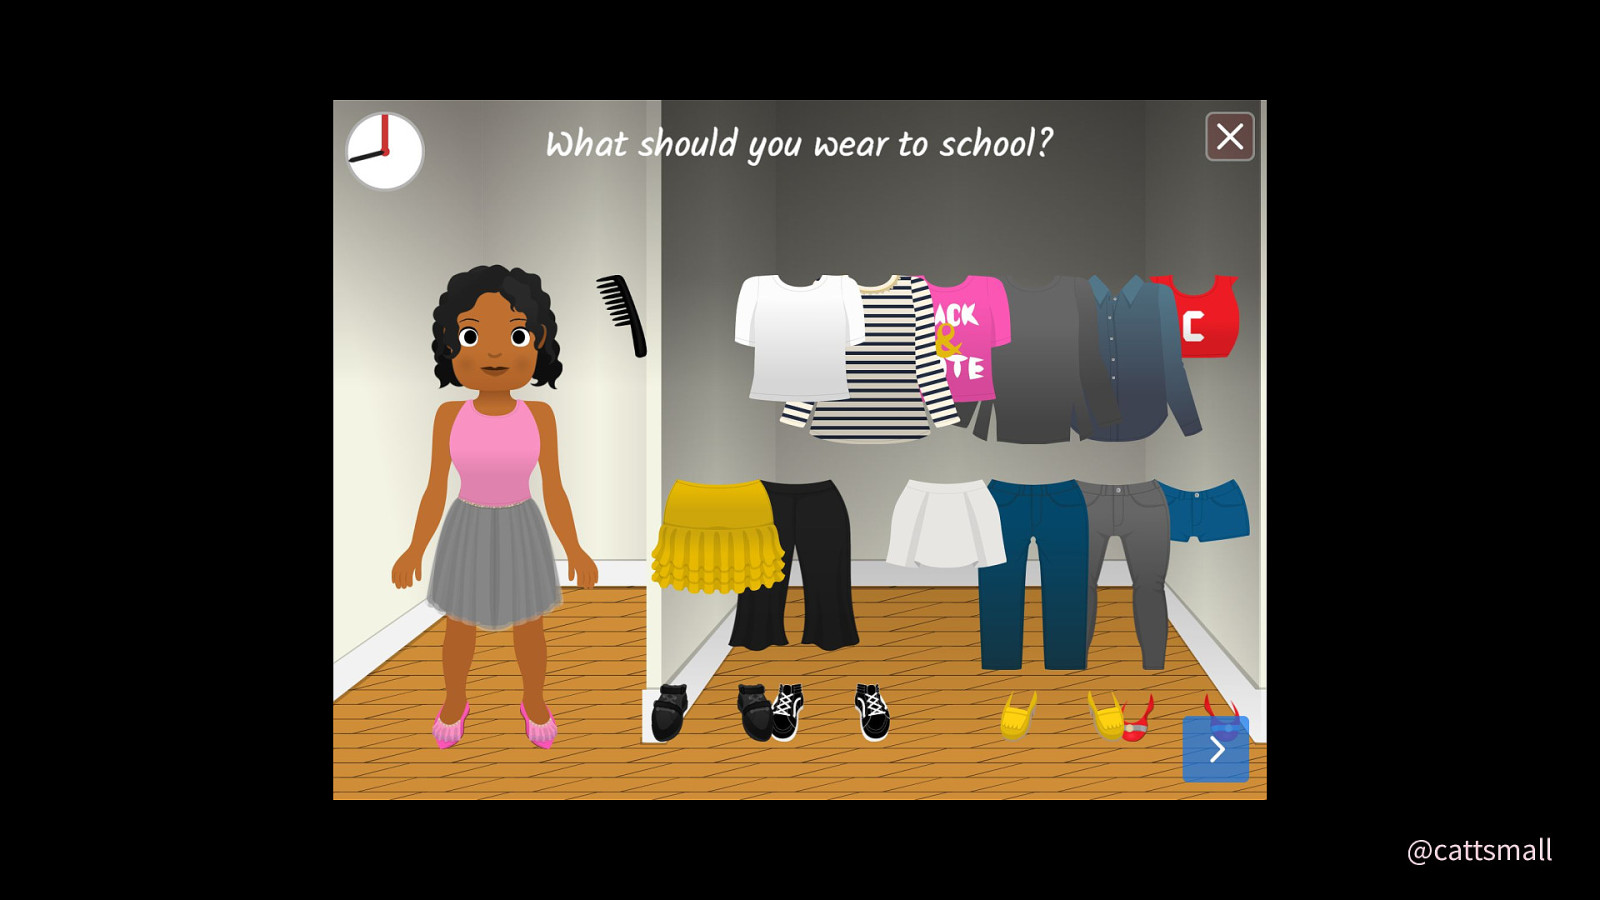
In the game, you dress the main character by choosing from a variety of clothes and hairstyles.
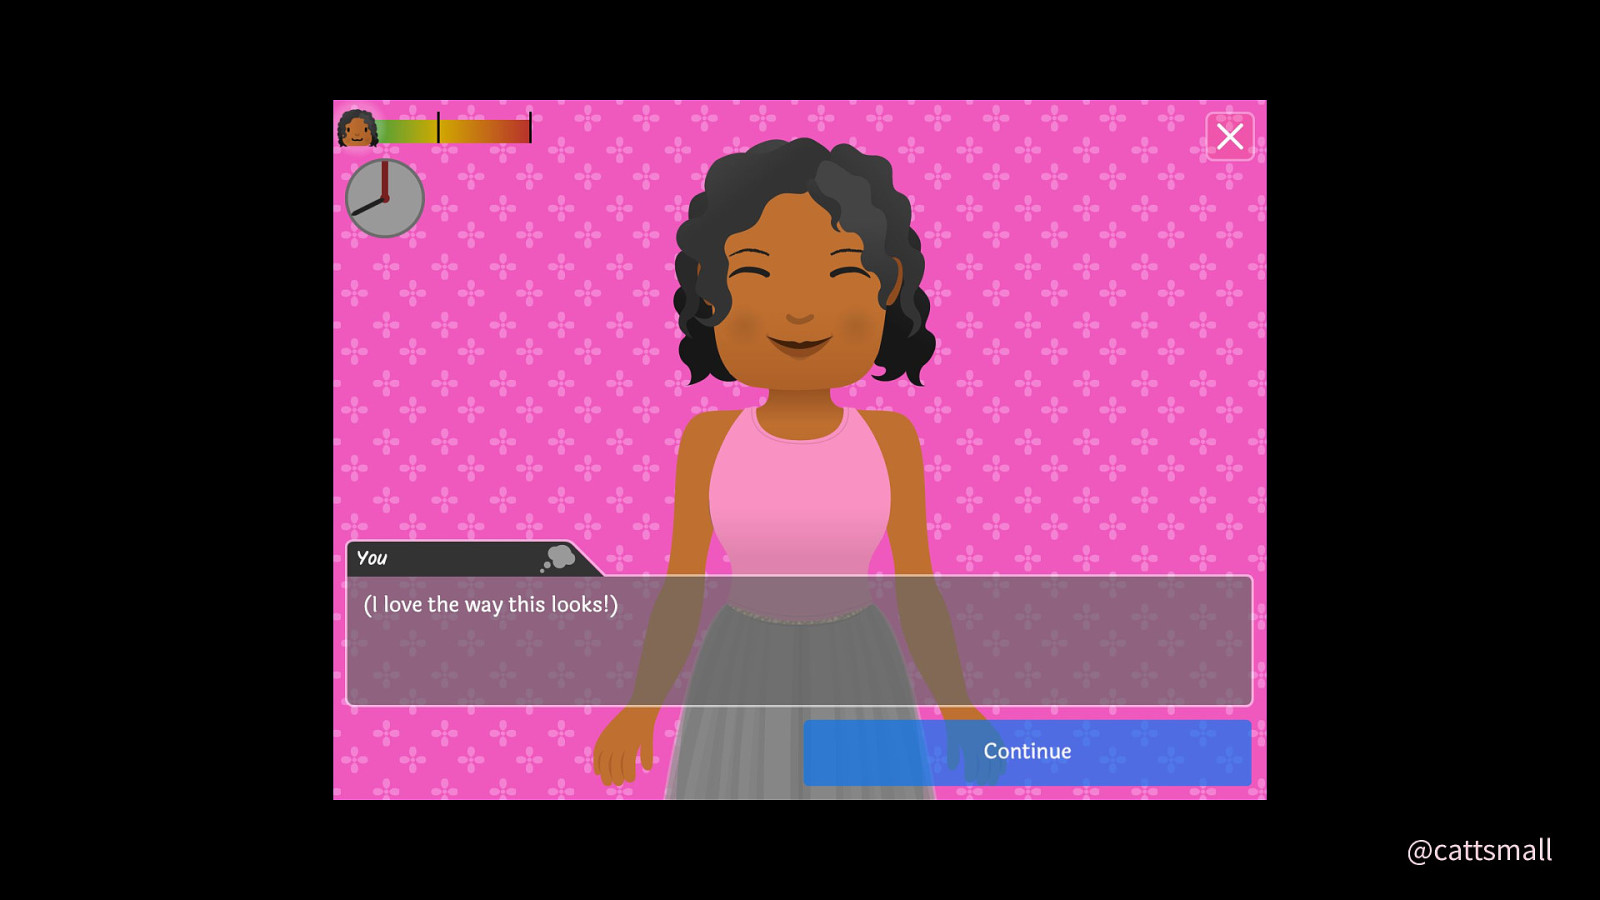
She reacts to the clothes you choose.
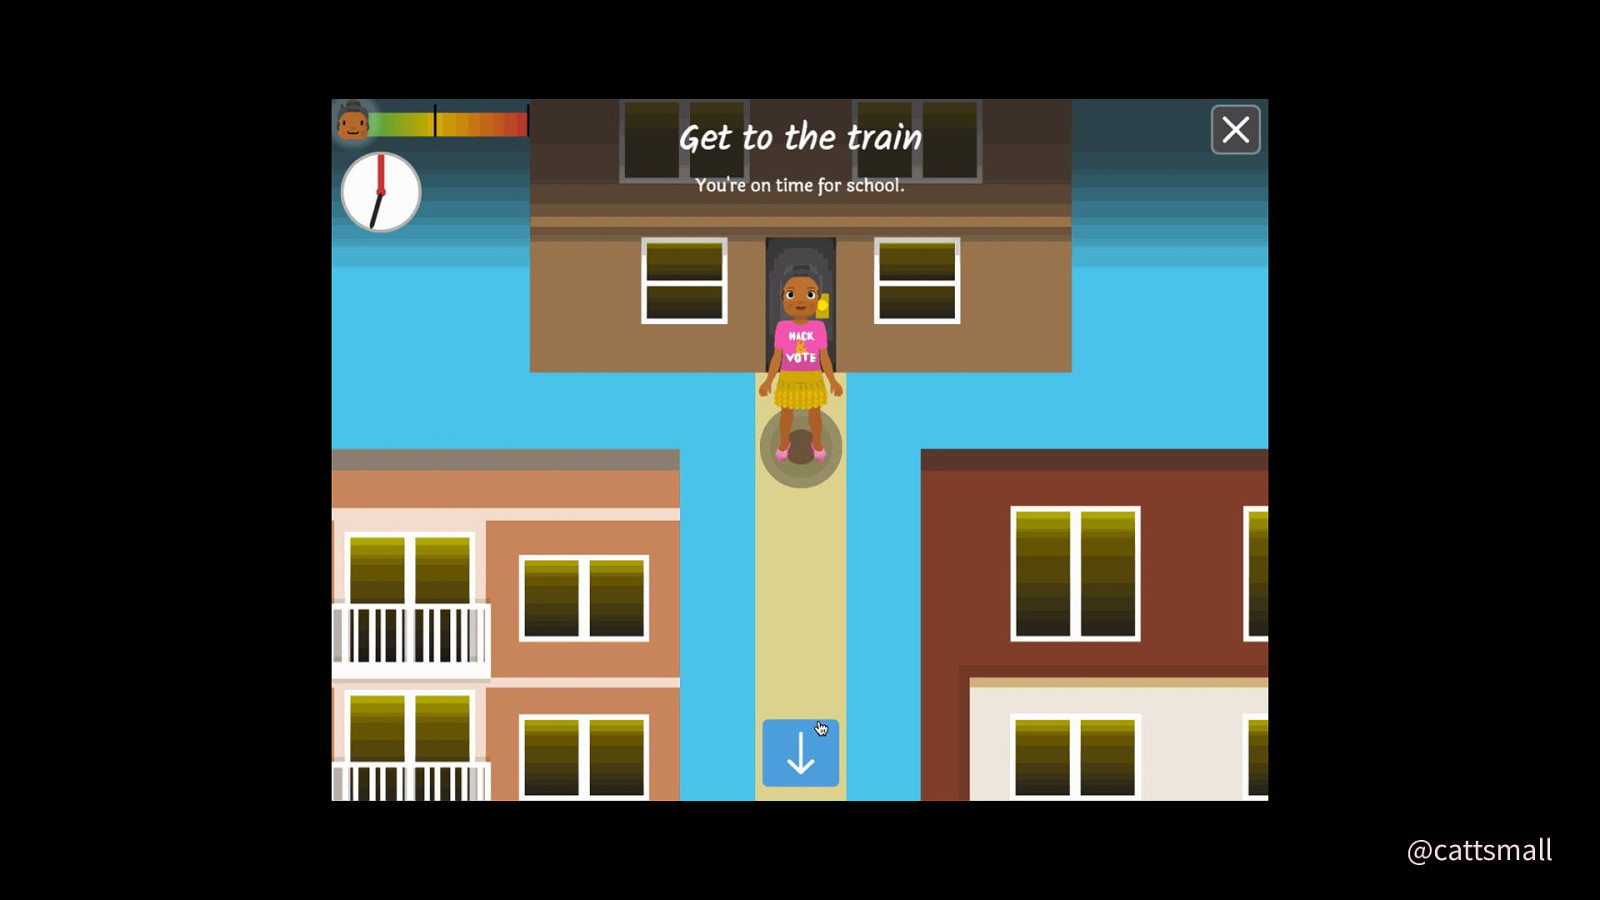
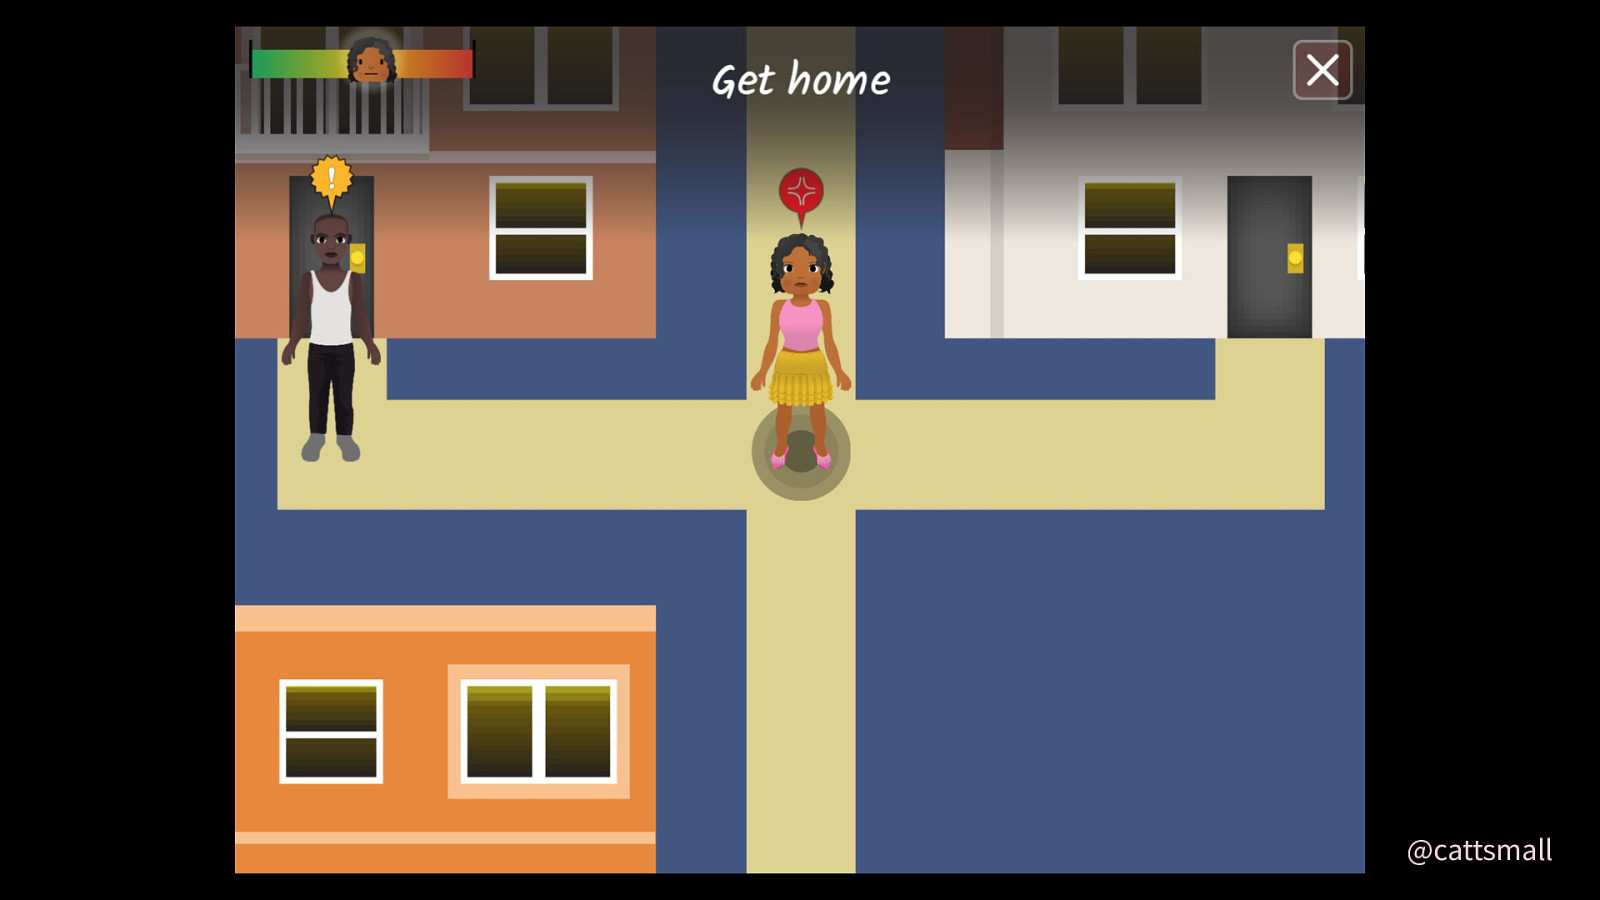
And you go outside. You get to interact with others in the game, including choosing how to react to men who say very creepy things to you. The main mechanic is stress, as you can see on the top left corner. You want to get through five days without being incredibly stressed.
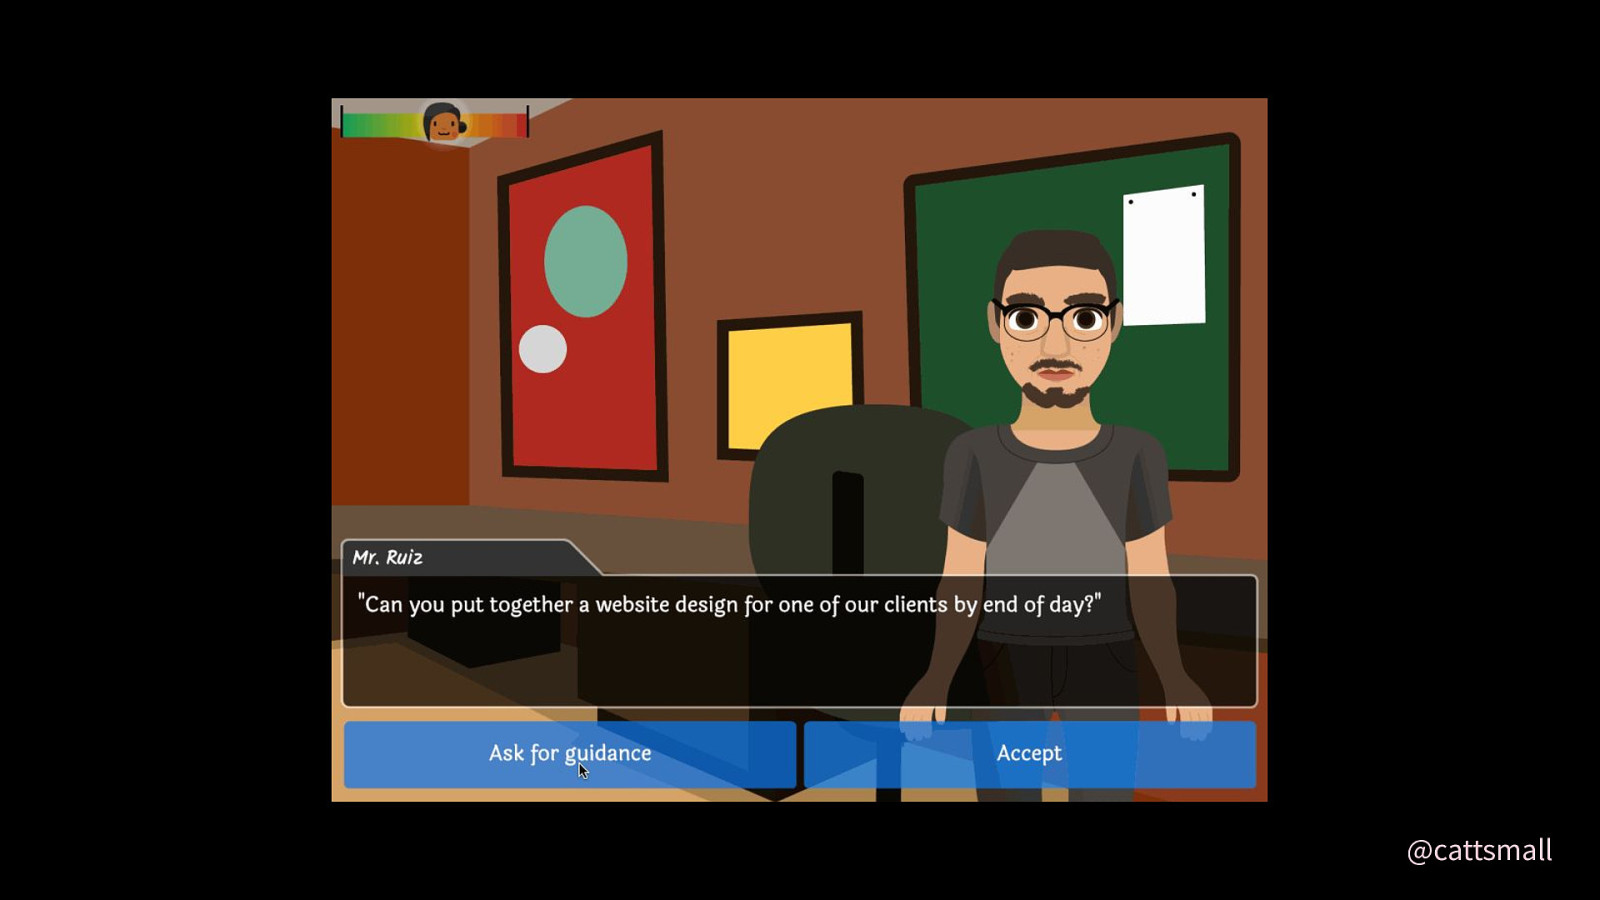
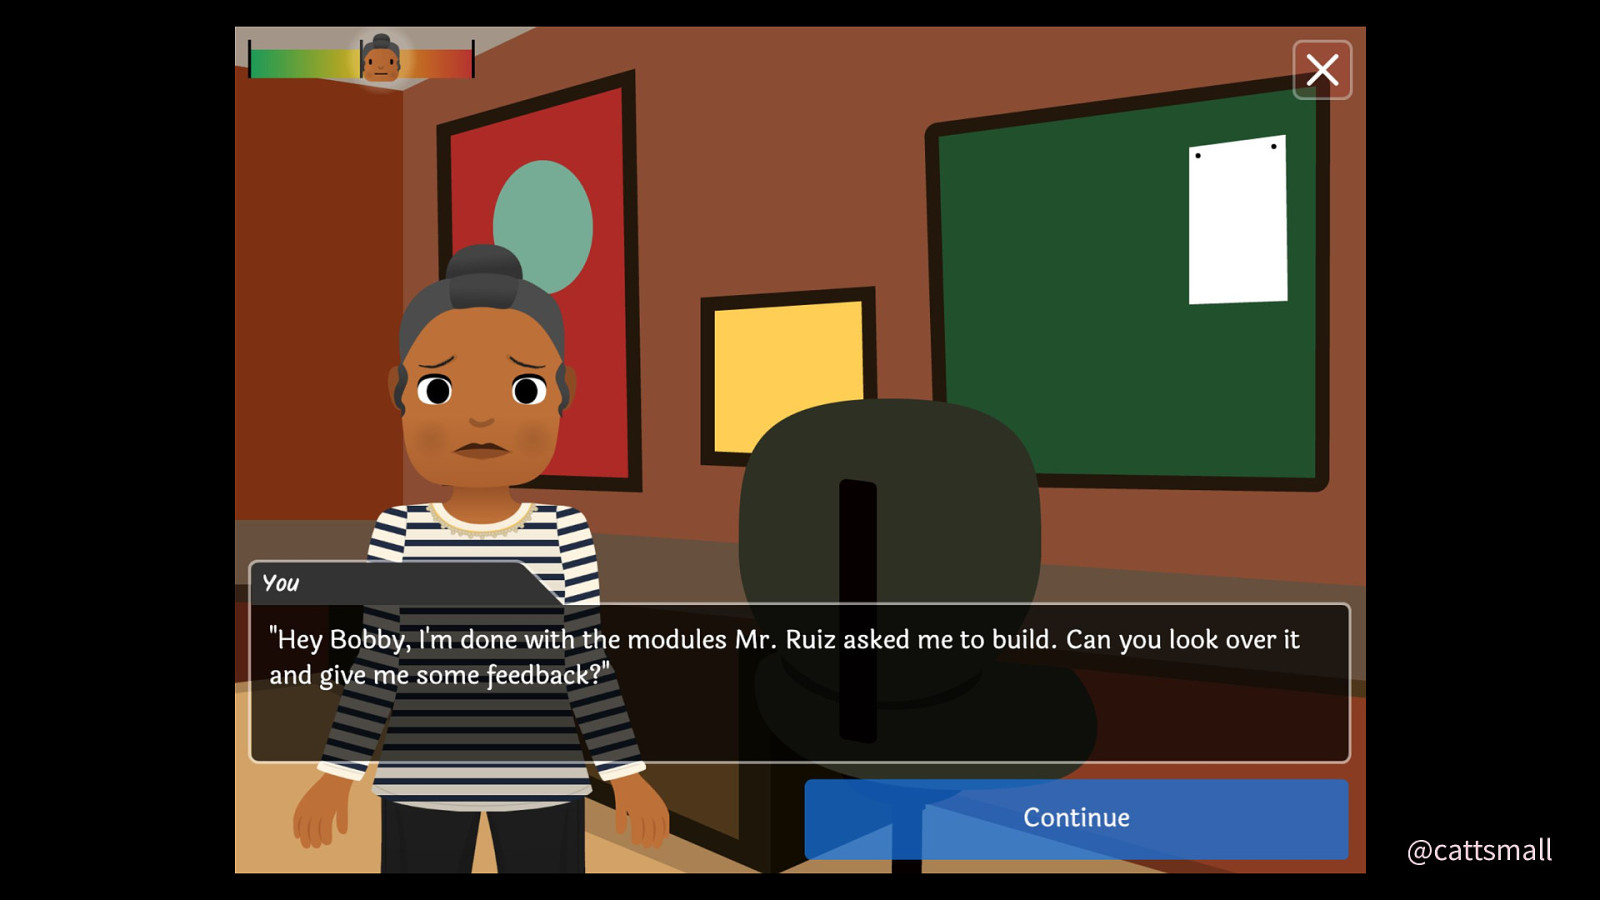
Players are navigating a week of regular tasks like work and socializing at school. For example, there are some design and programming tasks that characters celebrate or berate you for finishing (depending on the quality of your work). Every little interaction adds up.
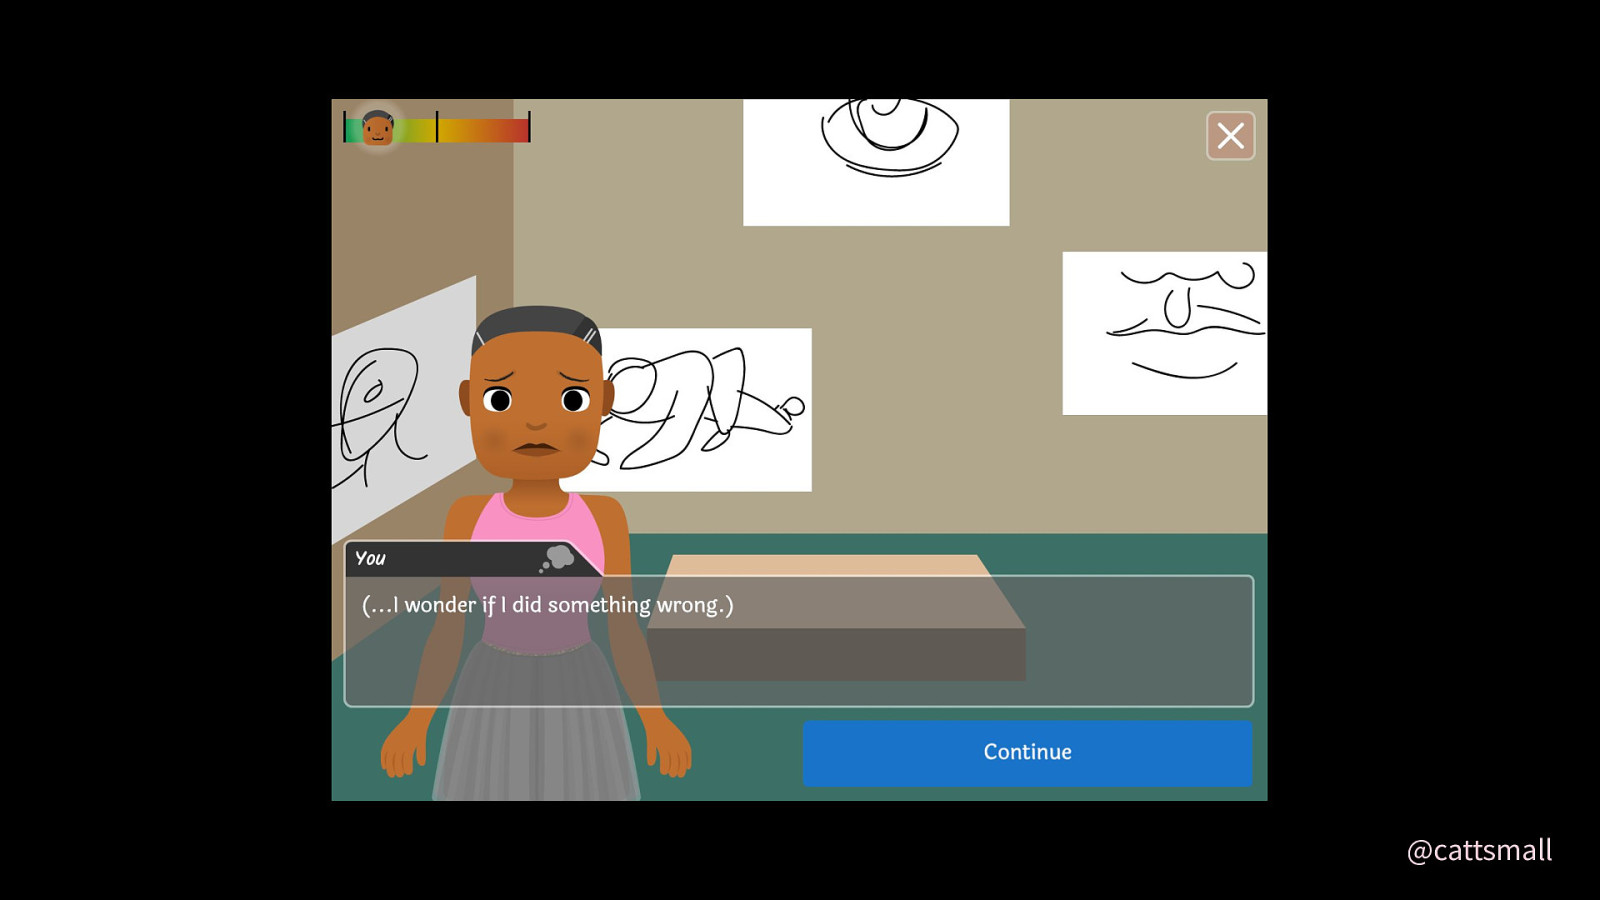
It’s a depiction of my former self’s anxieties and stresses; a homage of sorts to a turbulent time in my life when I was learning to be an adult.
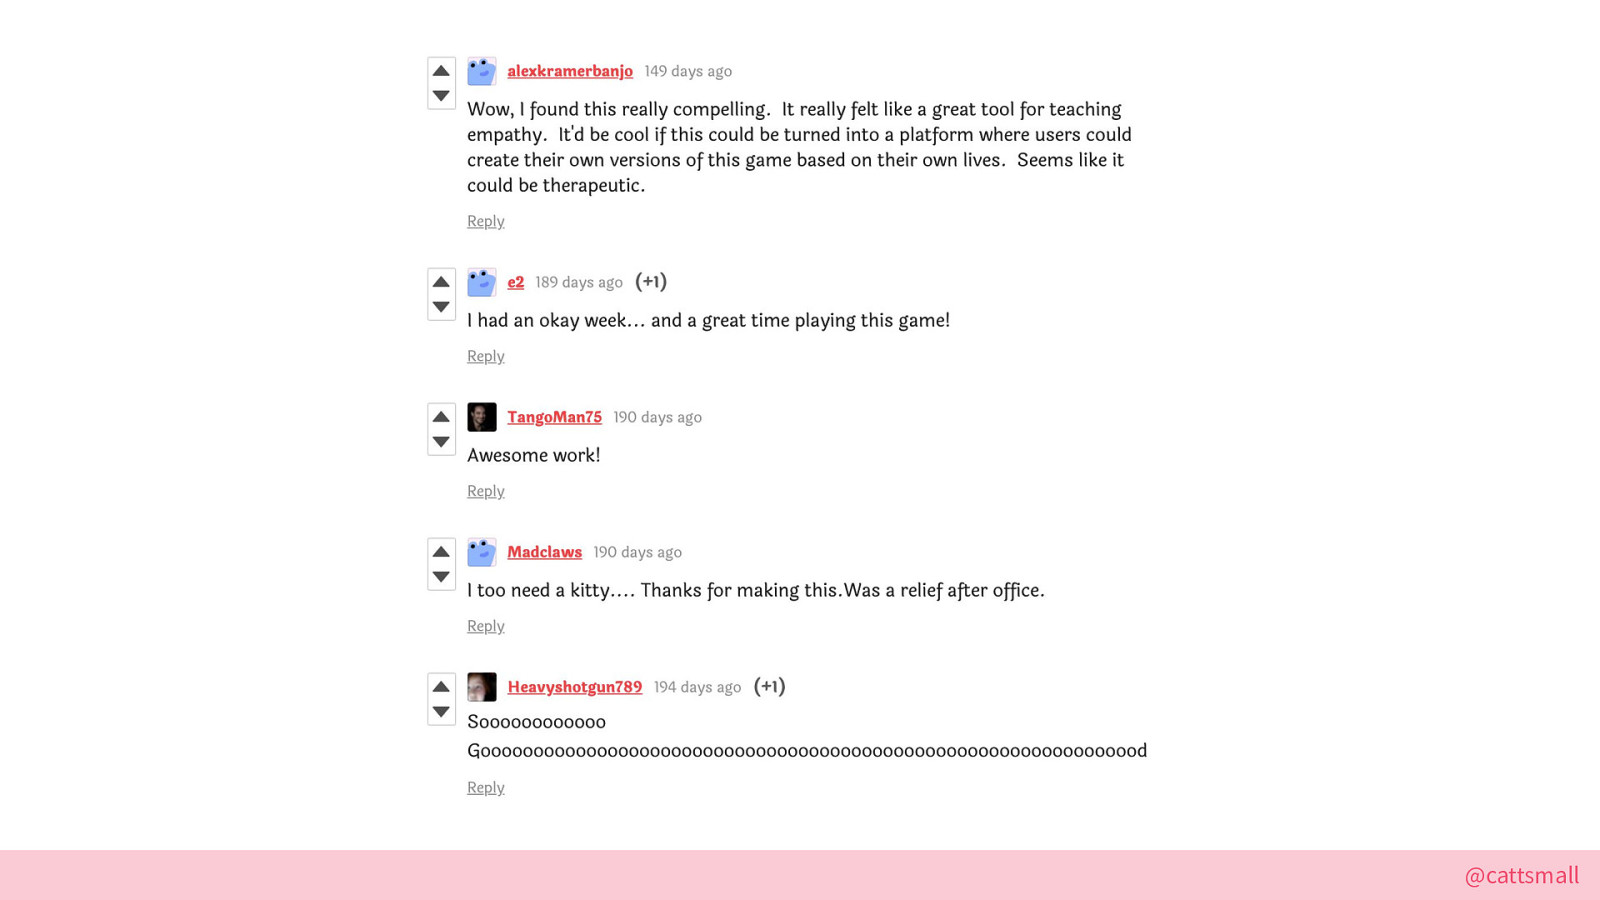
It’s a very uncomfortable game, but people really like it?! It’s got a 4.6 rating on the platform where I host it, which is honestly way higher than I thought it’d be. And all the comments, wow, are great. Thanks, folks, for the love.
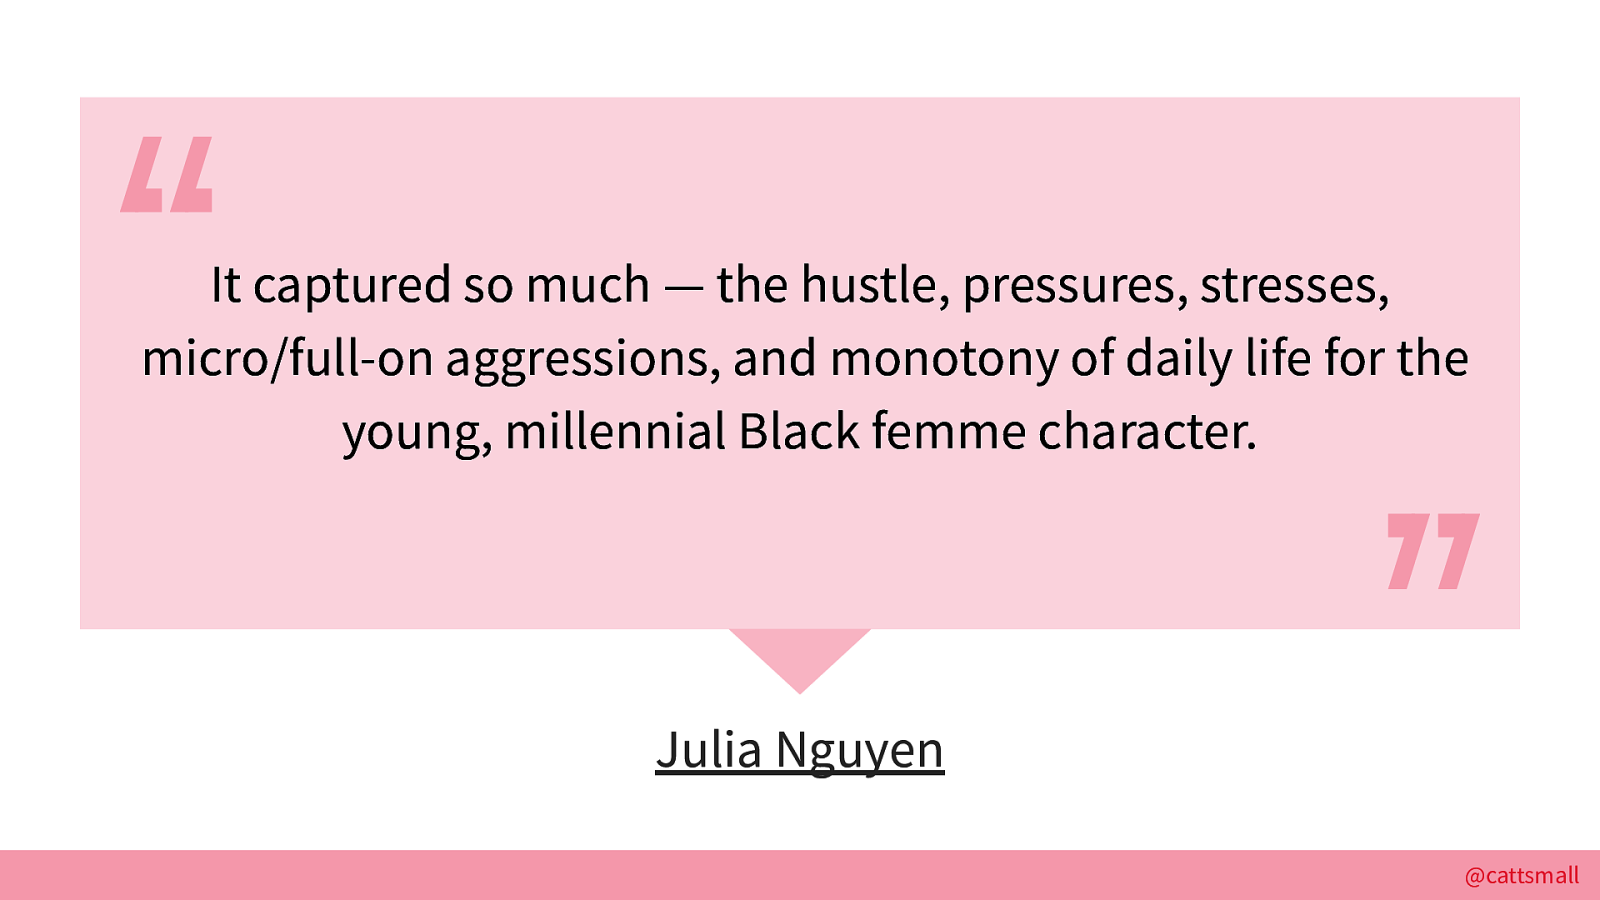
Players have called it a realistic portrayal of the experiences young women have in America. Shout-outs to Julia Nguyen for this positive note: “It captured so much — the hustle, pressures, stresses, micro/full-on aggressions, and monotony of daily life for the young, millennial Black femme character.”

My other favorite quote was from a guy: “At first I laughed at the animation, then realized that real women tolerate that BS behavior every day. Suddenly not funny.”
I’m helping people realize how bad this stuff is for women! Especially many Black women, some of whom have experienced street harassment since before they were even teenagers. In many cases, they experience it even daily or weekly.
And it’s worked. After playing my game at the Game Devs of Color Expo, one guy came up to me and told me he had no idea—and that he wasn’t going to catcall women anymore! The power of games, y’all!
Anyway, now that you’ve learned a bit about the game, here’s how I built it.
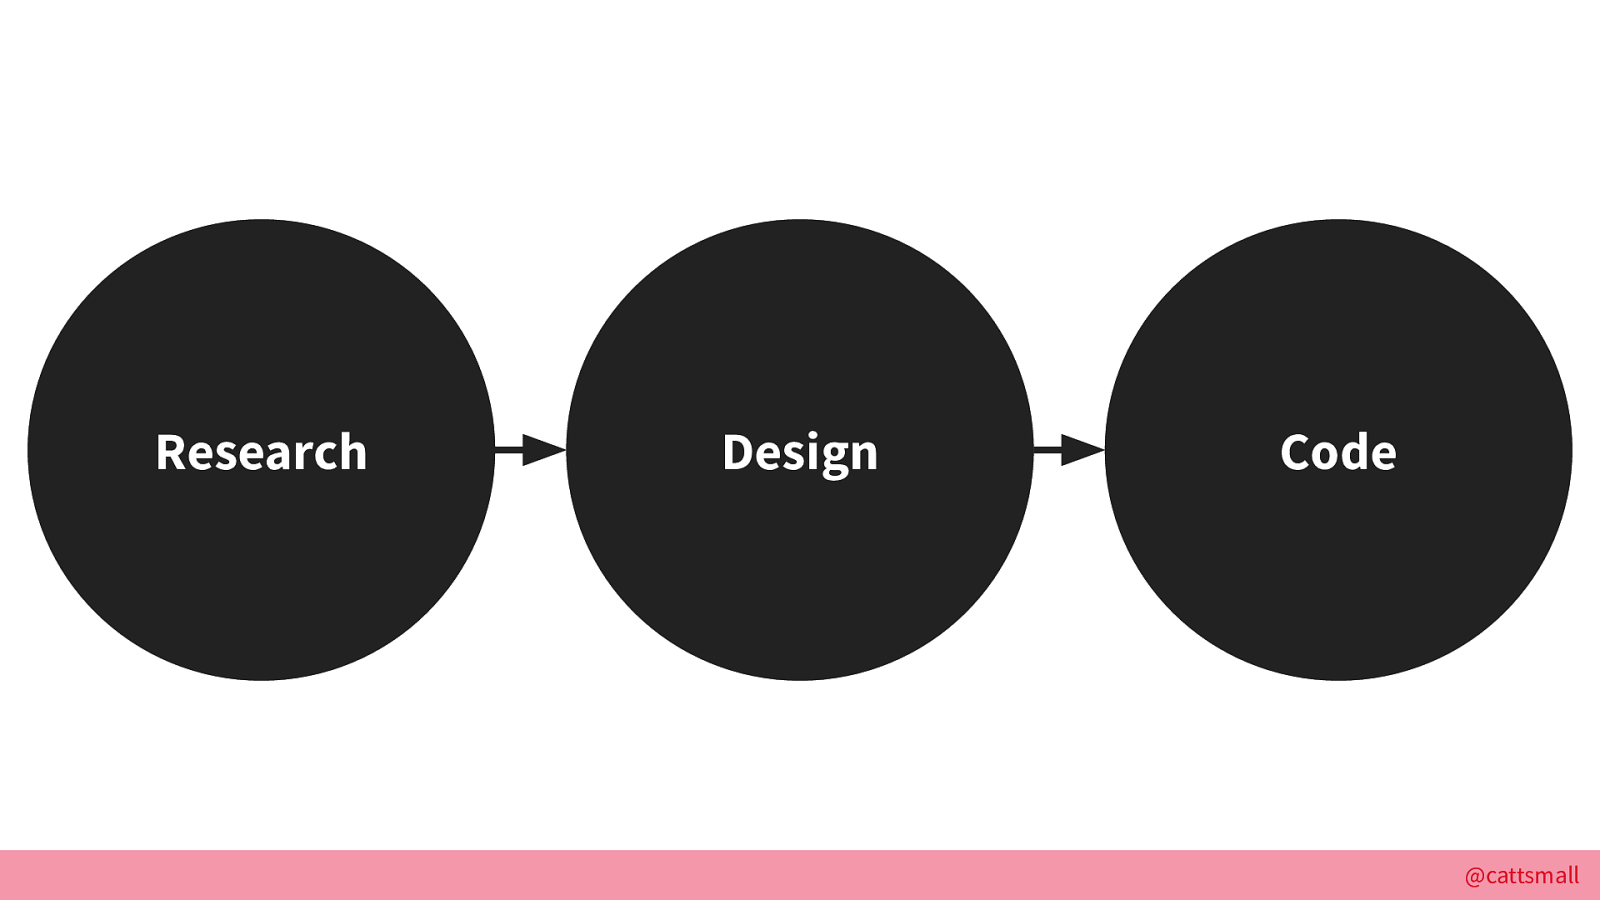
These were the three phases of my project: research, design, and code. I’m going to walk through each of these!
First, I did some research.
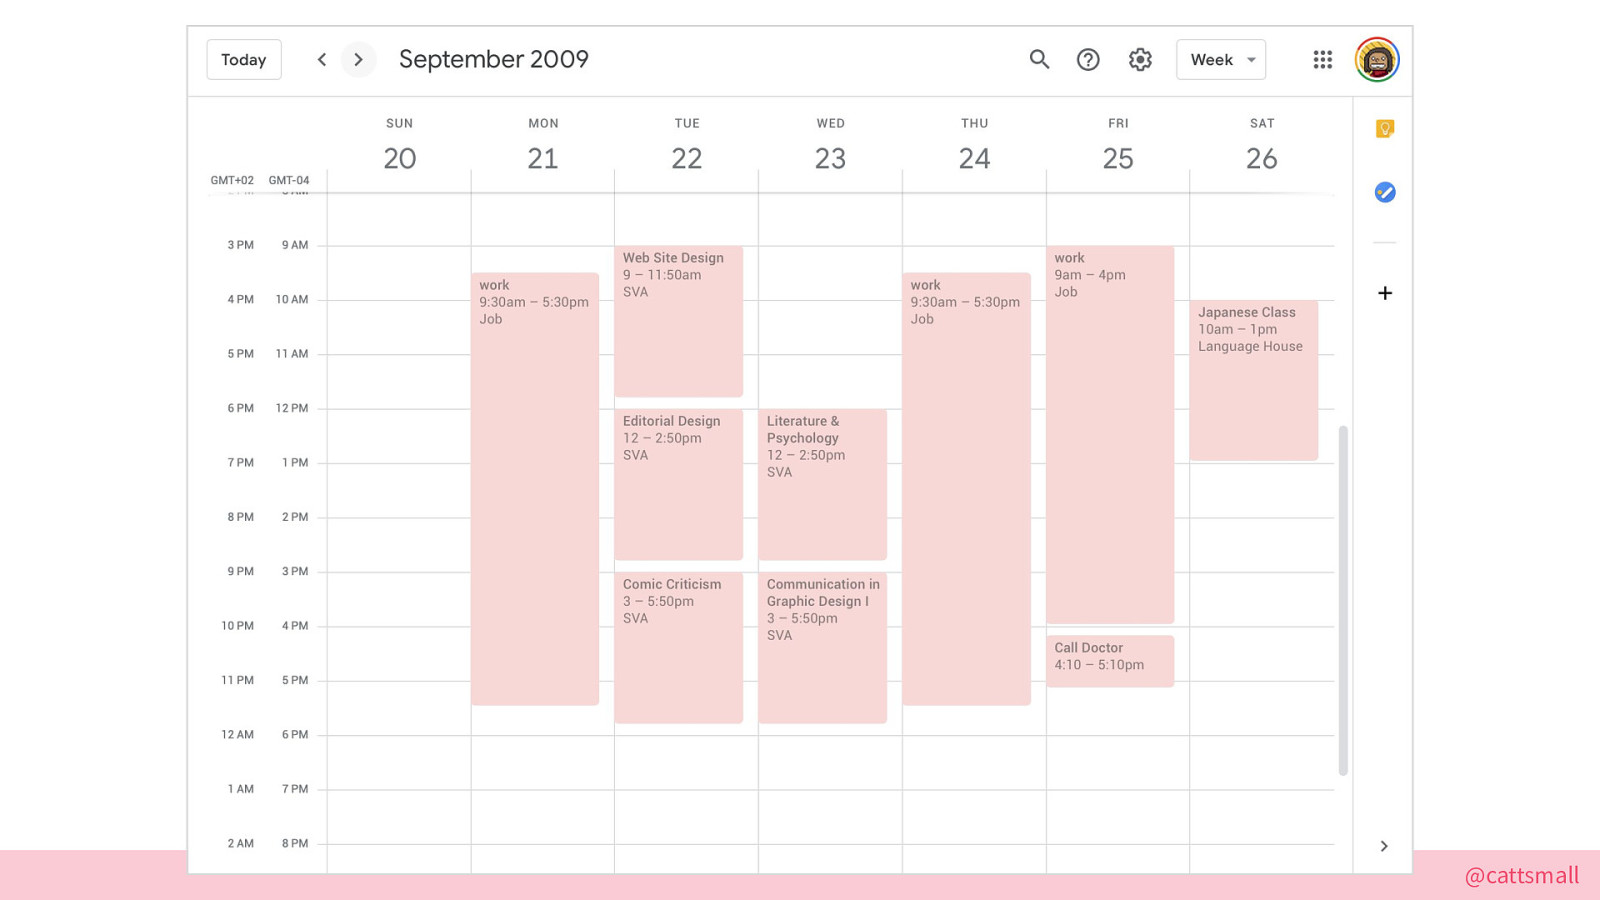
I reviewed my real-life schedule from college. I literally scrolled back to 2009 and WHAM, there was my list of classes. I was really organized, even back then, and I’m SO thankful for that!
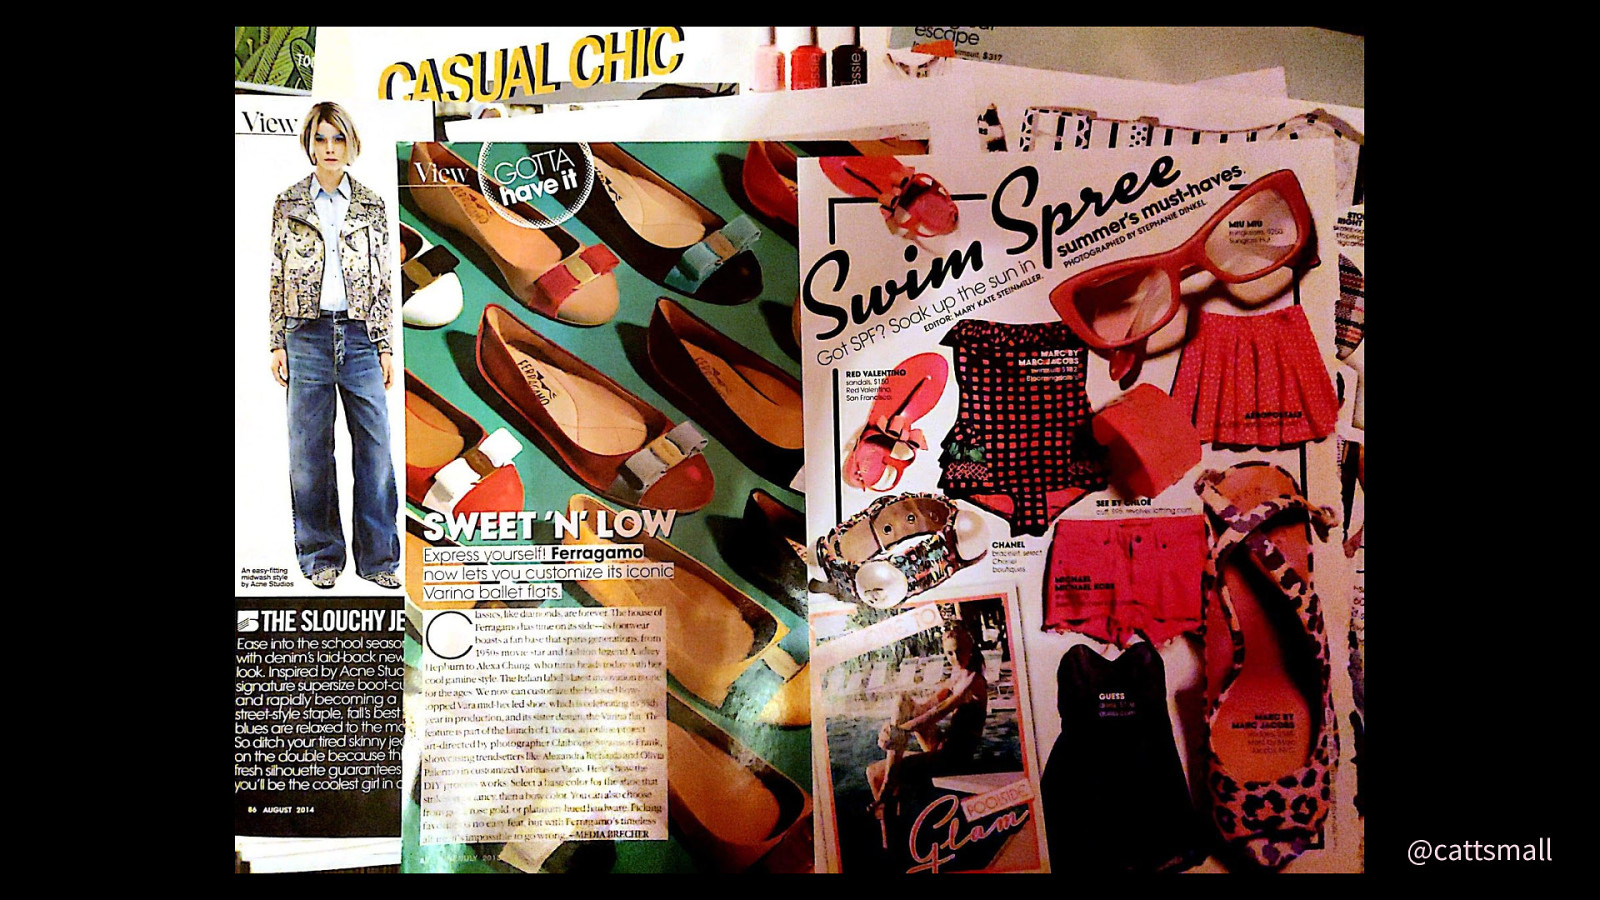
I looked at old magazine cutouts I found in a folder (because OF COURSE I had a mood board). I also bought new teen vogue magazines to supplement where necessary. This helped me create 5 days of outfits, plus a few extras.
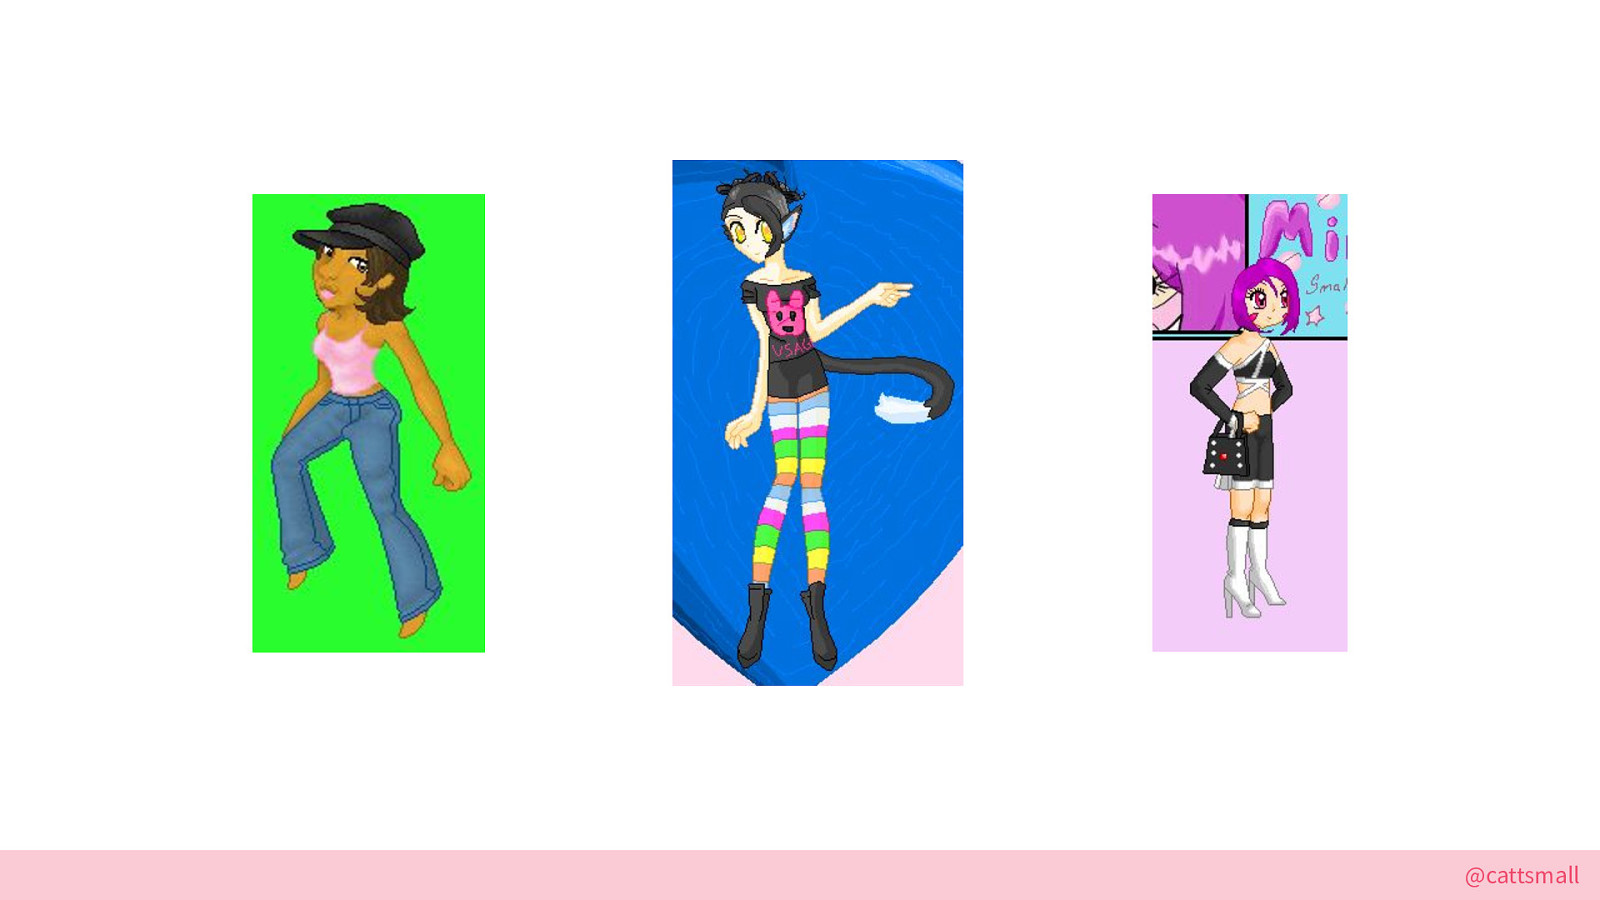
I also got inspiration from my old art. These are screenshots from my old dress-up dolls, which I made when I was aged 10–11. I wanted to include dress-up because it’s the reason I code and work in tech. Thanks to my grad school teacher, Kaho Abe, for the provocation to consider this as a mechanic!
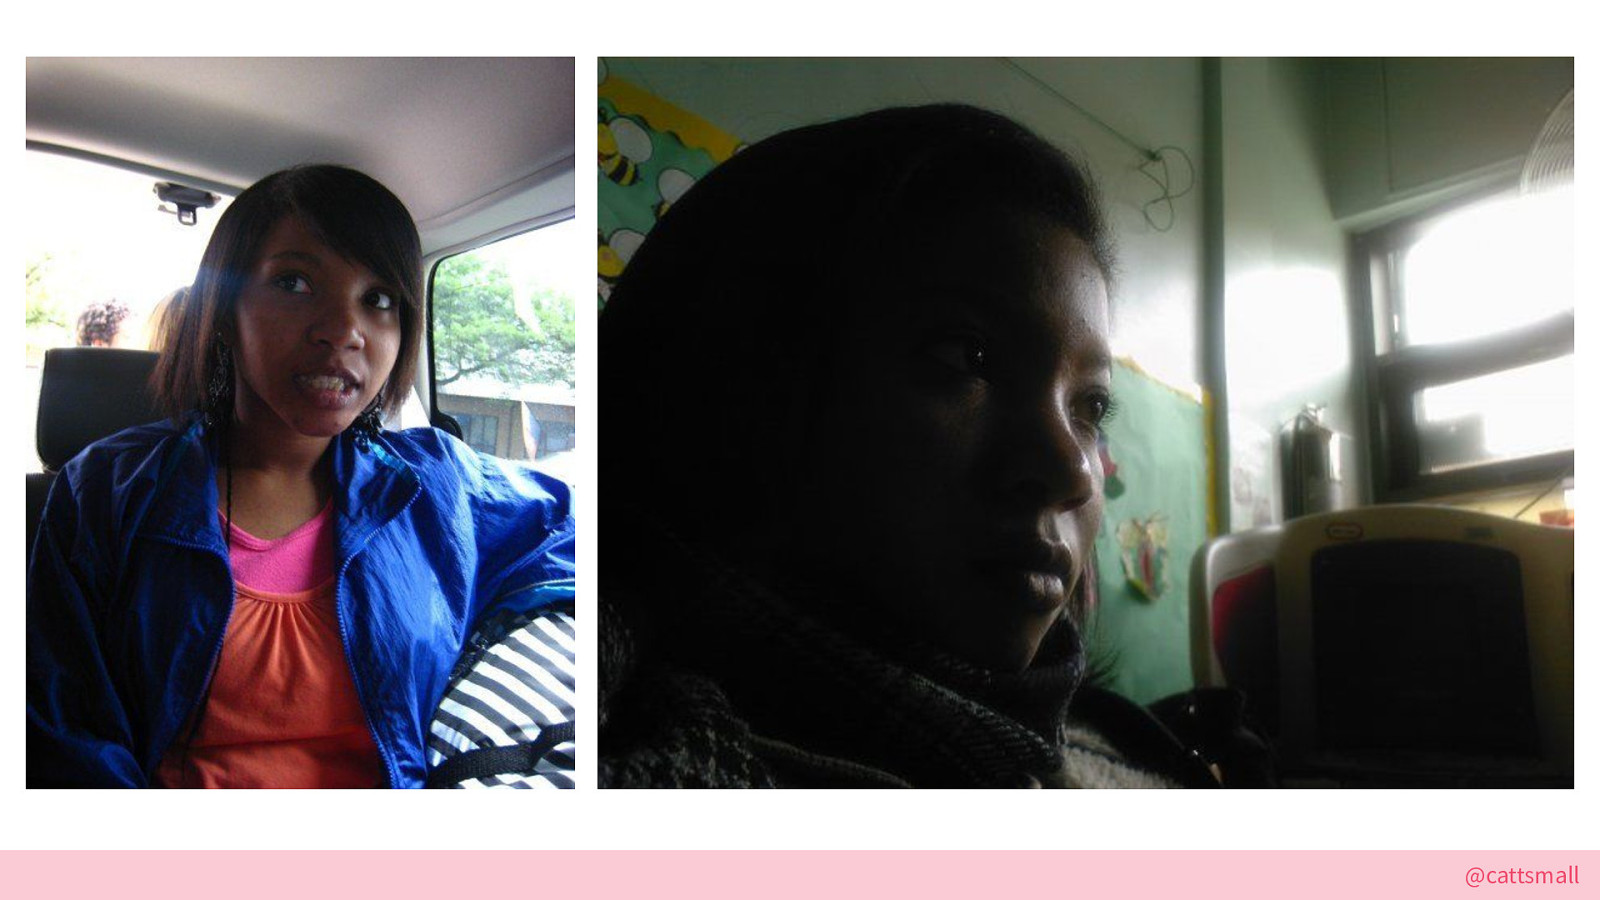
Finally, I found my old photos on Facebook, which helped me ideate on a Mood™. I was such an emo post-teen. This Vibe® was inspiration that I used and put into my game.
Once I had a bunch of research artifacts, I switched to design mode.
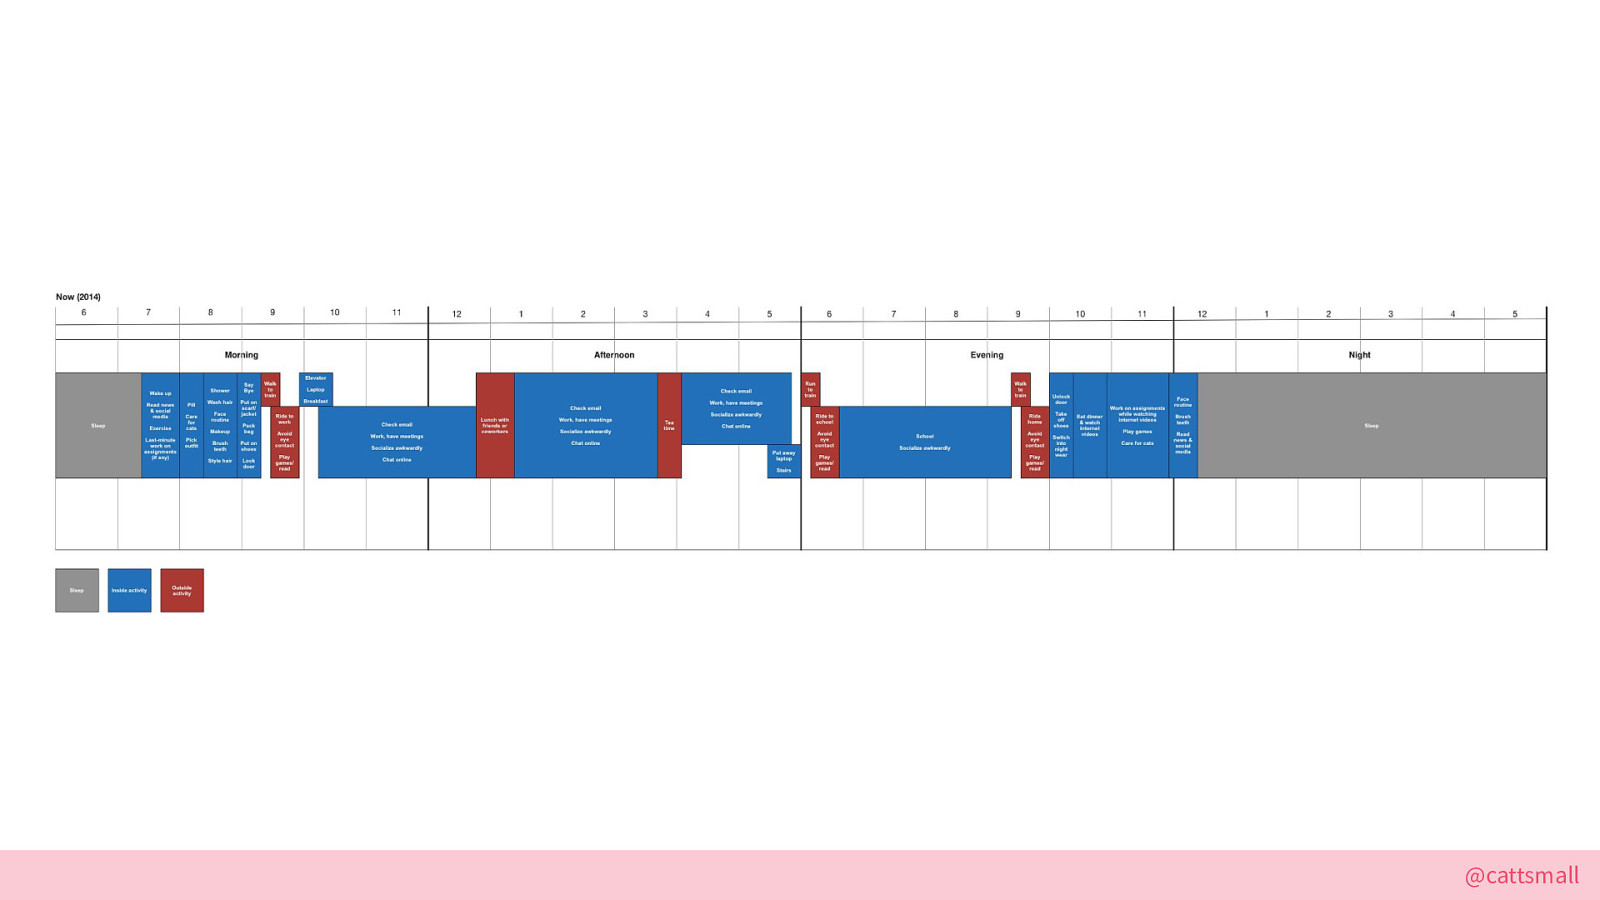
I took my college schedule and split the average day into specific moments across the morning, afternoon, evening, and night. I split them into inside and outside activities as well as sleep.
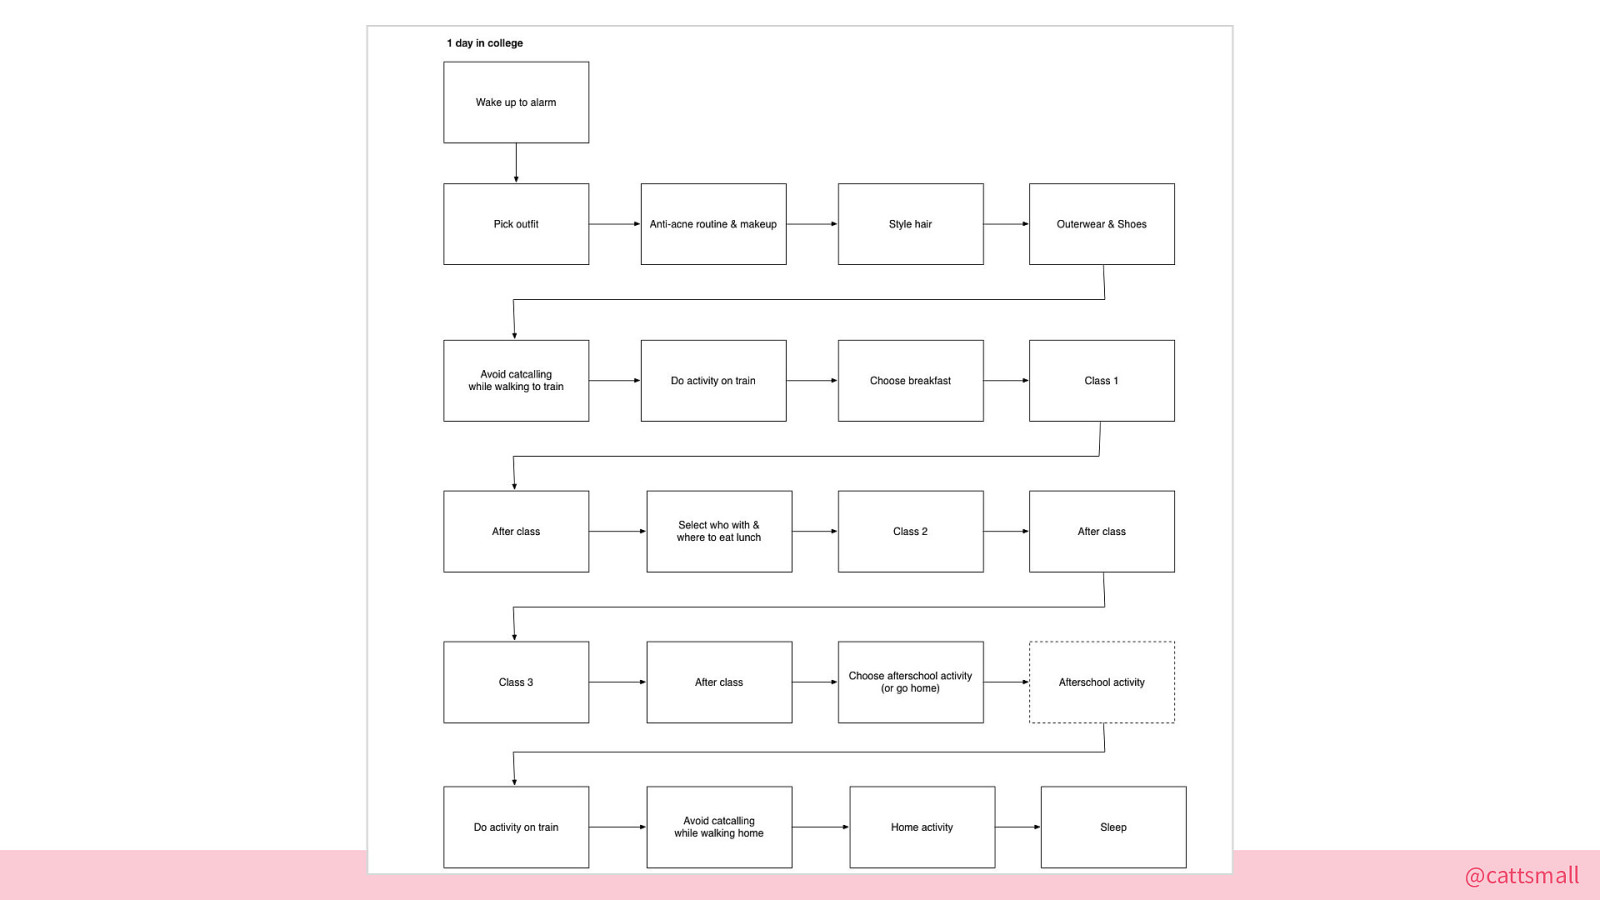
From that diagram, I was able to create an initial flow for the game. This helped me ideate on the actual architecture for the project; I was using these diagrams to figure out the structure I should use to build my game.
As a designer, I plan a lot. Diagrams help me visualize systems, which helps me to communicate within myself or with others. I highly recommend this exercise for your work—whether it’s a tech project or a games one.
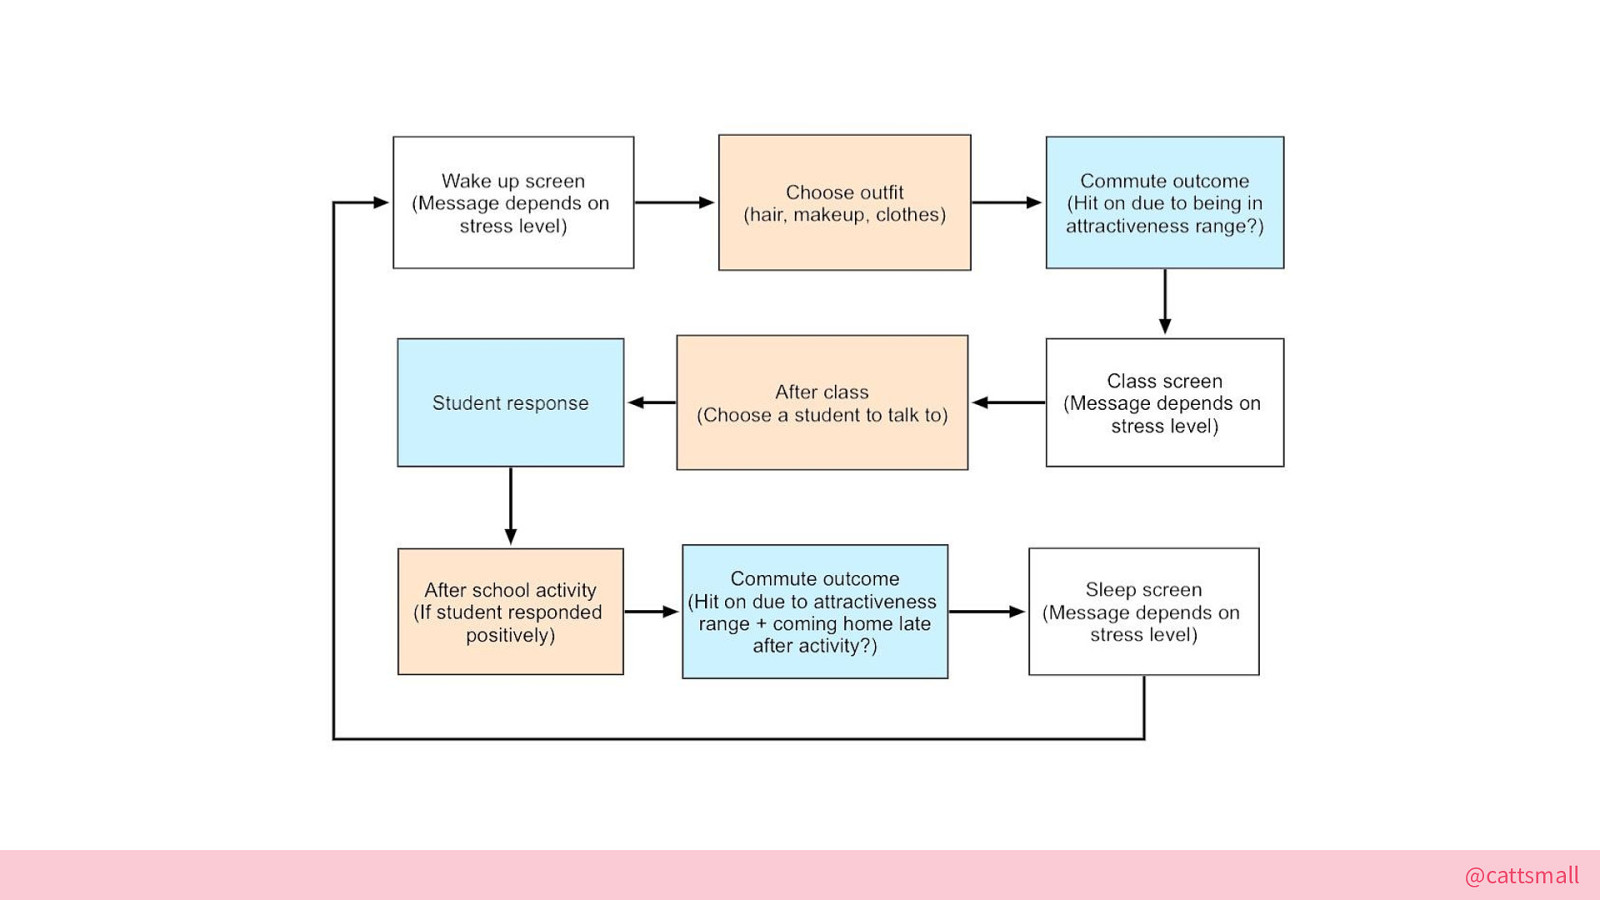
I then simplified some parts of the flow, but this is still a relatively accurate depiction of the in-game experience! White is dialogue, orange is an activity, blue is a response to the result of the activity. This helped me point out parts that could be interactive events and which parts would need to be scripted.
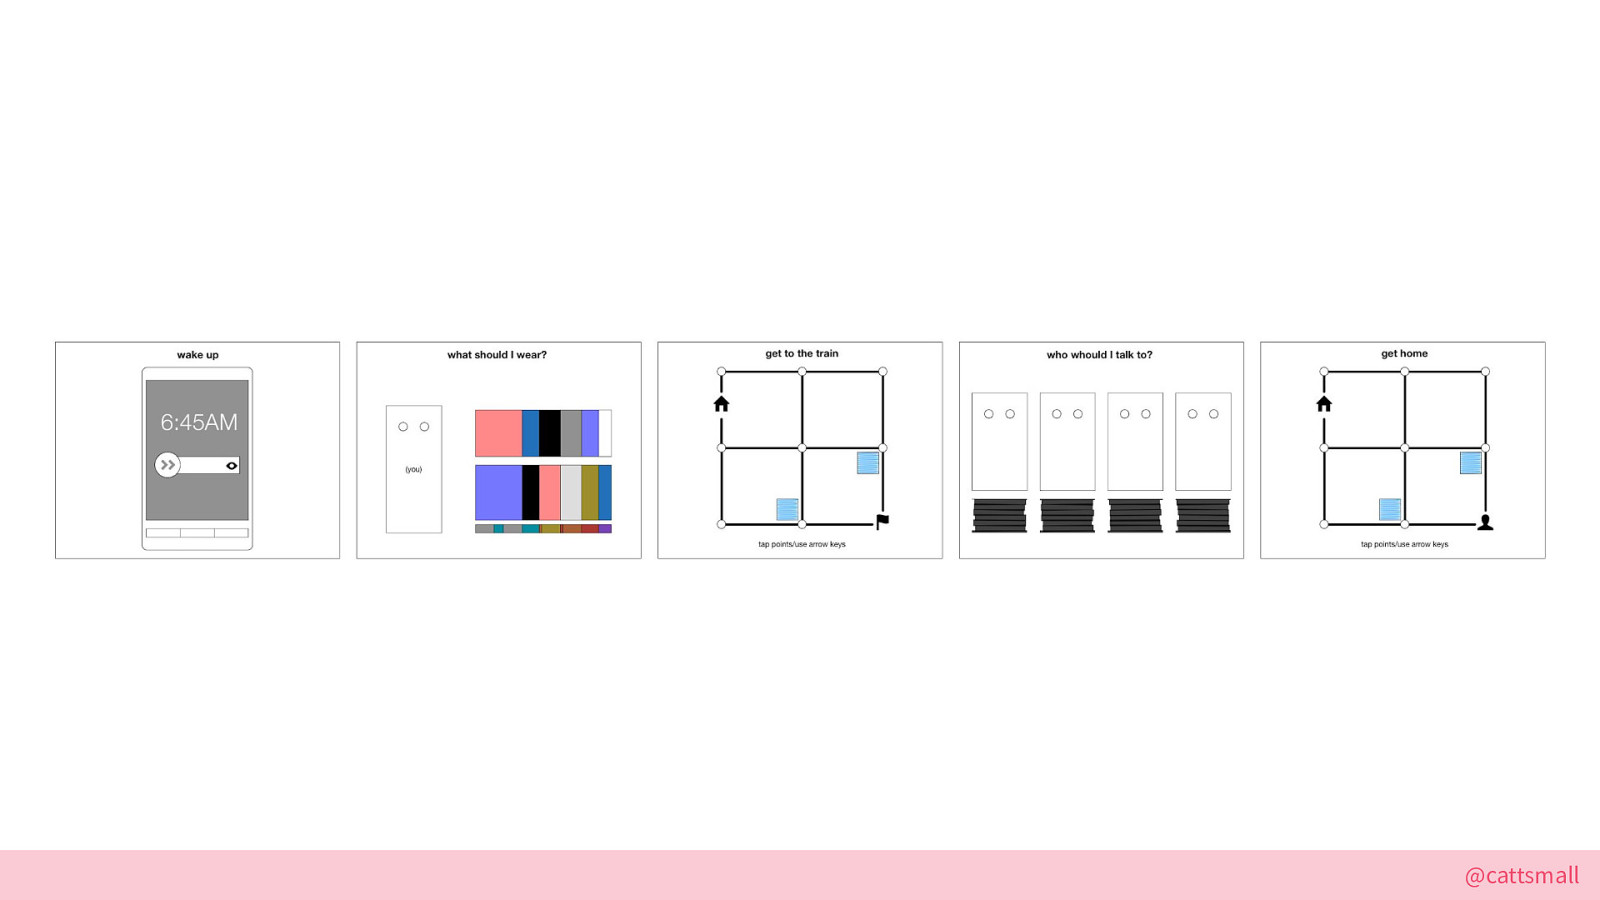
Next, I wireframed the designs for the main interactive screens.
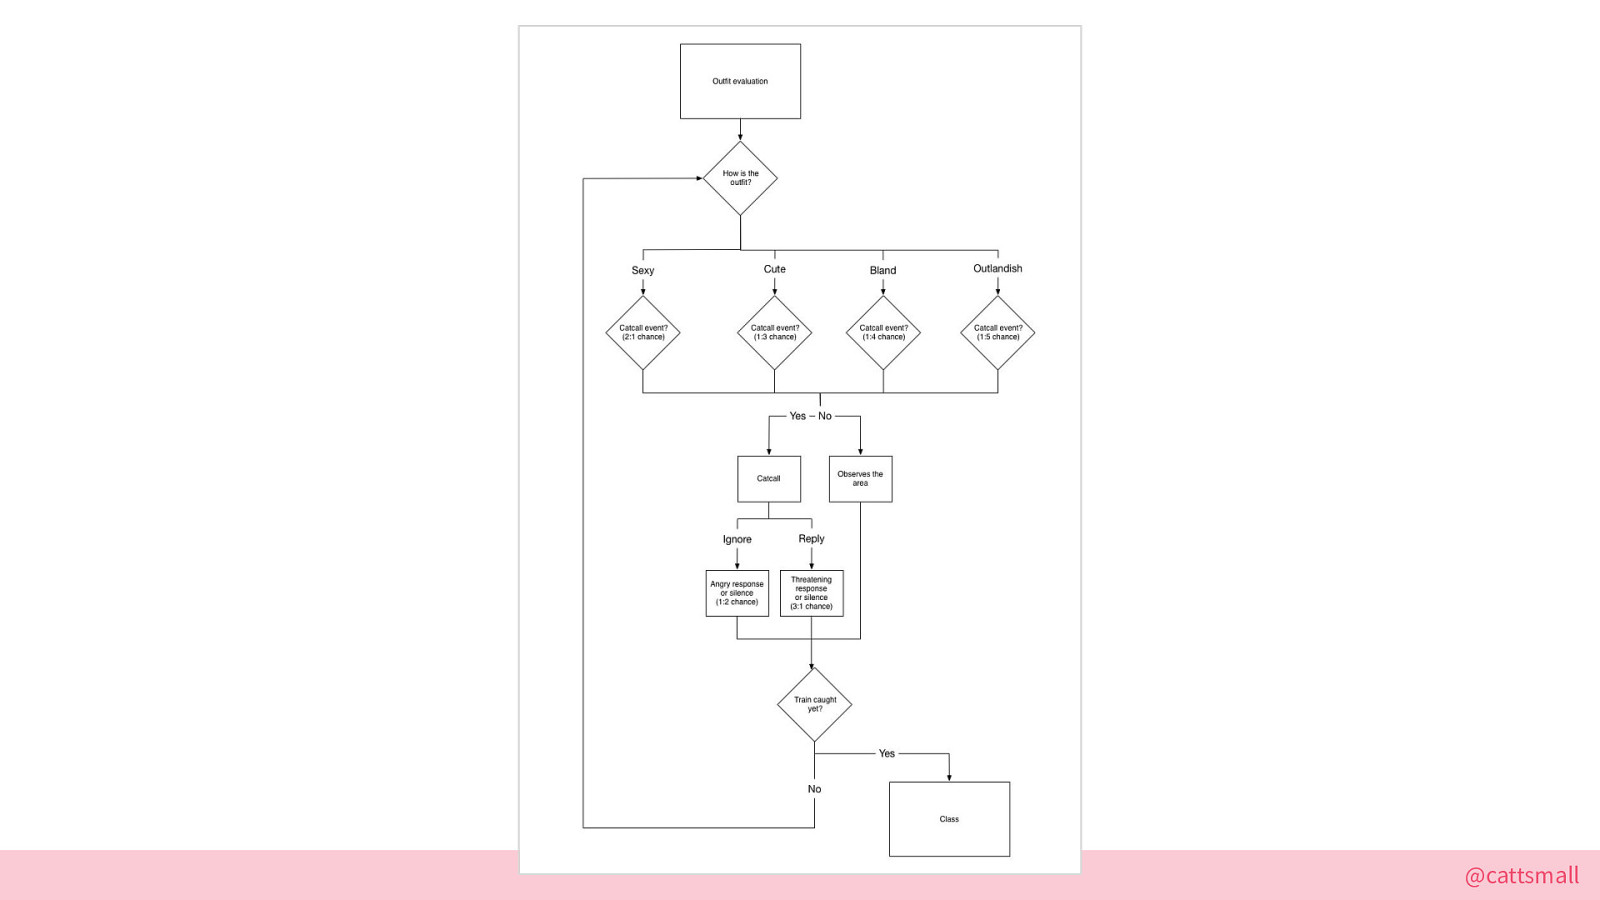
Then I diagrammed some of the most crucial flows including the outfit evaluation’s effect on catcallers. This helped me figure out how to structure the outfit evaluation code, and how I might use that to influence catcallers’ reactions to Kara. I’ll explain this more soon.
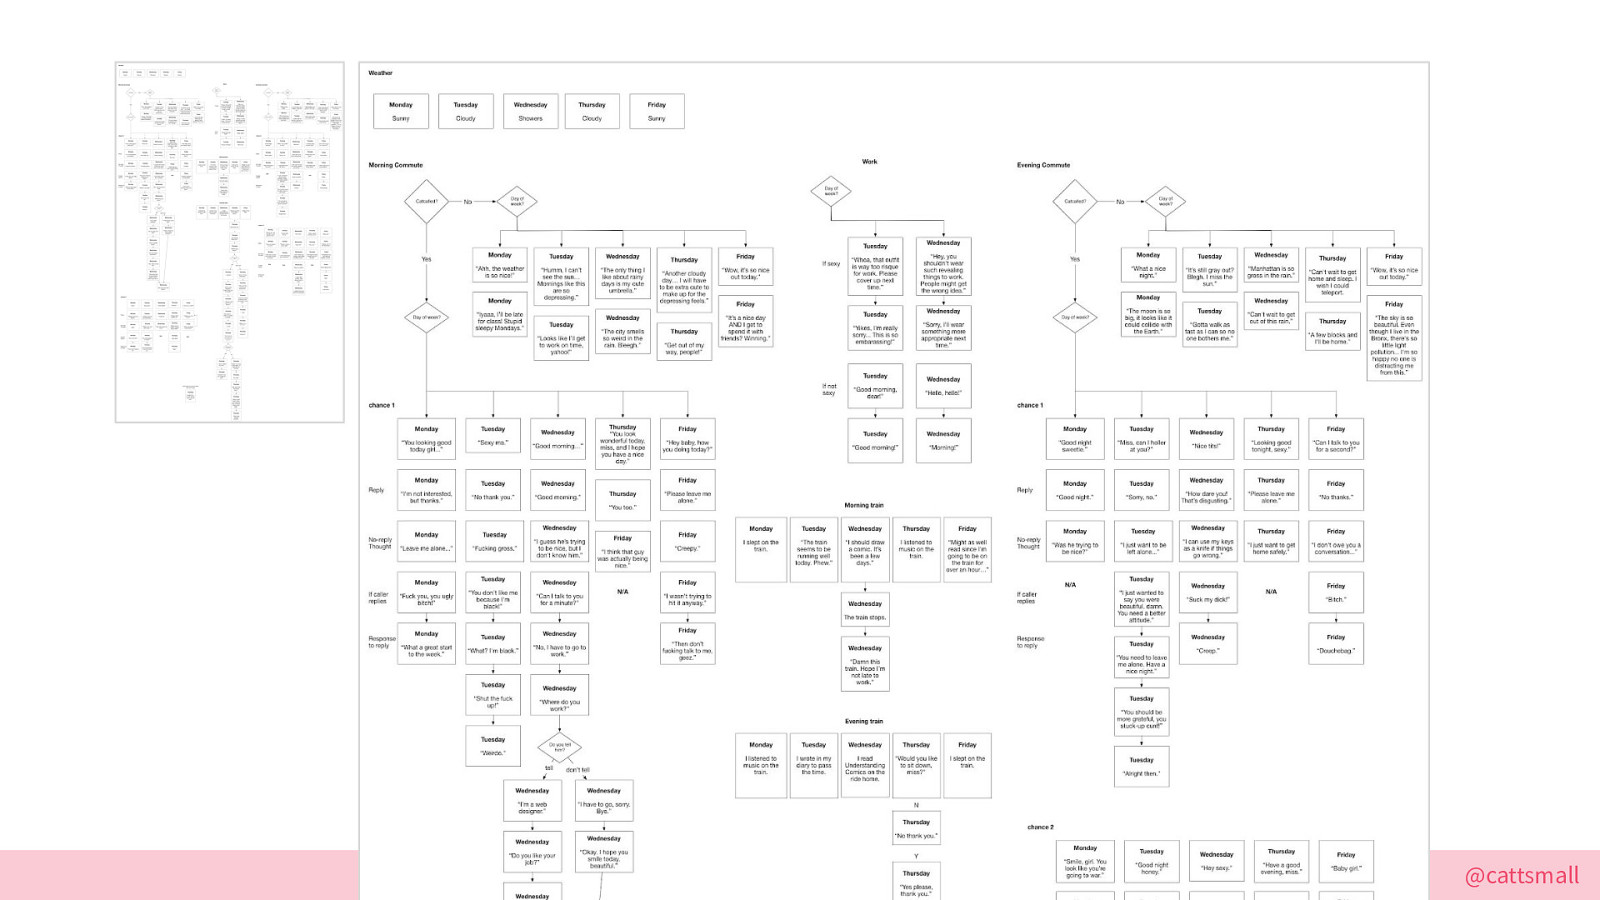
Next I made a tree to explore the dialogue for each day of Kara’s commute. This helped me assess my needs for a dialogue system, as I needed something that could support branching dialogue.
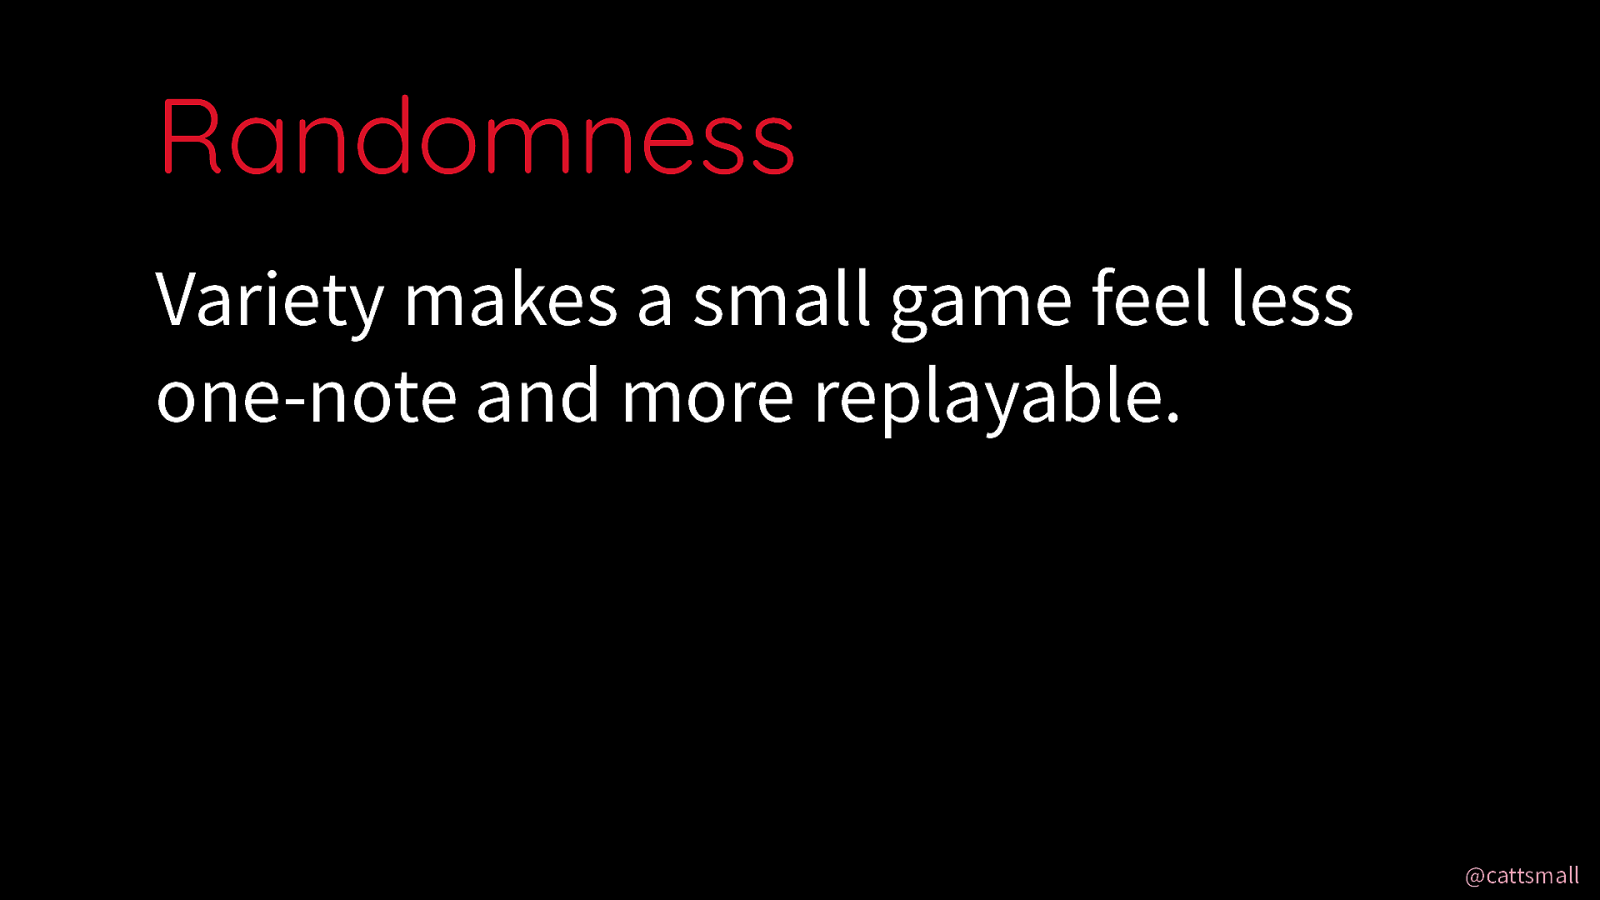
This diagramming also helped me identify areas where I could inject randomness into the game. Randomness makes a game feel less one-note and more varied. This is especially important for a small game, so I used this concept a lot.
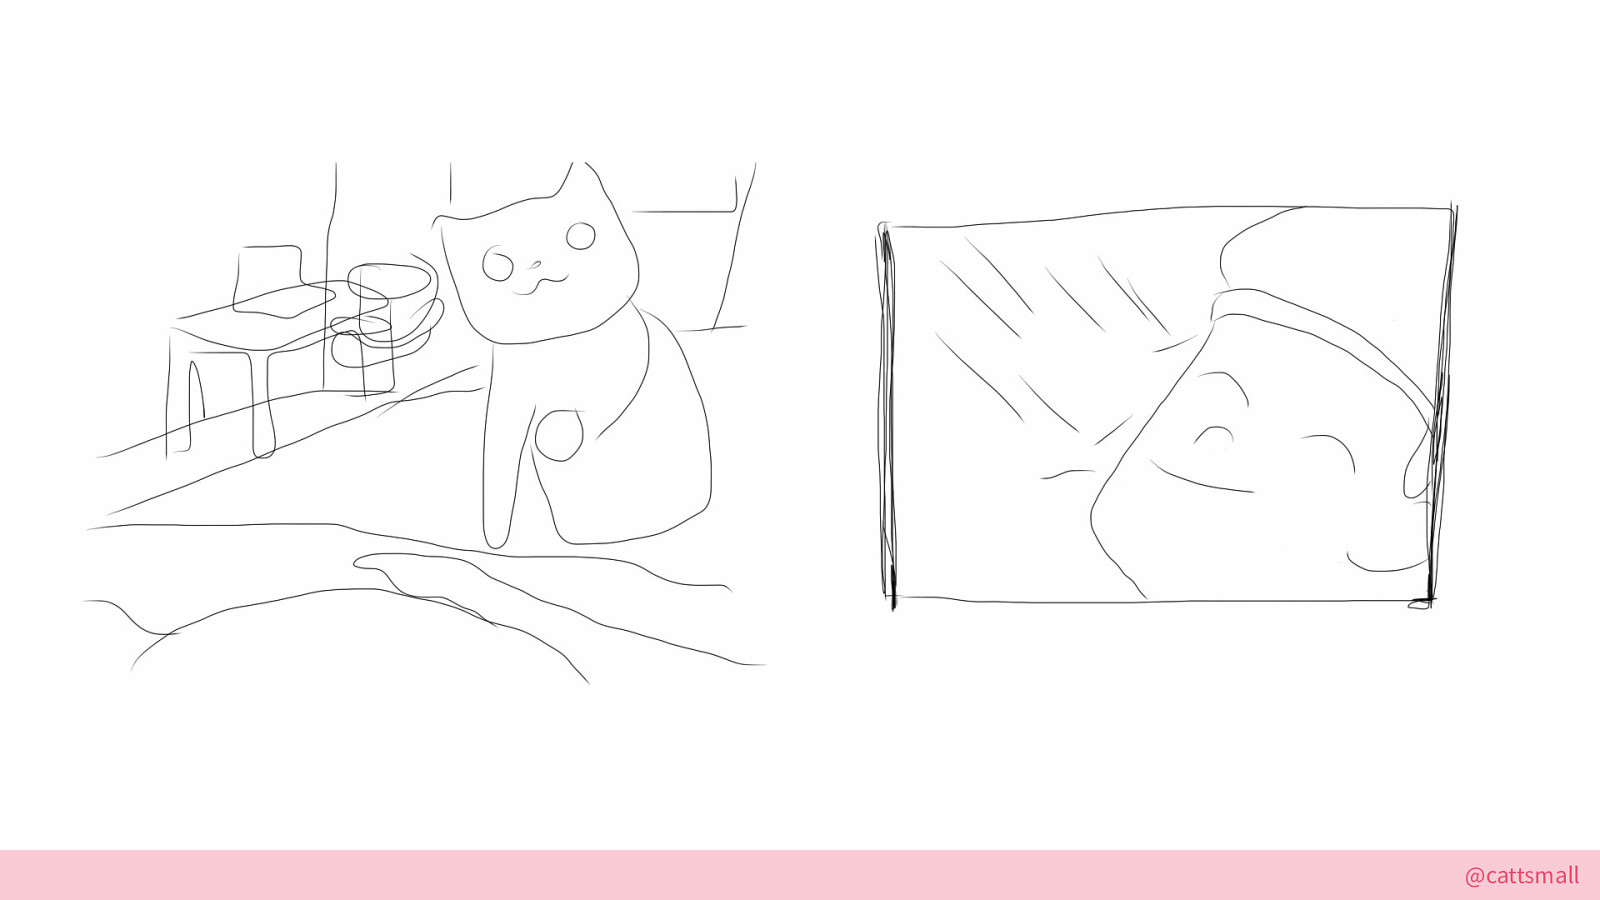
Once that was all done, I started actually sketching out dialogue screens.

And eventually I moved into Illustrator to start creating initial art assets for the game.
Which finally led me to coding!
Again, you can see that prep work is important. I strongly recommend against starting any project without thoroughly thinking it thorough.

With all my planning done, I had to choose a game engine (framework for game development). The game needed to be accessible via the web; players should be able to access it on phones and tablets as well as computers. Unfortunately Unity’s native web game support is hairy and requires extra work to play on Chrome. Phaser is native, and it’s also the best open-source JavaScript engine I’ve found yet.
NOTE: I made my game in Phaser version 2.4, so it’ll look different from Phaser 3. This game is 5 years old and I have learned that you have to stop updating your frameworks if you ever want to finish.

To use Phaser, you make an index.html file and include their minified framework. In other words, it works like many other of your favorite frameworks.

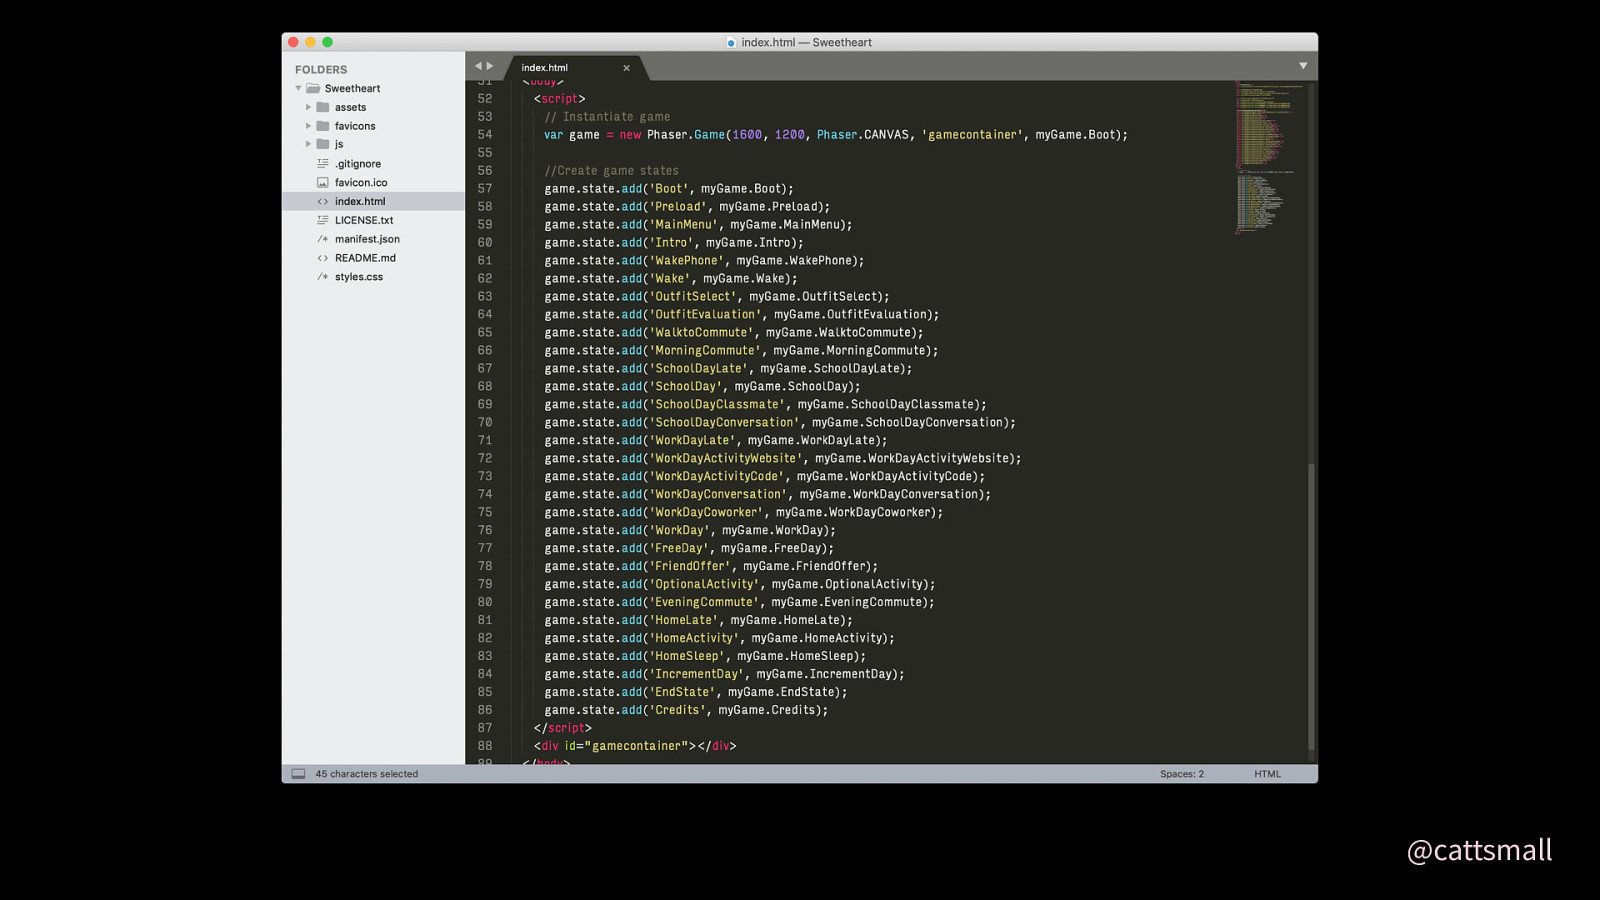
Then in the body, you instantiate the Phaser game object, add your game states, and create a container element for the game (which is where the <canvas> element will live. This game is huge, so I didn’t want to have one scene with everything. Instead, I split each part of the game into a different scene.
If you don’t know about scenes (or “states”, as they’re referred to in code), games can be split into multiple parts. This helps developers to better organize objects and structure the game in sections. For example, Kara goes from the dressup scene to the evaluation scene to the commute scene. This is not unlike separating CSS into different files arranged by the content it contains (form CSS, typography CSS, tables CSS, etc).
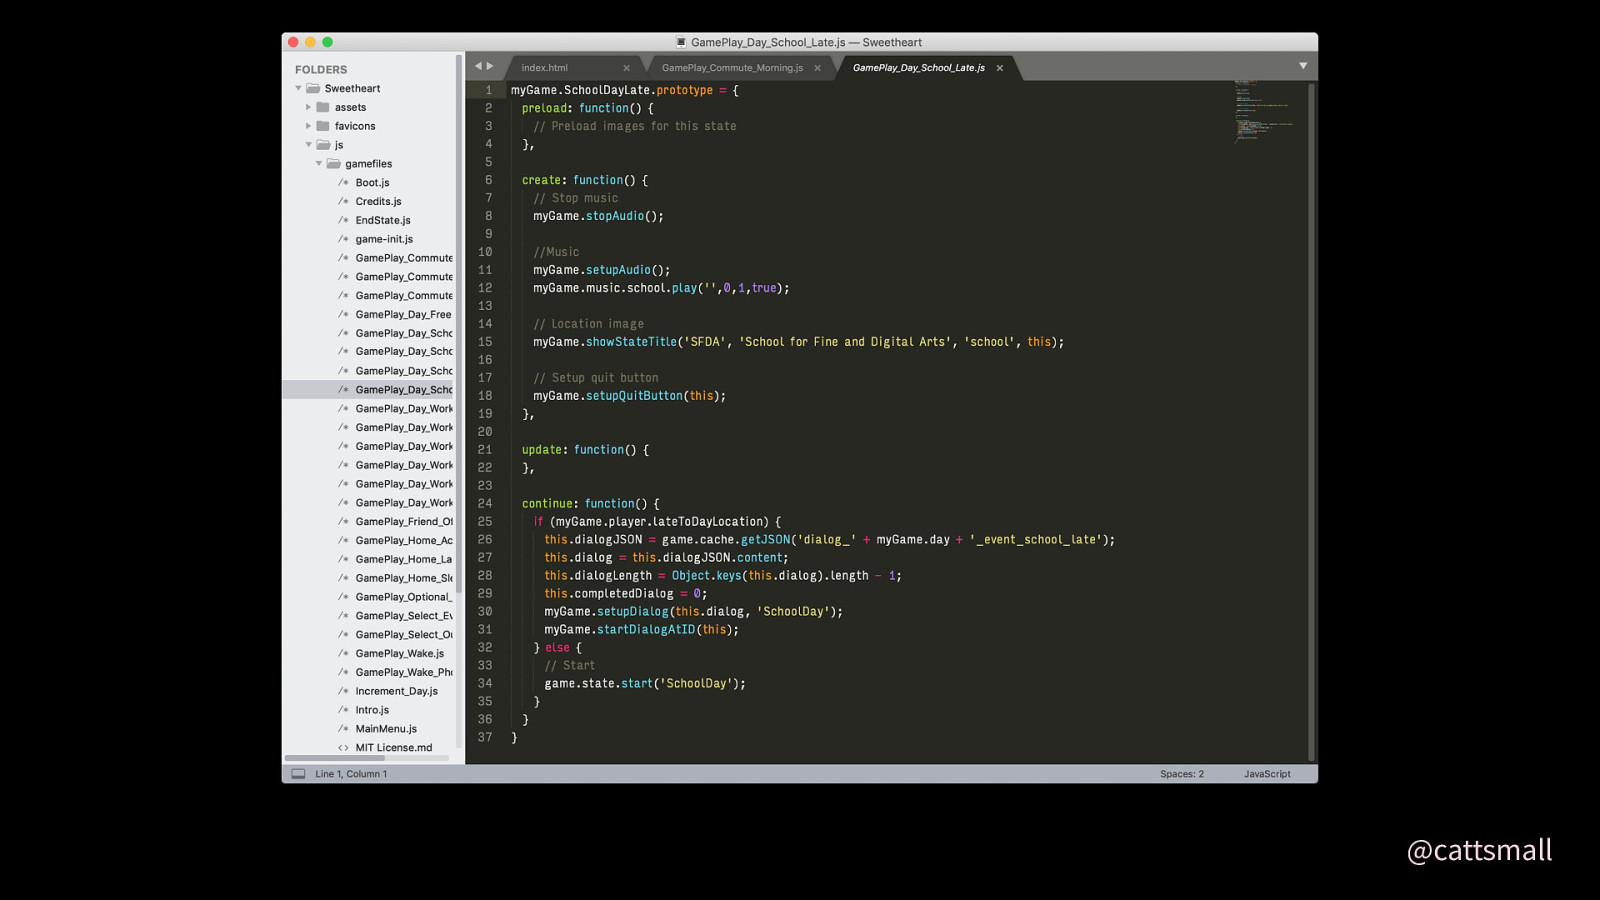
Here’s what a scene looked like. This is a scene that was just dialog. Other scenes had actual interactive portions, so they are much much larger.
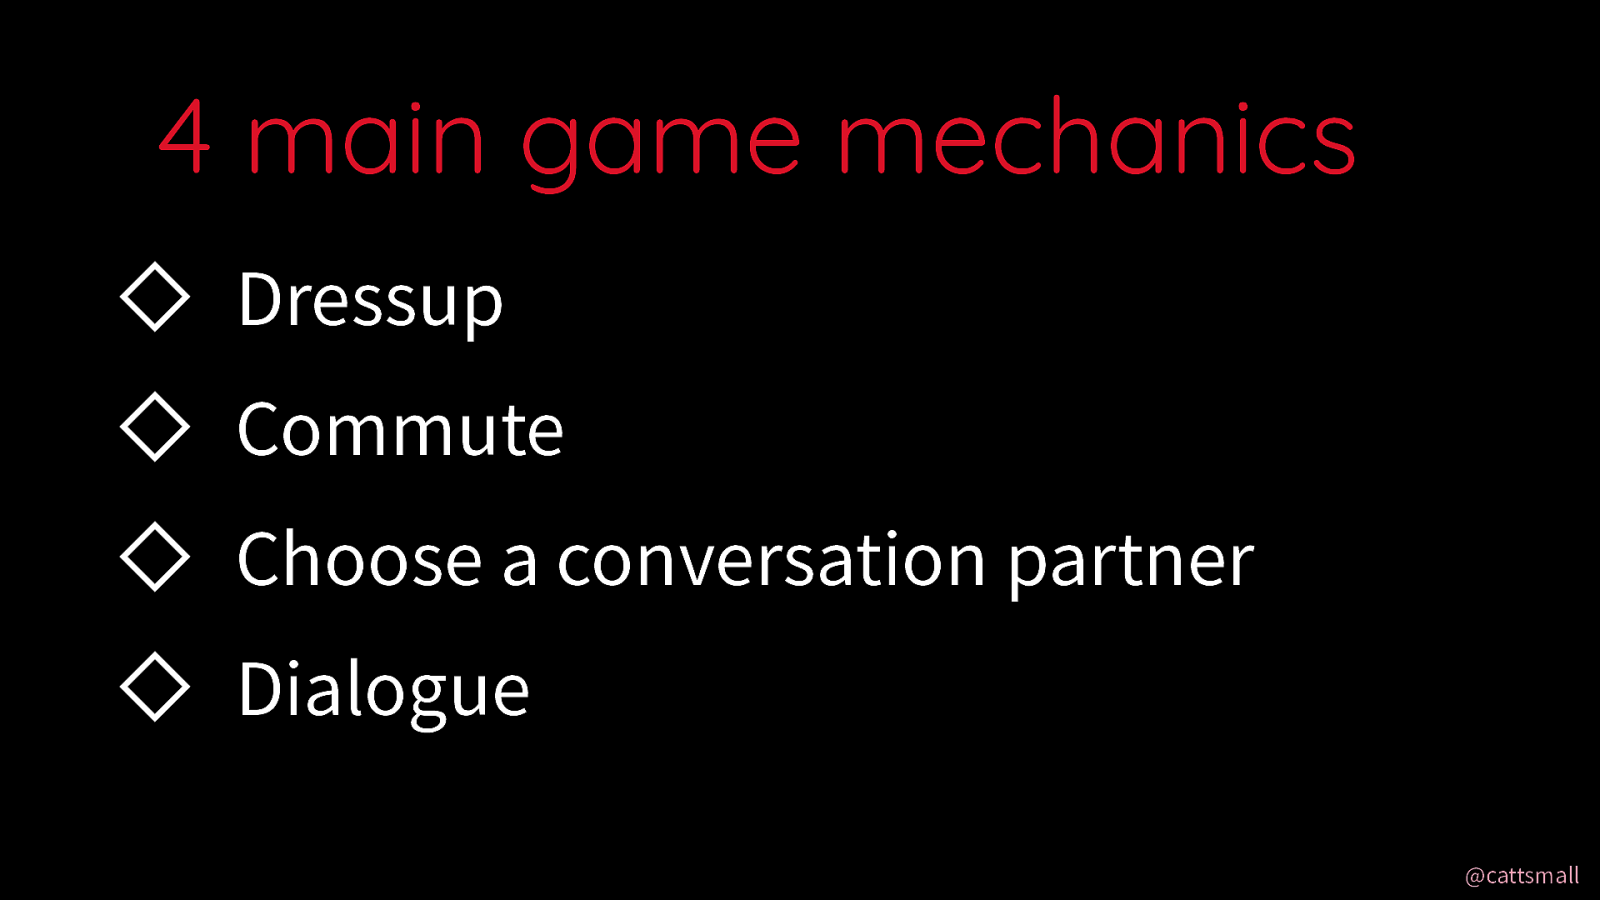
I’m going to talk about four of the main mechanics (types of functionality and interactions) in the game. In order to increase the agency of the player, these mechanics were reused in multiple ways throughout the game beyond their initial purpose. Thanks to everyone who gave me feedback when I playtested the game—y’all inspired me to get creative and make the game better.
I’ll link the game at the end of my talk so you can analyze it and see where techniques get reused!

Firstly, dressup.
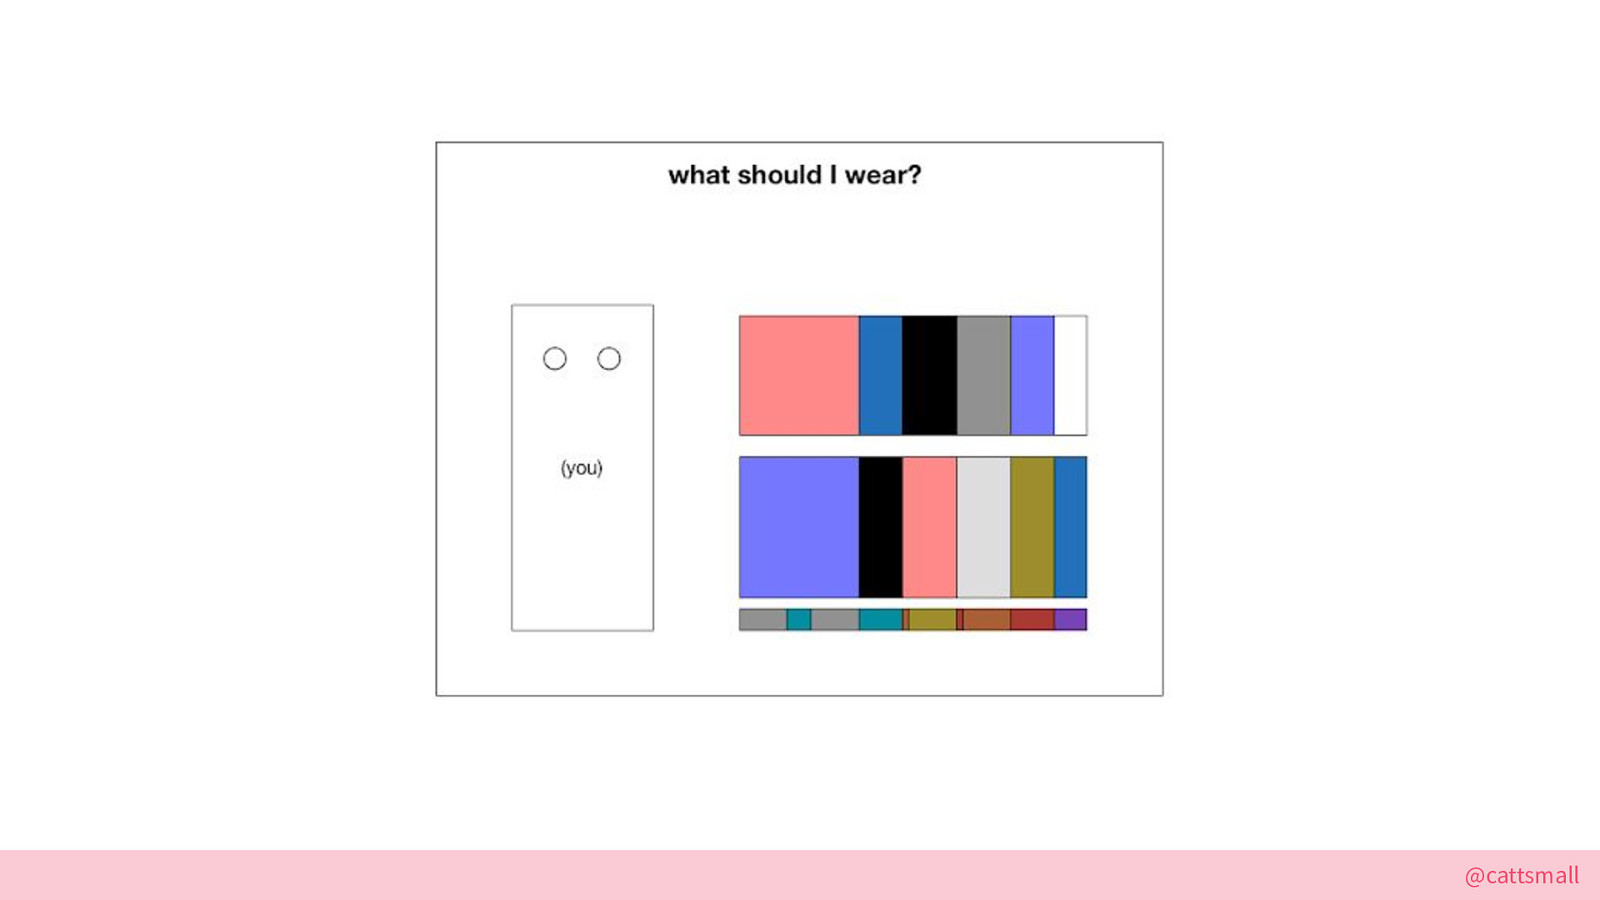
Here’s the original wireframe!
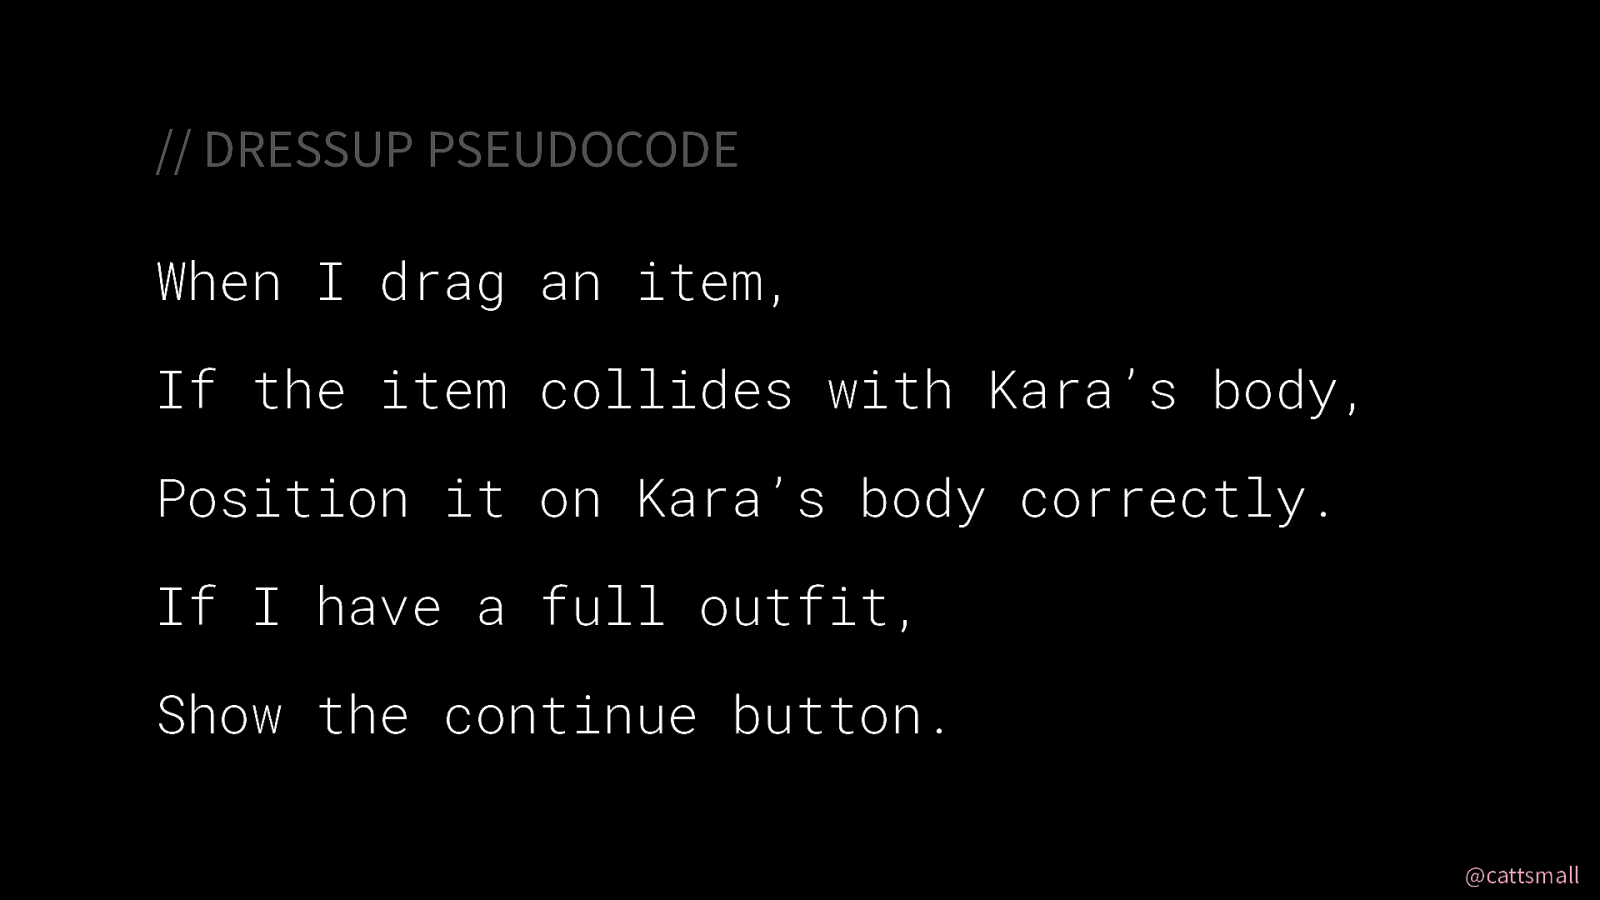
I like to write pseudocode before I start programming so I can get into the right mindset.
Here’s an example of what I wrote for this mechanic:
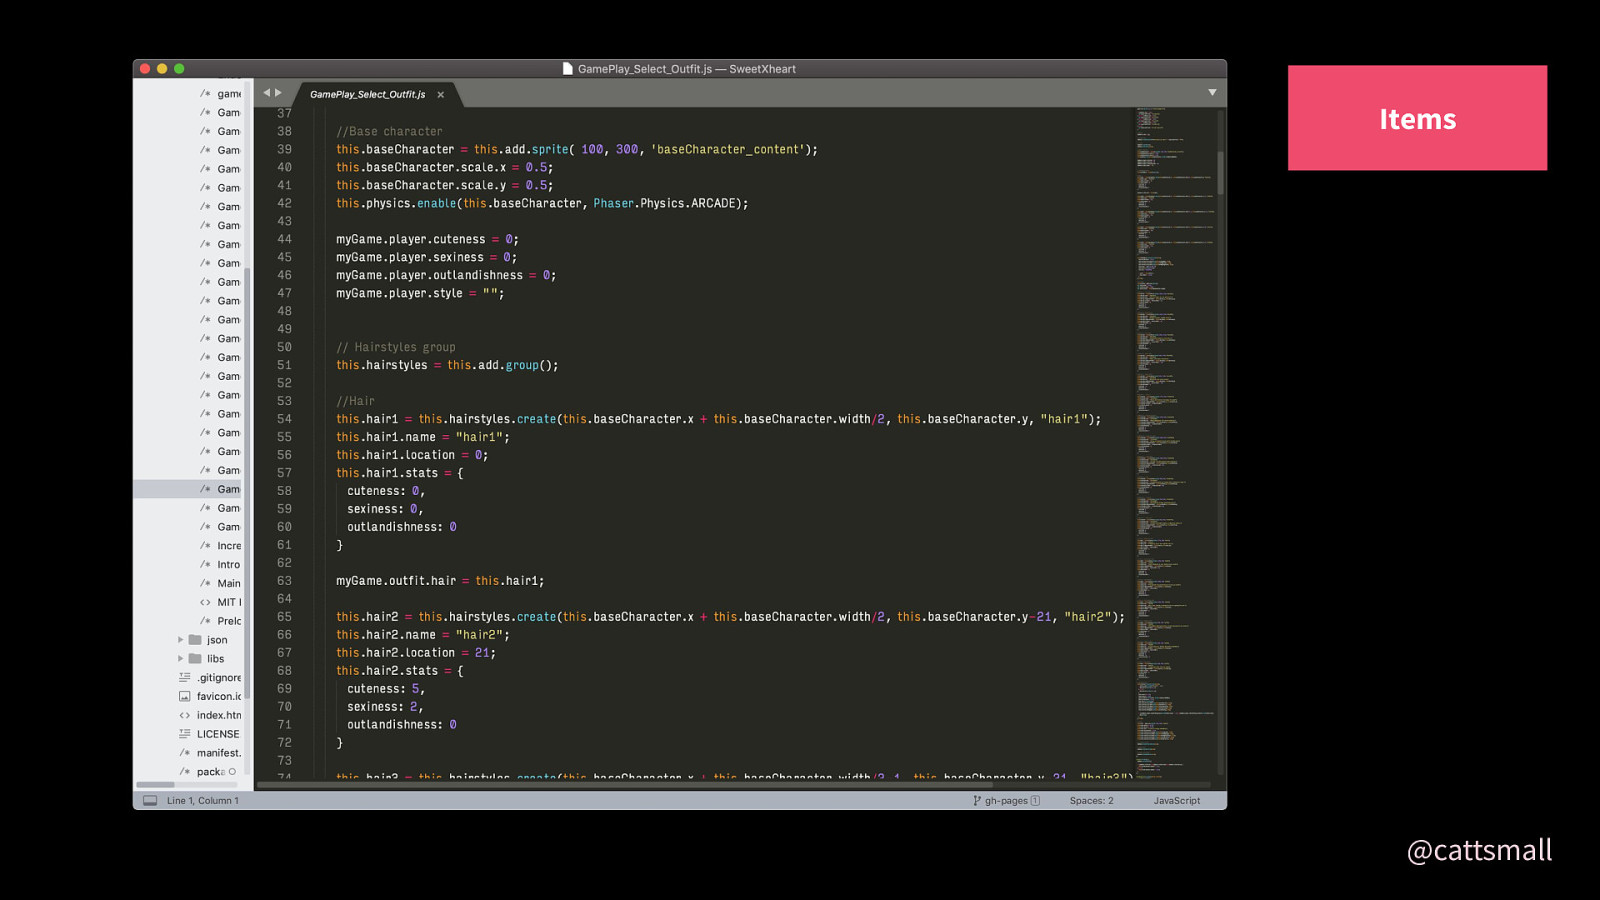
First, I create Kara’s sprite, her hair, and her clothes (top, bottom, and shoes). Every item has stats for cuteness, outlandishness, sexiness. An outfit with none of these qualities is bland. The player doesn’t see these stats on the frontend—this is how outfits are later evaluated.
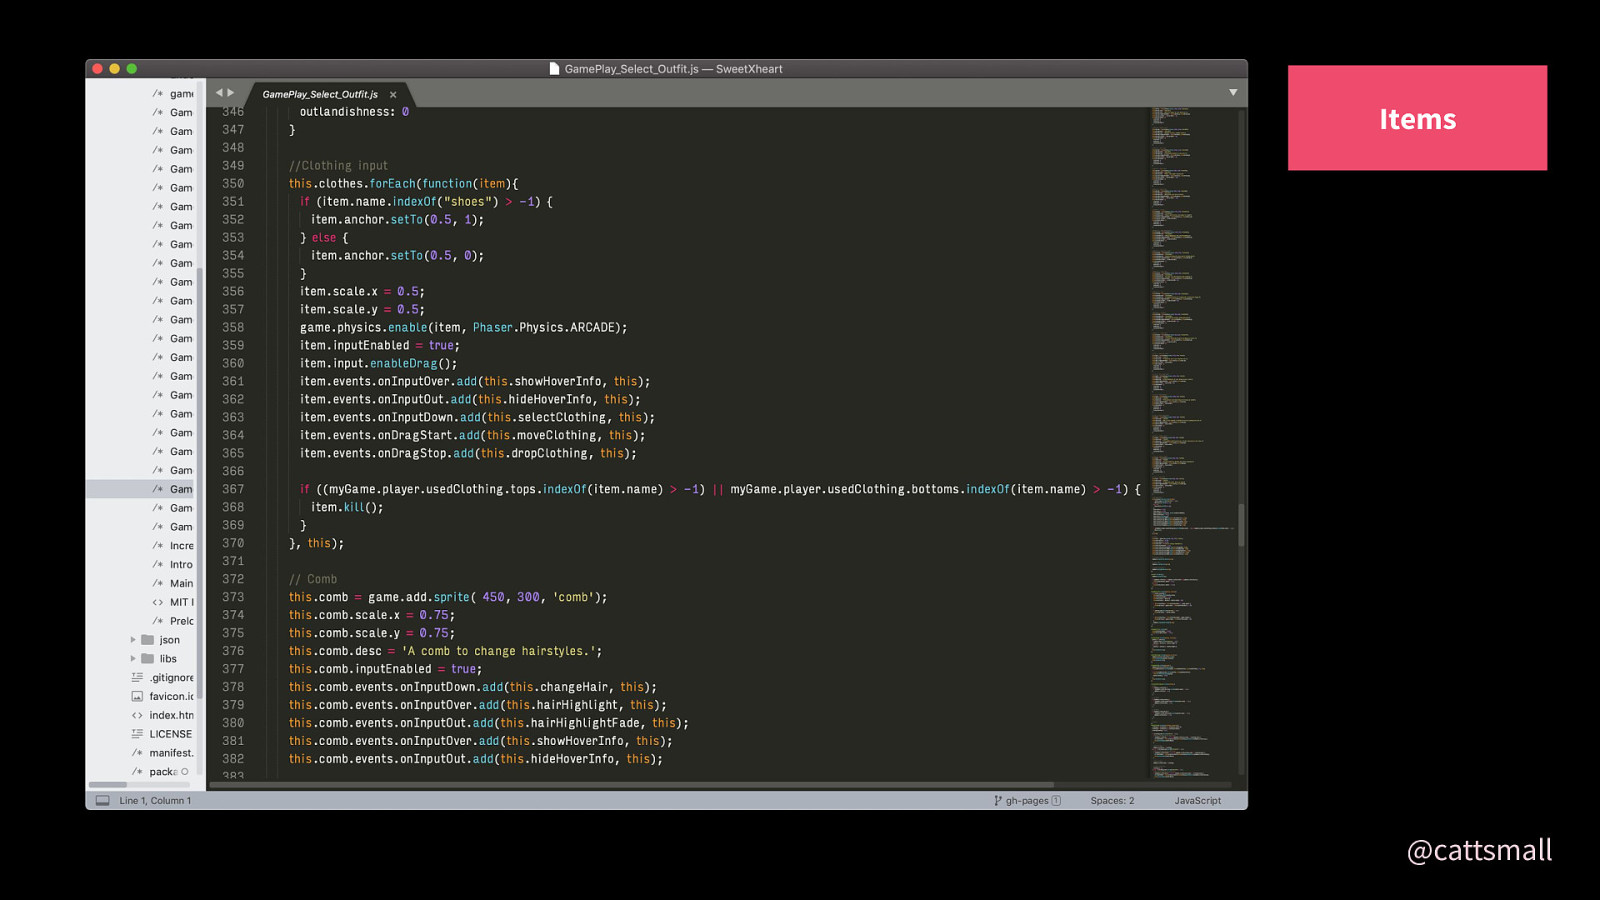
At the end of the clothing creation code, I have a function that applies physics and input events to each item in the clothes group. This lets each item be draggable, clickable, and hoverable. It also makes them able to collide with other objects, such as the main character! This is how I check when clothes overlap with Kara.
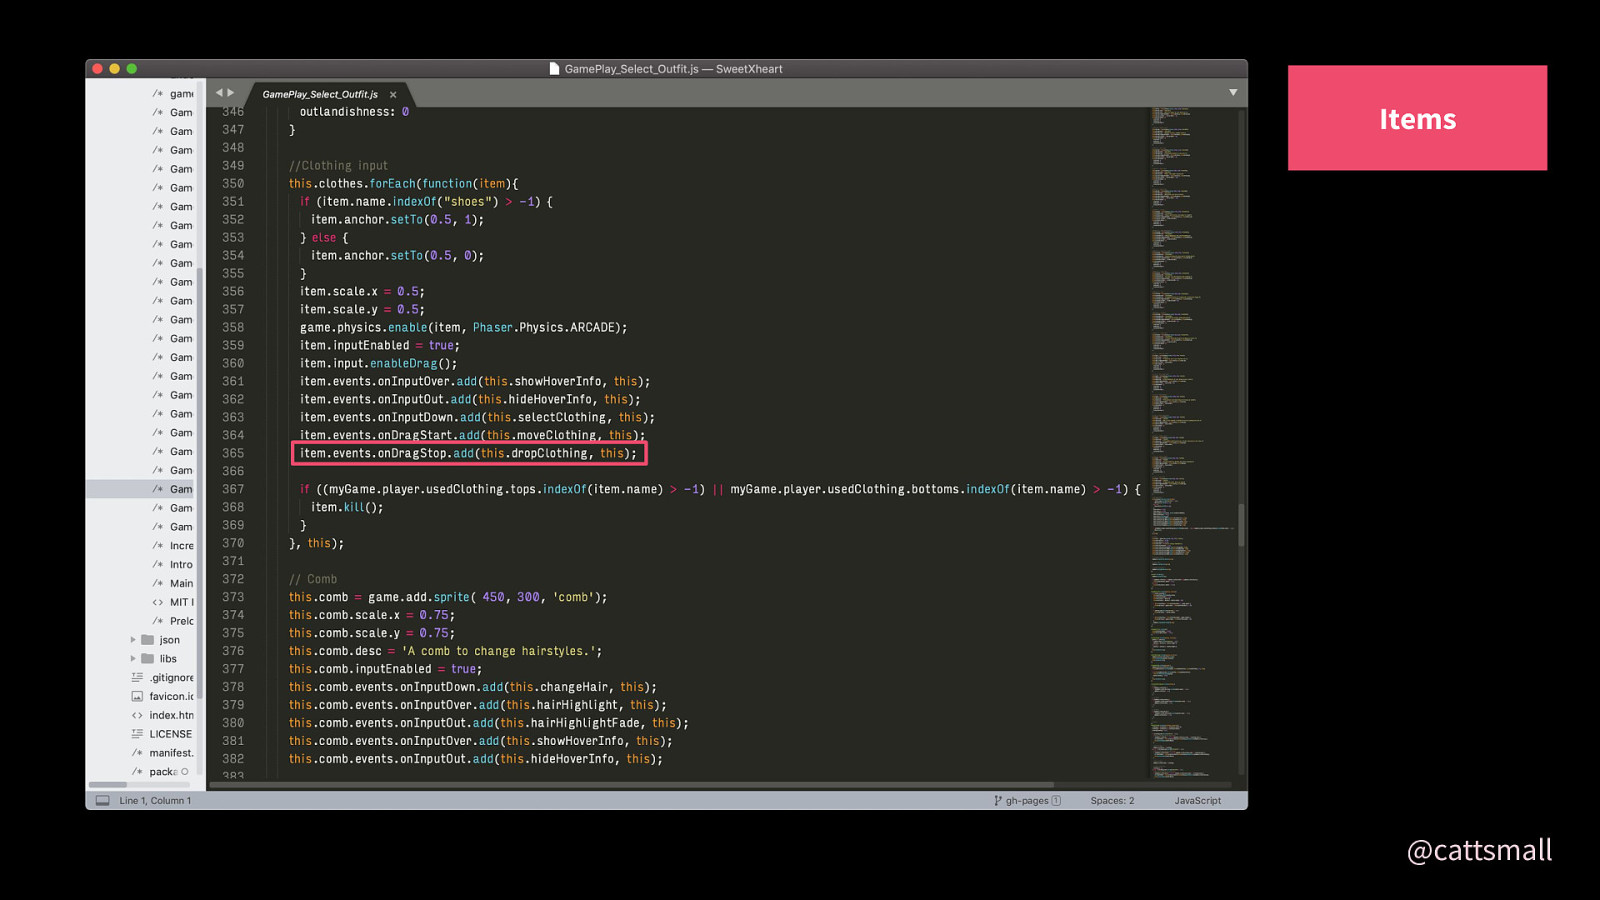
Note the line I circled in pink..
DropClothing is the function I use to check for that overlap between Kara and clothes.
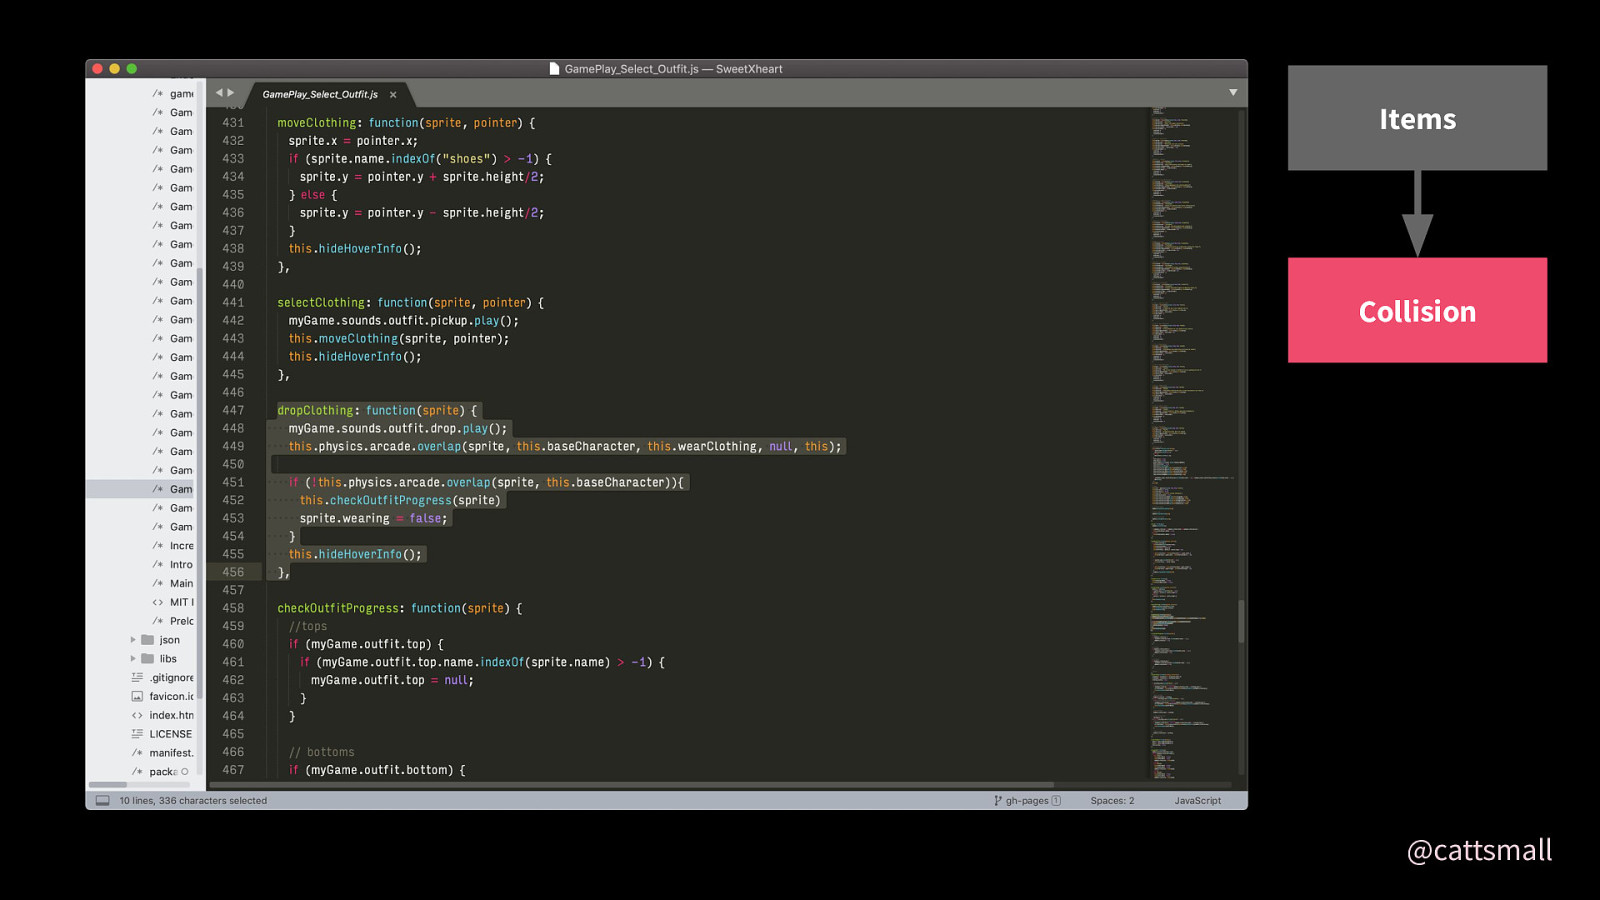
When an item is dropped, if the overlap occurs, wearClothing is called.
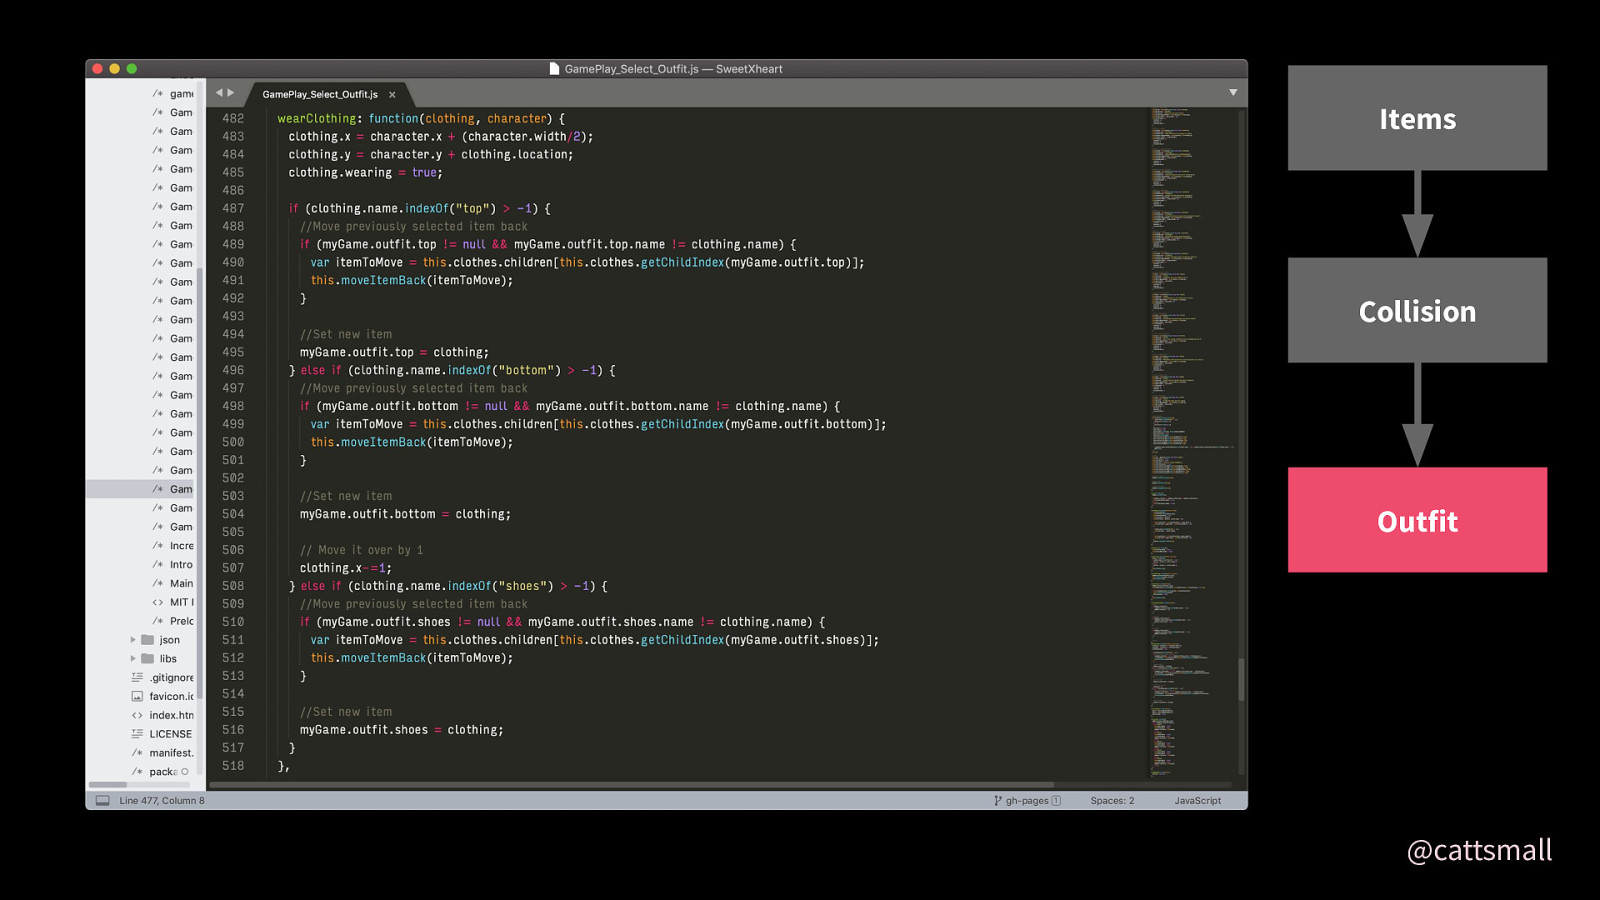
In wearClothing, the item is positioned on top of the player. Then, the item is added to the player’s outfit object.

If the outfit is complete, the continue button gets shown! When the continue button is clicked, it calculates the values of all the items together.
Next was the commute.
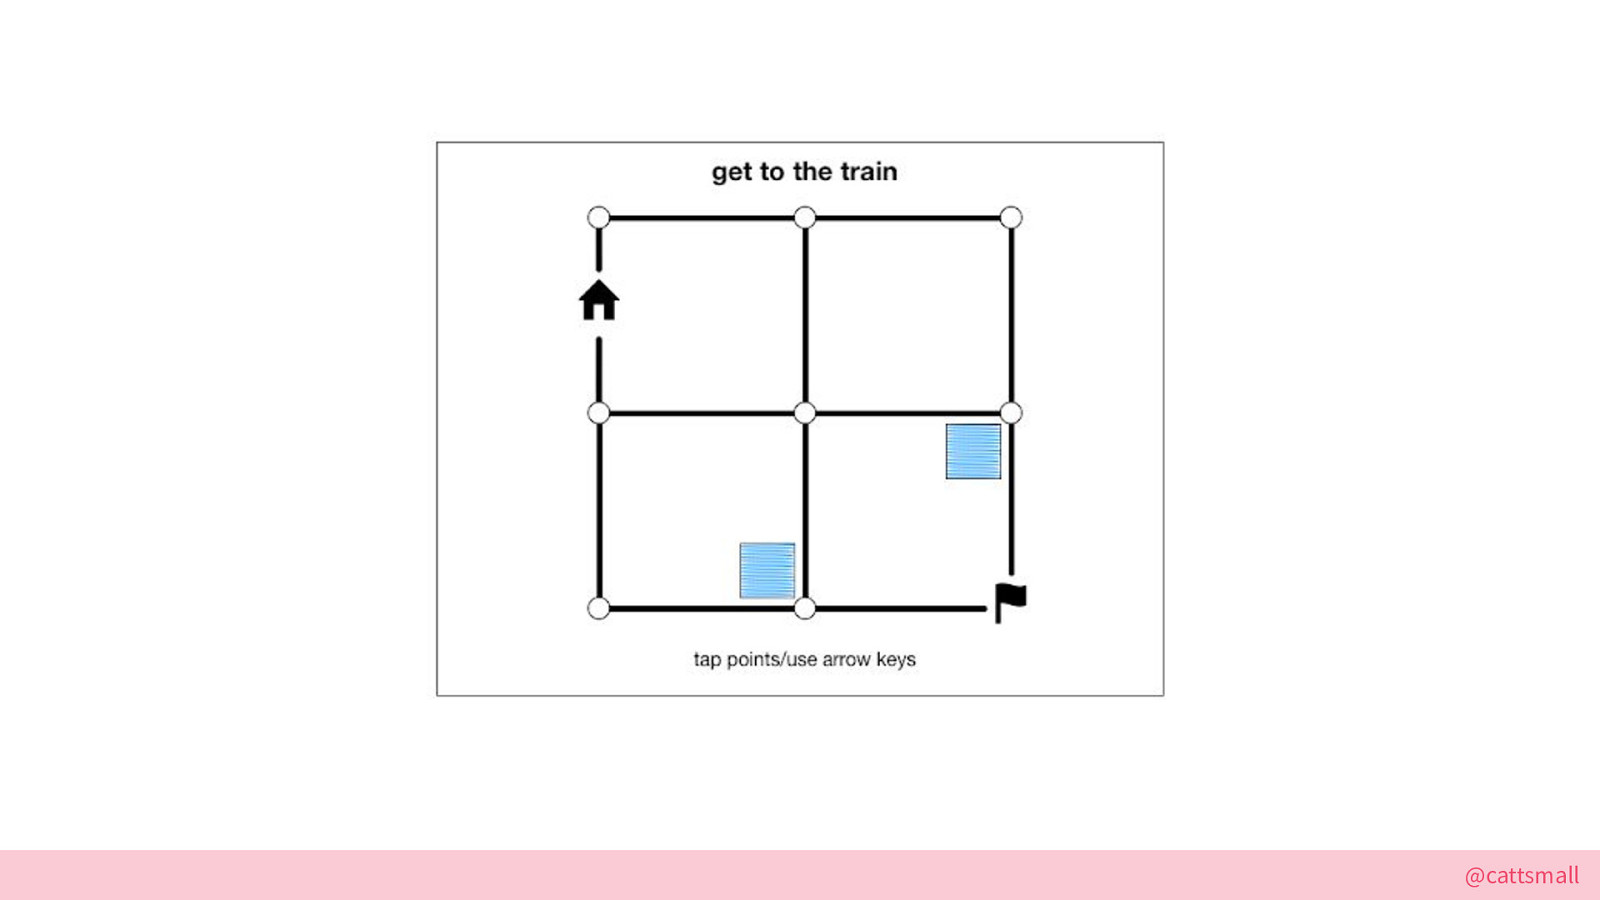
Here’s the original wireframe.
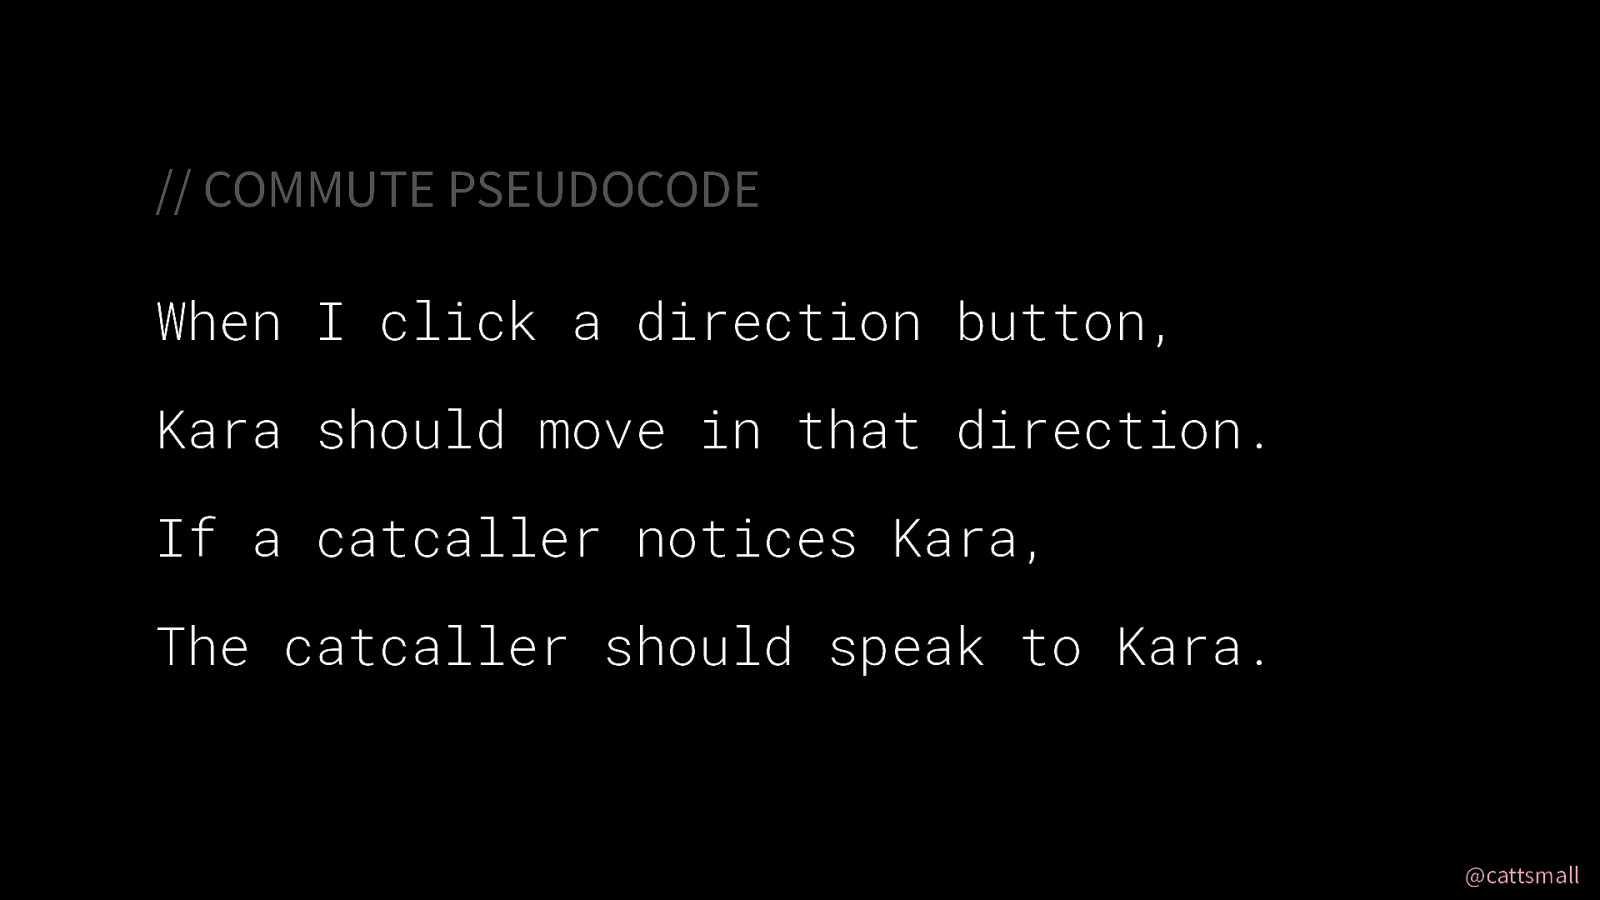
PSEUDOCODE:
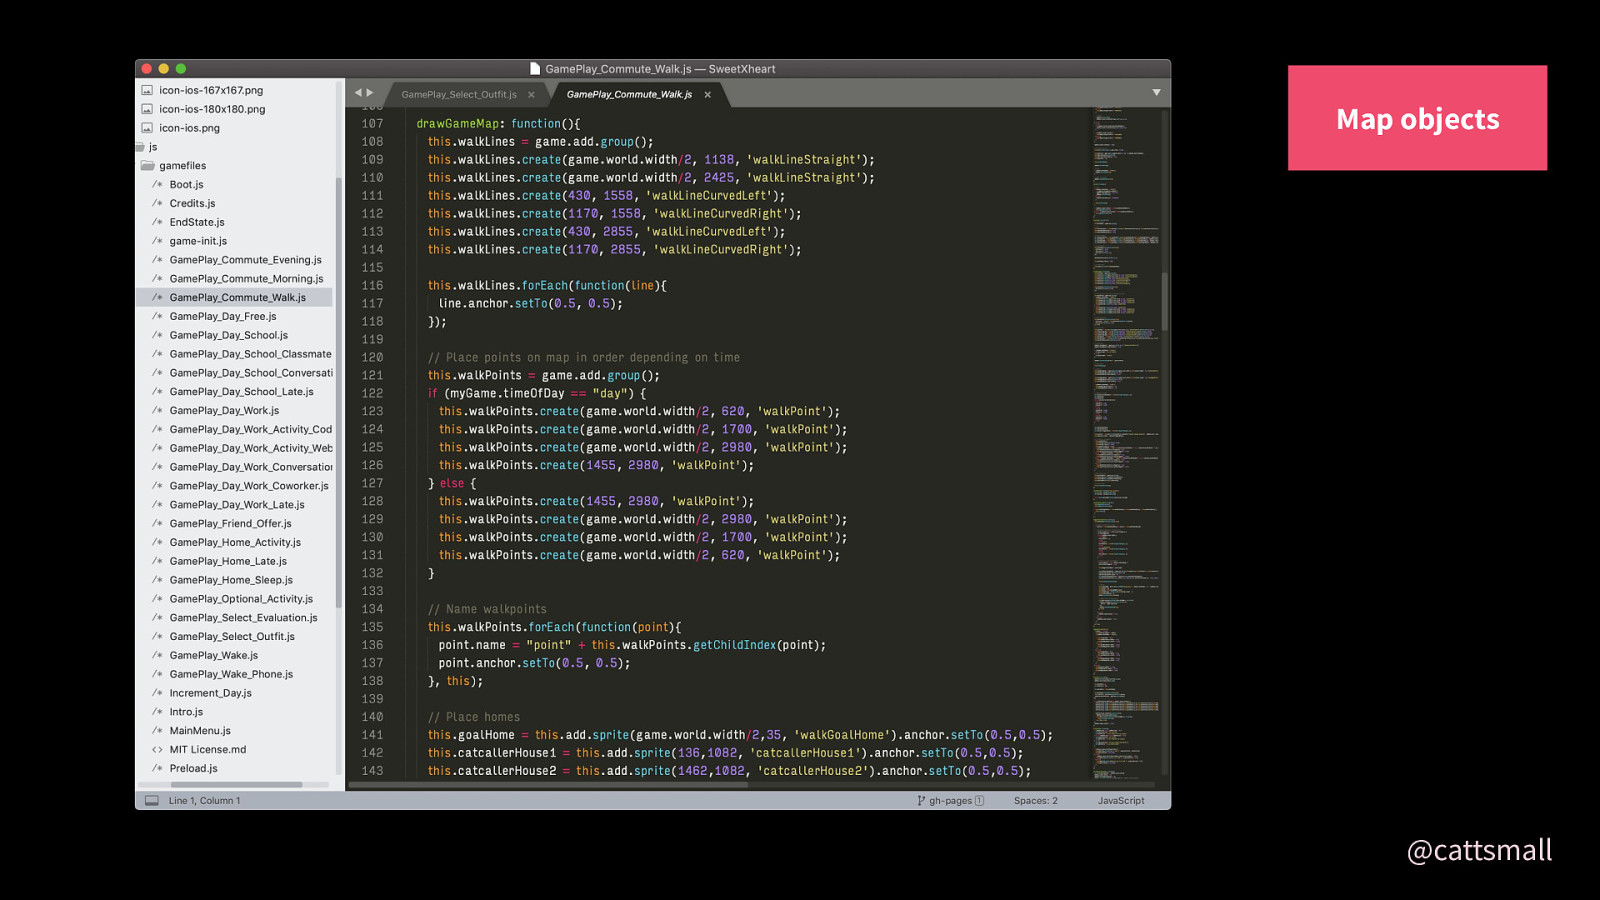
First I draw the map objects, including anchors that the character will move to.
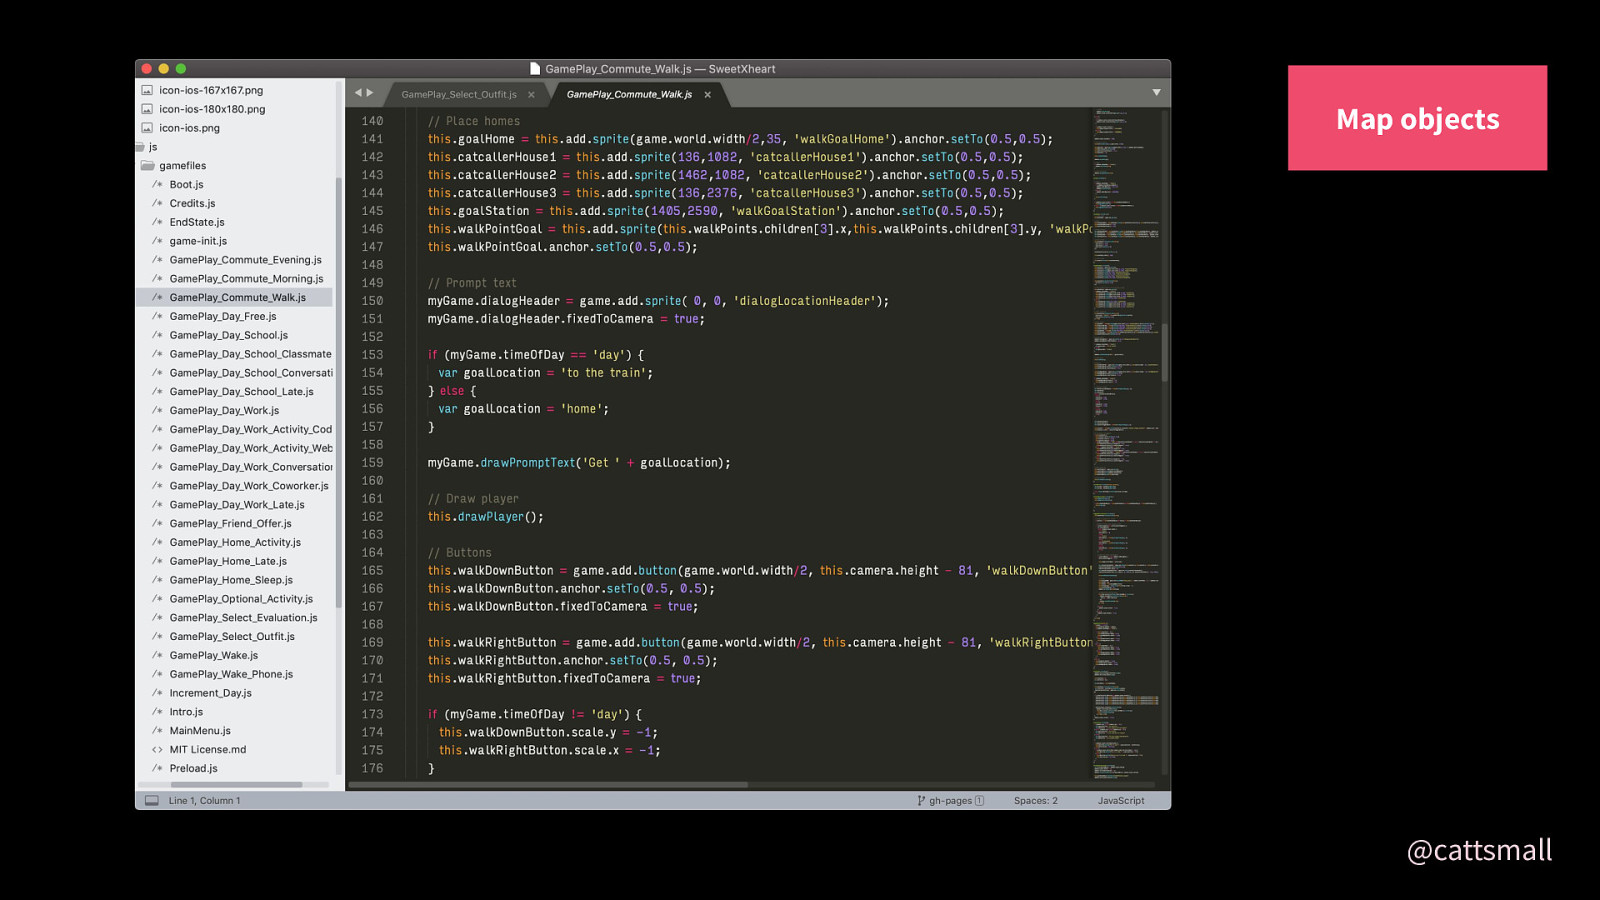
Then I draw more objects, including the houses, the main character Kara, and the direction button.
NOTE: Kara has her own drawing function because I have to redraw the outfit she’s wearing.
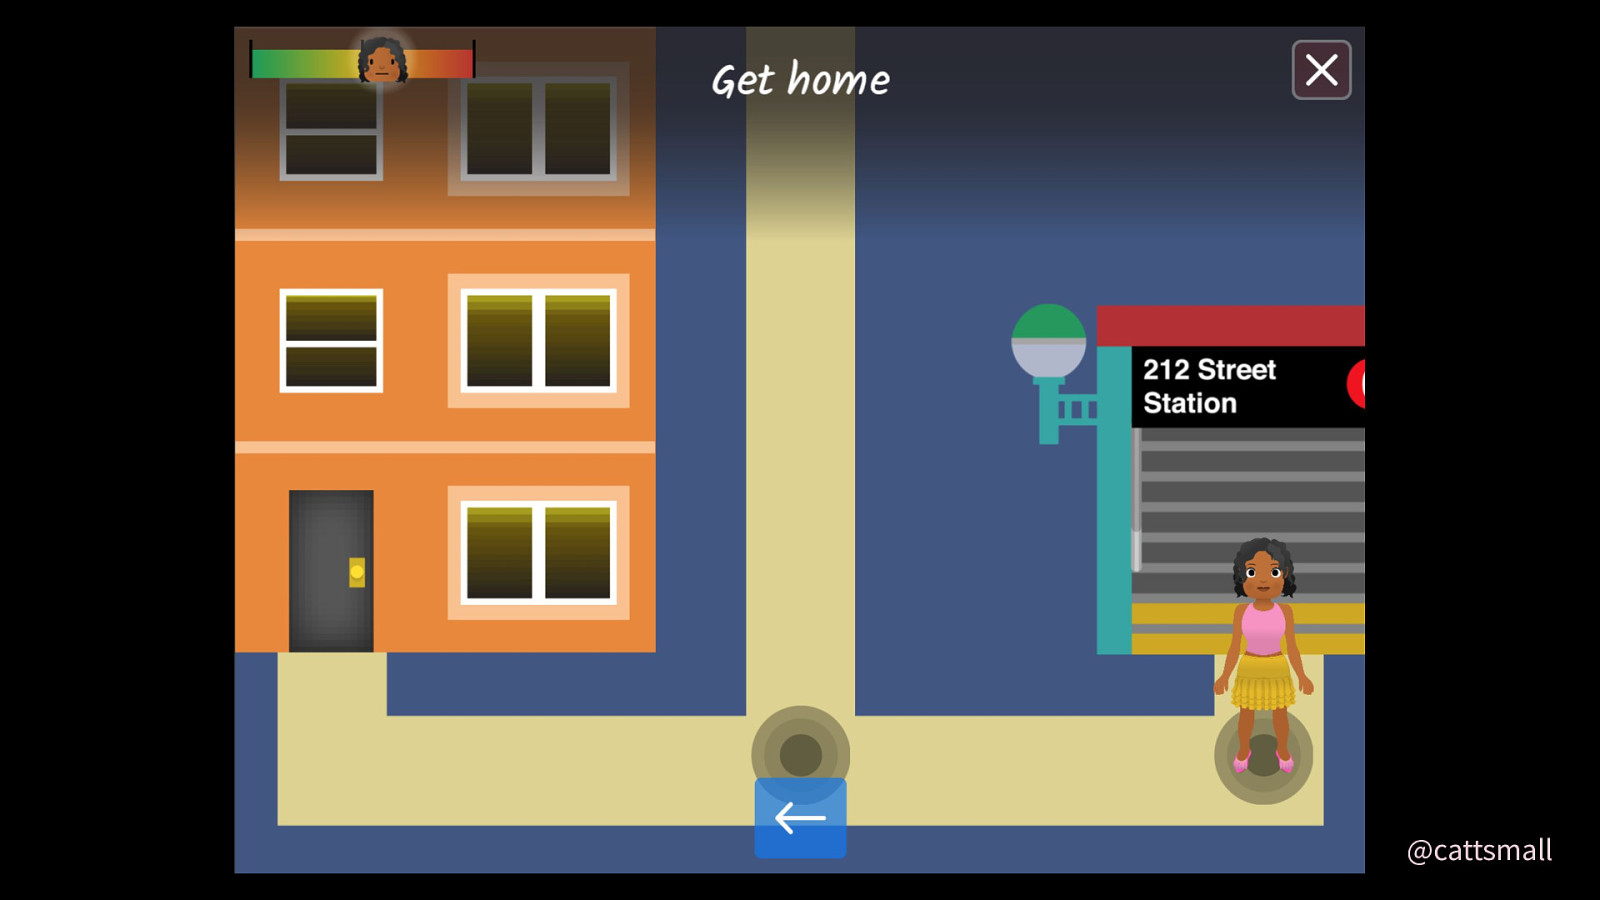
This is how it shows up.
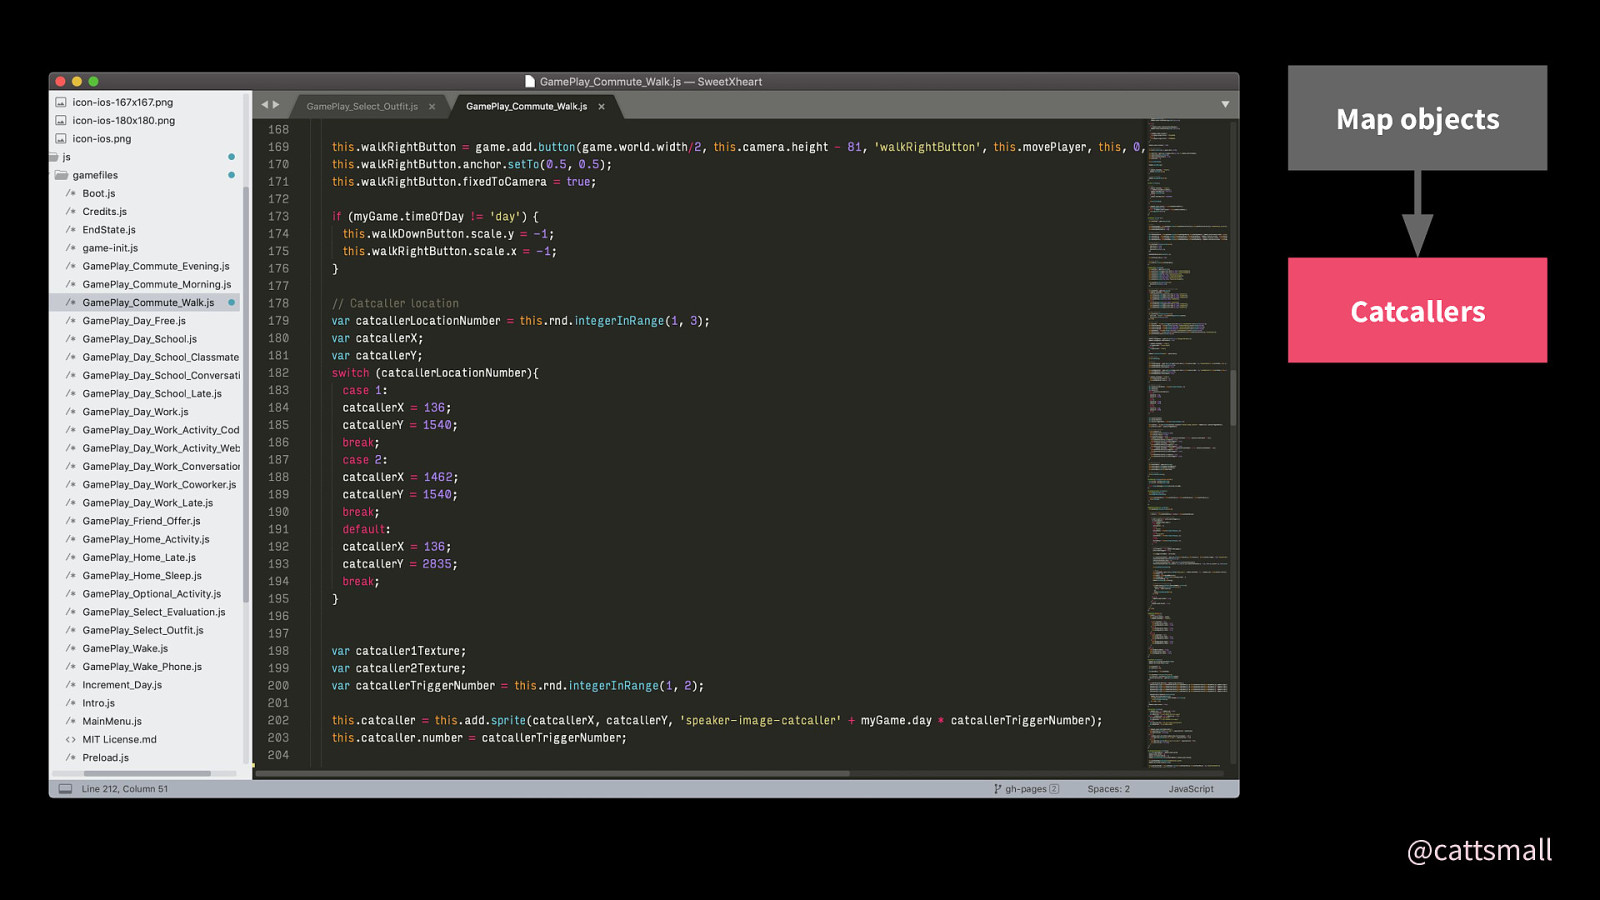
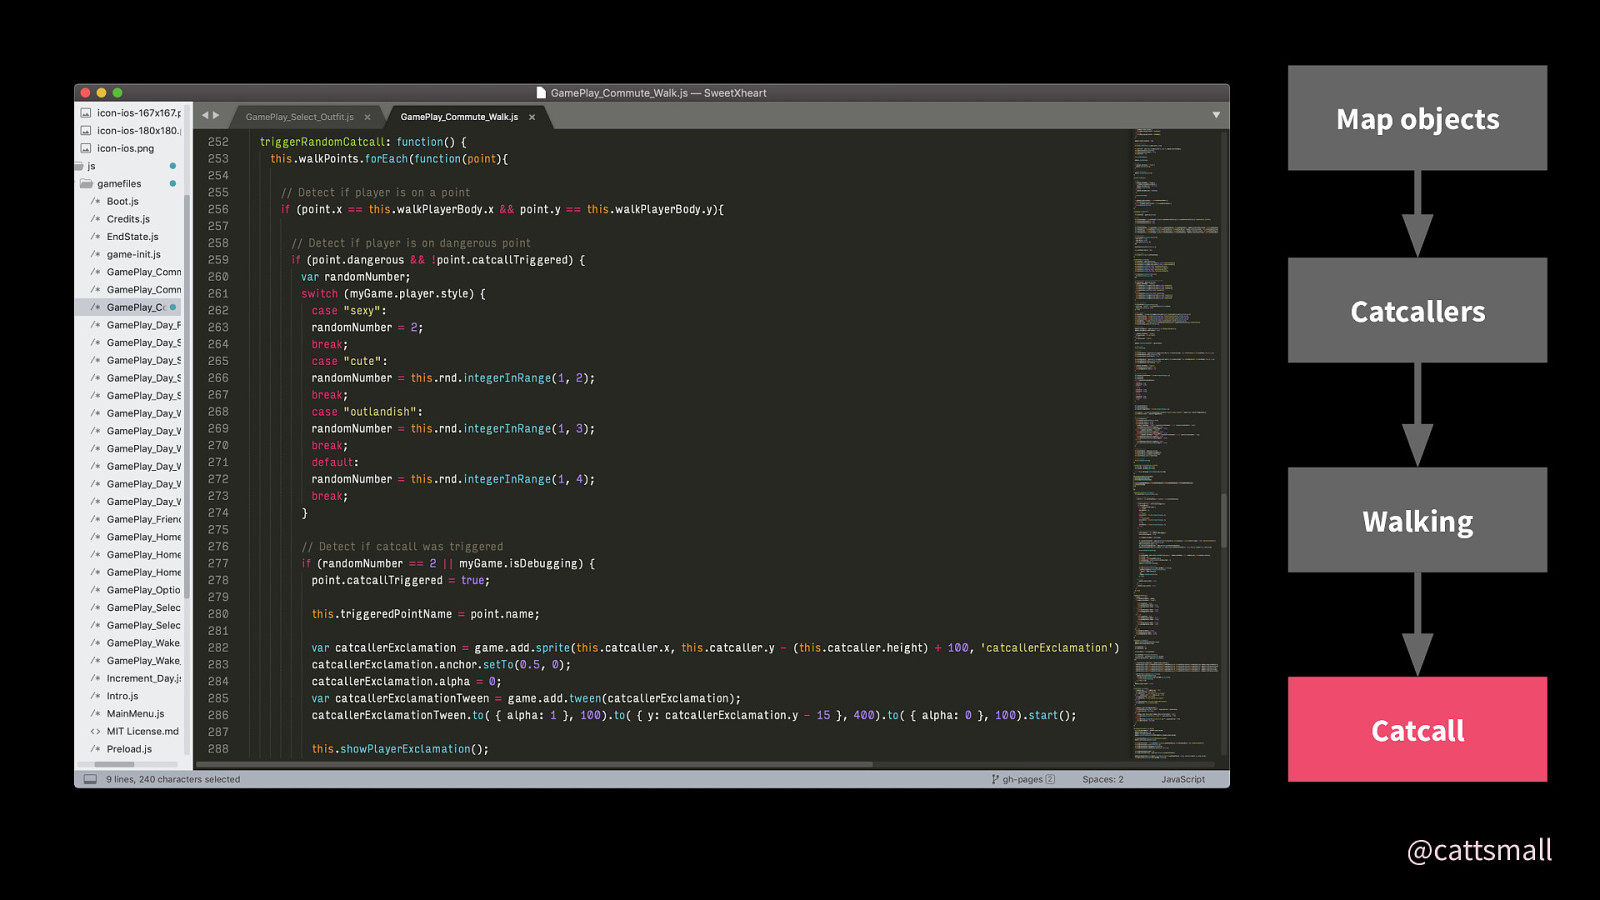
Next I create the catcallers and give them a random location as well as trigger number, which determines the catcaller image that gets shown and which dialogue is used if the catcall is successfully triggered. There are 20 different catcallers in the game.
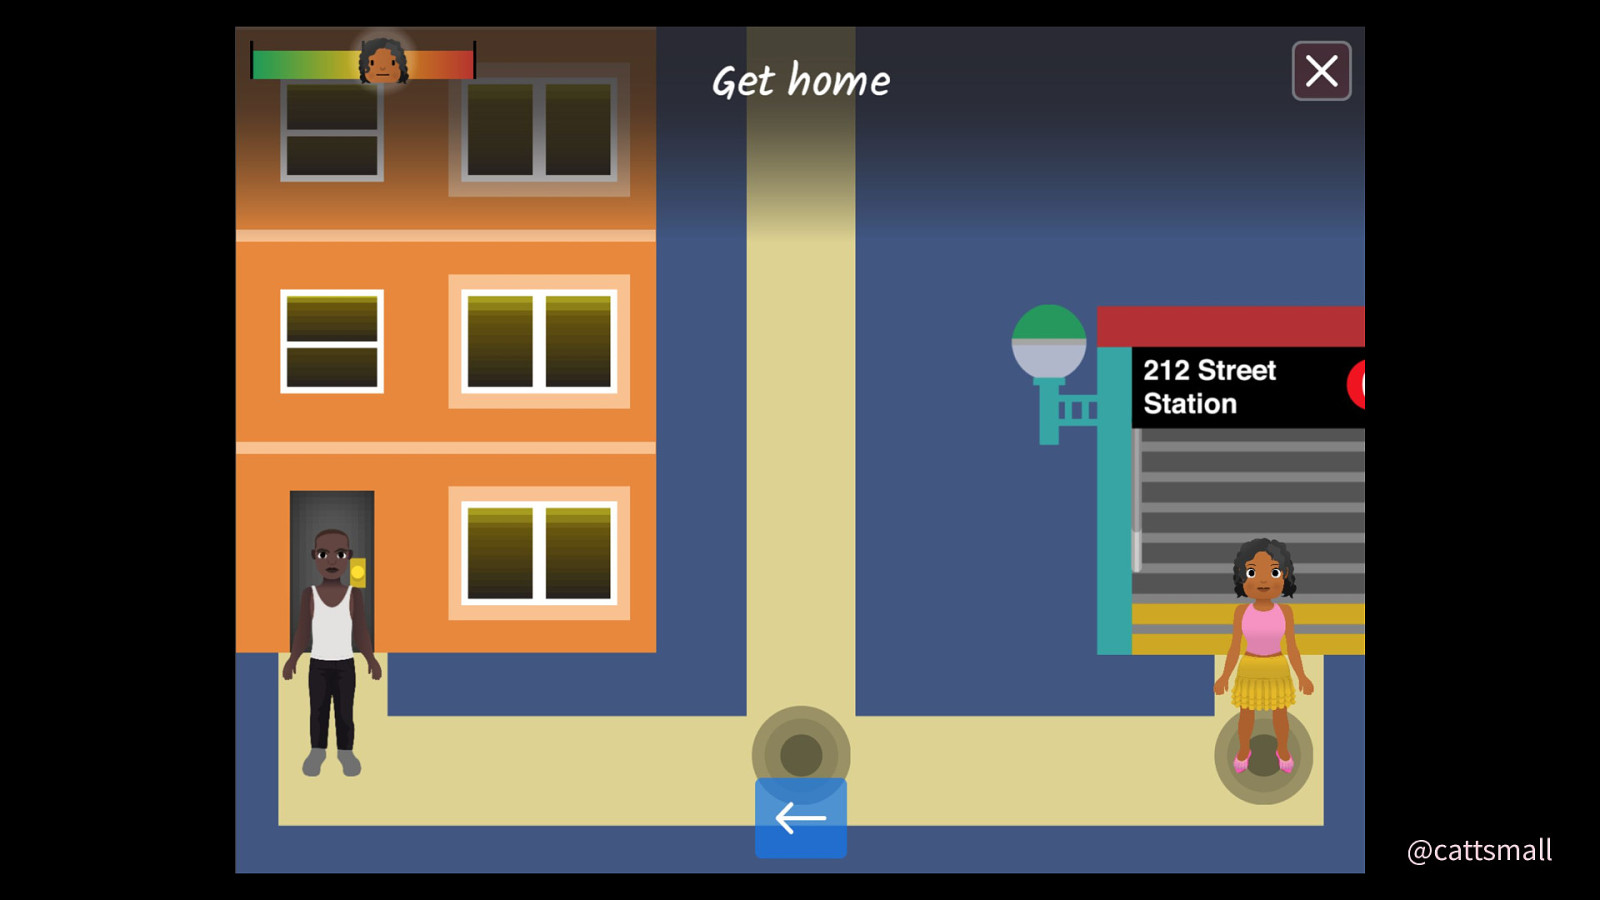
Hello, catcaller!
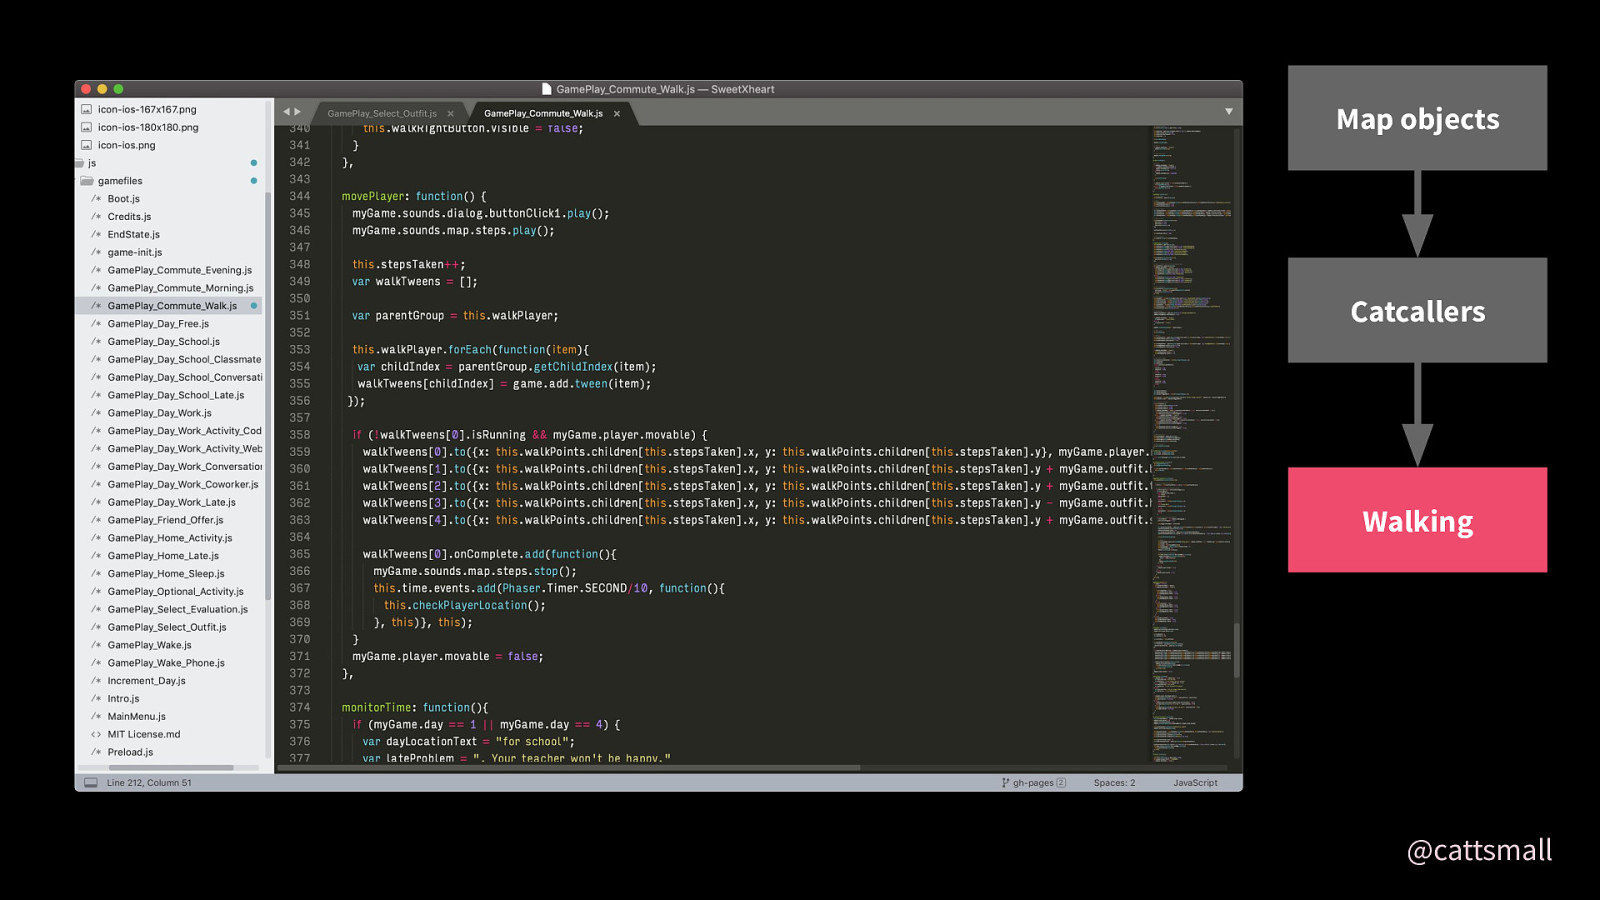
Next, I enable the player to be moved when the player clicks on the direction button.
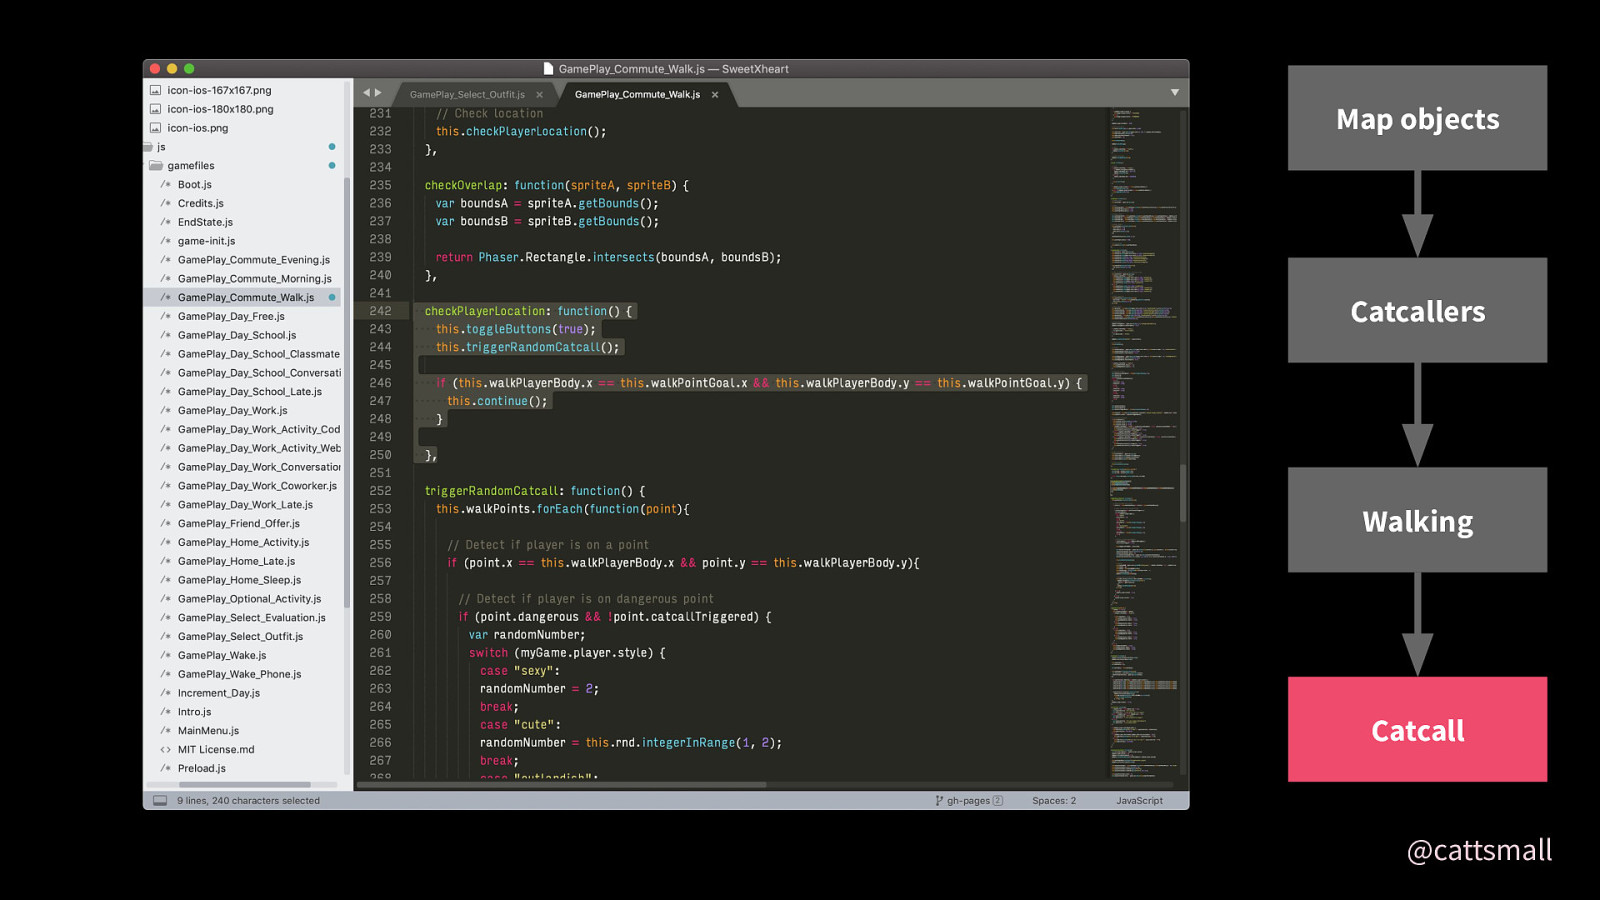
When the player is done walking, their location is checked.
If the catcall is successfully triggered, the catcaller shows an exclamation.
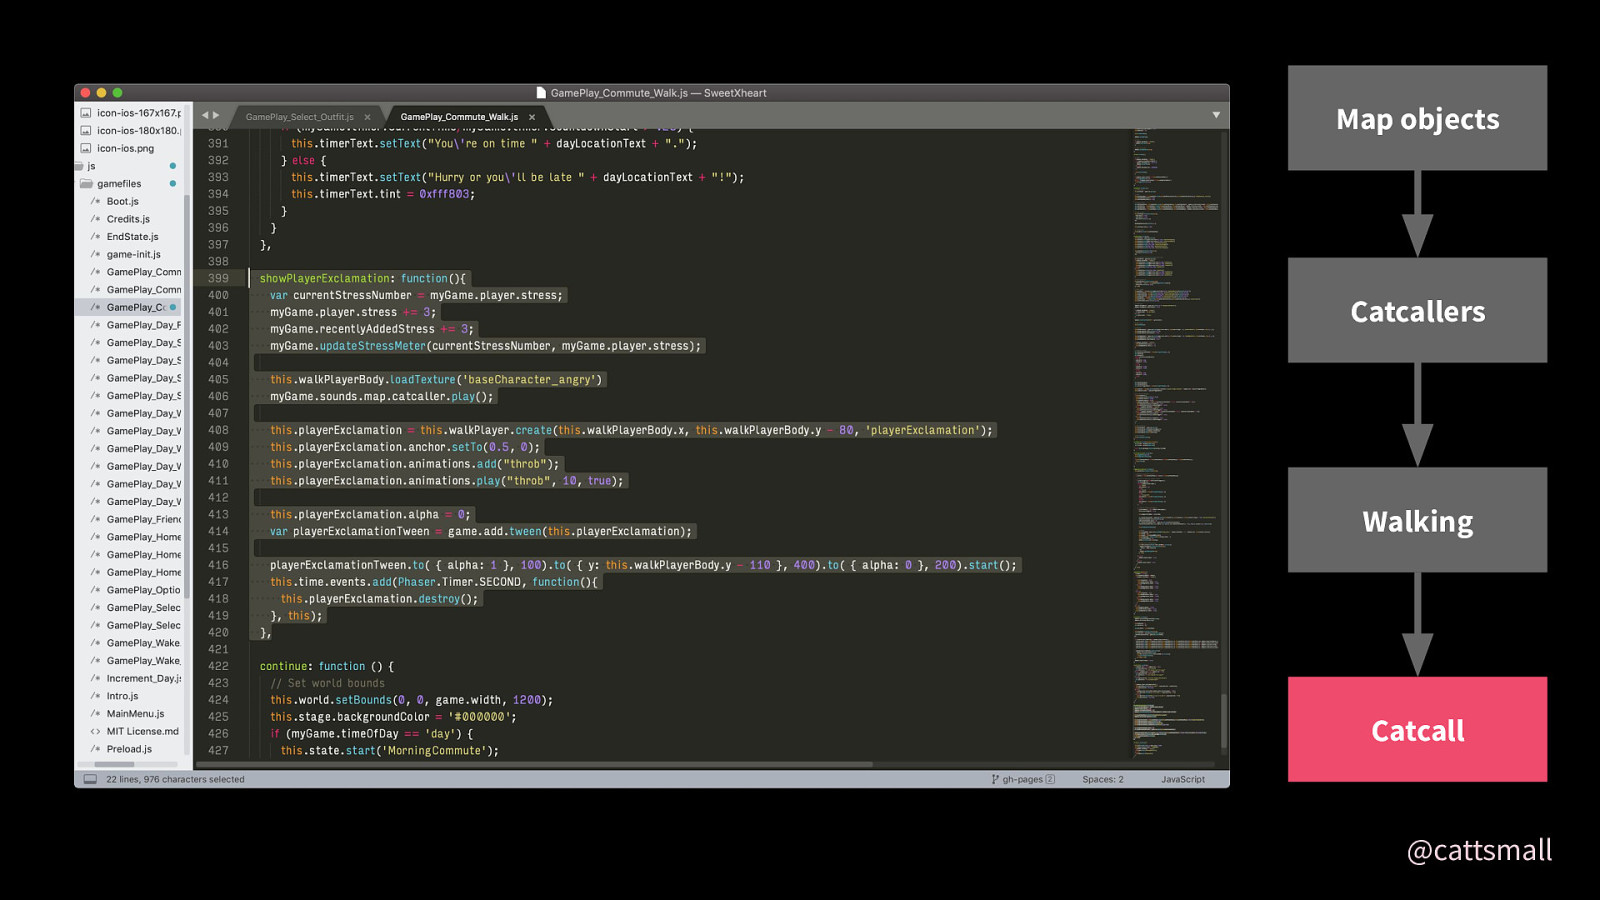
The player does too!
Sorry, Kara.
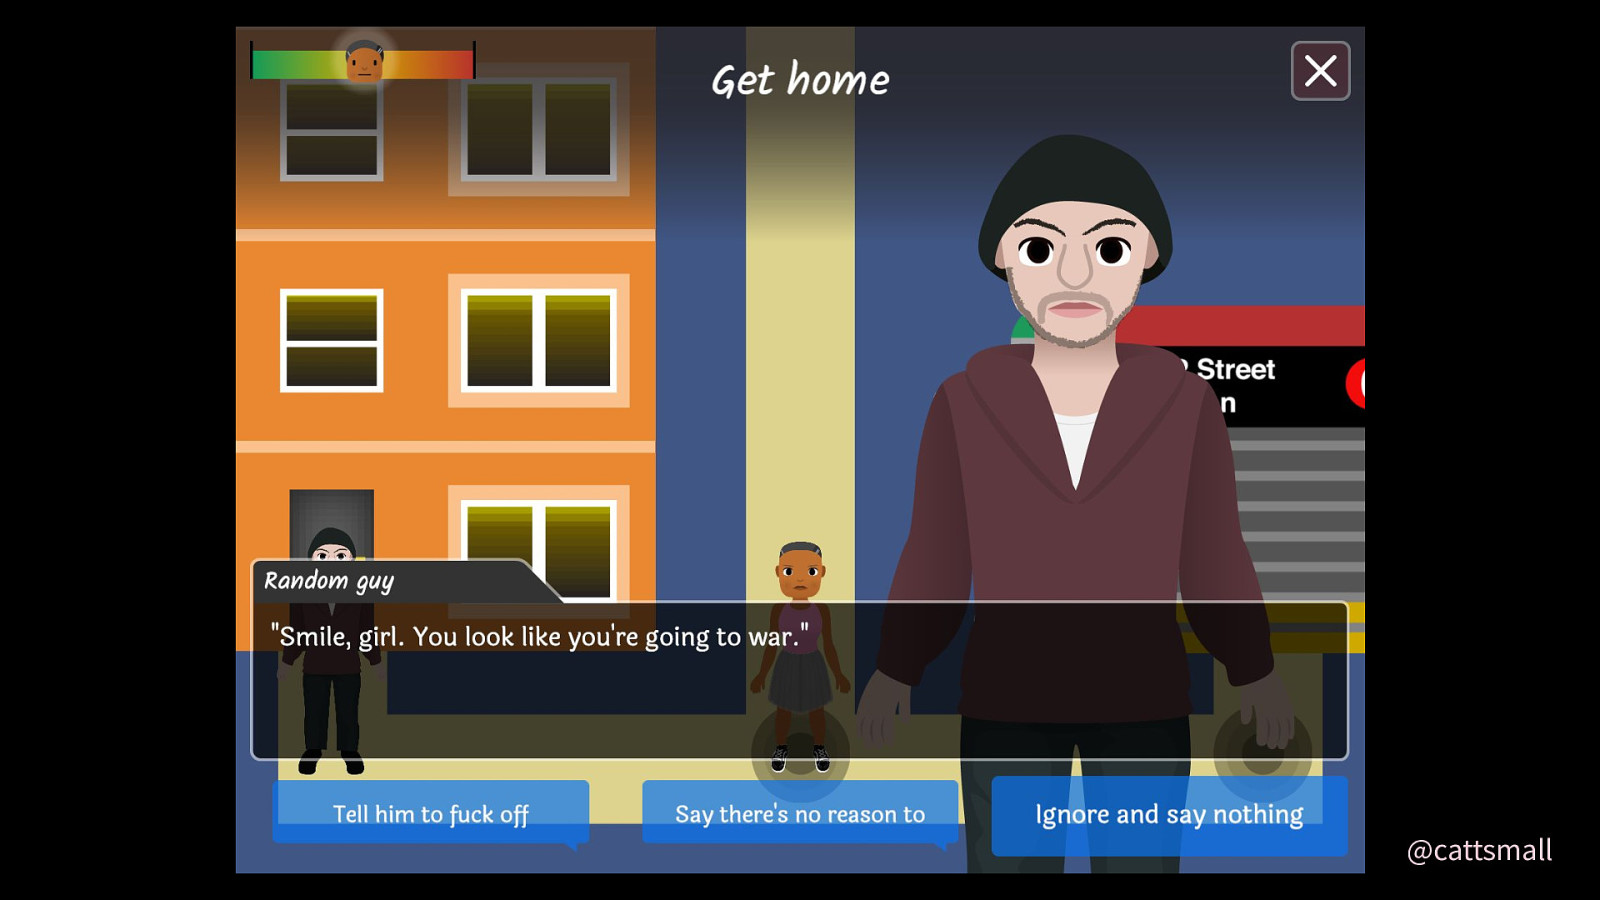
Then dialogue gets shown. I’ll talk about how dialogue works soon! Pièce de résistance and all.
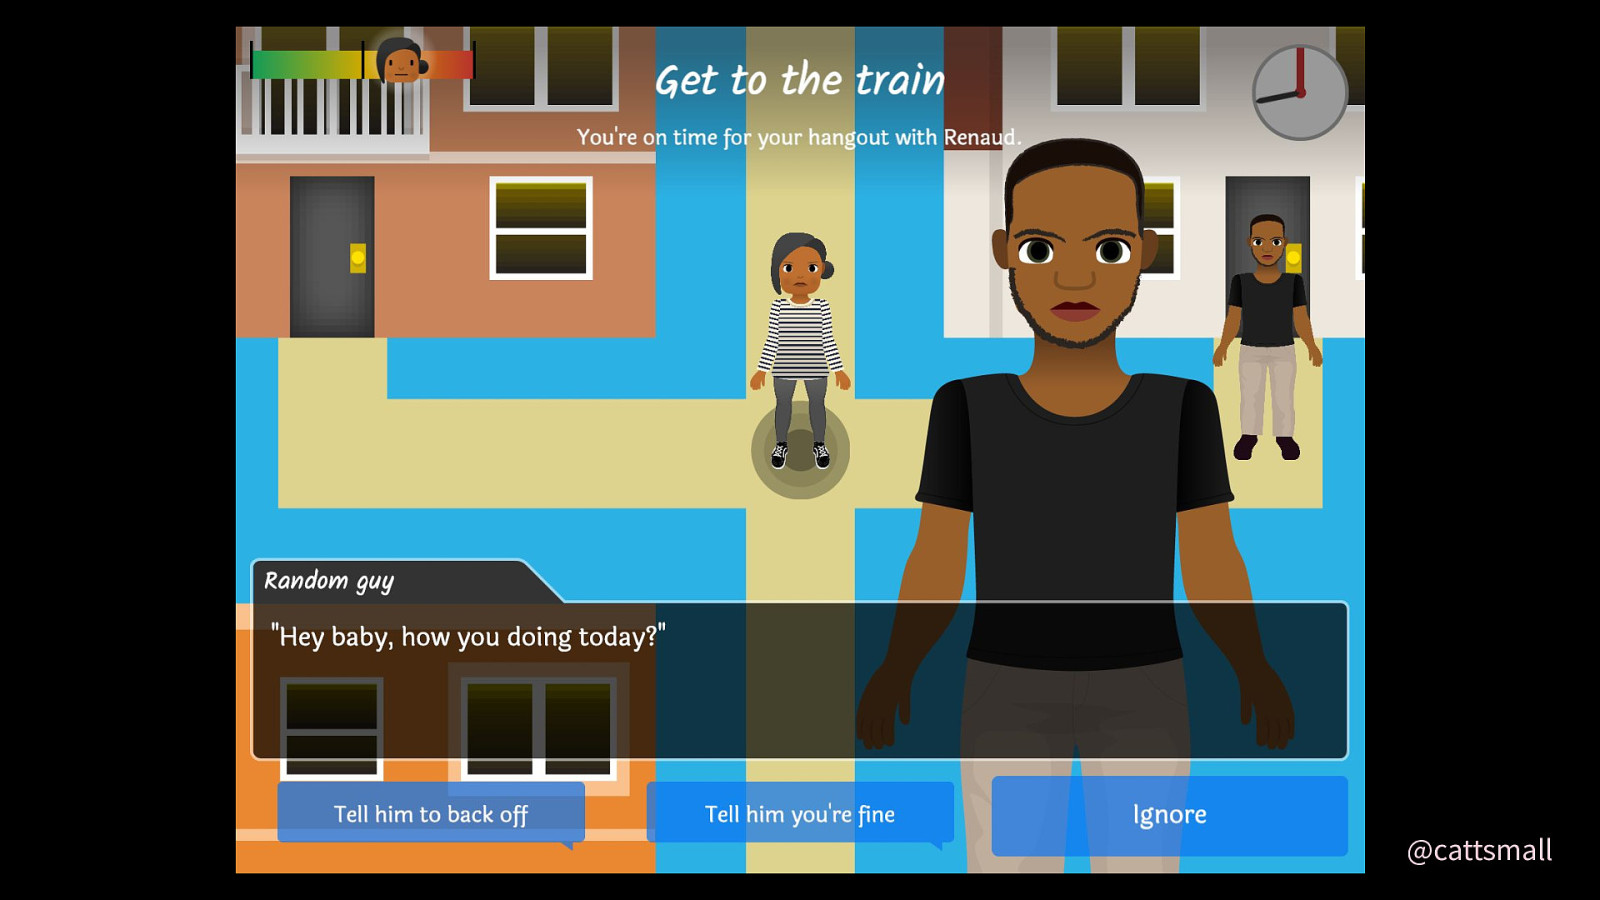
This works across night and day, and with different catcallers. Randomness, yay!
Next, choosing a conversation partner.
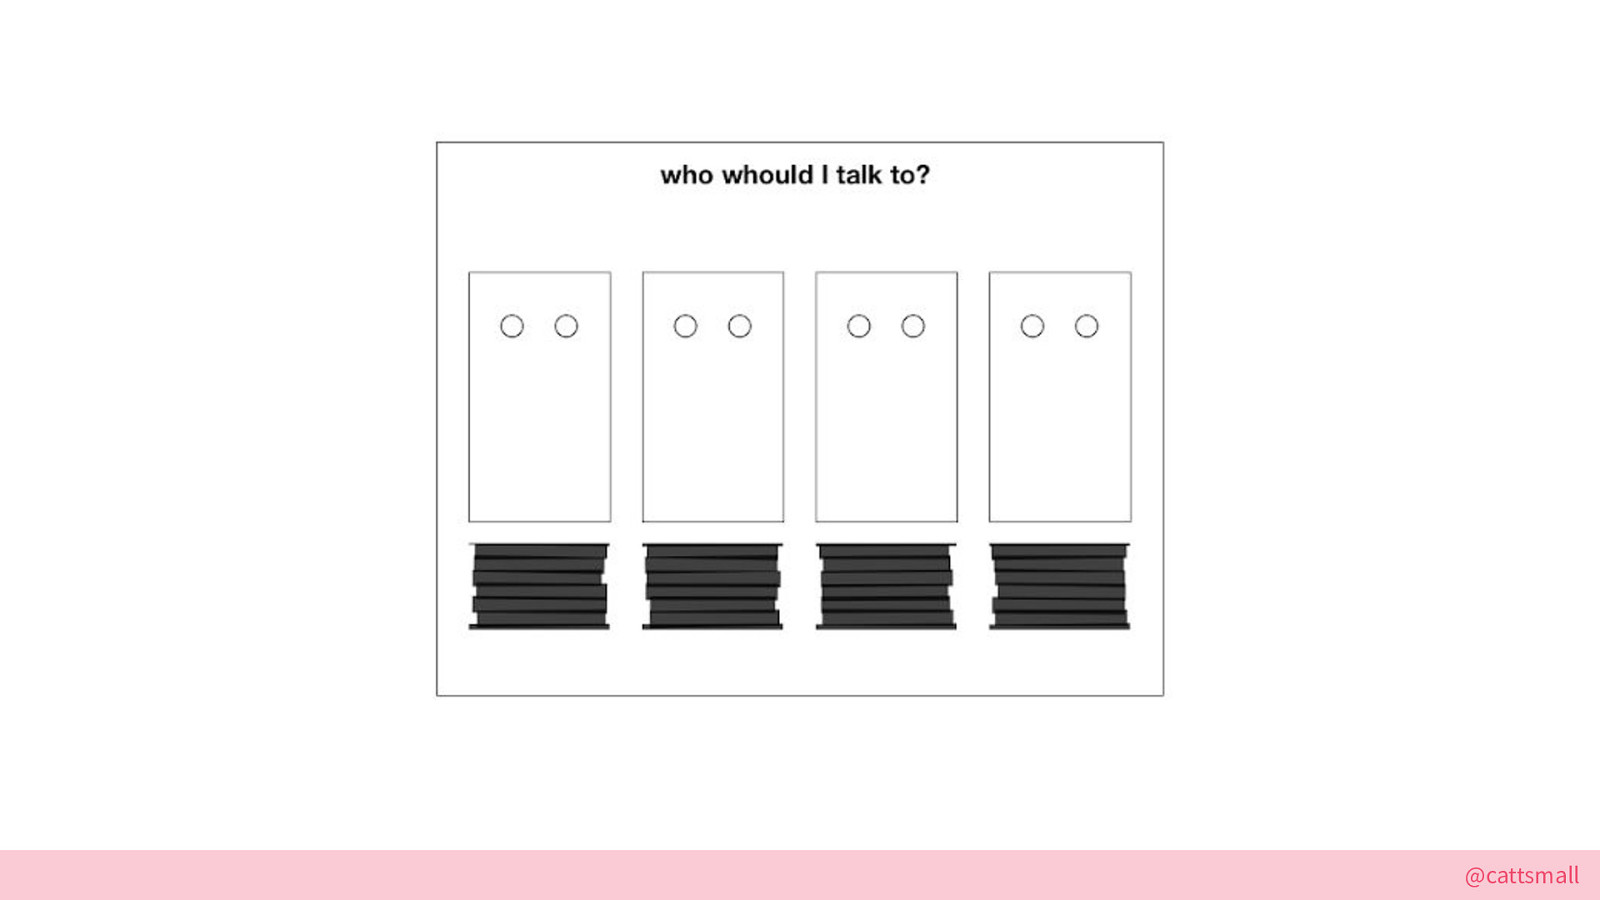
Here’s the original wireframe.
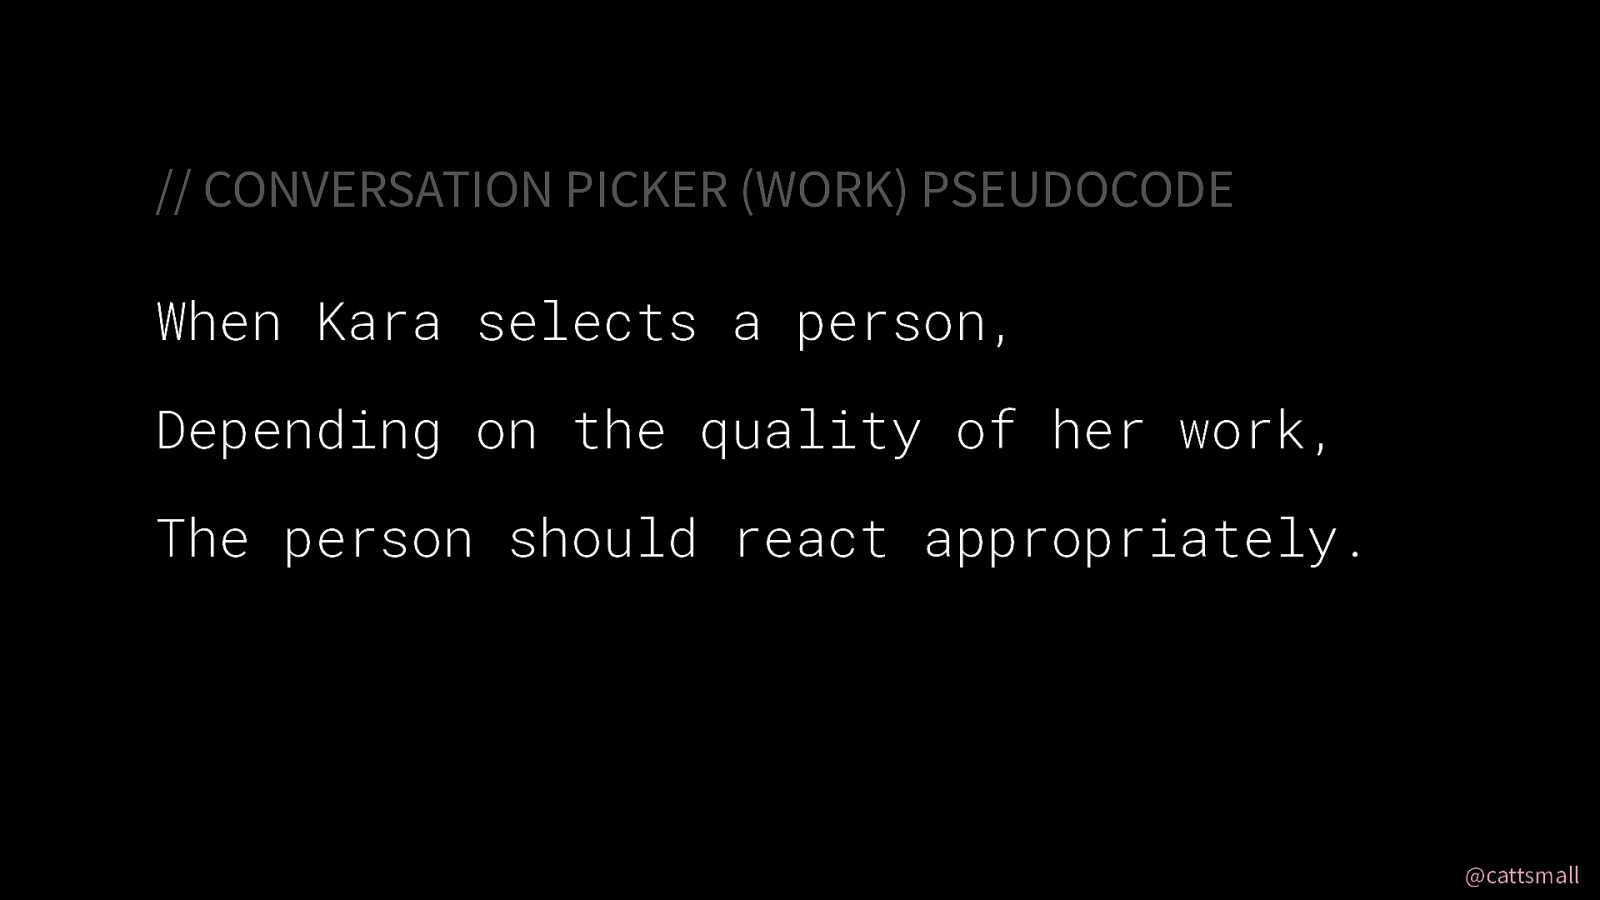
PSEUDOCODE:
This is modeled after the evaluation code for outfits and has been extended into its very own mechanic.
After you’ve dragged and dropped code into “functions”, you press the continue button.
Kara evaluates your work, then you have to pick someone to review it! Yes, this game has code reviews. I’m not sorry.
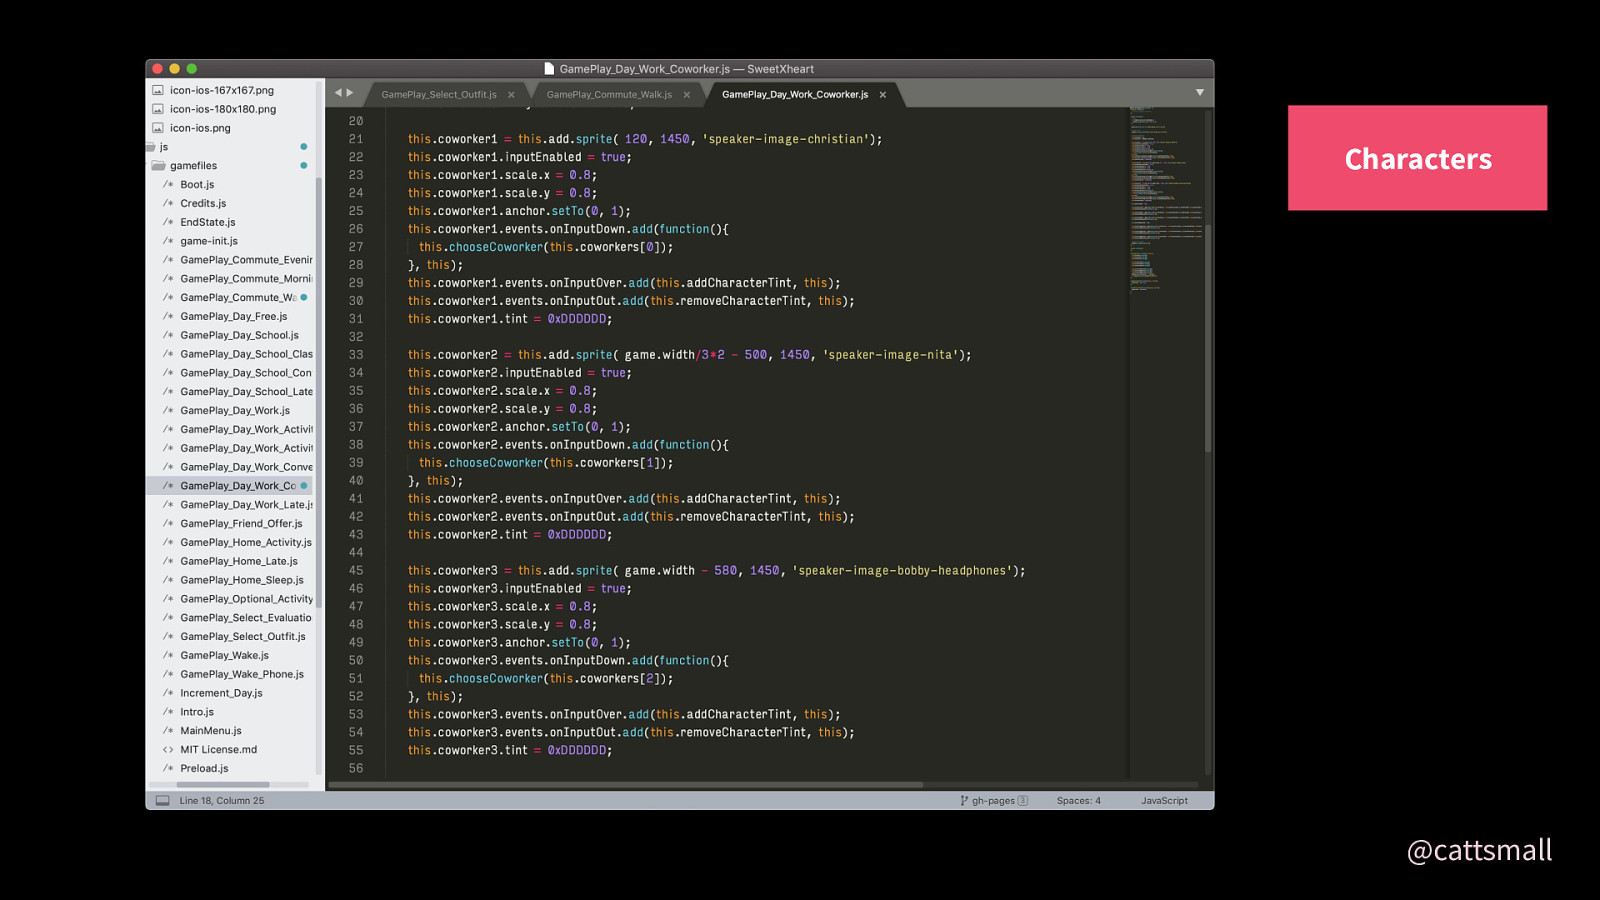
First I draw the characters and enable click events. On click, the coworker is chosen.
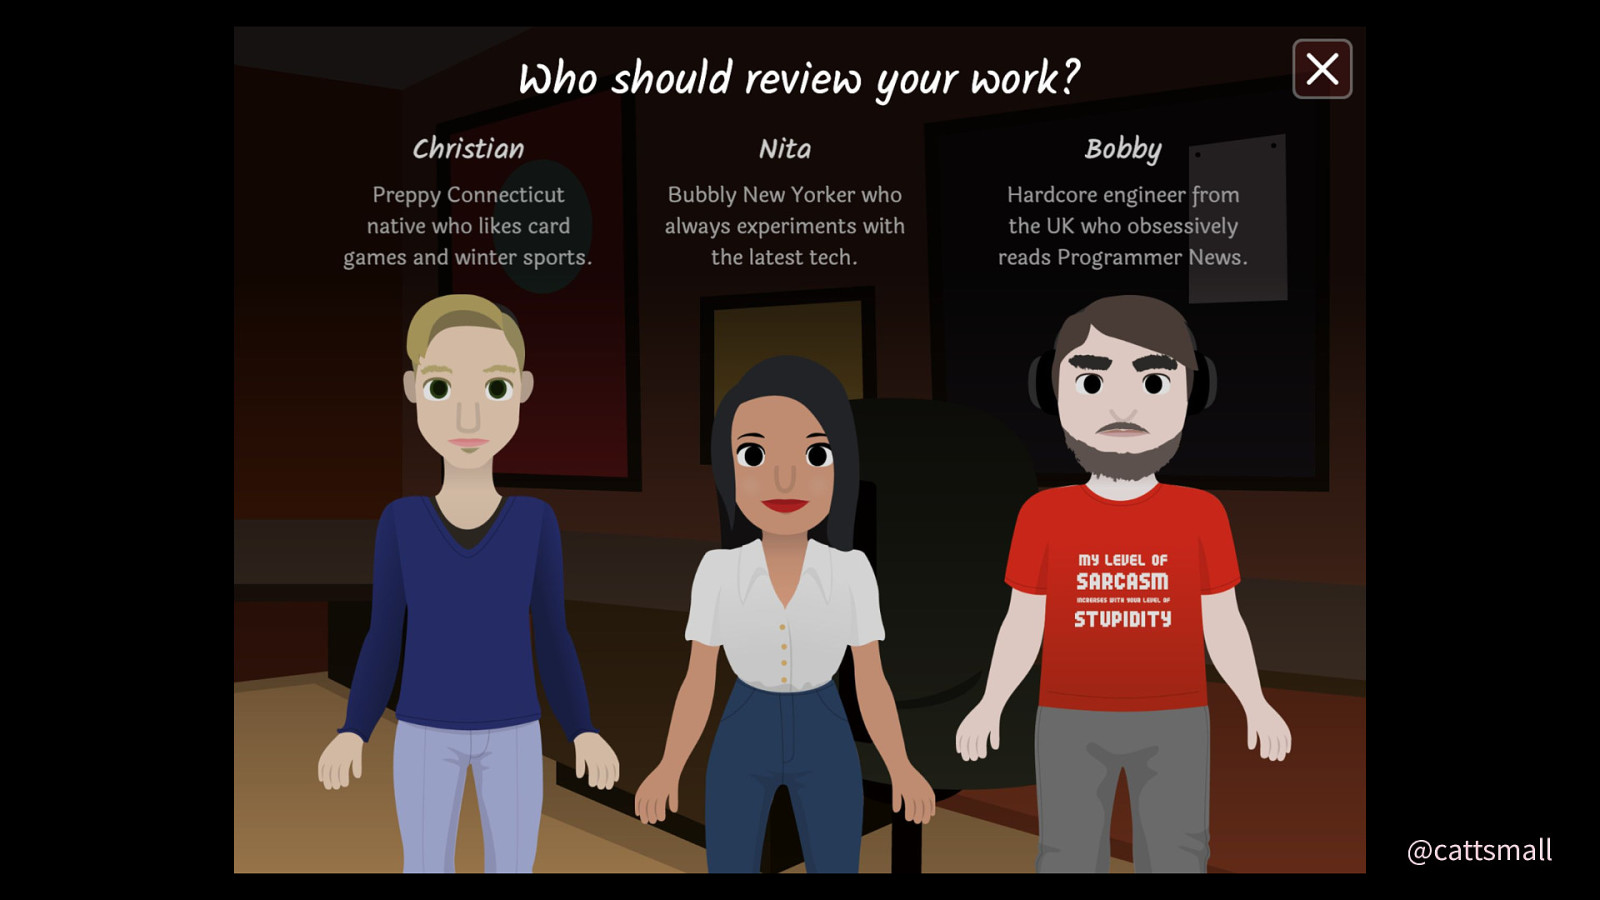
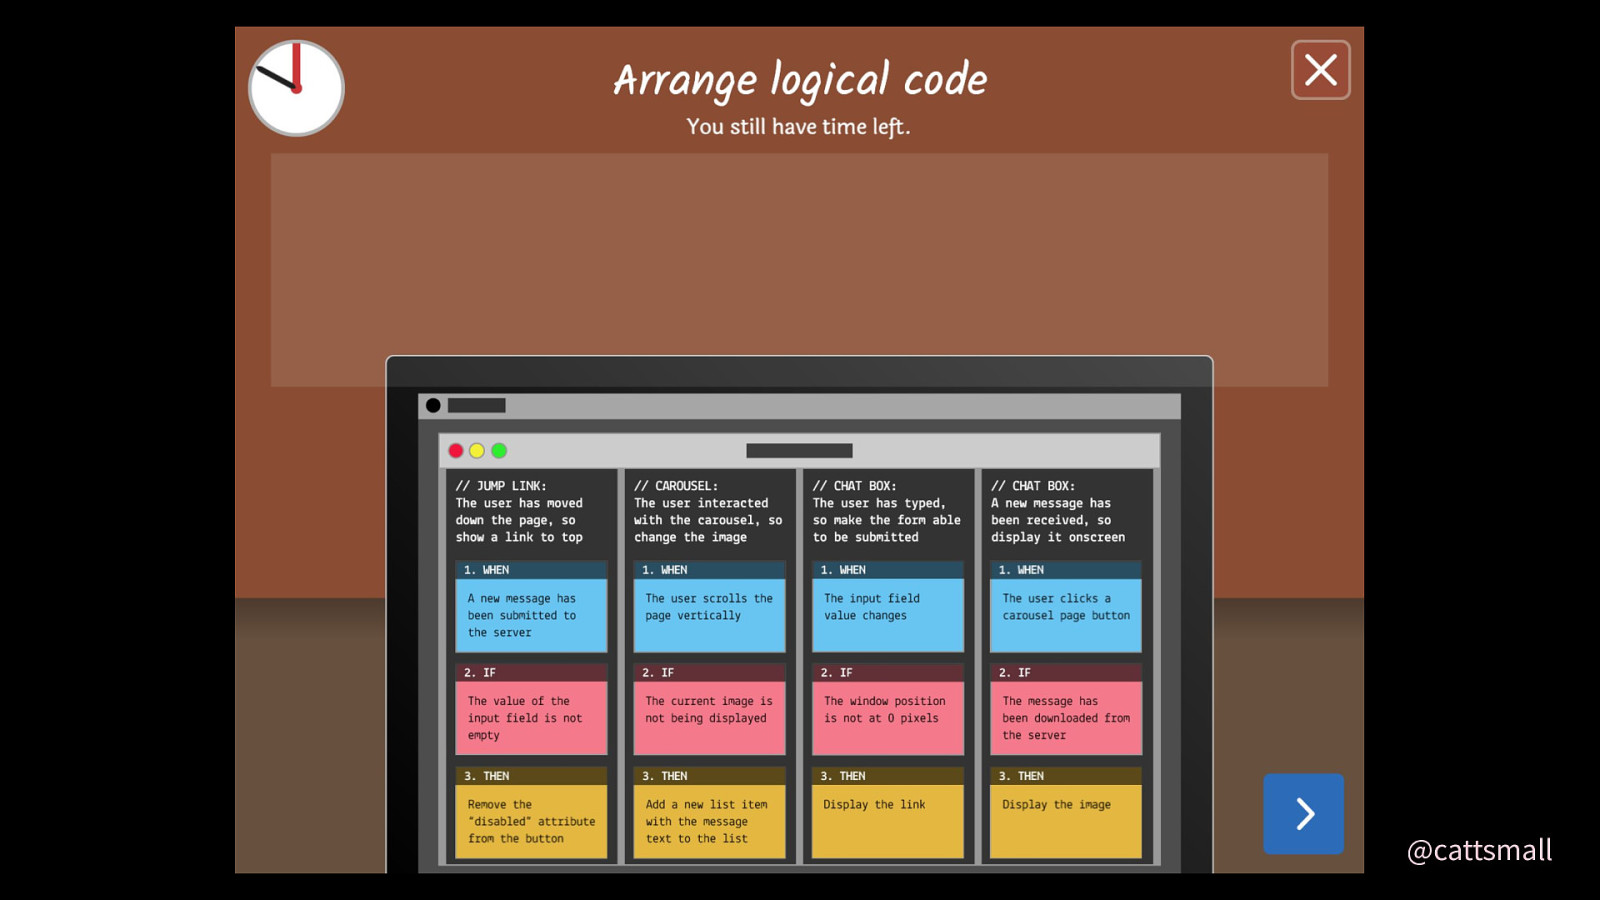
Here’s what that looks like!
By the way, going through my work history and merging programmer archetypes was so fun.
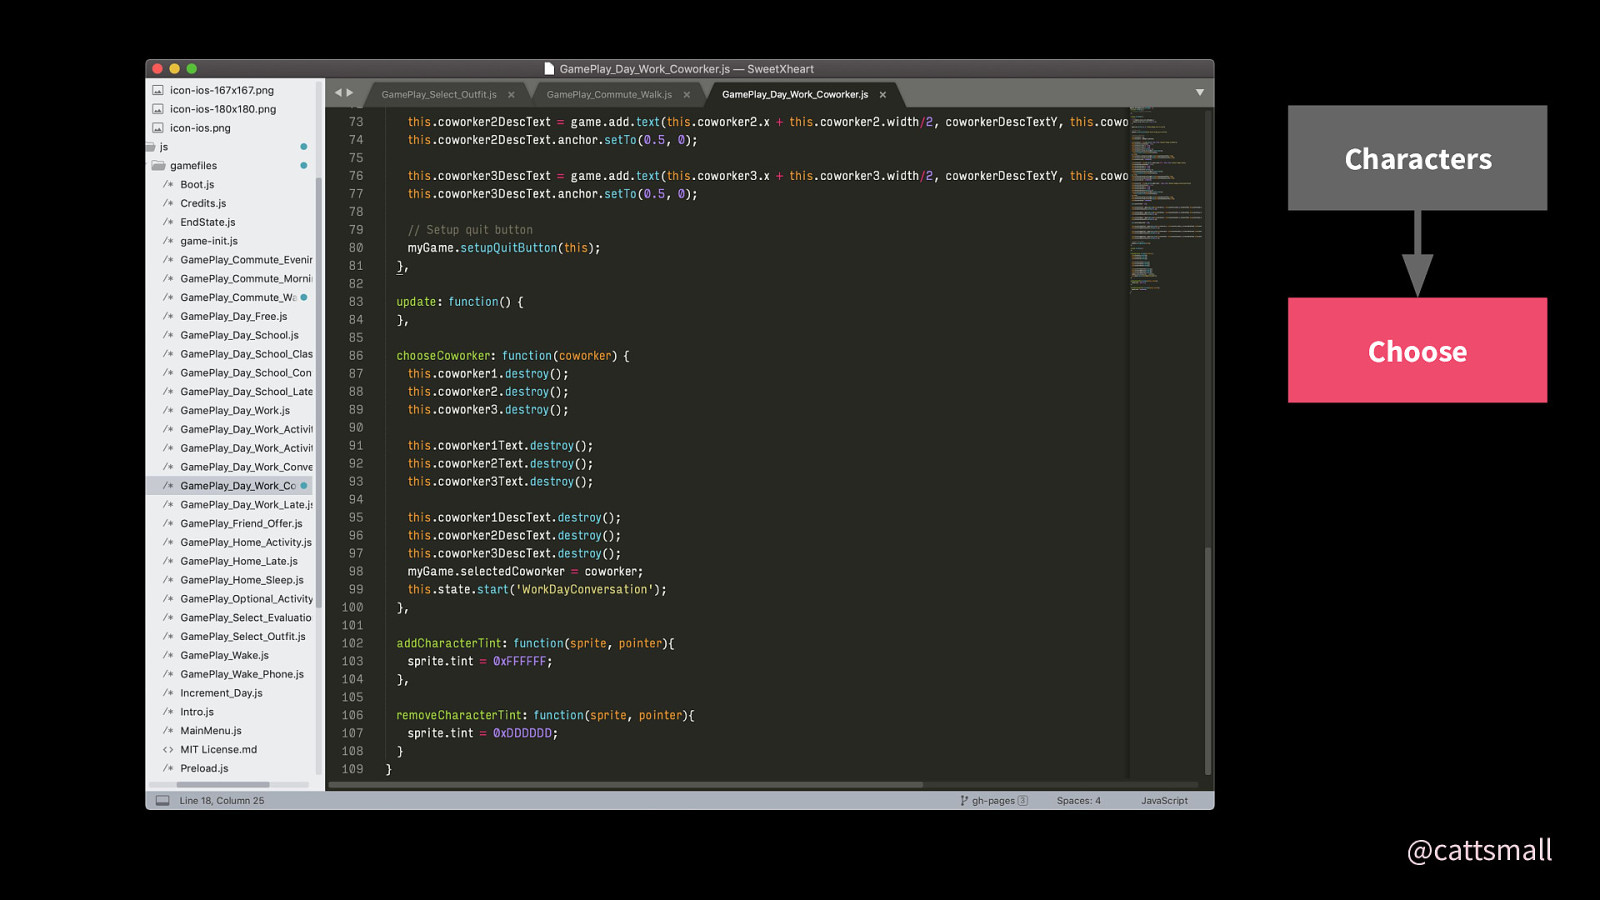
When a character is chosen, all the objects are immediately destroyed and then the next state starts.
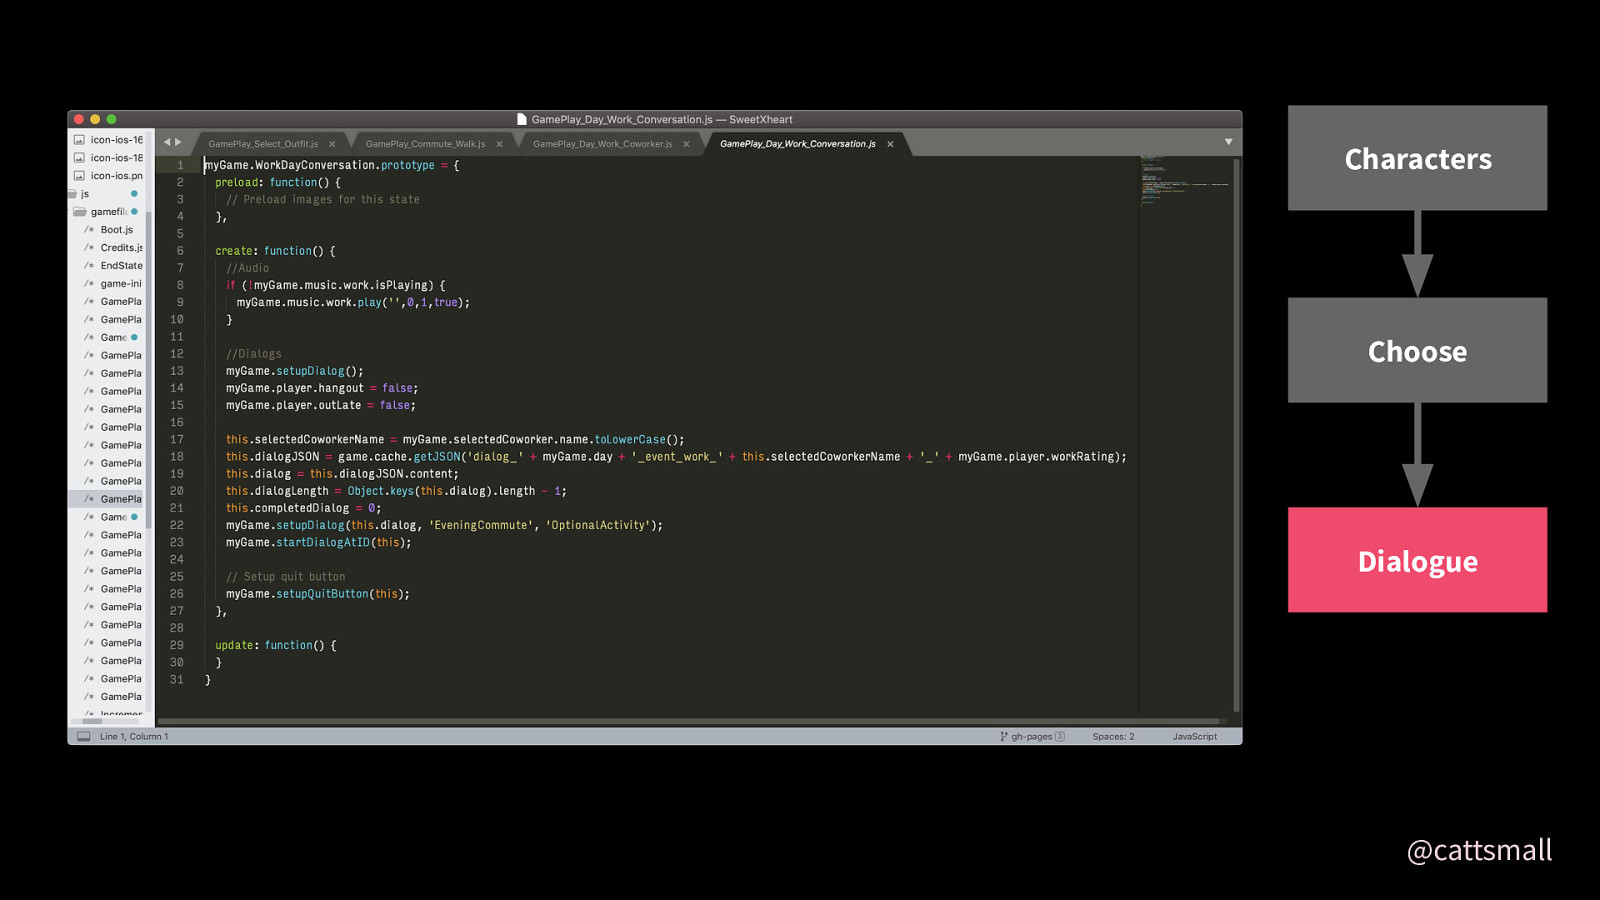
In the next state, it’s quite simple—just dialogue.

I’ve highlighted the part that matters most! I show dialogue based on the person picked, the day of the week, and the rating of the work done. This is what most of the dialogue-only states looked like. I’m thankful that Phaser supports JavaScript variables like this.
I’m sure I could’ve written this better, but HEY. 5 years.
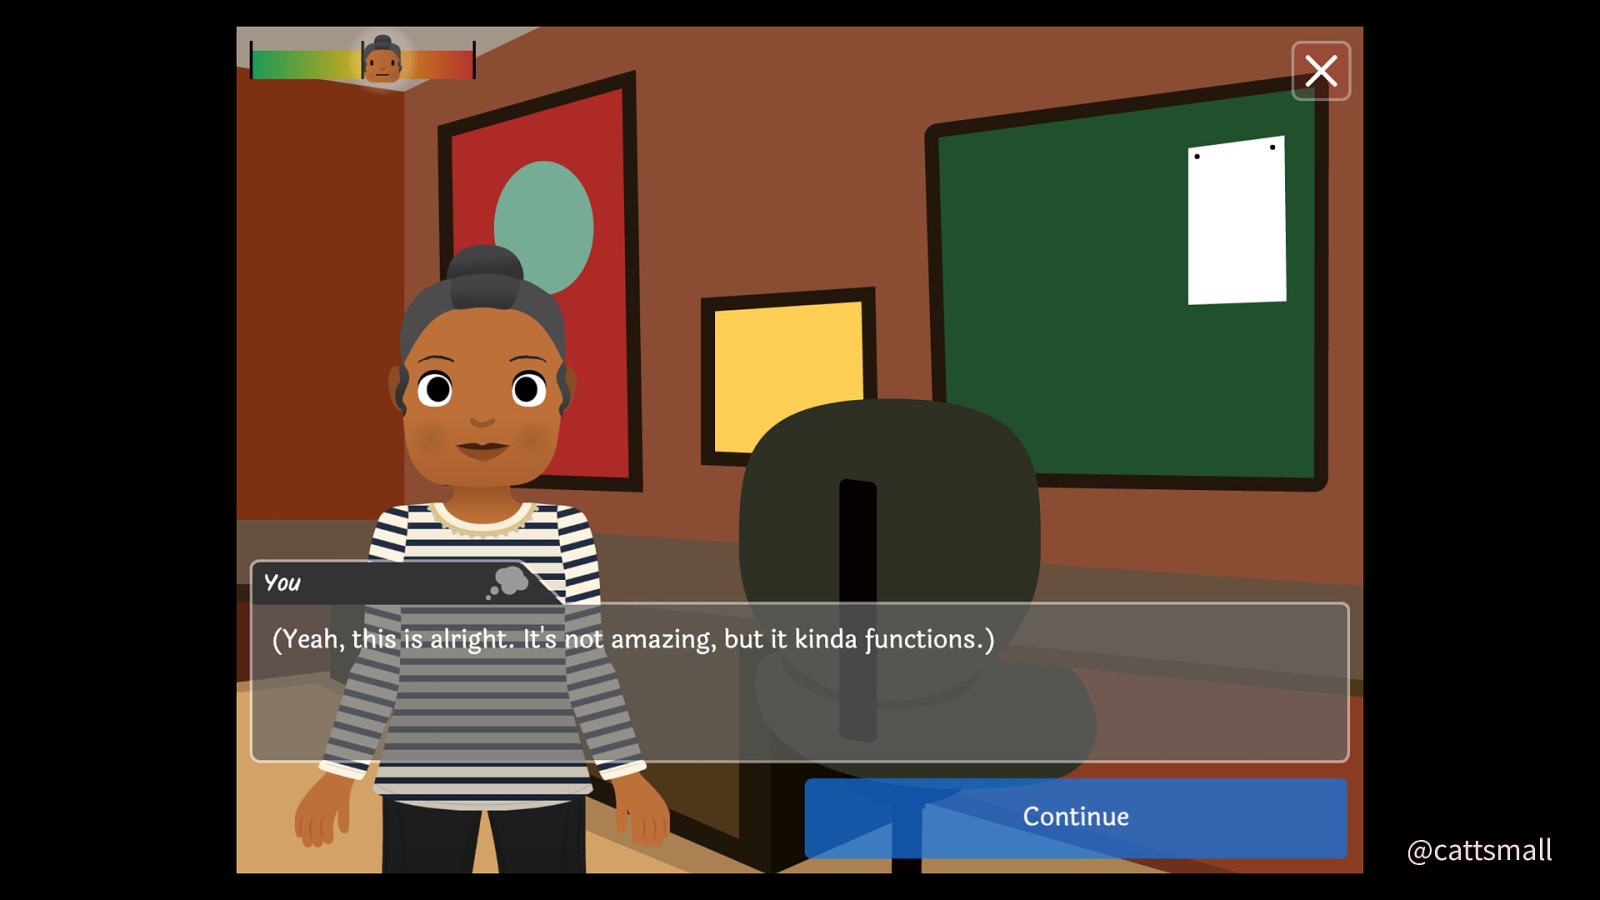
Here’s what that looked like!
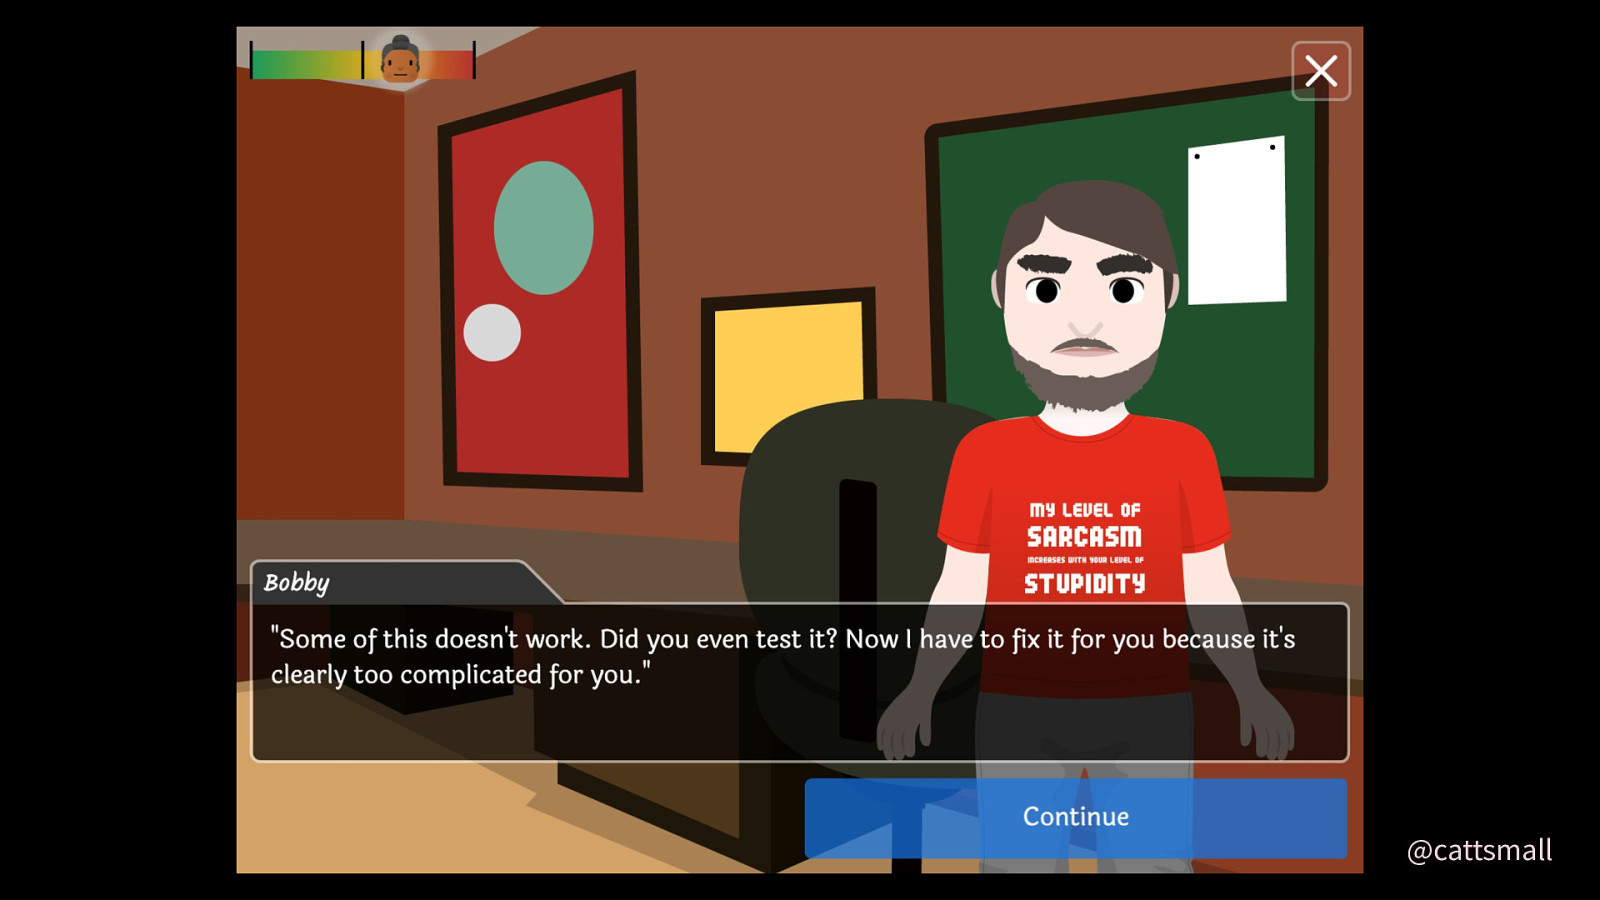
Bobby hates my work. Bobby hates women. Don’t be like Bobby.
And finally, here’s how dialogue works!
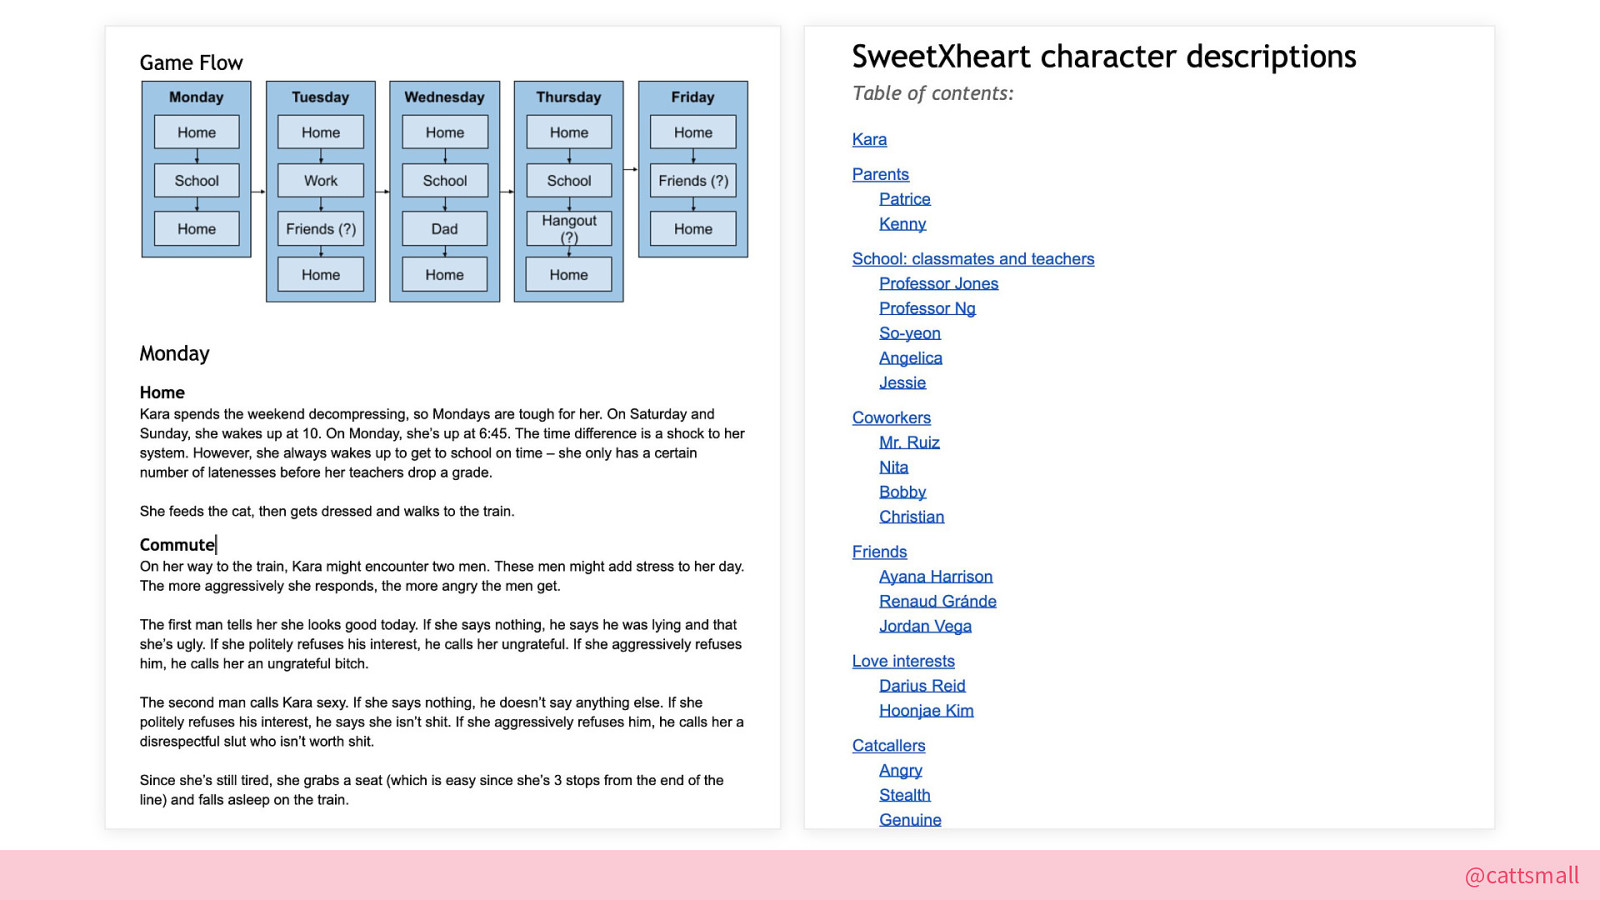
As you can tell, a major part of SweetXheart is the dialogue. I spent a lot of time making the storyline cohesive, writing pages worth of Google Docs, and trying to make characters believable.
When it came to actually building out the dialogue system, I wanted something flexible and ideally very graphical. It also had to work with JSON files because that’s what Phaser supports. There sadly wasn’t an easy way to do this when I started, but now there’s Ink. I’m glad we’re in the future.
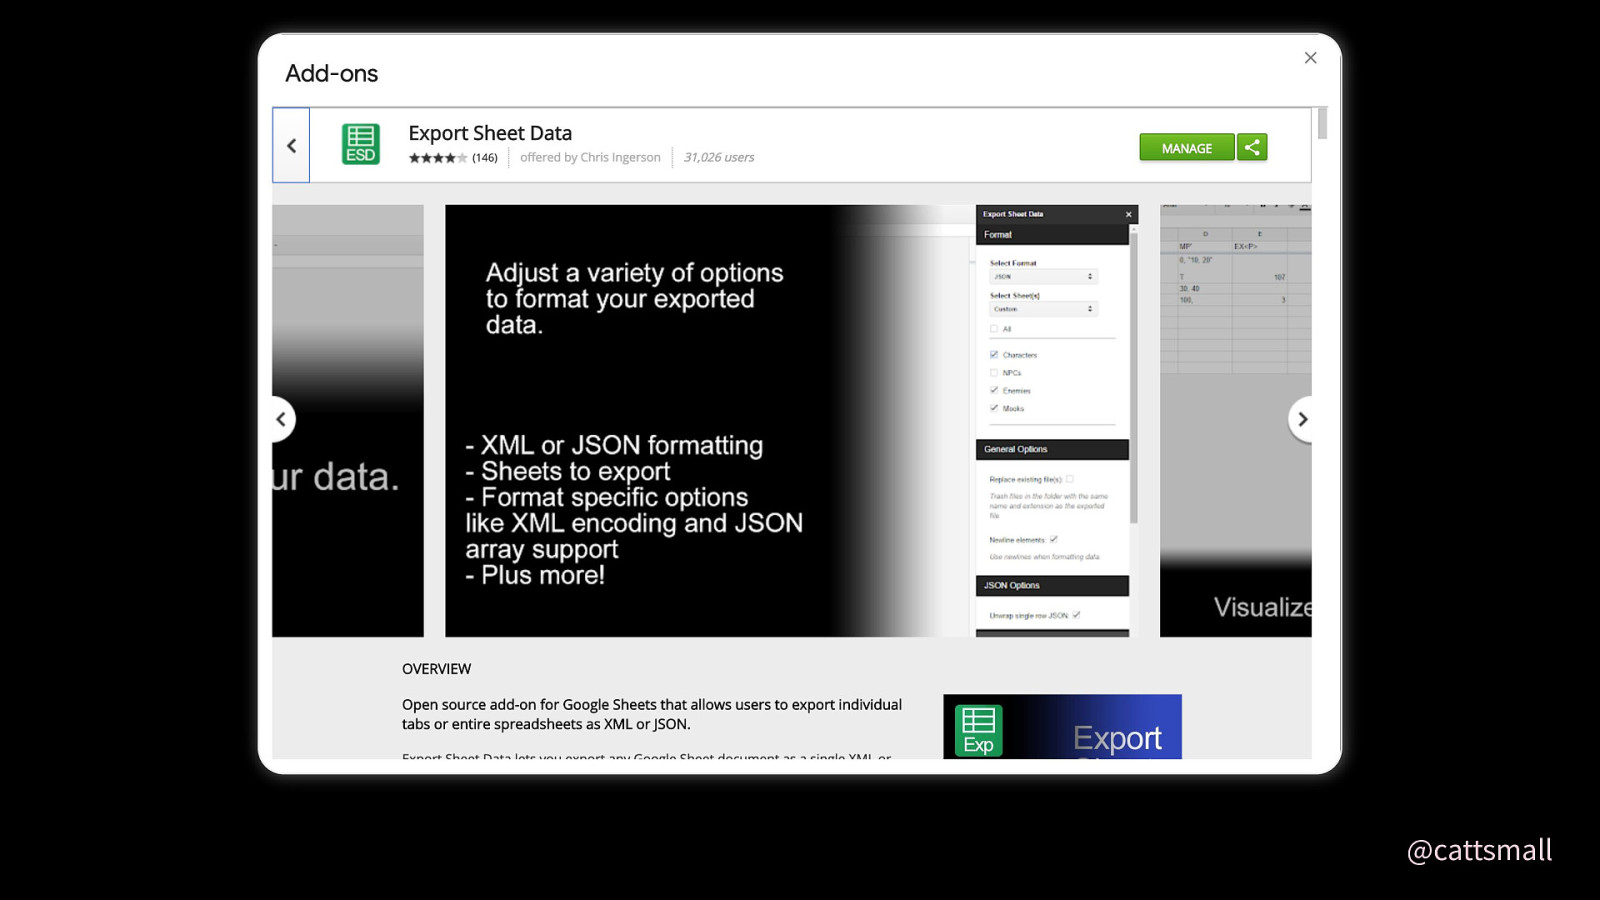
OKAY. Here I was, in 2014, searching for a GUI. I found out that Google Sheets had an add-on called Export Sheet Data, and that it supported JSON formatting. I like torturing myself, so I had to try it out.
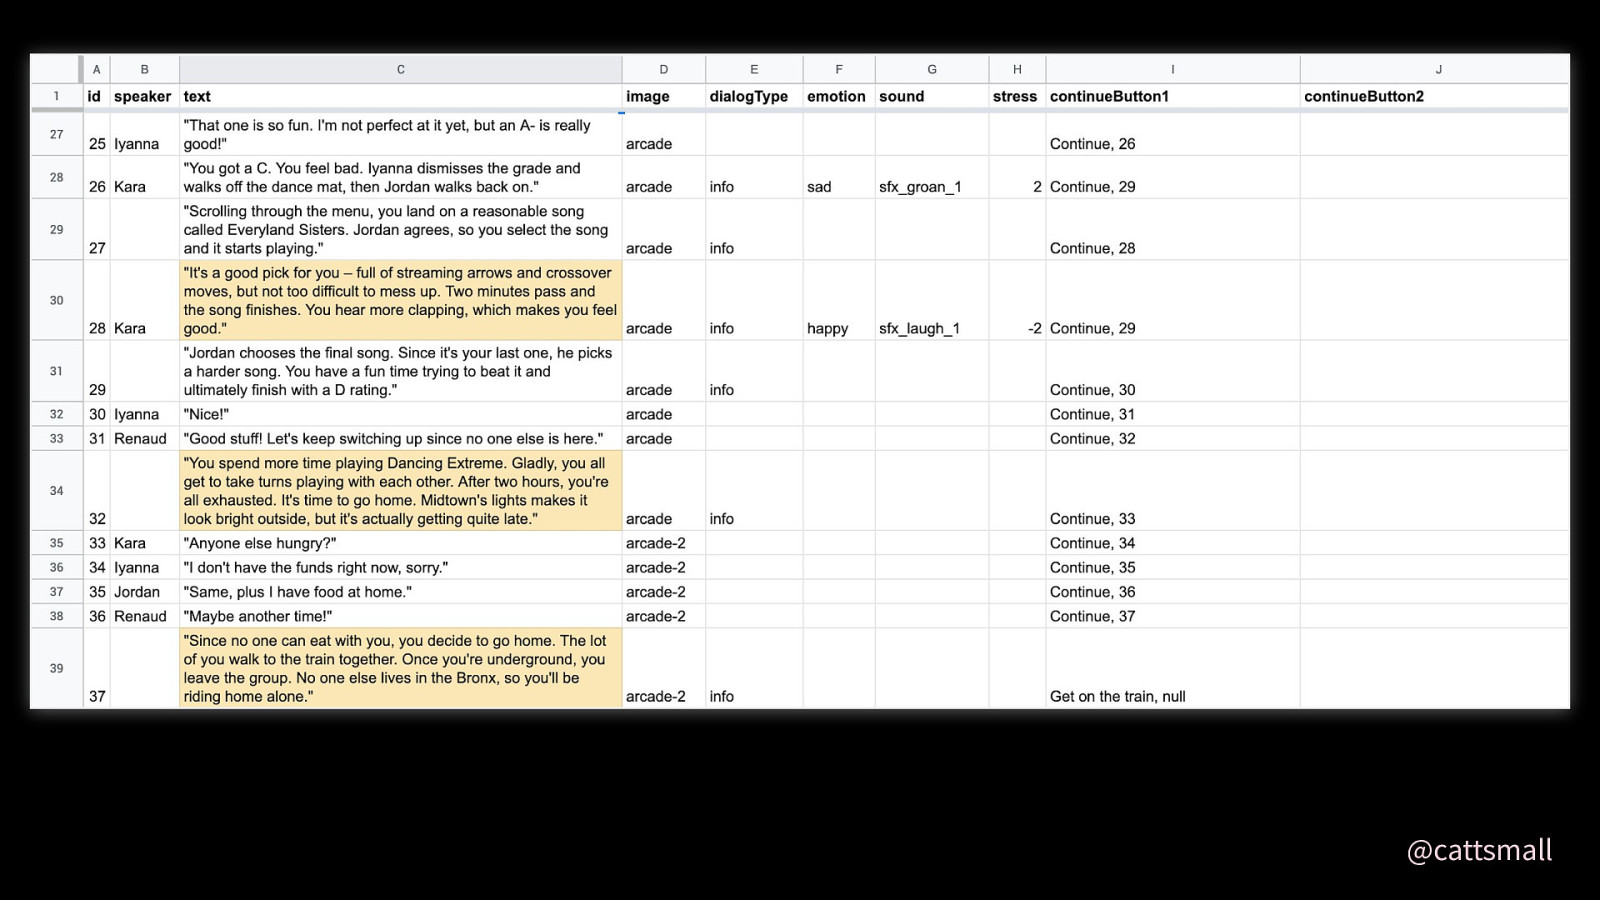
And it worked! Here’s an example of a Google Sheet with dialogue. Each row is a line of dialogue, and each column identifies something in relation to that dialogue. The yellow text cels are getting close to the limit I set on lines of text.
I have over 150 of these spreadsheets.
Each line of dialogue had its own ID.
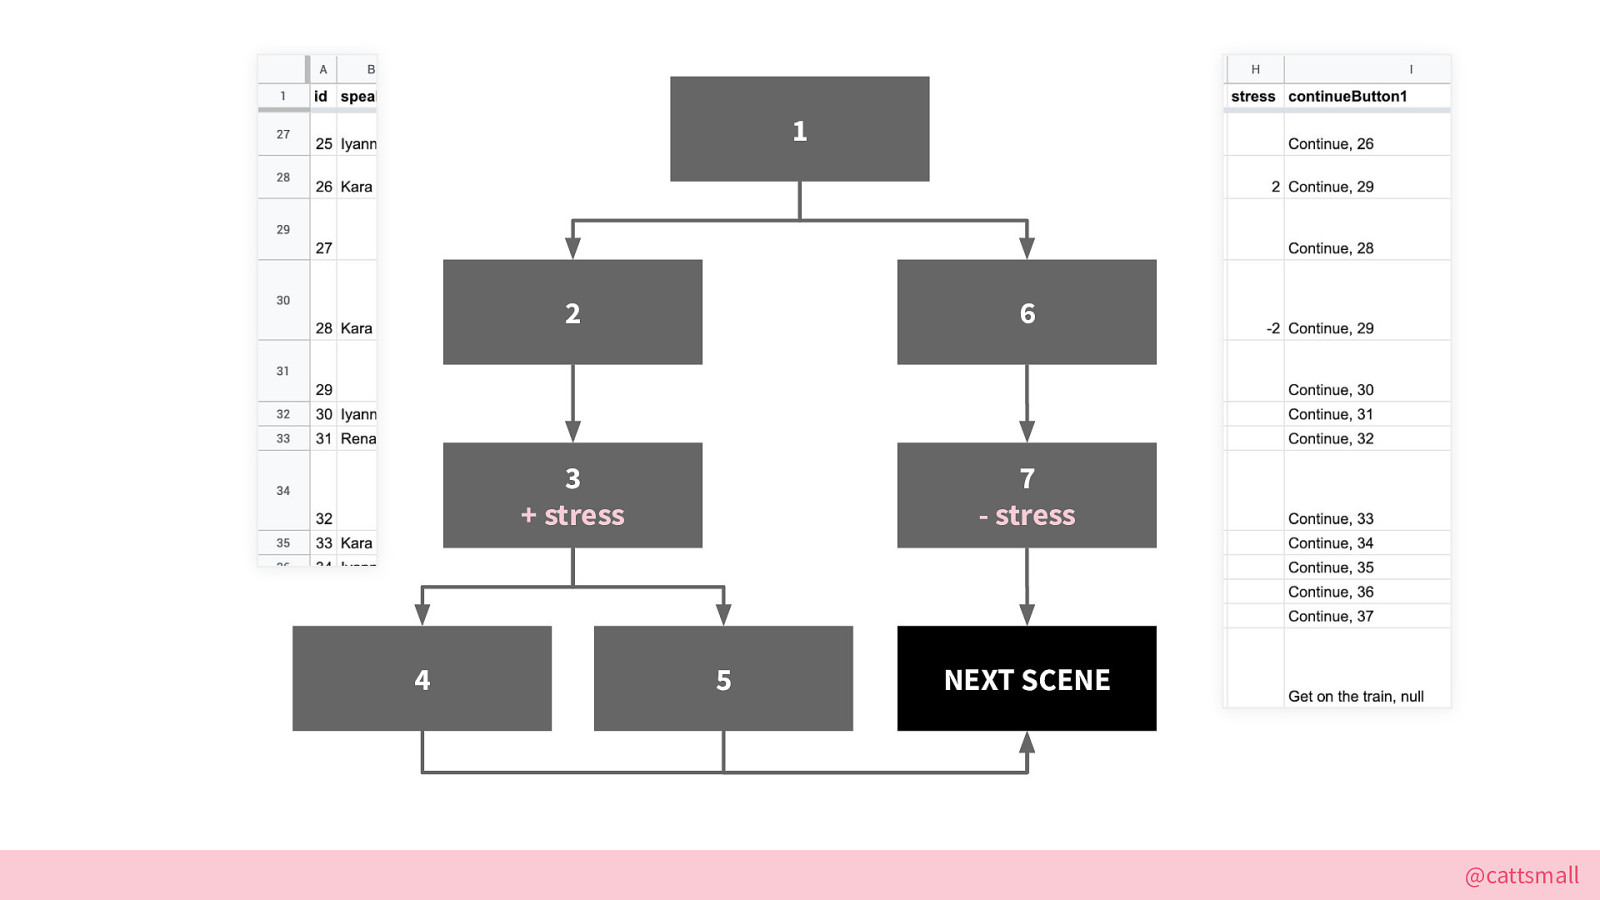
Here’s what a dialogue tree might look like in the spreadsheet, versus how it looks in abstract. The numbers don’t add up, and that’s okay. I believe in you. SO as you can see in the diagram: 1 can go to 2 or 6. 2 goes to 3. 3 goes to 4 or 5, which both go to the next scene. 6 goes to 7, which also goes to the next scene.
And as you can see, each line of dialogue could have different effects! 3 increases stress, and 7 decreases it.
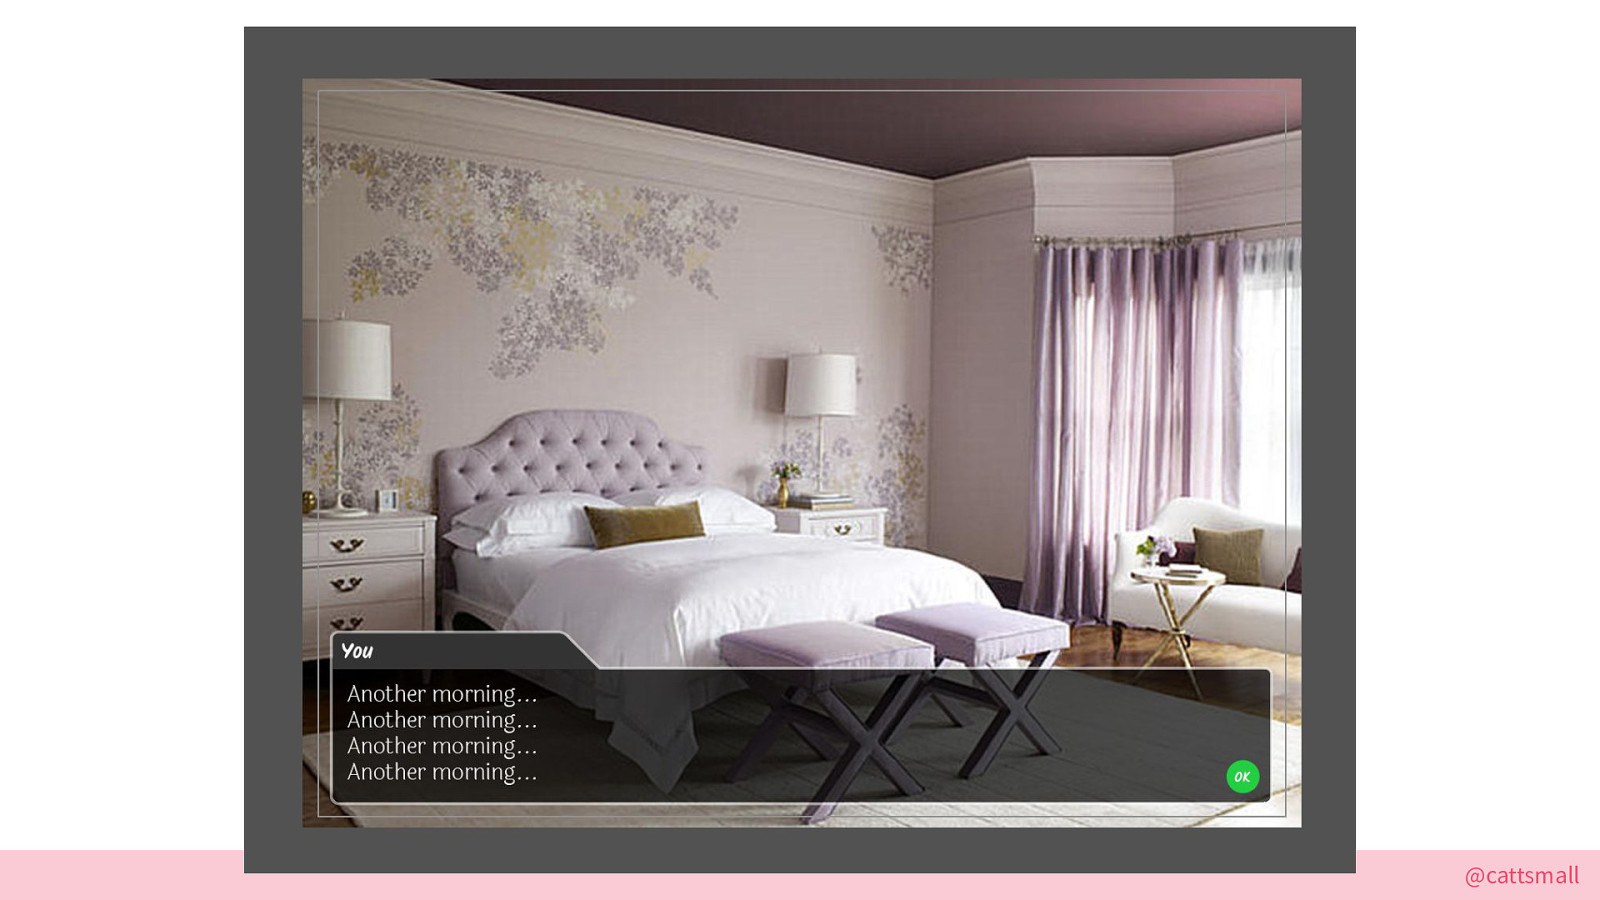
Here’s the original Illustrator image from the design I created for dialogue. It didn’t change much other than some slight UI refinements!
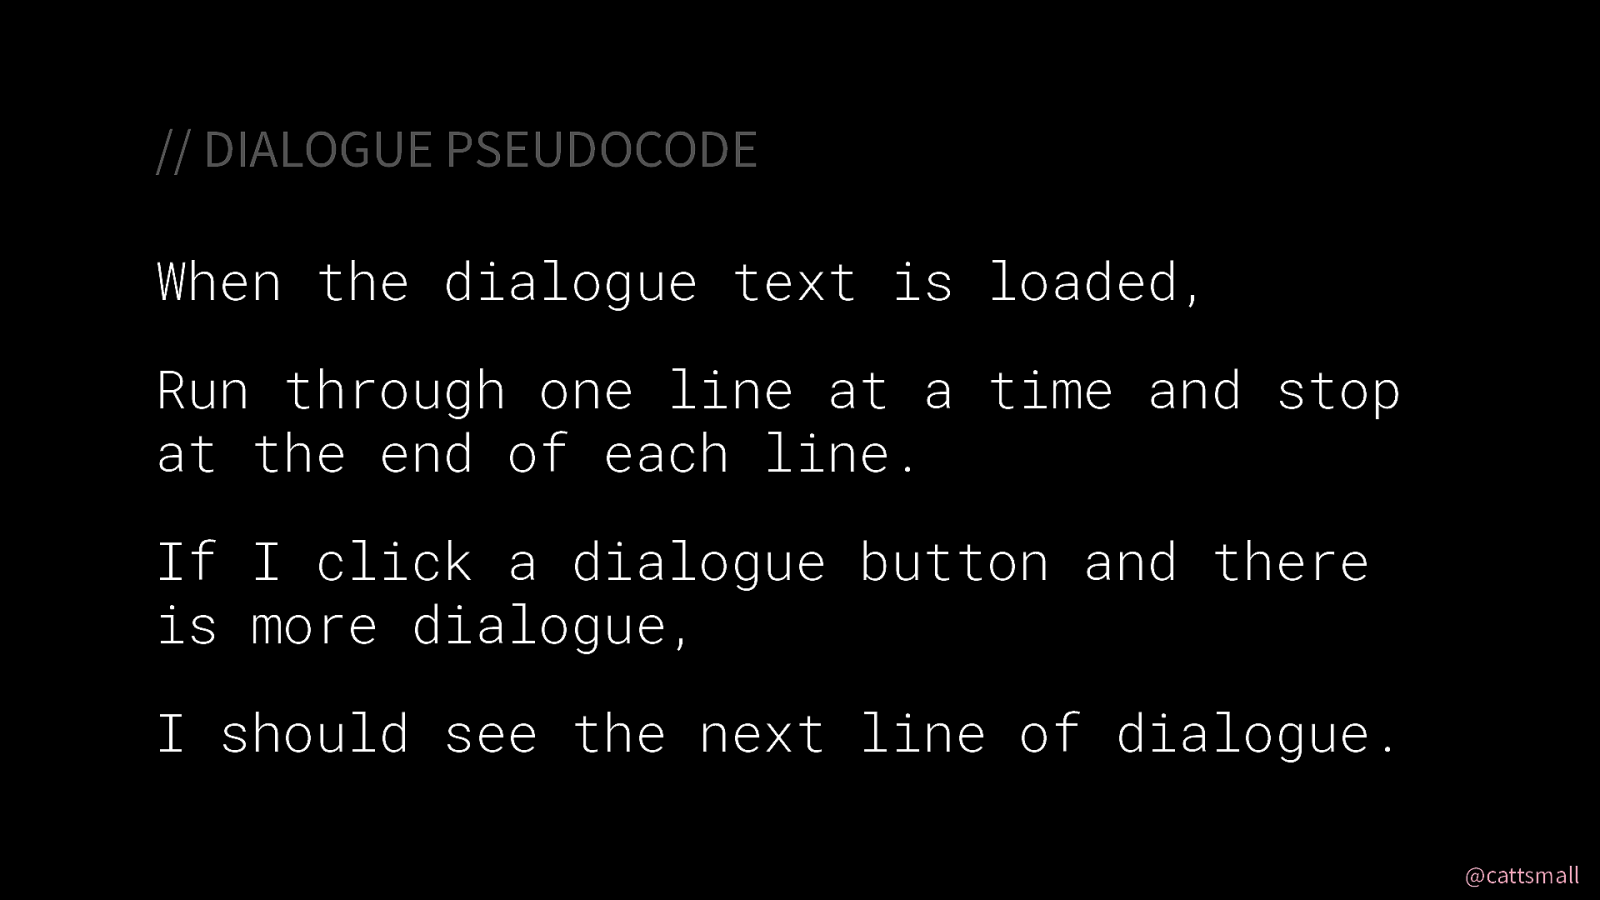
PSEUDOCODE:

When I’m was ready to add dialogue to the game, I turn it into JSON using the add-on.
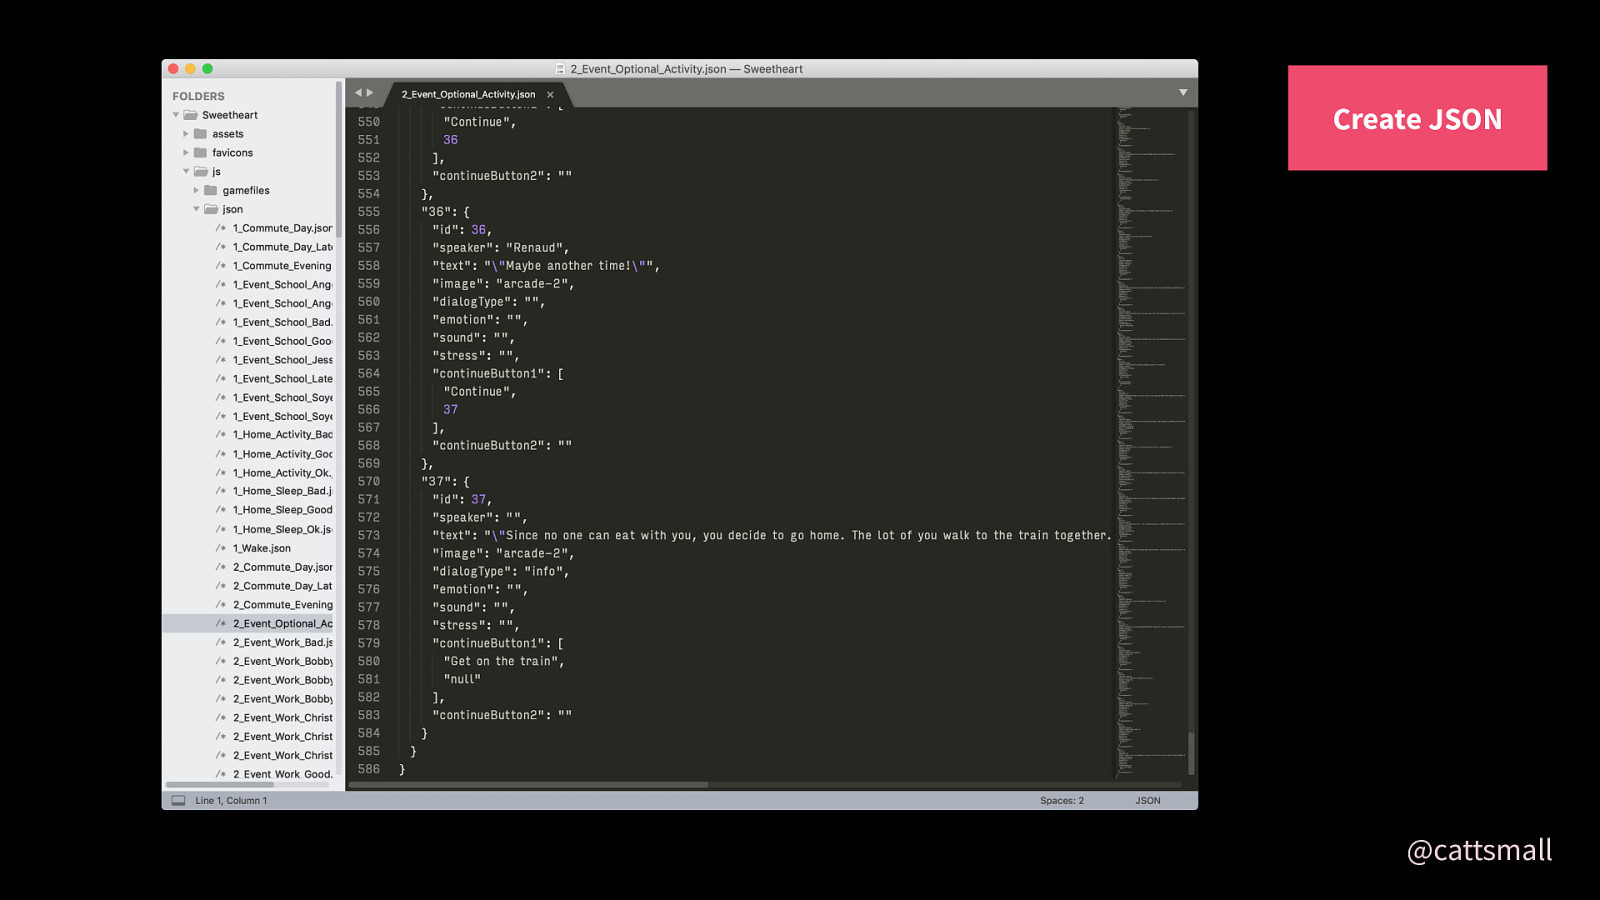
And it creates this JSON file for me! Sweet.
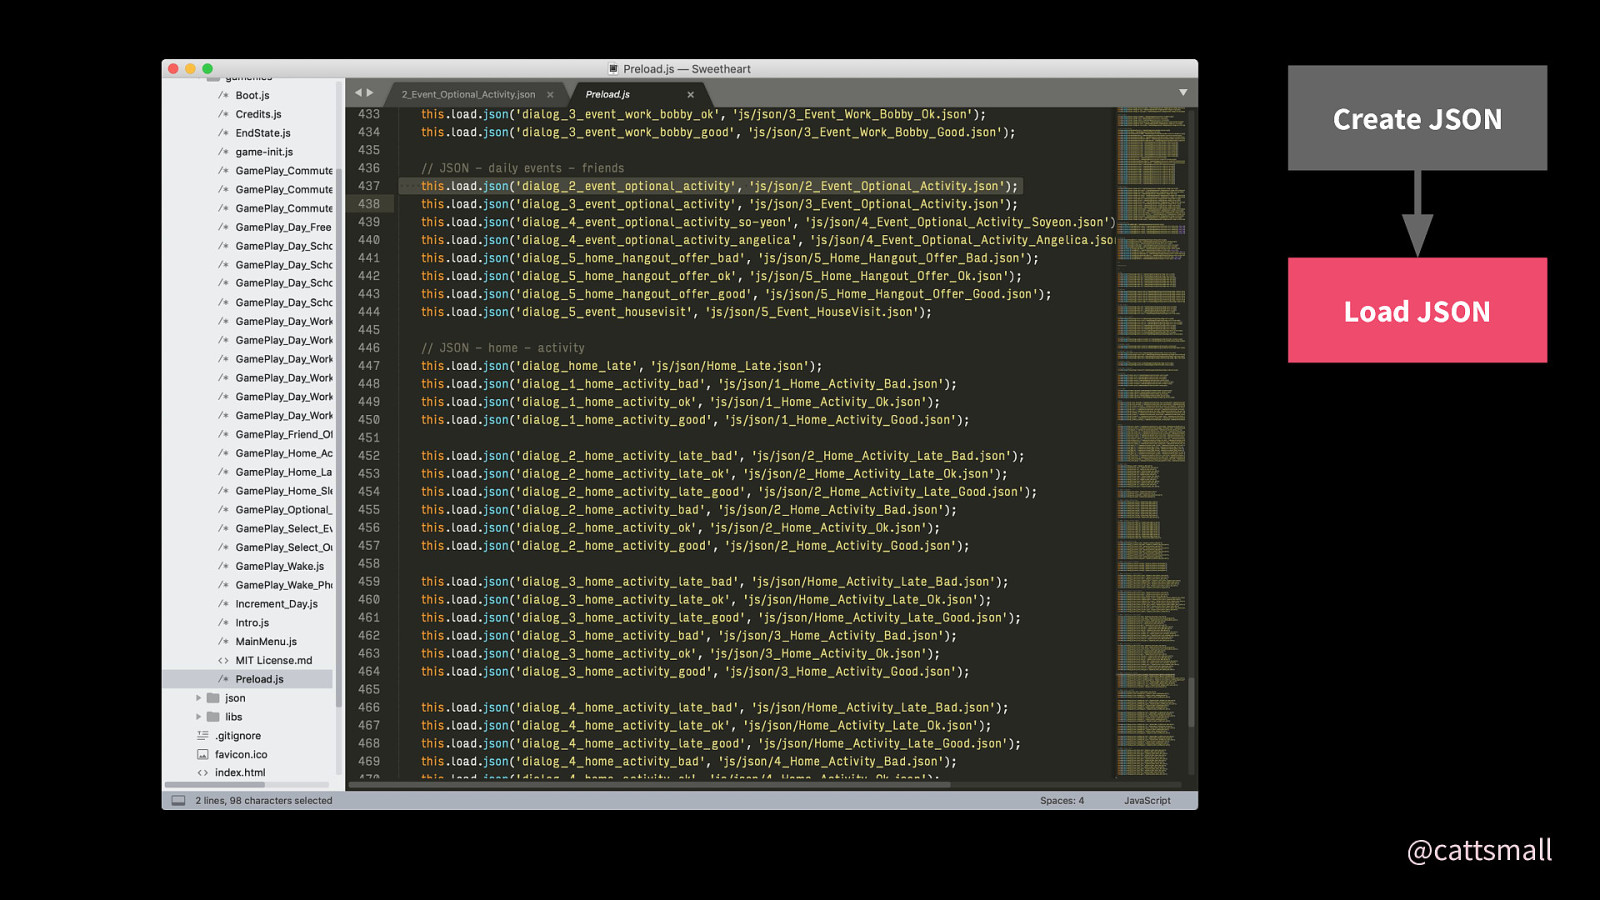
All my JSON files are preloaded when the game begins.
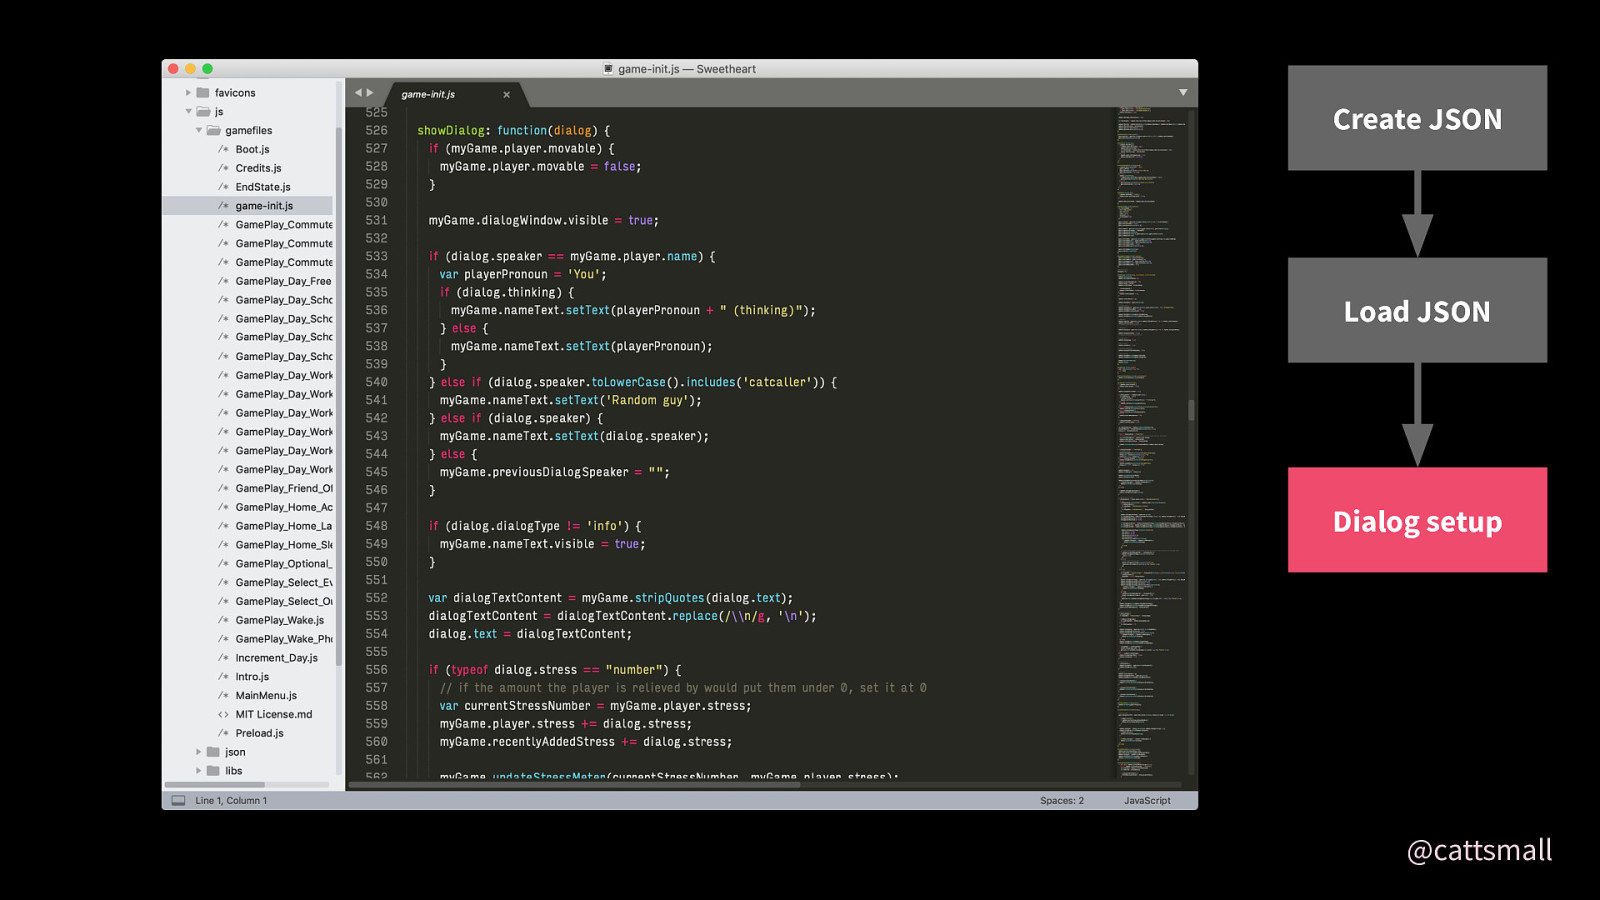
I have a giant function called showDialog that runs through each row of dialog from the spreadsheet. It checks for the speaker, images, sound, type of dialog, and more.
NOTE: Sorry, “dialog” and “dialogue” are part of an internal spelling battle my brain is having, and both are clearly equally winning. I usually refer to “dialog” in code and “dialogue” in other forms of writing—I blame jQuery for this!
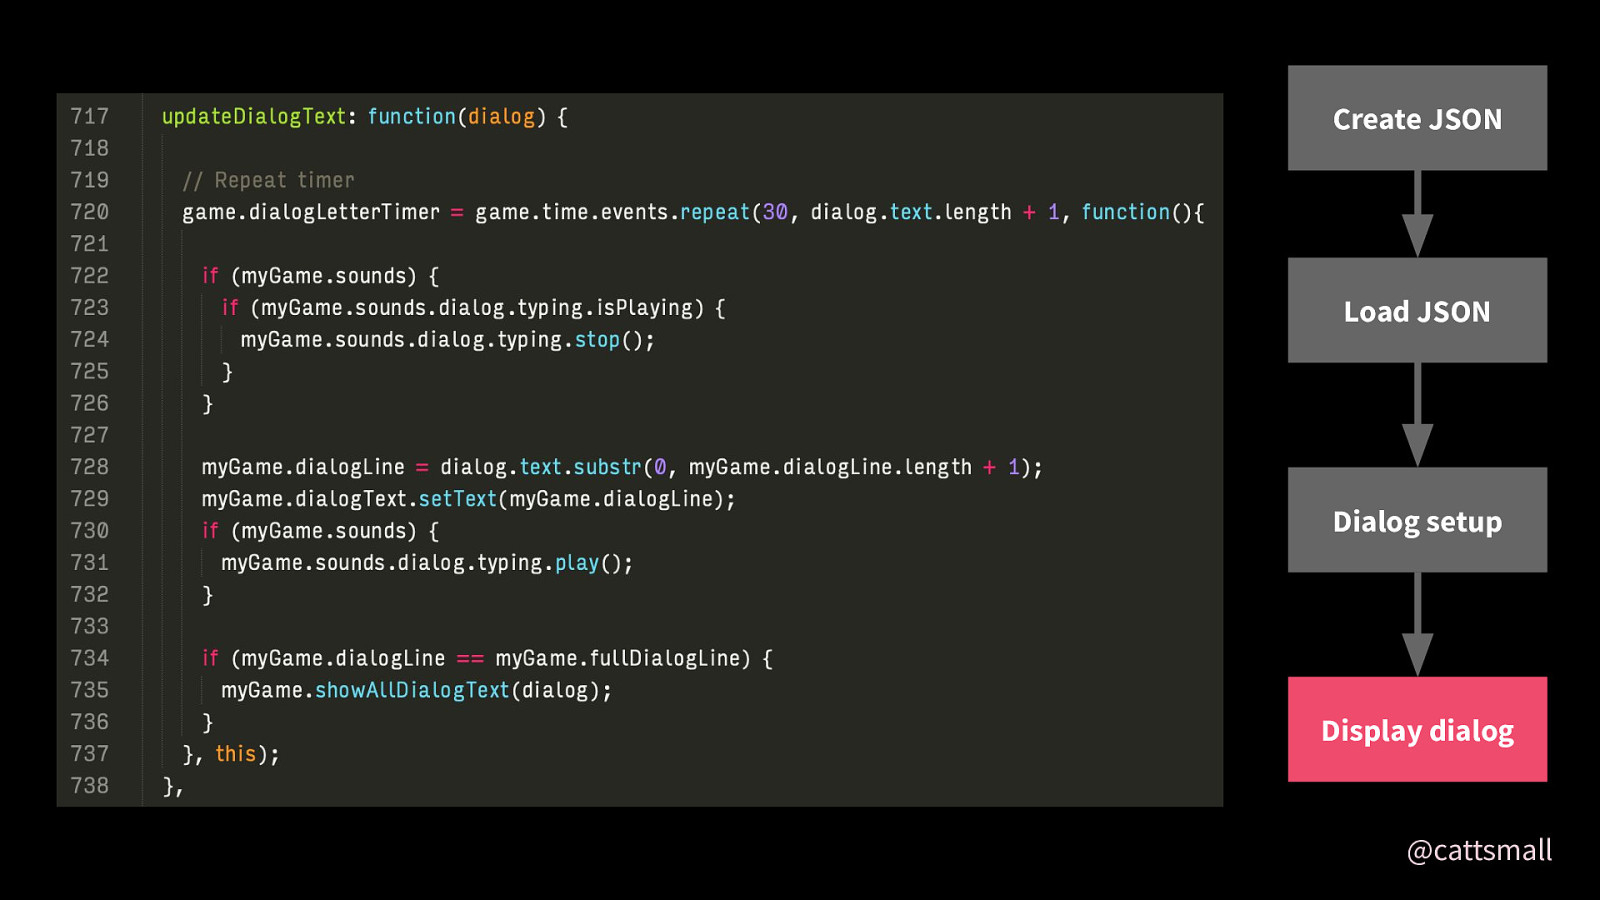
For a nice effect, I have the text display one letter at a time using a repeat timer. I’ll link the game at the end so you can see how this happens live.
And that’s how I made some of the most important parts of the game! Here are some lessons learned from my 5 years in game development with this project.
1: Test early and often. I started getting feedback very early in the process.
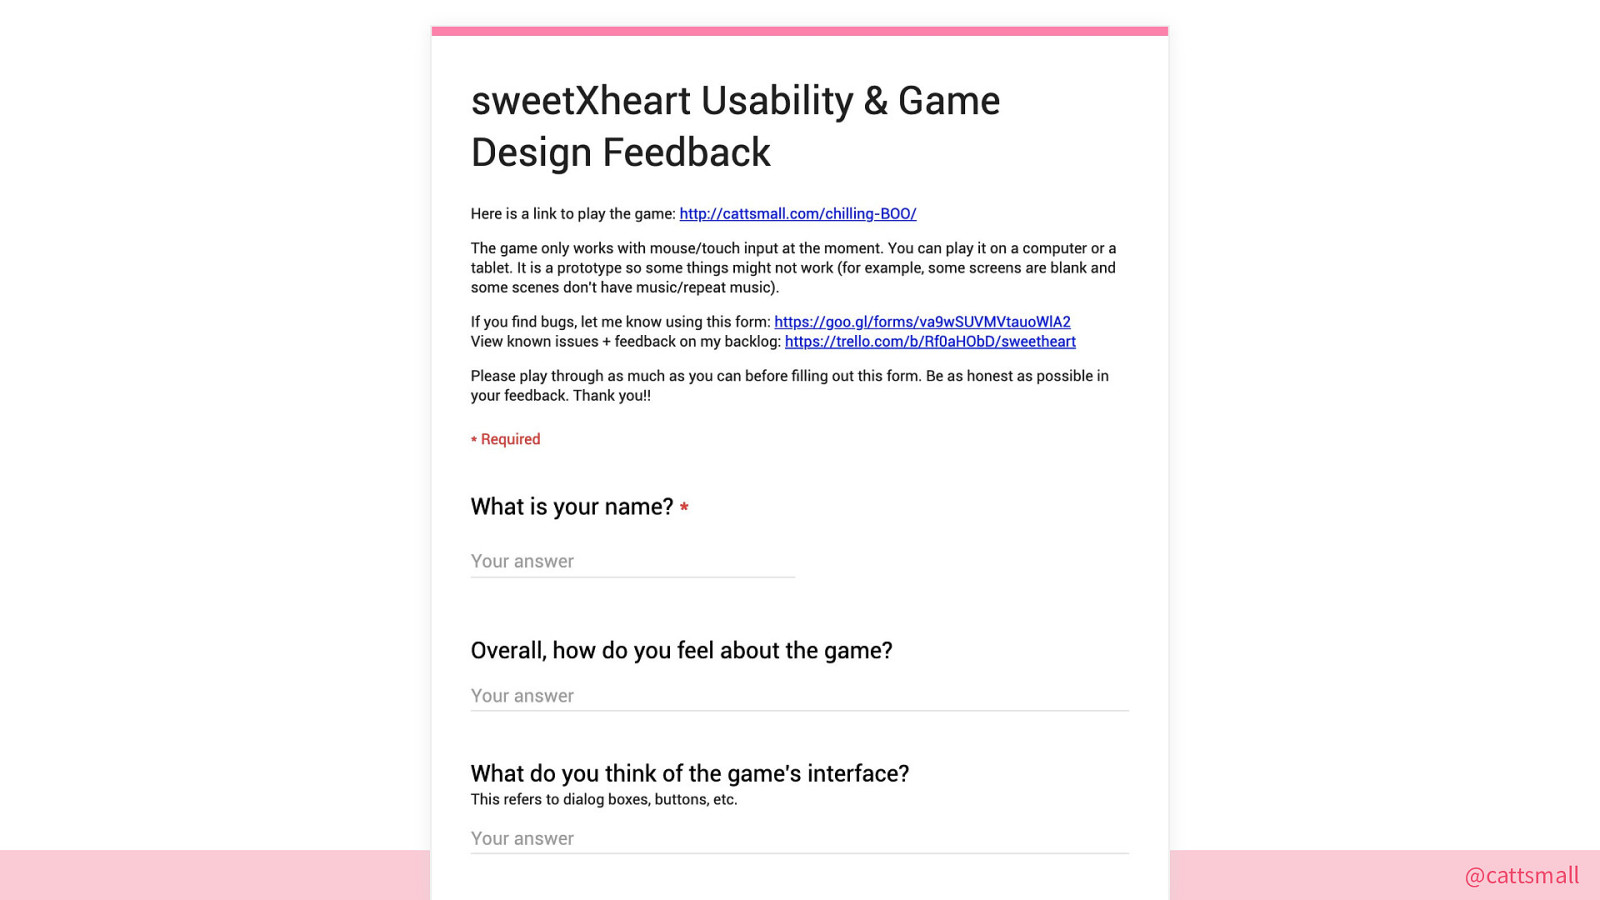
This project started as a graduate school piece, so I got feedback each week from my professor, Kaho. When I finished schooling, I started playtesting using a Google form—all I had to do was send folks a link! The feedback I got encouraged me to keep making my project better. It also kept me re-engaged when I found myself burning out, which I did a lot. I walked away from the game and thought about throwing it out a few times, but people’s comments kept me going. Thank you.
2: Organize yourself.

As I said, I’m very organized and that was super beneficial for lots of things, including research.

I started using Trello when I realized this was going to be more than a class project. It let me split work into groups and prioritize features. I’m sorry, petting kitty had to get cut.
I also heavily valued creating an organized file system for my game with fairly consistent naming and well-maintained folders. And, as you can see, I commented everything. This was all crucial for helping me pick the game back up again after abandoning it for months out of exhaustion.
3: Ask for help. Recognize your weaknesses. I’m an artist, writer, and programmer. Through some experimentation I realized I was not a musician.
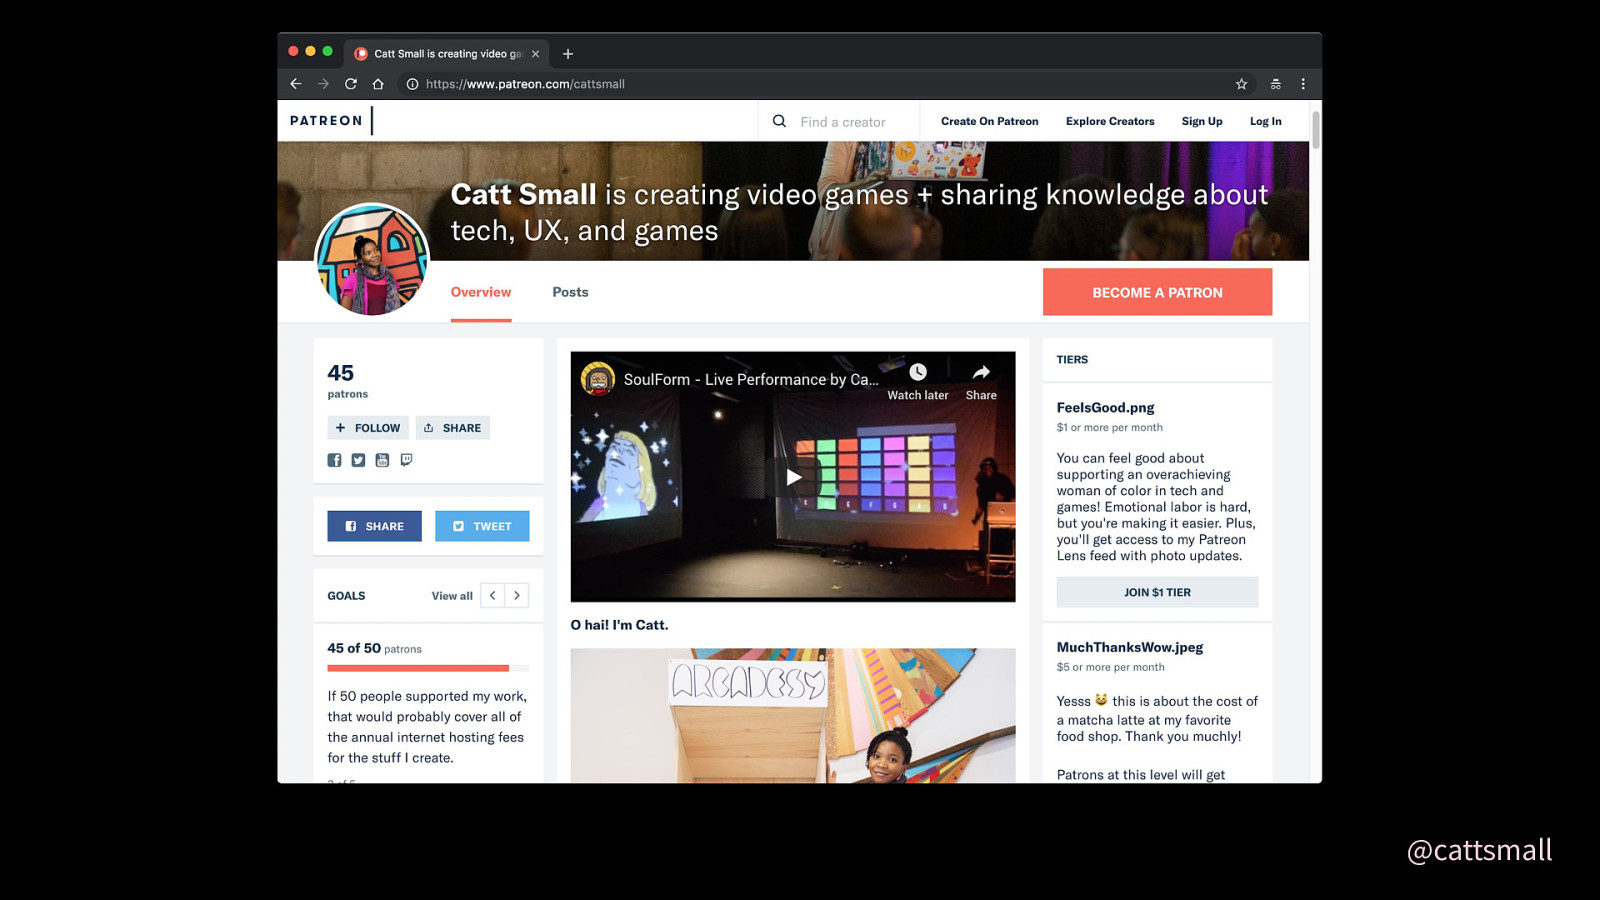
After some failed experiments to work with fledgling musicians for free (always pay people, folks!), I opened a Patreon. By getting funds from interested patrons, I was able to pay a musician to help me create the rest of the music and sound required to finish the game. Without their help, this game would never be so great.
4: Stop upgrading. Phaser was around 2.1 when I started, and I kept upgrading. I got to version 2.4 before I realized my efforts were futile. Things kept breaking and it was taking up development time.

I wouldn’t have finished the game if I kept trying to be Hella Fresh and On Top of That Open Source™. I’m okay with the fact that my game is over 0.5 versions behind (gasp). I already decided to troll myself by making an unnecessarily complex, web-based visual novel using Google Sheets as a dialog GUI; why add constant infrastructure updates to my SIDE PROJECT workload?
In other words: I had enough problems and I knew when to cut my losses.
Speaking of chasing newness, know when to call your project done. There were lots of extra features I considered adding.

But I knew the point at which would be good enough. I quit when I felt good about the game. I was tired after working at it for five years—proud but VERY tired—and knew I’d feel better about finishing on a high note.
We live on the internet now. Just finish your project. You can worry about updates later! Updates actually help keep folks engaged, if that’s something you care about.

That’s all the advice I have for you! Here are some resources I used to make this game:
Also, if you want to see a more in-depth tutorial for a less complicated game, I presented about Phaser as a guest tutor on The Coding Train!
Thank you for reading! Try SweetXheart for yourself if you’d like. All my other games are Itch.io as well!