I don’t know about you but I love the feeling of getting to hit the merge button on my code and sending it off to production. That’s the ultimate goal as a software engineer, right? To get our code out into the world on prod.

A presentation at EmberConf in April 2022 in by Kara Luton
I don’t know about you but I love the feeling of getting to hit the merge button on my code and sending it off to production. That’s the ultimate goal as a software engineer, right? To get our code out into the world on prod.
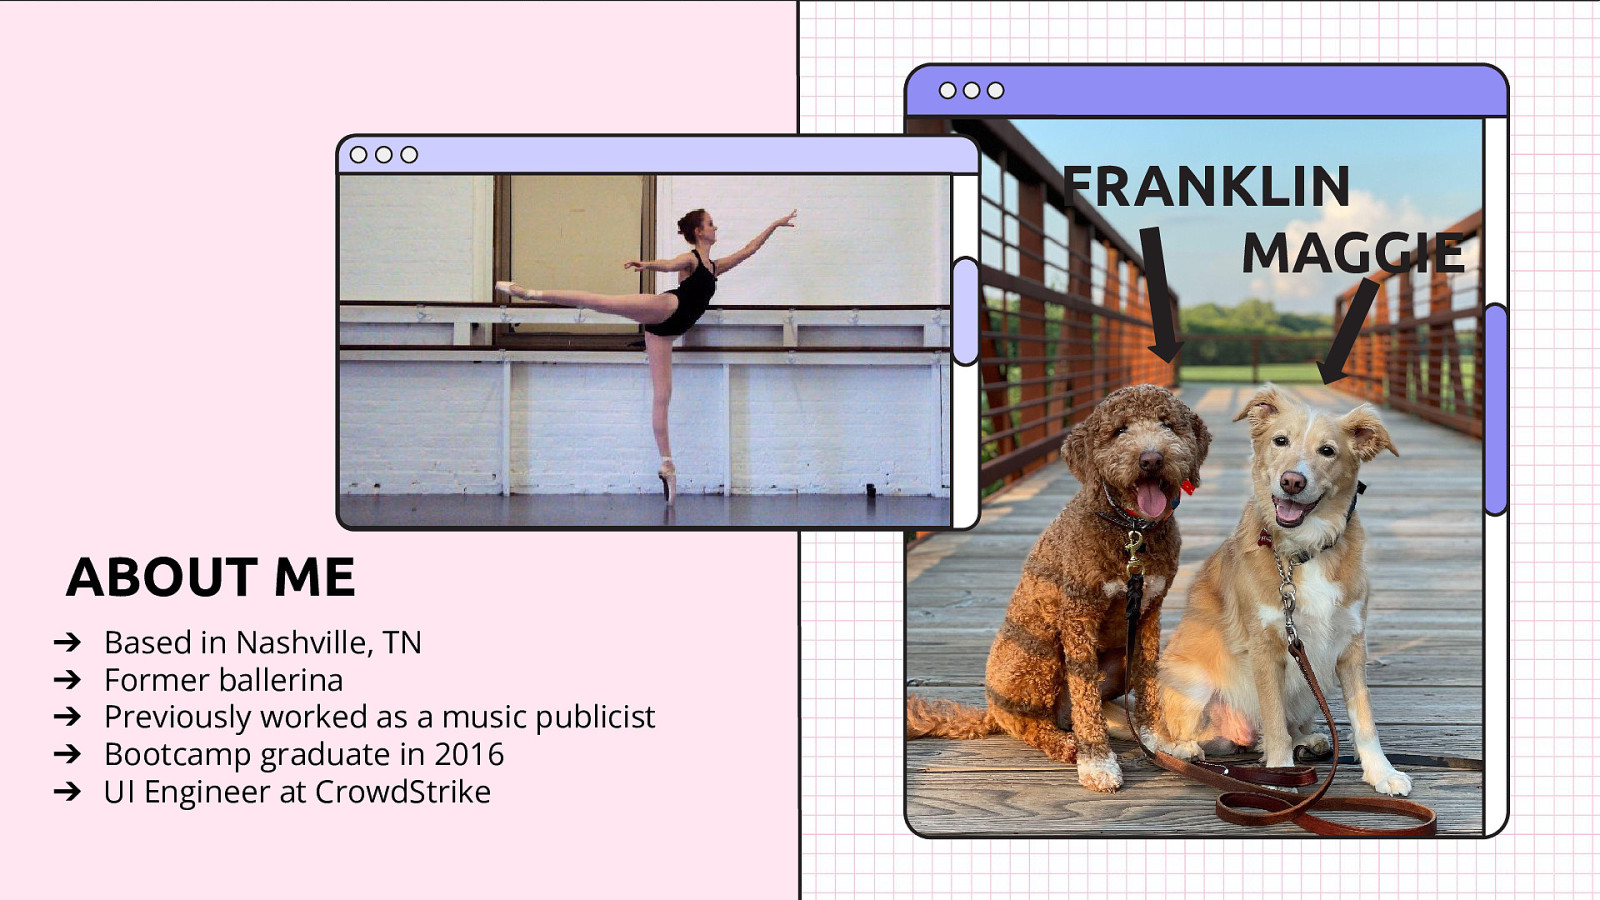
Before we dive in I want to give y’all a little background on myself. I’m Kara. I’m based in Nashville, TN and have two adorable dogs - Maggie and Franklin. Before tech I pursued a career as a ballerina and worked as a music publicist but in 2016 I enrolled in a front end engineering bootcamp and I’ve been in tech ever since. I’ll do a little plug here - I spoke about my career journey and why non-traditional developers are awesome at EmberConf in 2020 so you should go and watch that. Now I work as a user interface engineer at CrowdStrike, a cybersecurity company that aims to stop breaches. And as a UI engineer, I write and look at a lot of pull requests and I’ve seen both good and bad PRs.
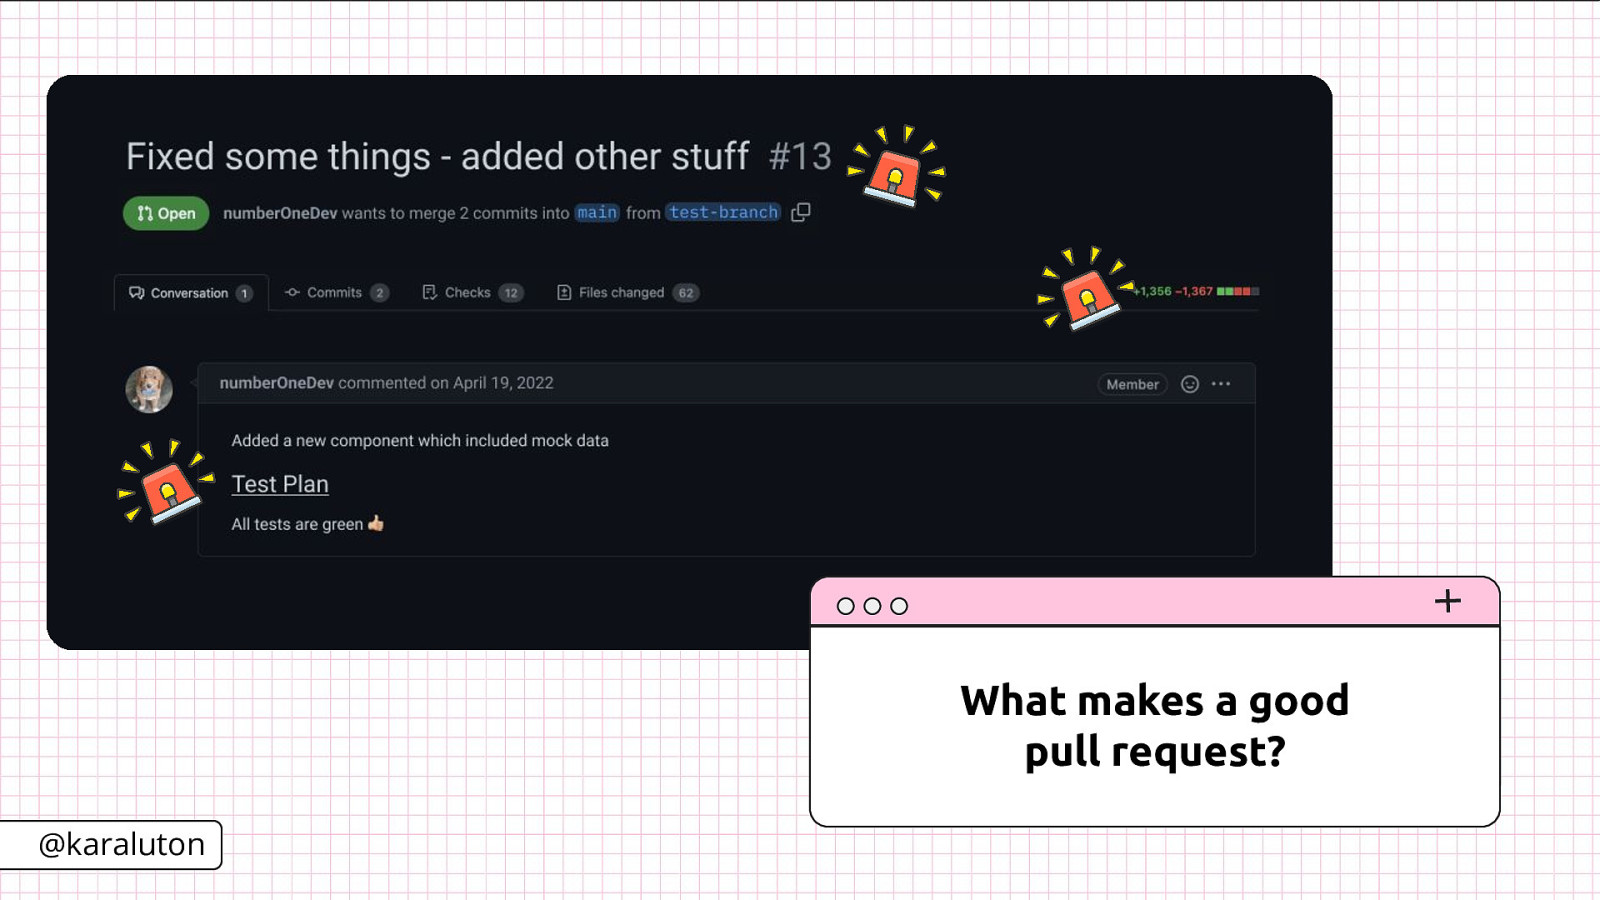
What even makes a pull request good? Let’s take a look at this totally real PR. This is not a good pull request - but why? First, glancing at the title doesn’t really give you an idea of what happened in this PR other than some things were fixed and other things were added. But that’s ok, let’s look at the description. We’re told a little bit more information about what has gone on here - a component and some mock data was added. We’re also given no instructions on where we can find this new component or how to test it. Last but not least, even though this seems like a fairly straightforward change, seeing over 1300 changed lines of code would imply otherwise. As the reviewer looking at this pull request, we really have nothing to go off of and are left in the dark. The sad part of this is that, unfortunately, I’ve seen pull requests exactly like this one before and in the long run you’re only making the PR process longer for your reviewers by doing this.
Pull requests are telling the story of your changes. They’re a conversation between you and your reviewers - and as the author of that story you want to make sure the process of reviewing your PR is as easy as possible. It is vital that our PRs give everything to our reviewers that they may need. They should concisely describe our motives and thoughts behind our changes all the while preemptively answering any questions our reviewers may have.
Just like a good story, our pull request should begin with an outline of its chapters. In our case, our chapters are our commits. We’ve all seen commit messages that provide absolutely no insight into what has gone on but each commit message should show a progression in your pull request story.
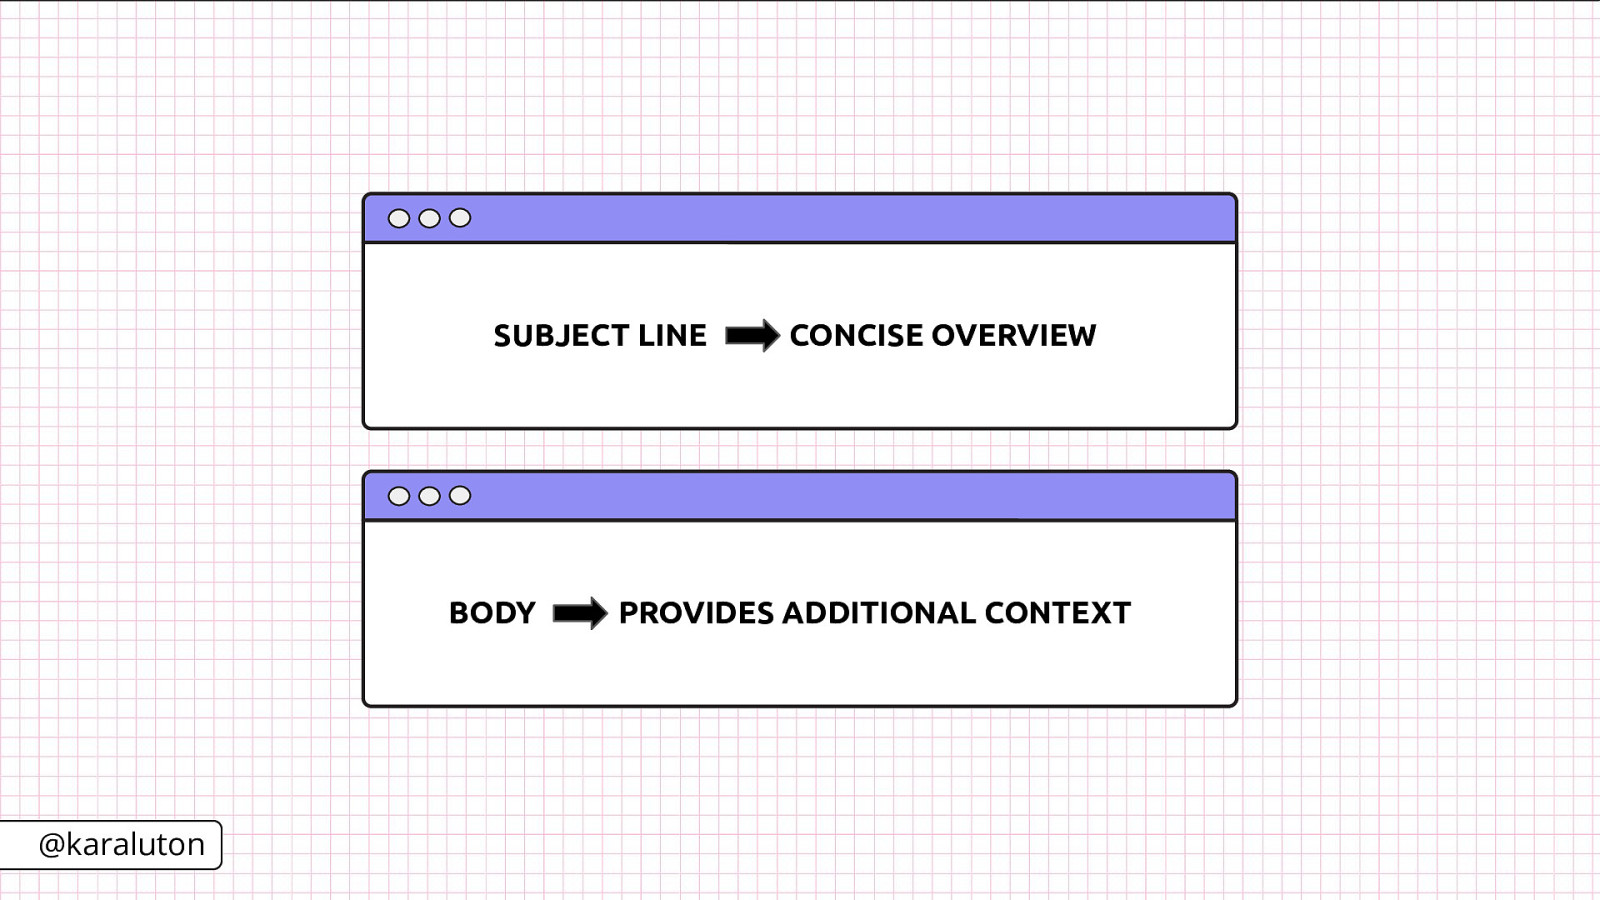
The subject line of your commit should give an overview of the changes that were made while the body should provide additional context like why you made that decision, any possible future implications and a reference to the ticket or issue number. Using conventional commits can help provide even more at-a-glance insight. This is where the commit subject line includes various prefixes that follow semantic versioning such as ‘feat’ or ‘fix’ but can also include ‘test’, ‘chore’ or ‘style’.
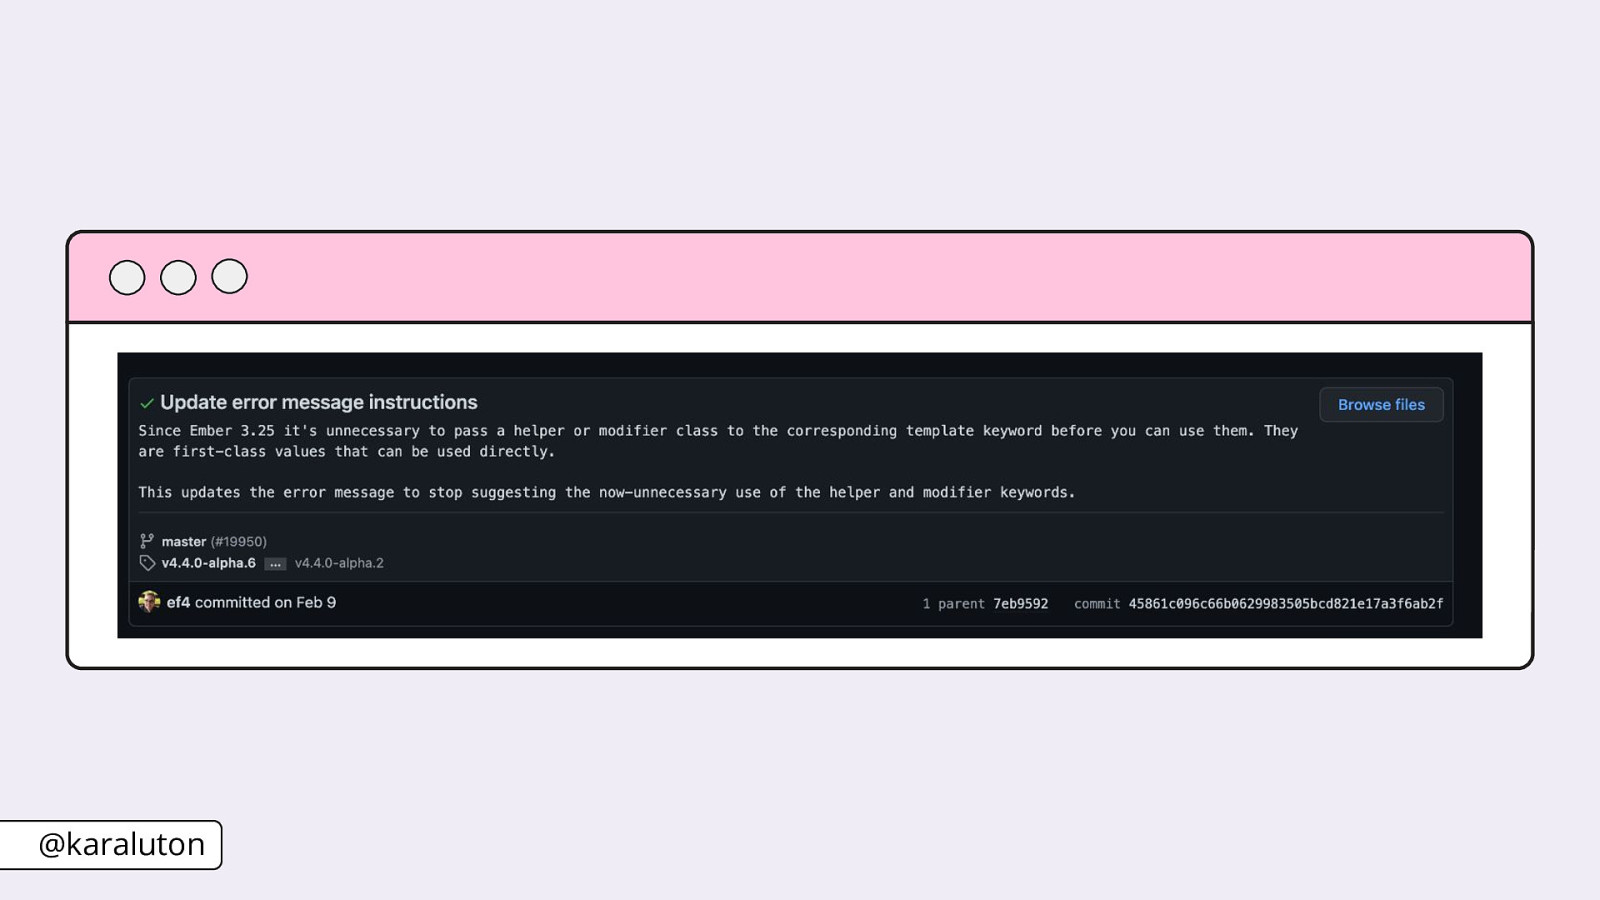
Here is a great example of a descriptive commit message from the Ember core repo. The subject line - “Update error message instructions” - is easily understandable. The author could have left the commit at that but went into further detail in the body of the commit message explaining why this change needed to be made. Now anyone looking at this commit gets the full story of what was happening.
Having explicit commit messages is important but in order for your story to be understood they need to be organized in a way that makes sense. It would be extremely confusing to someone if a book had chapter two before chapter one. You’d have no idea what was going on. You want to make sure your reviewers can easily follow the story you’re telling about your changes. You’re probably sitting there saying “well, I may have a fix that I need to implement later when I’m writing my code or what if I need to refactor something?”. That’s totally ok. The great thing is that as developers we have the power to change history with rebasing. If you aren’t familiar with rebasing it allows you to rework your commits. You can change the order, rewrite your commit messages or even squash two or more commits together.
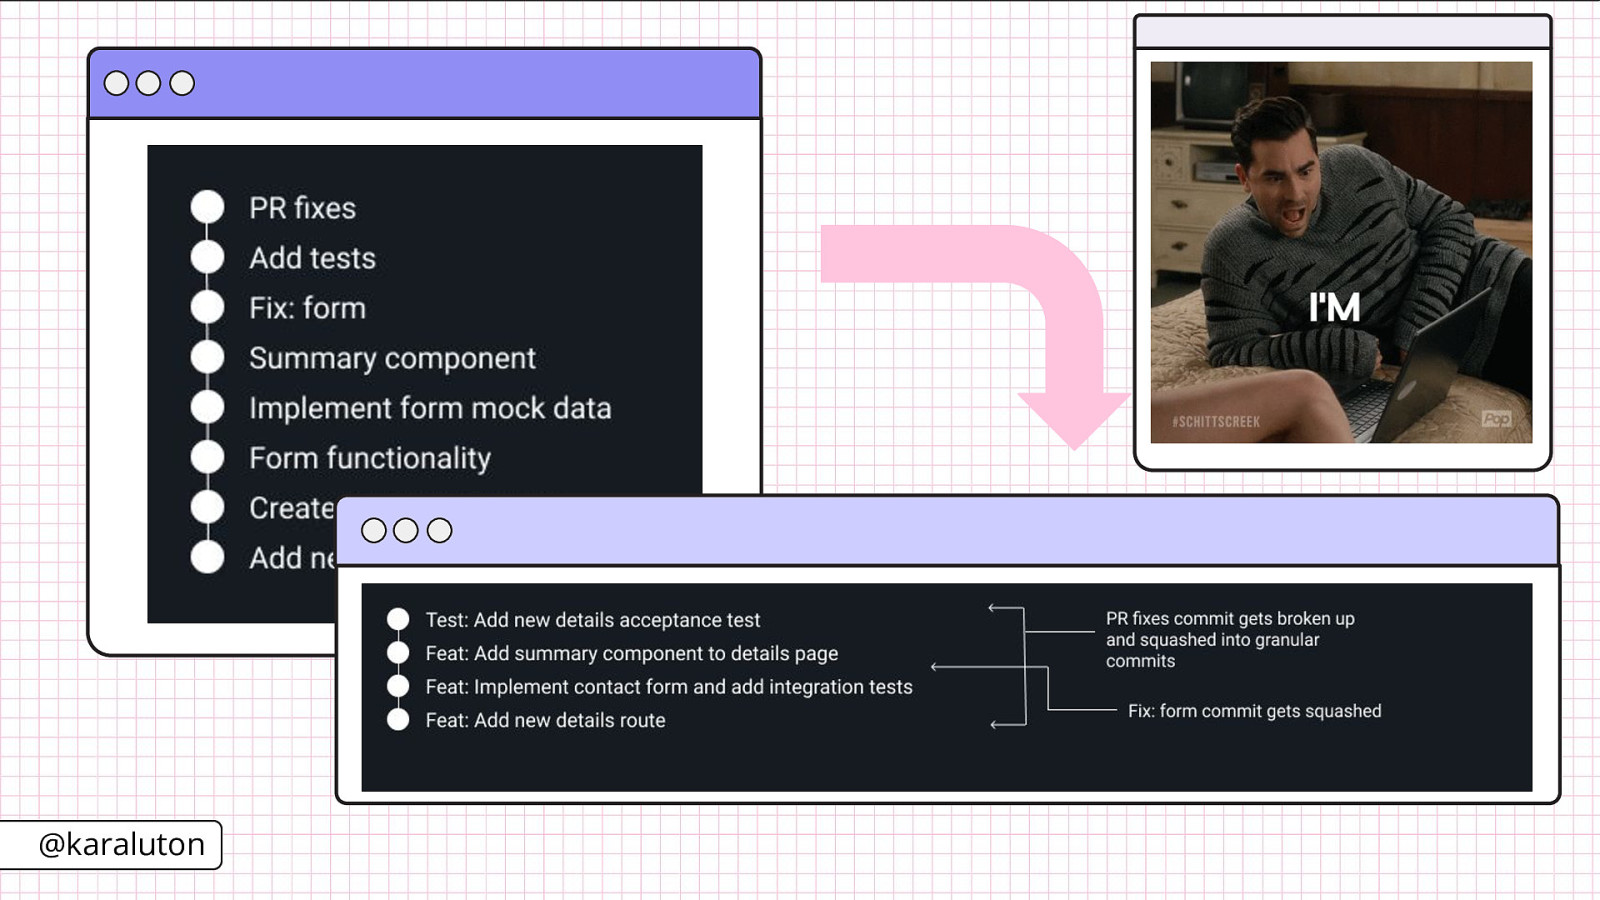
Your commit history can go from something that looks like this - jumping around from implementing new components to adding mock data and PR fixes - to something like this that is much easier for anyone looking at your pull request to follow. This history gives a clear outline of what occurred in each commit. It shows a clear path that the developer was taking. You can see that one off commits like fixing the form and applying feedback from the review were squashed into the commits where those changes make sense. Now looking at the commit history reviewers are able to easily follow the author’s development process and anyone looking at this in the future can easily dive in and know what to expect on each commit.
If our commits are the chapters to our pull request then our actual code implementations and changes are the story itself. It’s important that we pay attention to the size of our story.
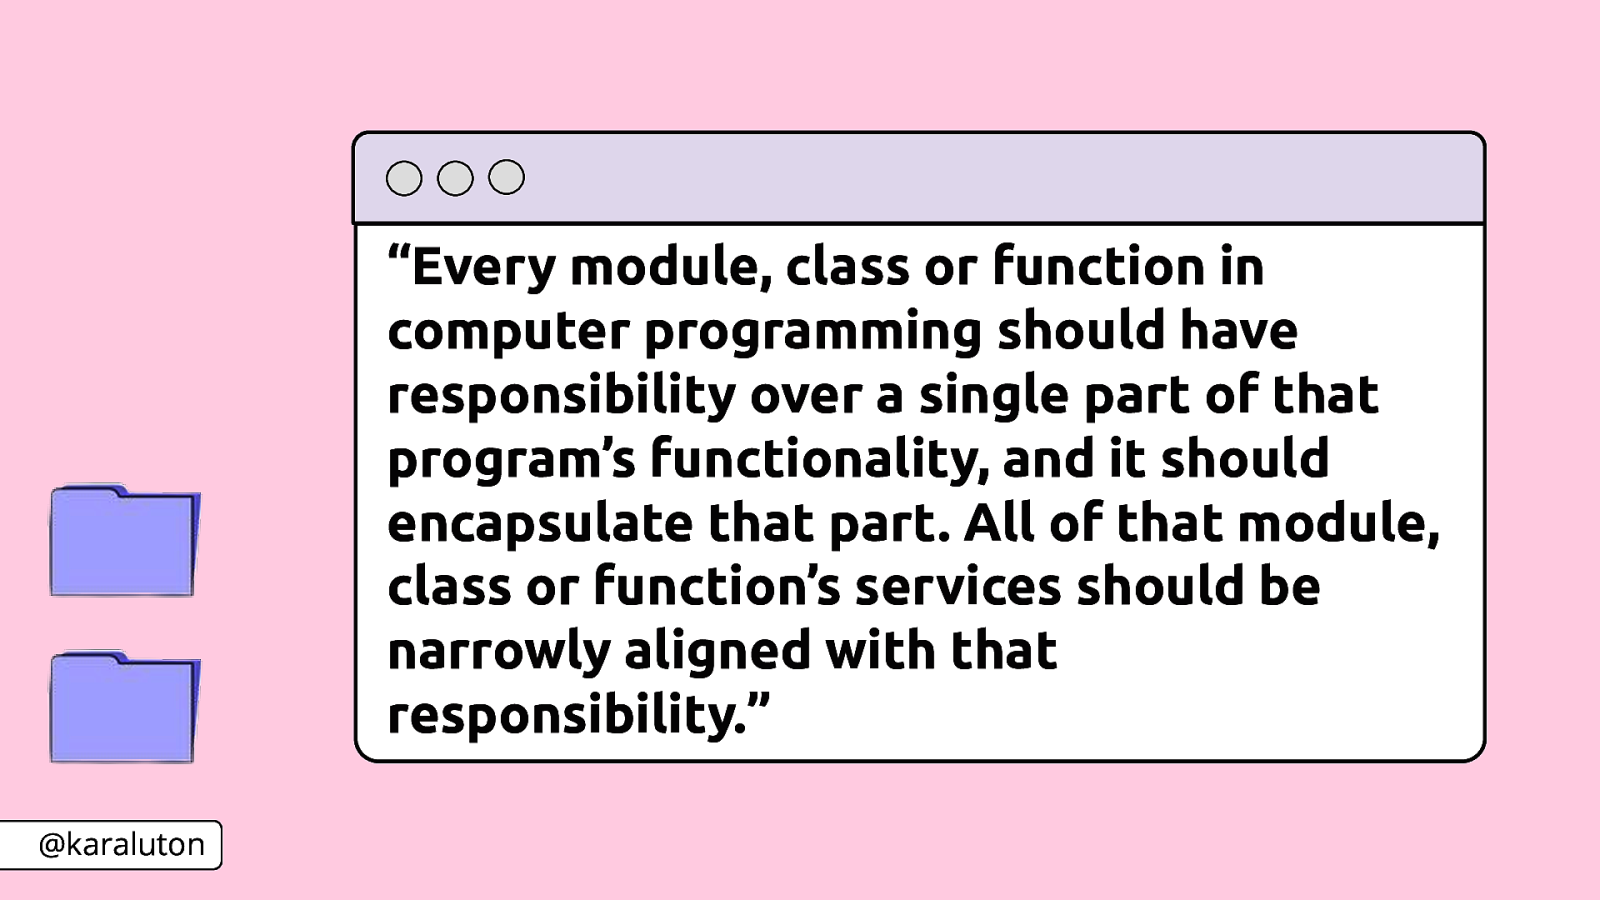
There’s a computer programming principle called the Single-Responsibility principle. It states that “every module, class or function in computer programming should have responsibility over a single part of that program’s functionality, and it should encapsulate that part. All of that module, class or function’s services should be narrowly aligned with that responsibility.” It’s basically stating that a single module, class or function should only focus on one thing. It should only have one responsibility. That same concept applies to pull requests.
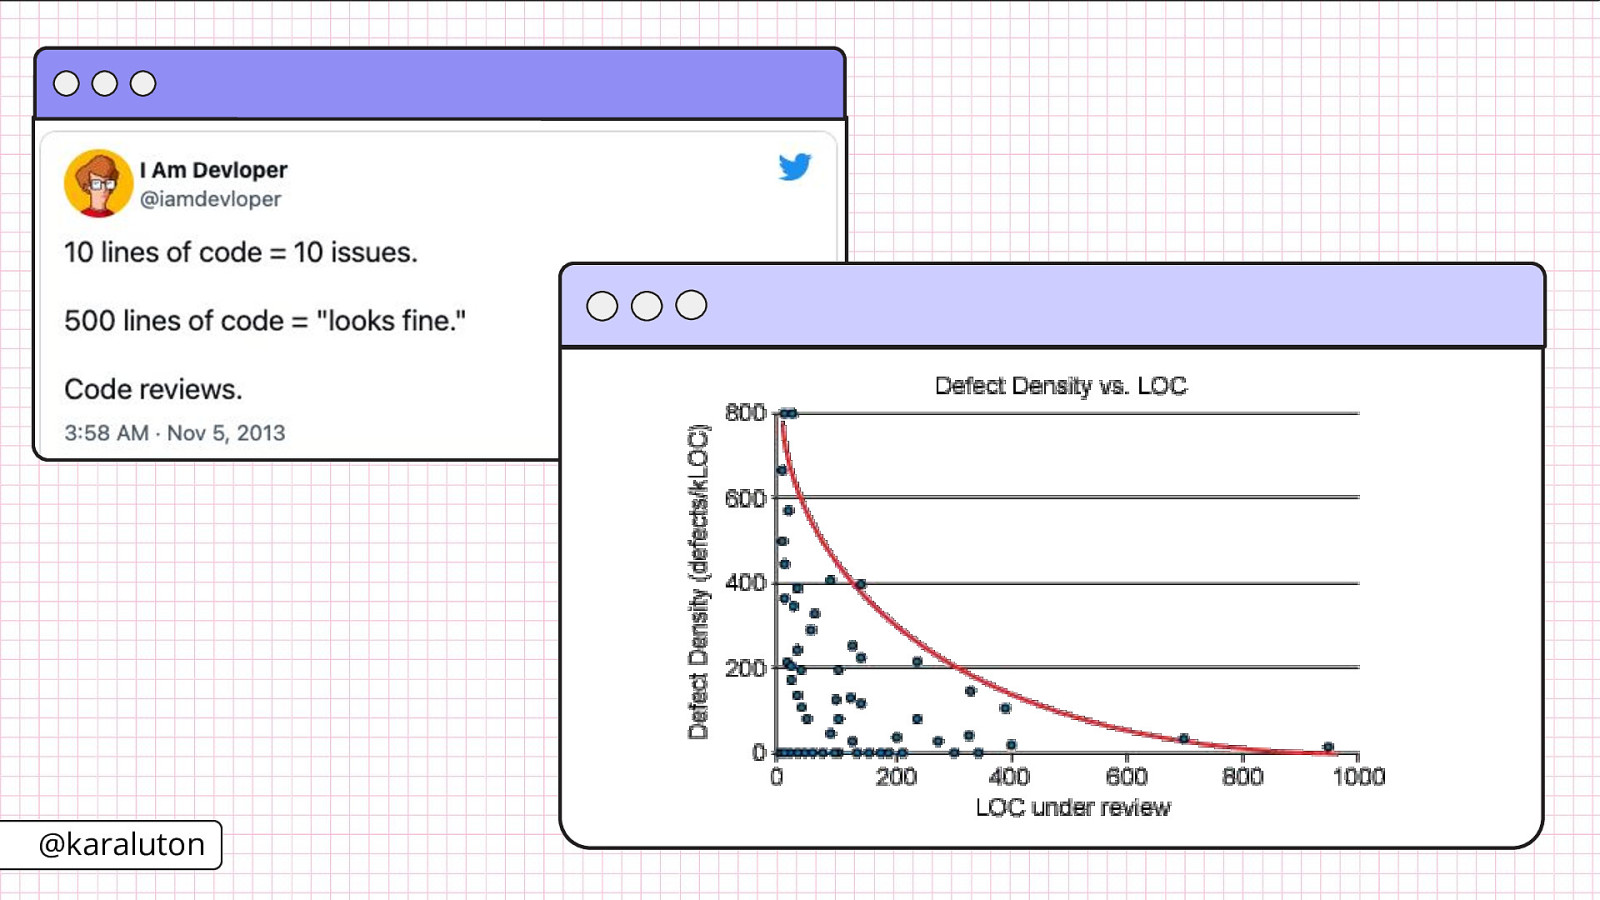
You would think that a PR that touches a lot of files would receive more comments than a smaller PR but a study of a Cisco Systems programming team revealed that developers should review no more than 200-400 lines of code at a time. Beyond 400 lines of code, the ability to find defects diminishes. So by breaking a larger pull request into several small ones you’re actually increasing the chance that you’ll receive feedback and the potential for your reviewers to catch a bug that may have been overlooked.
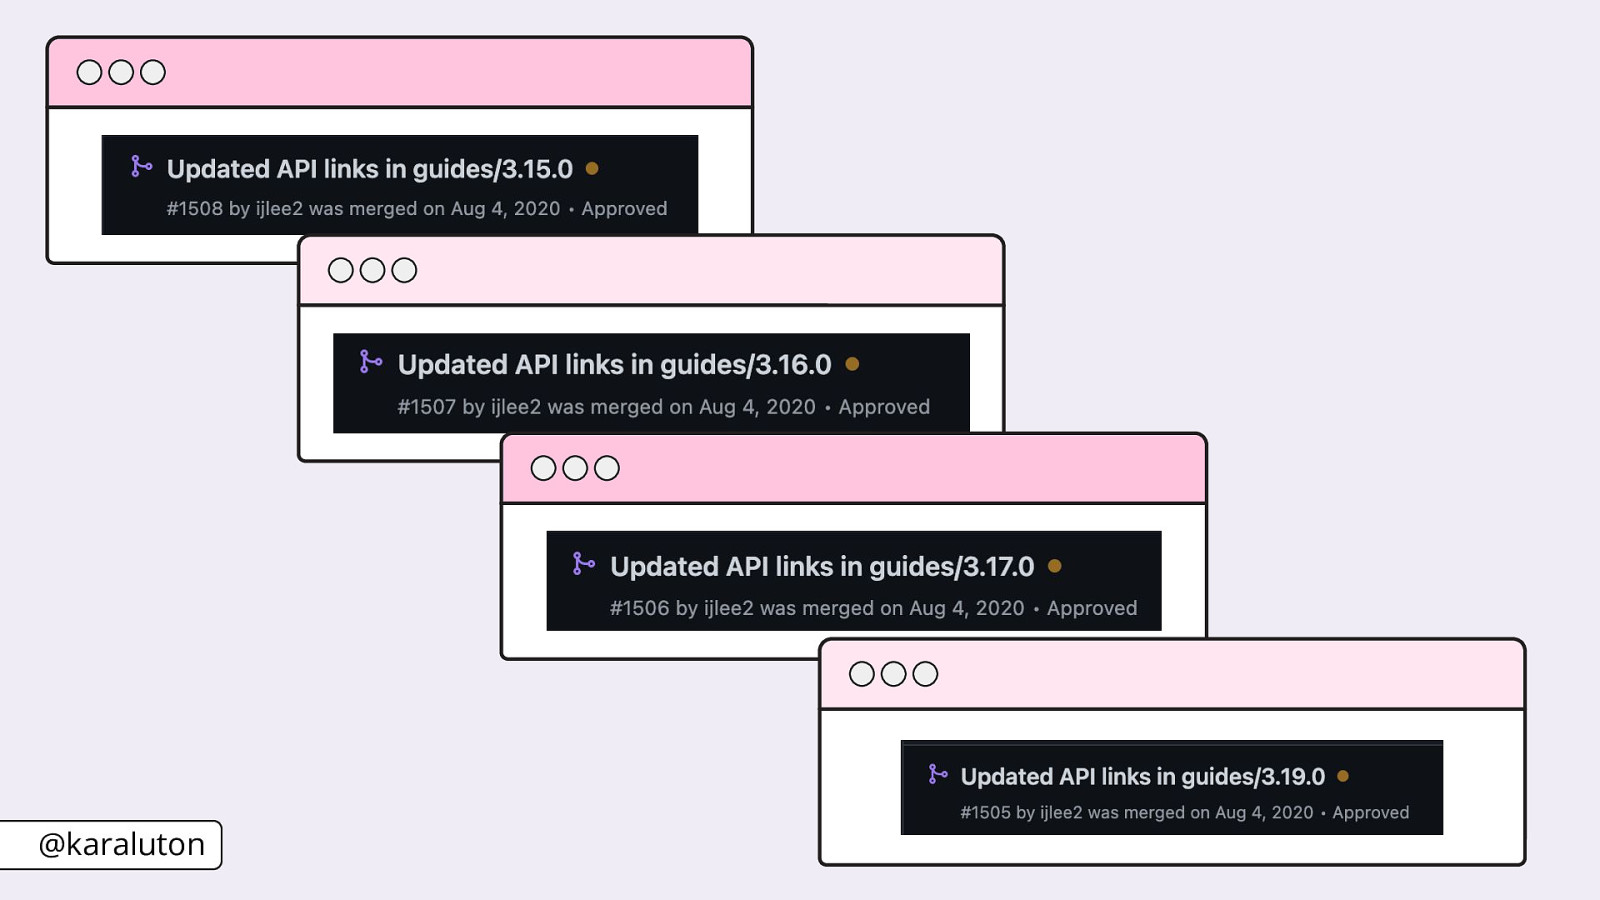
Here is a great example of keeping a pull request small from the Ember learning team. An issue was created to fix some of the API links in the guides. The catch was that this needed to happen in the docs for multiple versions. The developer that took on this task created a separate pull request for each version where the links were updated. They easily could have made this one PR although it would have been pretty large with a lot of file changes. By opening one PR per version they’re enabling the reviewers to easily be able to parse the changes and look for any issues or missed spots.
Breaking down a pull request sounds straightforward but can sometimes be daunting. How do we know when a pull request is getting too big and should be separated? Say you’re starting a new project on your team and that includes generating a lot of boilerplate code. That starting code should be its own PR. This is because you’ll be adding a lot of files at once and you want your reviewers to be able to look through each of those files to make sure everything that is needed is included. After generating all of that boilerplate code now it’s time to start on the index page for the project and generate some mock data. That work can be separated into its own pull request as well. By having each pull request be concentrated on a singular task you’re allowing your reviewers to focus on one thing at a time. They’re not getting bogged down trying to put together the pieces of what’s really going on.
We’ve covered the chapters to our PR story and the story itself but what’s a good story without an introduction? That’s where our title and description come in. A pull request title is the first bit of information you’re providing to your reviewers for what they are about to look at. It needs to give a concise overview of what is happening in the PR. One of the most common mistakes I see is using the last commit message as the title of your PR but this is only giving a brief peek into your story and not explaining the entirety of your changes.
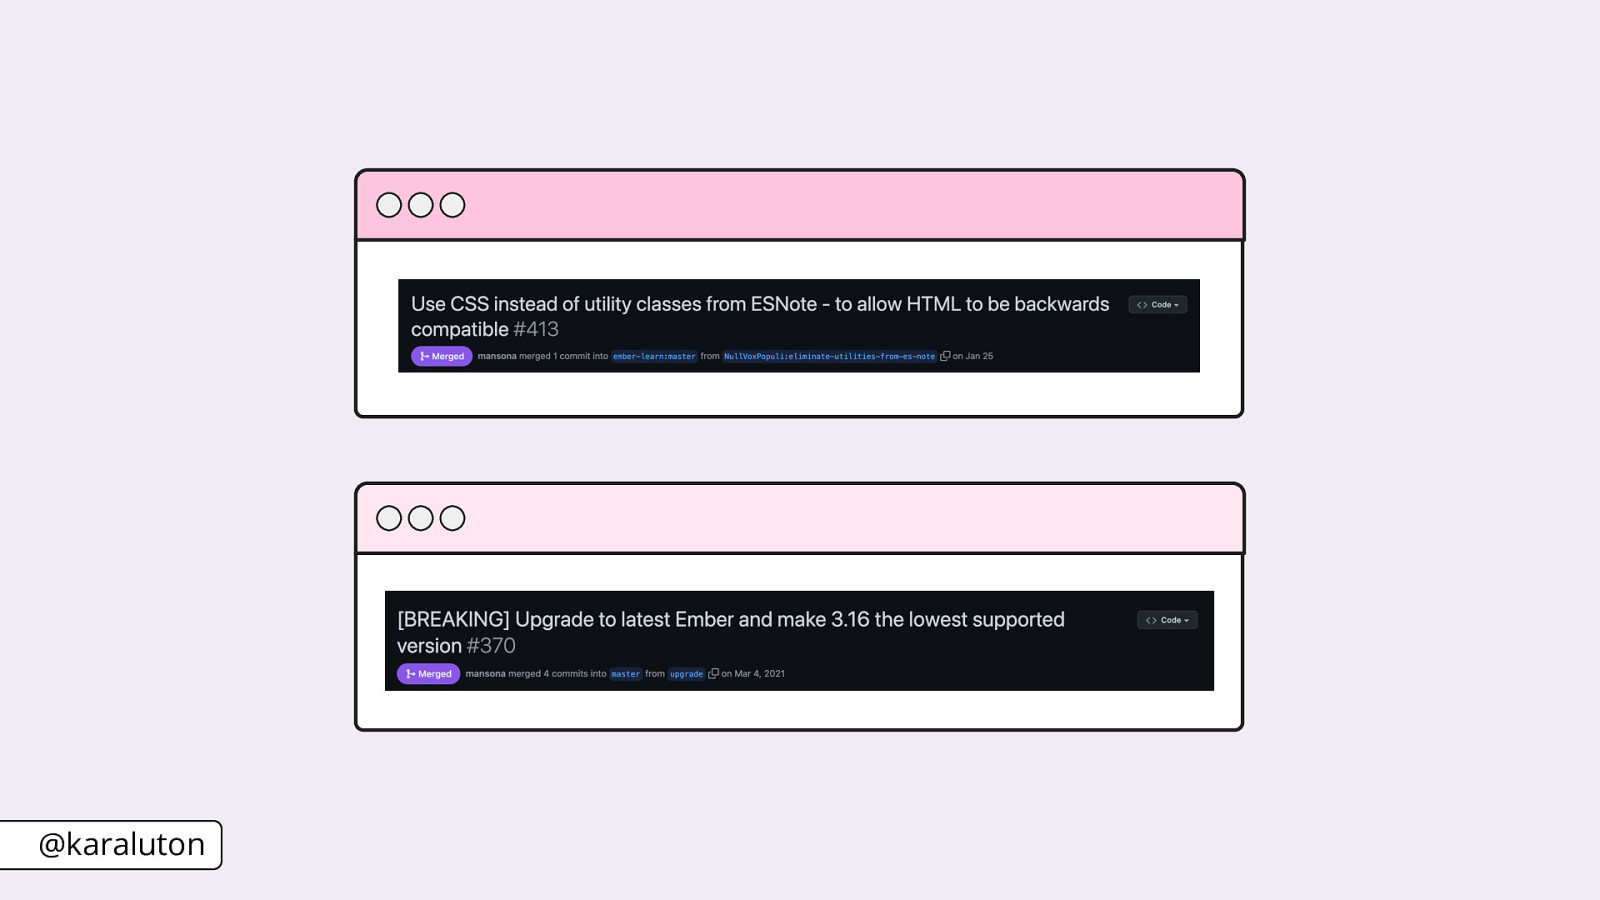
Here you can see two great examples again from the Ember Learning team. The first example - “Use CSS instead of utility classes from ESNote to allow HTML to be backwards compatible” – is to the point explaining what changed and even an explanation of why. The second example – “Upgrade to latest Ember and make 3.16 the lowest supported version” – does this as well. You’re even alerted to the fact that this pull request is going to contain a breaking change which is extremely important information the reviewers need to know up front.
The description is where you can provide more detail for your reviewers or anyone looking at your PR in the future. Something important to keep in mind is when writing your description you shouldn’t assume the reader’s prior knowledge of the area of the codebase you’re working in. It’s your job as the author to provide the context to them. You can do this through including information on the “what”, “why” and “how” of your changes. What changes were made, why you made those changes and how the reviewers should test them.
The “what” should provide explicit details on the changes in your pull request. Remember how our commits are the outline of our story? Well this is where that outline comes into play. Use your commit messages as a baseline for explaining your changes to your reviewers. Expand on what you wrote previously with a bit more detail. This section of your description should also include any lingering TODOs linked to their follow-up ticket. Remember that you want to cover all of your bases in your PR so it’s important to provide all of the context of what happened or has not yet happened within your pull request to your reviewers.
The “why” section of your PR explains the reasoning behind your changes including any architectural decisions you made and any possible implications from those decisions. This can include user stories for why this specific feature was added, thoughts behind refactoring you did or even explaining your thought process. You should also link to the ticket or issue that your pull request addresses to provide even more context to your reviewers.
Lastly is the “how”. How are your reviewers supposed to test your code? You can provide all the details about what you changed and why but your reviewers probably don’t know the steps to actually reproduce your changes in a demo environment. Go through the steps of demoing your code changes and write each of those in a list for your reviewers to follow. You want to be as explicit as possible. Provide direct links for the route they need to test and any feature flags or permissions they may need. You also want to make sure the exact scenarios you want tested are laid out. For example, certain steps your reviewers need to take to show an error state. You want to detail the exact interaction that will need to happen.
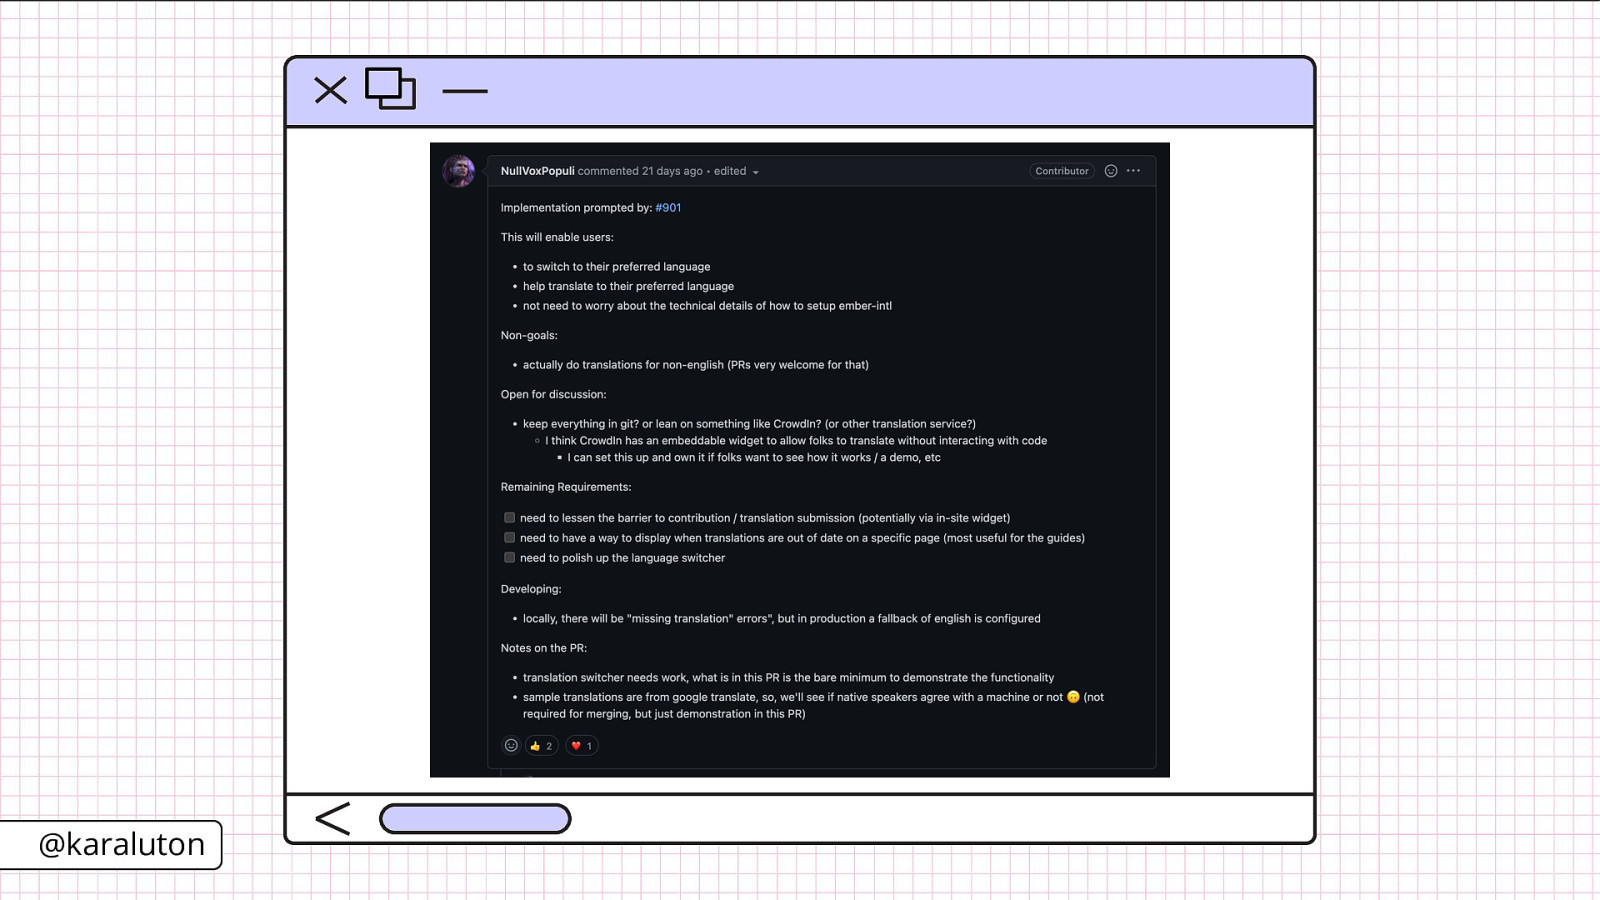
Here is a well-written description for an update to the Ember website. It combines a lot of what we’ve been talking about. At the top is a link to the corresponding issue. Then the developer goes into a list of what exactly was implemented in the PR and why those needed to happen. They dive even deeper by listing the remaining requirements that need to be addressed and provide additional notes to encourage feedback. This PR is still a work in progress but the only thing that would make it even better when it’s ready to fully be reviewed is to add the exact testing steps reviewers can take to make sure the language switcher is working as expected in a test environment.
A way to enhance your pull request description even more is by adding a visual aspect.
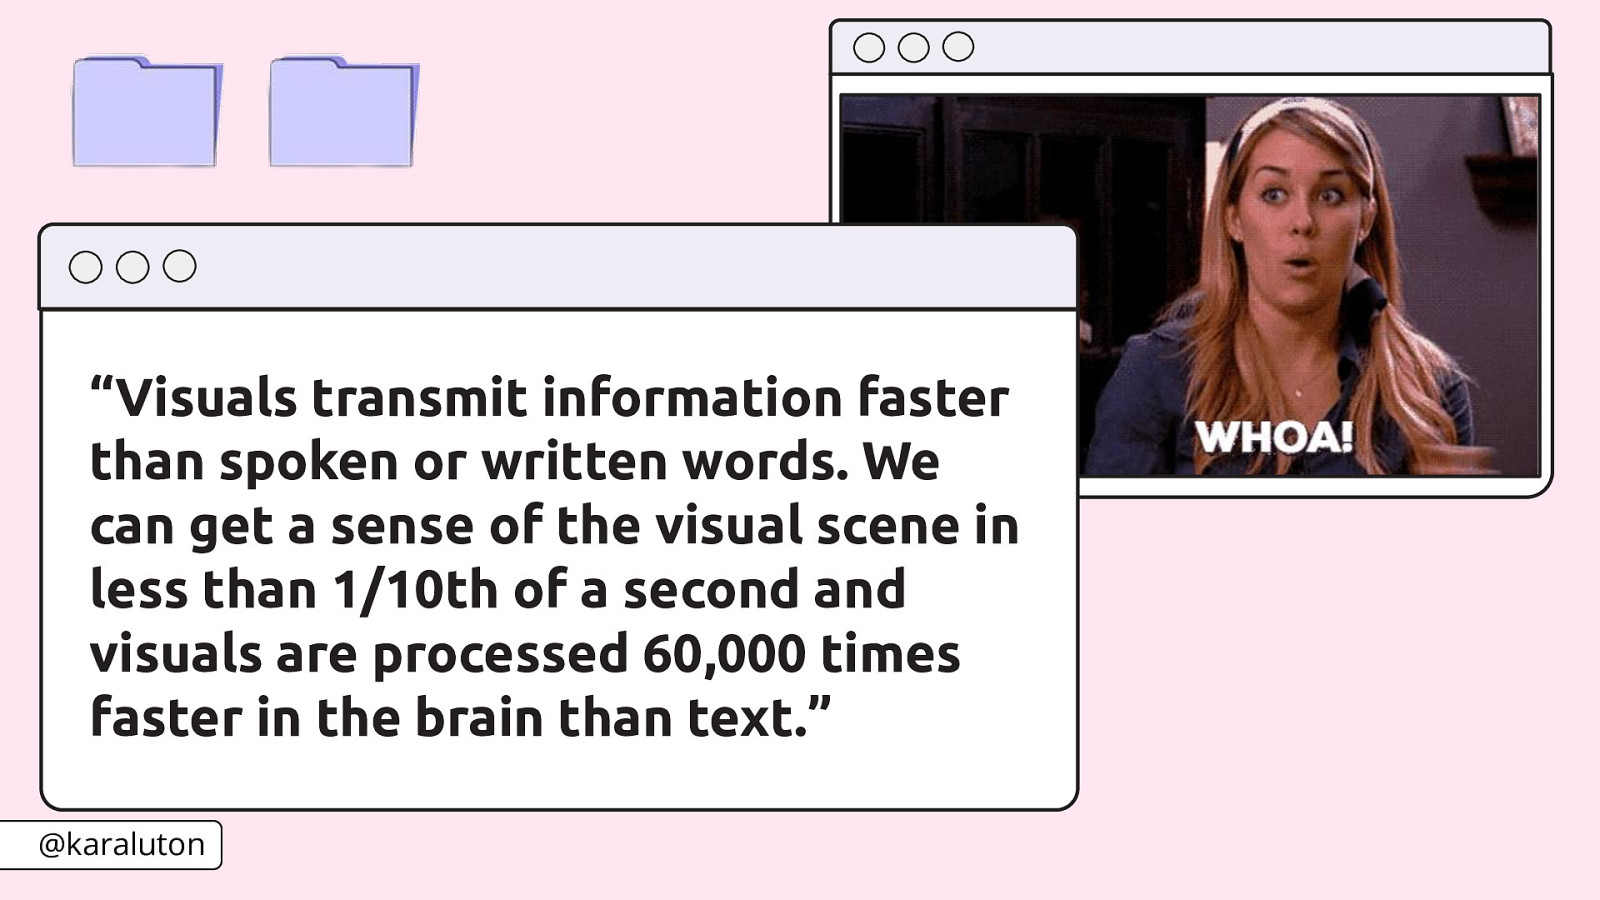
According to the Visual Teaching Alliance, “visuals transmit information faster than spoken or written words. We can get a sense of the visual scene in less than 1/10 of a second and visuals are processed 60,000 times faster in the brain than text.” Think about when you’re putting together a piece of furniture. There’s written out instructions but there’s also visuals to help you. You actually see a picture of the base of your furniture piece along with diagrams of where you need to drill and add screws. We all poke fun at Ikea’s drawings of how to put together furniture, but honestly, that is a lot easier to parse than complicated instructions being written out with no visuals of all the different parts.
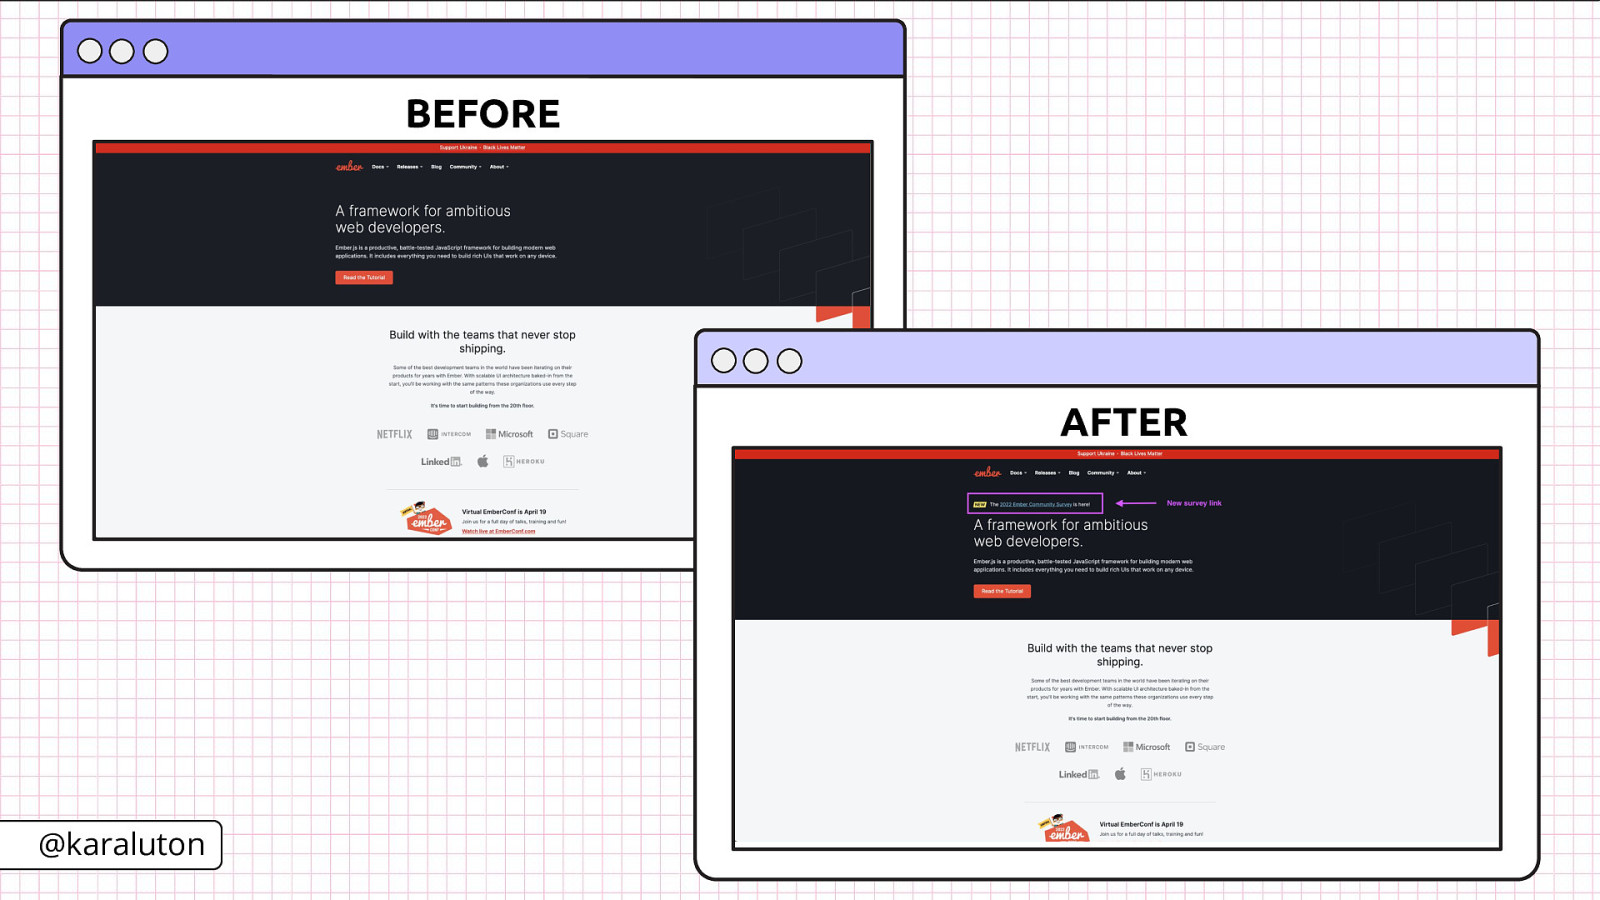
Adding a screenshot of the before and after of your changes and highlighting the differences can help your reviewers process your changes even faster. You don’t even need to download software to do this. You can simply take a screenshot on your Mac by pressing CMD + SHIFT + 4 and highlight the area where you want to screenshot. You’re then able to use the markup feature to draw a square around what you’ve added or changed.
You can take this a step further by recording your screen through something like QuickTime and actually walk your reviewers through your changes. This is great when your reviewers may not be as familiar with the area of the codebase you’re working on. You taking an extra five minutes to record a demo can save your reviewers possibly fifteen minutes of getting up to speed. The thing I really love about recording a walk through is that your reviewers get to hear your voice and see a live demo. We’re living in an asynchronous world and those small things can really make a difference in helping your reviewers fully understand what’s going on in your pull request.
Our PR is now officially done….right?! Well, not exactly.
Before adding any reviewers to my pull request I become my own reviewer. I look through each of my commits to make sure they’re linear and self-explanatory and take a look through my code as well. During this process I often catch simple mistakes like a leftover console log. While doing this I often also annotate my own PR. Have you ever been reading a book and left yourself notes in the margins? This is the same thing but for your reviewers. While reviewing your own changes, comment on specific lines of code that may leave your reviewers with questions. You can use this to explain why you chose to do something a particular way like if the direction you decided to go was a little outside of the norm or you can highlight a line of code to get more opinions on
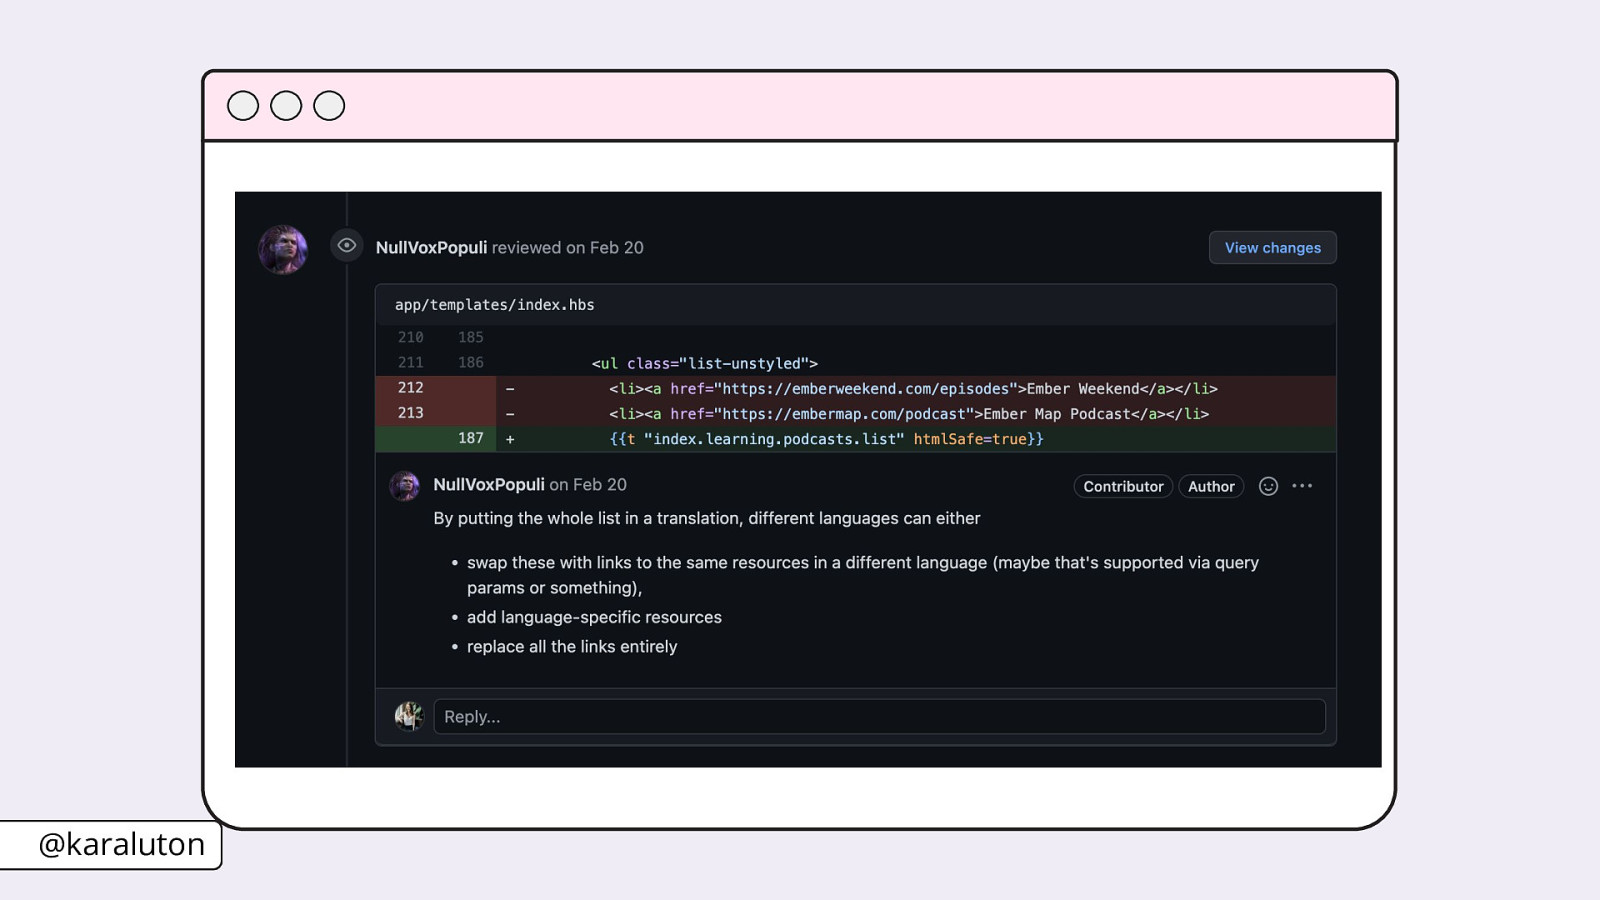
Here is an example of doing this from a pull request for the Ember website. The author went through and commented on their own pull request to clarify any areas where reviewers may have questions. Then they go into a bit more detail on why they implemented the translation as one line instead of translating each individual segment of the string.
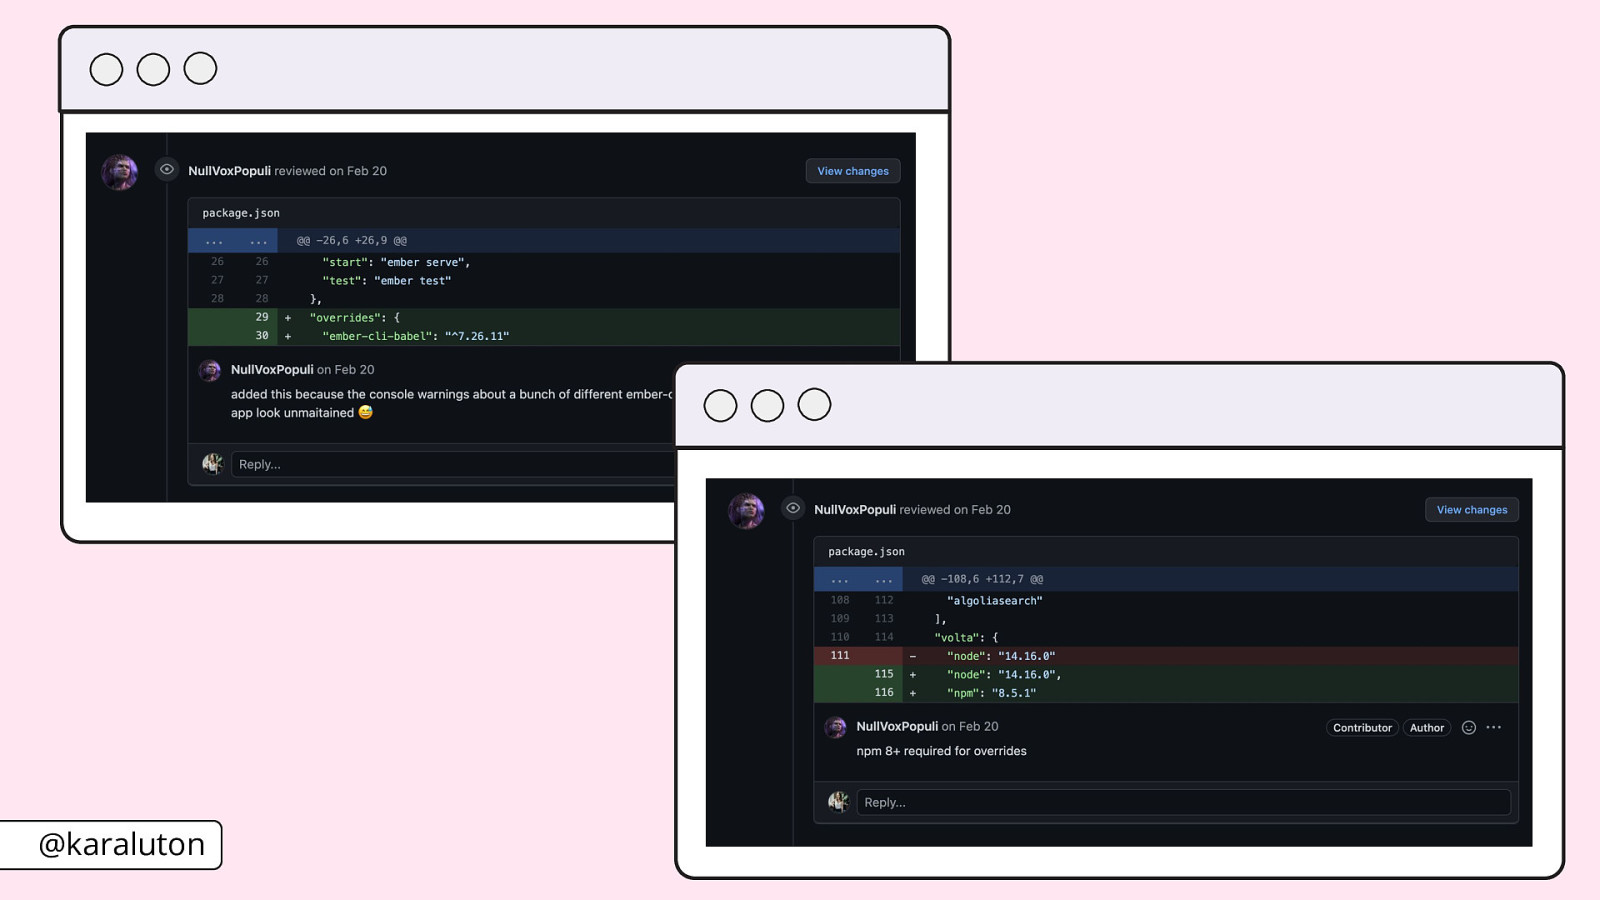
On the same pull request the author explains why the additions they made to the package.json file were necessary. Pointing out these types of changes in your pull request are imperative and doing so through commenting on your own PR helps shed even more light on them.
Now that you’ve put together the story of your pull request, added your reviewers and officially opened your PR you would think that things end there, however, the conversation around your changes are only beginning. The entire point of a pull request is to get eyes on your code so others can catch bugs or provide feedback. An essential part of the PR process is responding to that feedback.
Pull requests are a story and you should be having conversations around that story with your reviewers. When receiving that feedback you want to make sure you’re understanding the reviewer’s perspective. They’re commenting to learn more about what you’ve done and to help you grow as a developer. It’s ok to get comments on your pull request and you shouldn’t view that as a negative thing or take it personally. Honestly, I would take it more personally if I received zero comments on a pull request. I want that feedback because it’s pushing me to become a better developer and think outside of the box.
If your reviewer makes a comment that you don’t quite understand then ask for clarification. However, pull requests are not the place to be debating about certain implementations. Those conversations can get out of hand and overthrow the original objective of your PR which is to get it reviewed and merged. If you catch that happening, take the conversation off the pull request and into a face-to-face or virtual meeting. The important part of this is to update your pull request with any decisions that were made during that meeting. Again, you want to be completely transparent on your pull requests. You want to make sure that the outcome of that meeting and any decisions are there for your reviewers to also be made aware of.
Also remember that not all suggestions need to be implemented. Feel free to provide any clarification to your reviewers on your decisions behind certain changes if they have questions. This is where becoming your own reviewer and annotating your own pull request ahead of adding reviewers really comes in handy. By doing this, you’re making it easier for your reviewers to understand your changes and eliminating the amount of back and forth that could possibly happen.

Whether you only get one or two comments or ten, you’ll want to make sure to reply to every single one. Pull requests should not be merged until every comment has been addressed whether that’s implementing a suggestion or not. If you do apply a suggestion from a reviewer be sure to acknowledge that. Give it a thumbs up.
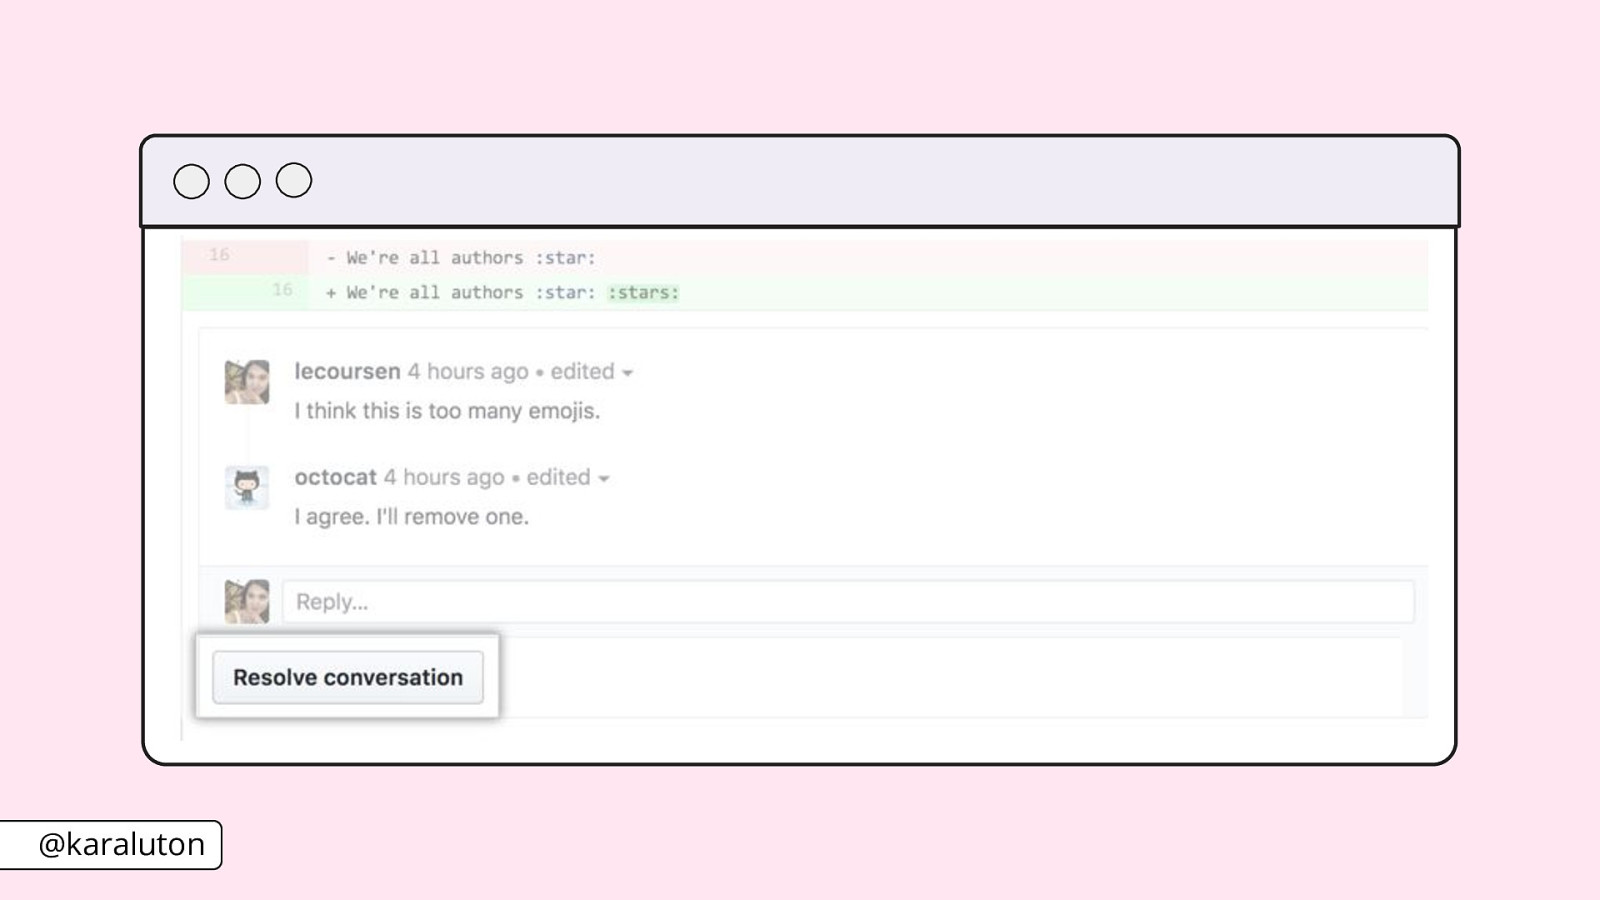
Something I really love about GitHub and GitLab is that they both have a “resolve comment” feature in their pull requests. This allows you to let your reviewer know that you’ve acknowledged their suggestion, have put it into effect and it’s no longer a concern. By clicking that resolve comment button, or if that’s not an option, simply liking their comment or replying with a thumbs up emoji, you’re making it easier on both yourself and your reviewer to know that their comment has been addressed. Plus, this is a great way to keep track of what you have or have not yet gotten to in your pull request feedback.
Not all comments will be within the scope of your pull request, however. Ultimately, it’s your decision what is and is not within scope but if something is outside of the scope then you need to create a follow up ticket. The key to a great pull request is being completely transparent. Explain to your reviewer why their suggestion is out of scope and include the link to the follow up ticket where it will be addressed.
After all comments are addressed it’s finally time - you get to push the merge button! You’ve accomplished your goal of merging your code to production and that’s another ticket marked off your to do list. Now it’s just time to start the entire process again with a new one.