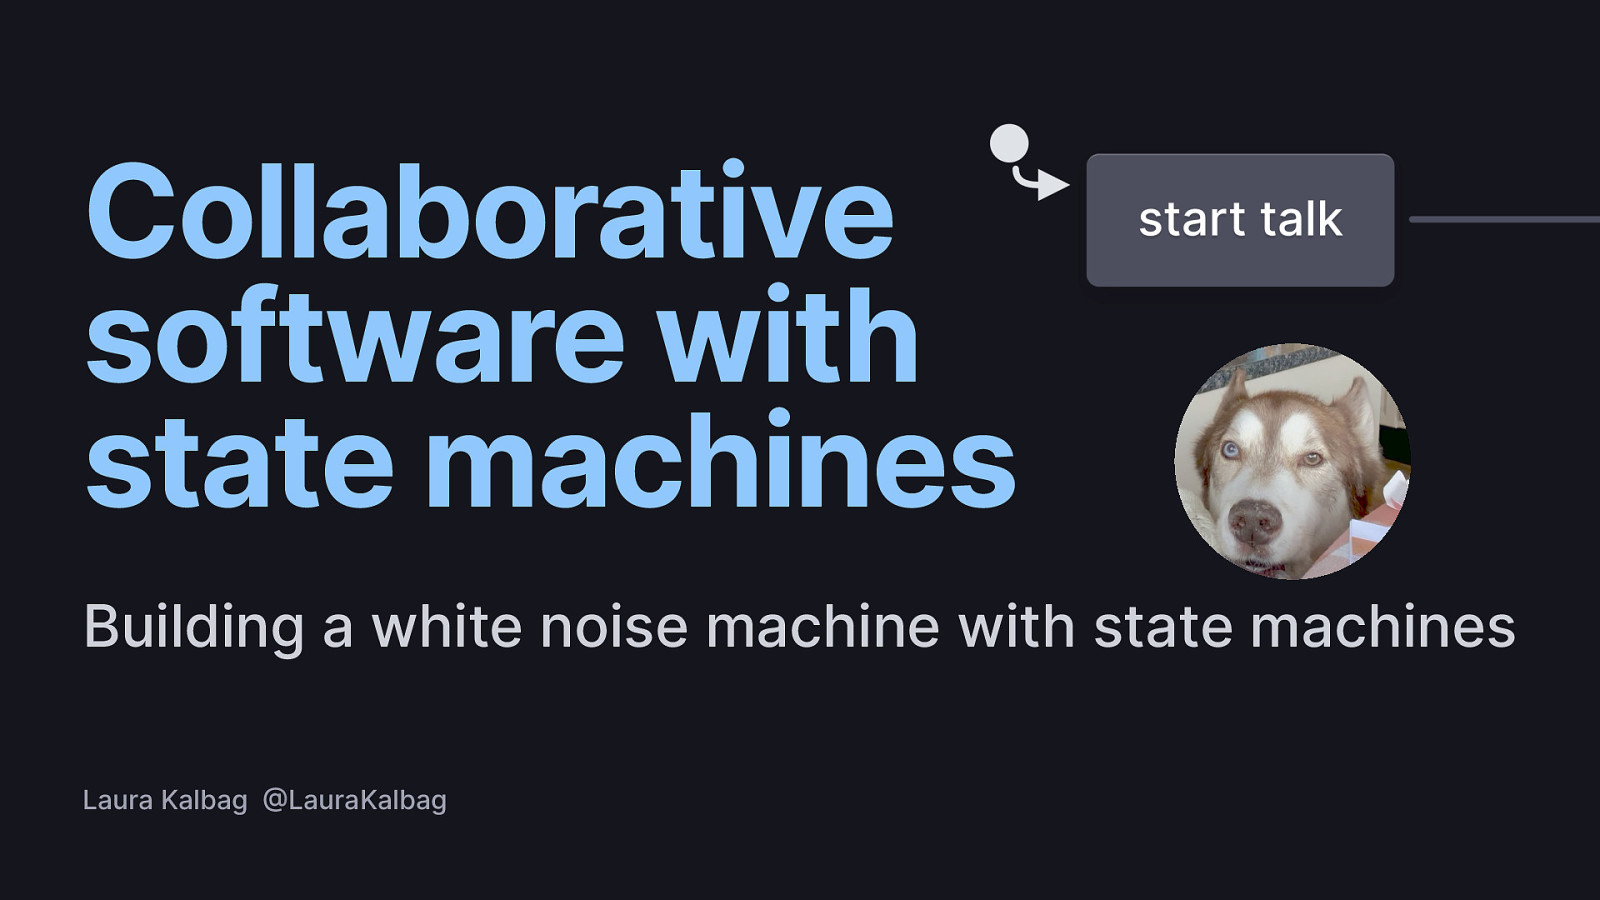
Collaborative software with state machines
Building a white noise machine with state machines
Laura Kalbag - @LauraKalbag

A presentation at WeyWeyWeb in November 2023 in Málaga, Spain by Laura Kalbag
Building a white noise machine with state machines
Laura Kalbag - @LauraKalbag
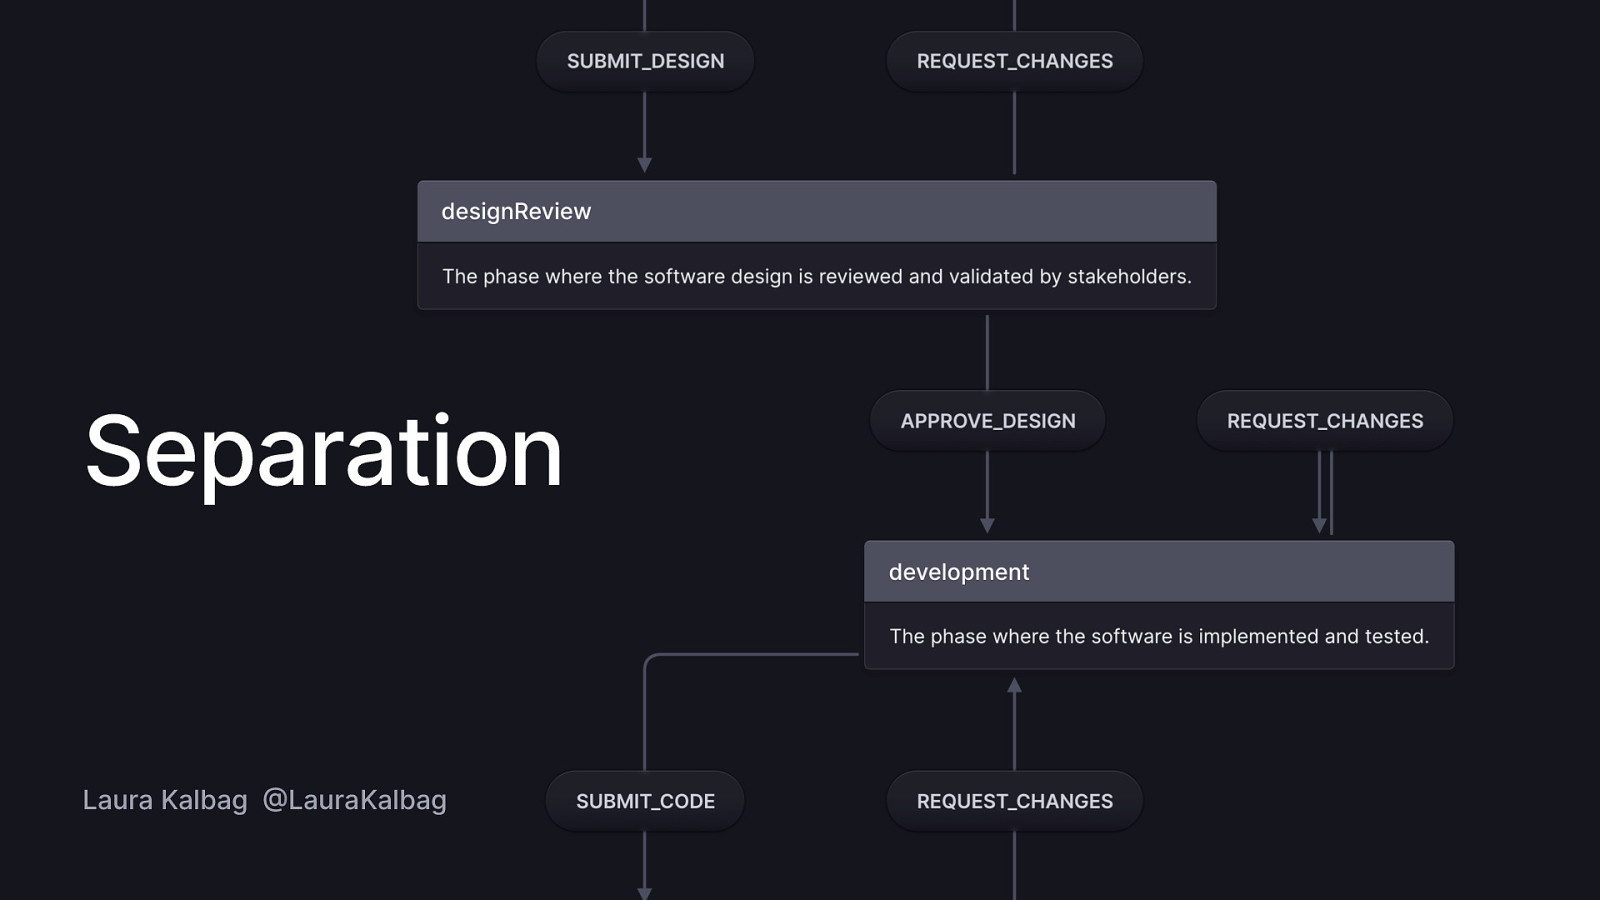
I’ve been working in tech for 15 years with a variety of teams. I’ve worked in design, development, both managing projects and working for managers. And one of my biggest pet peeves is the separation created between our areas of expertise when there’s realistically so much overlap. So often we are doing bits of each others’ work; a designer makes decisions that impact engineering, engineers frequently make design decisions (including filling in missing details from mockups.) Project managers do the same! And we’re all constantly passing documents around with feedback and requirements.
And sure there’s better ways to communicate; processes we can employ, egos we can set aside. But sometimes we just need tools to help us get there faster. And because I’m all about uniting developers and designers, we’re going to talk about something that affects us all: managing your application logic.
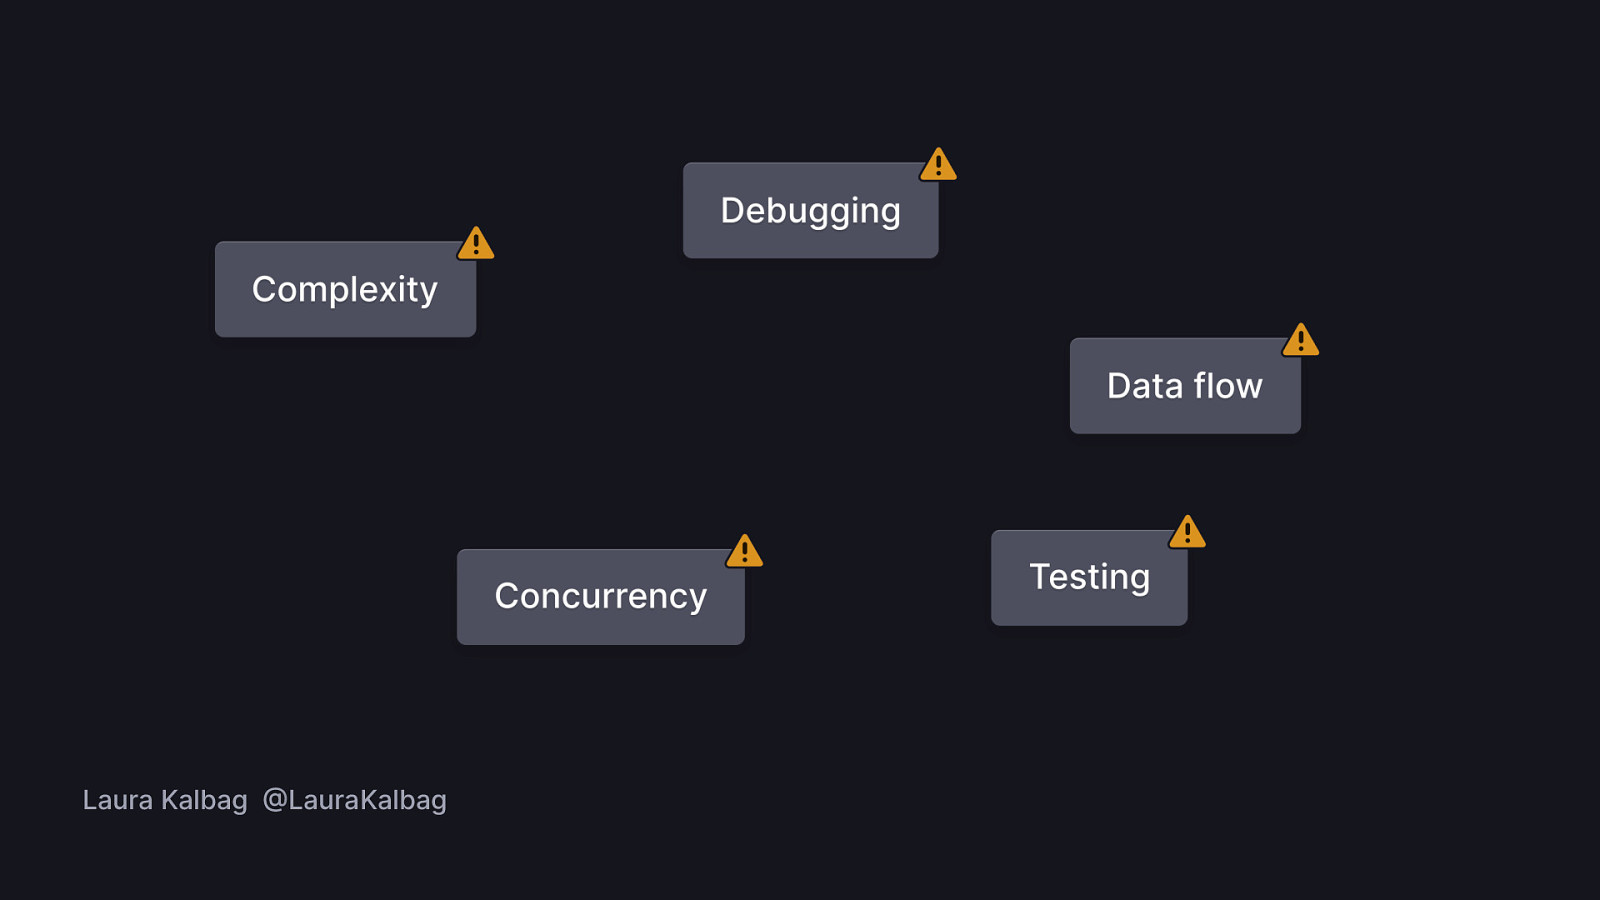
Let’s start off with some issues we find around state management:
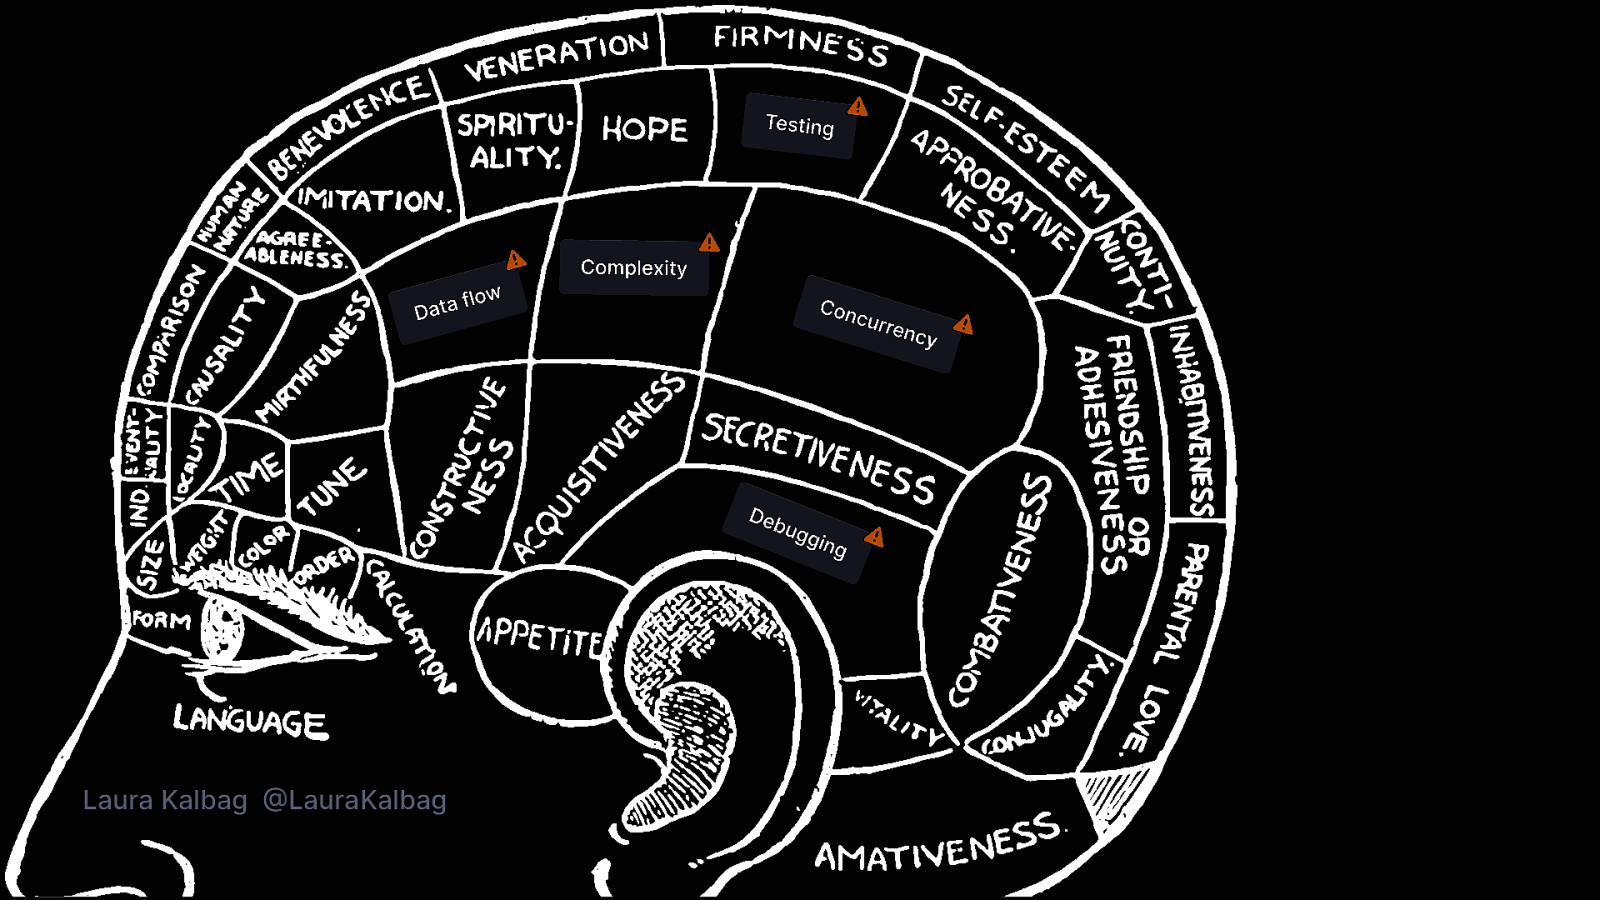
Let’s be honest, a lot of the time, the sum of your app logic is essentially stored in the engineer’s head. (And it really isn’t easy to communicate the stuff that’s stored in your head!) (Especially if you’re out of office or get another job!)
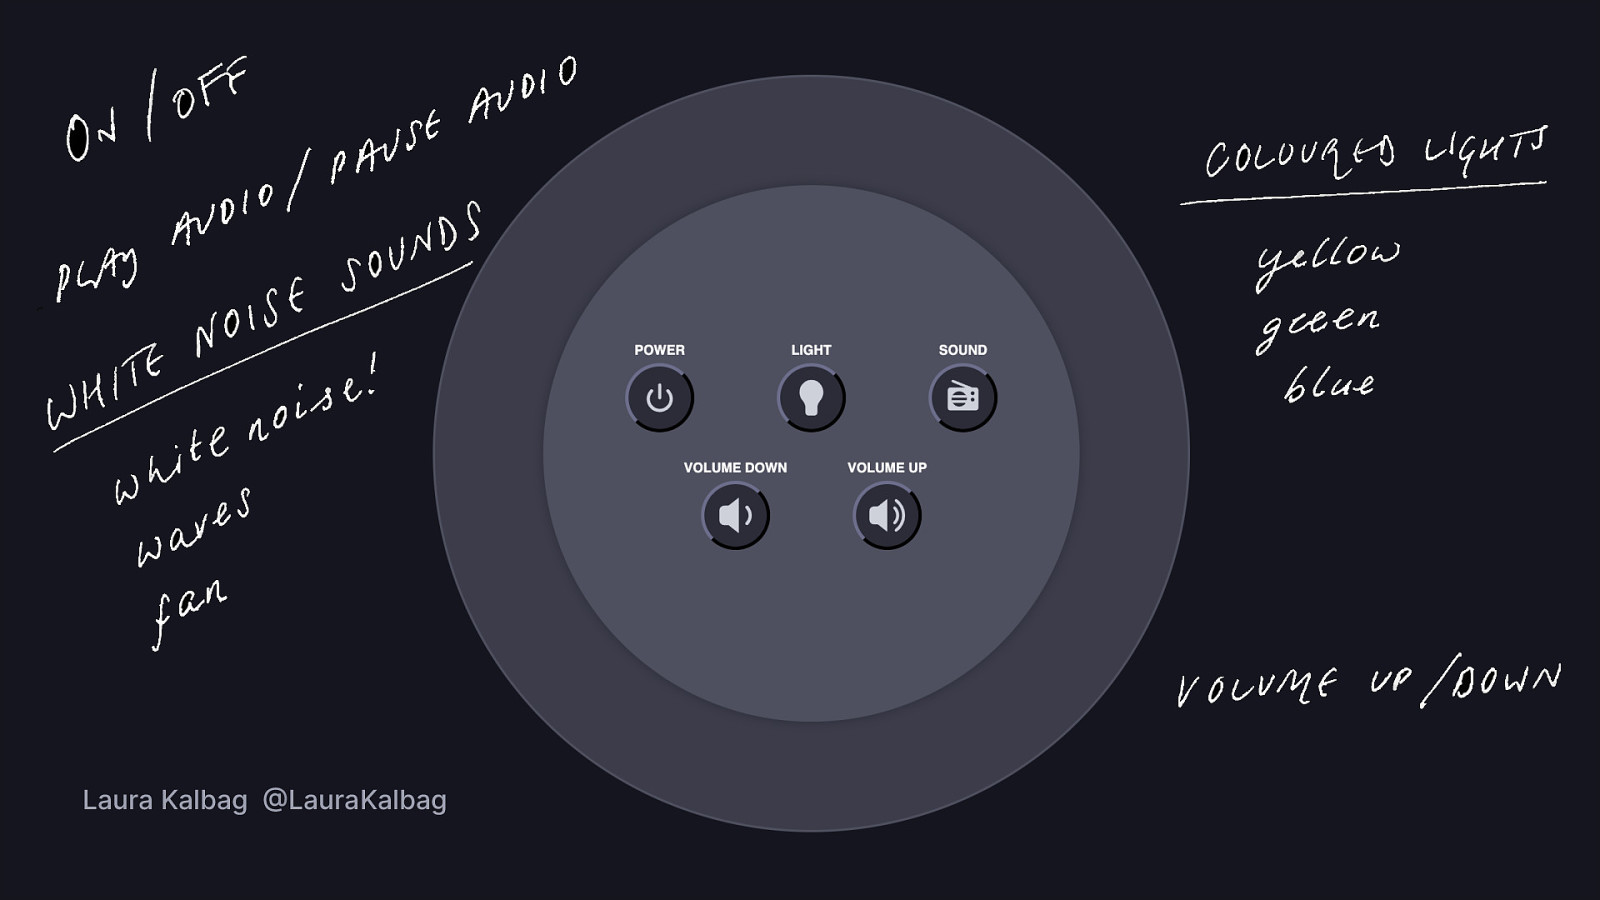
So here’s my white noise machine app. I wanted to make a white noise machine after I got one to help soothe my dog’s anxiety during fireworks and thunderstorms And thinking about what my state situation might look like:
This is already getting pretty complicated, so what tools am I going to recommend? (The clue is in the title of my talk!)

Enter finite state machines. A finite state machine is a model that can only be in one state at a time. For example playing and paused are both states. And a state machine can change from one state to another in response to an input. A play event could be your event, or pause.
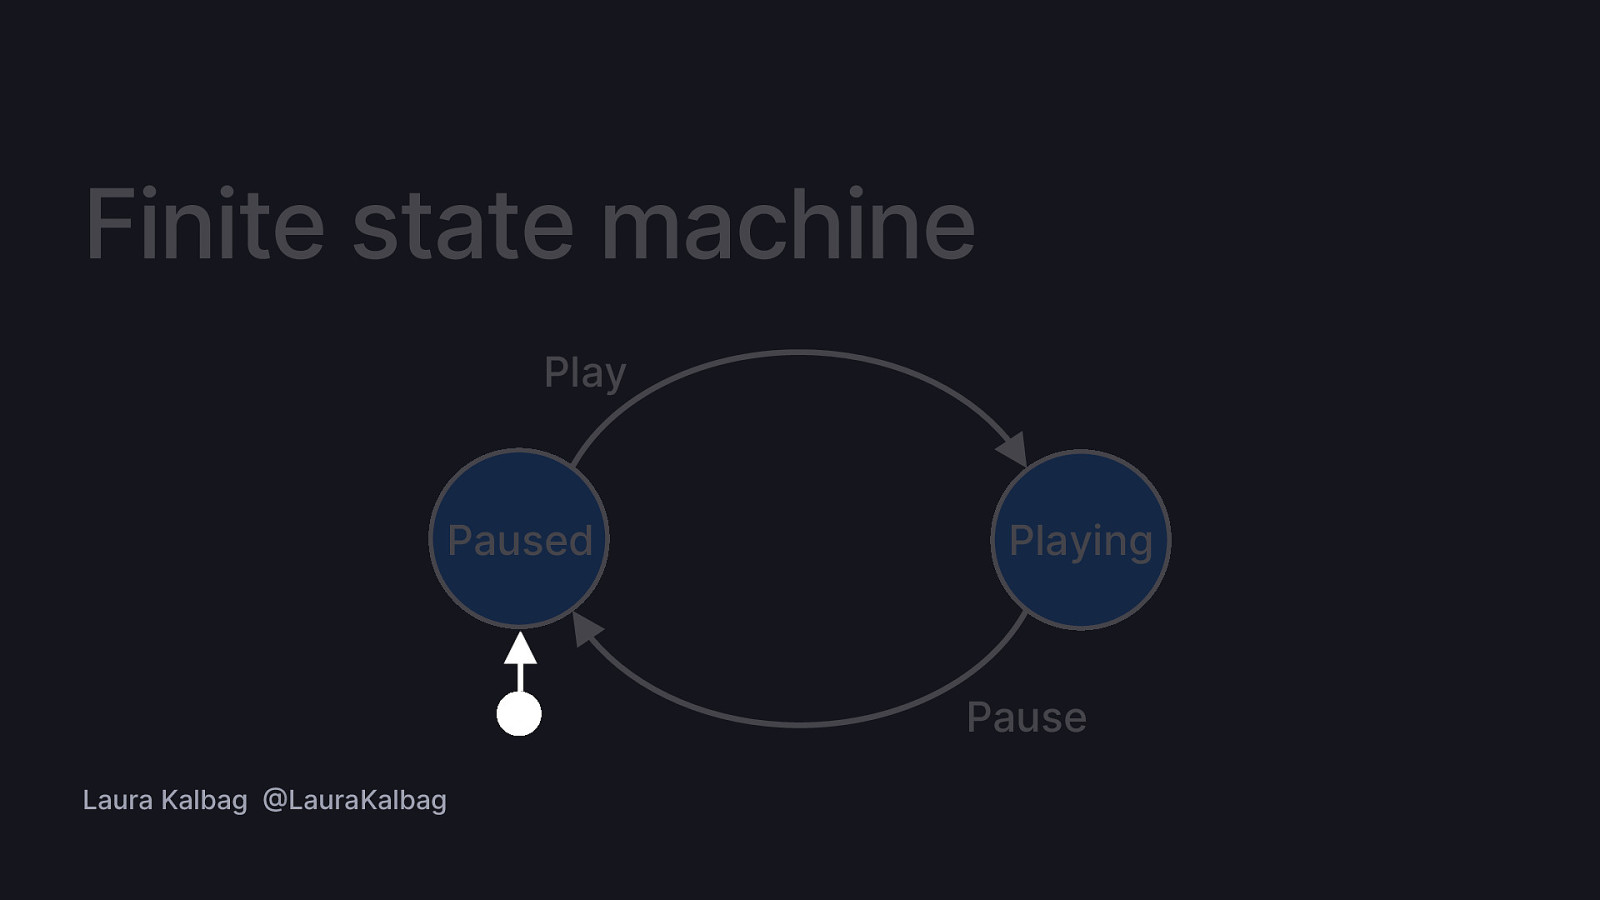
This icon (a circle with an arrow pointing away from it) is the initial state and it indicates which state the machine should start in. The arrow points to the initial state.

State machines are also an excellent visual representation of what your code should be doing. So I’m going to create a state machine for my white noise app!

Now despite the frontend-yness of my example, state machines can be used anywhere in your stack. And I’ll show you some more examples later.

Modelling the state machine. You can find my state machine link in the Resources section!
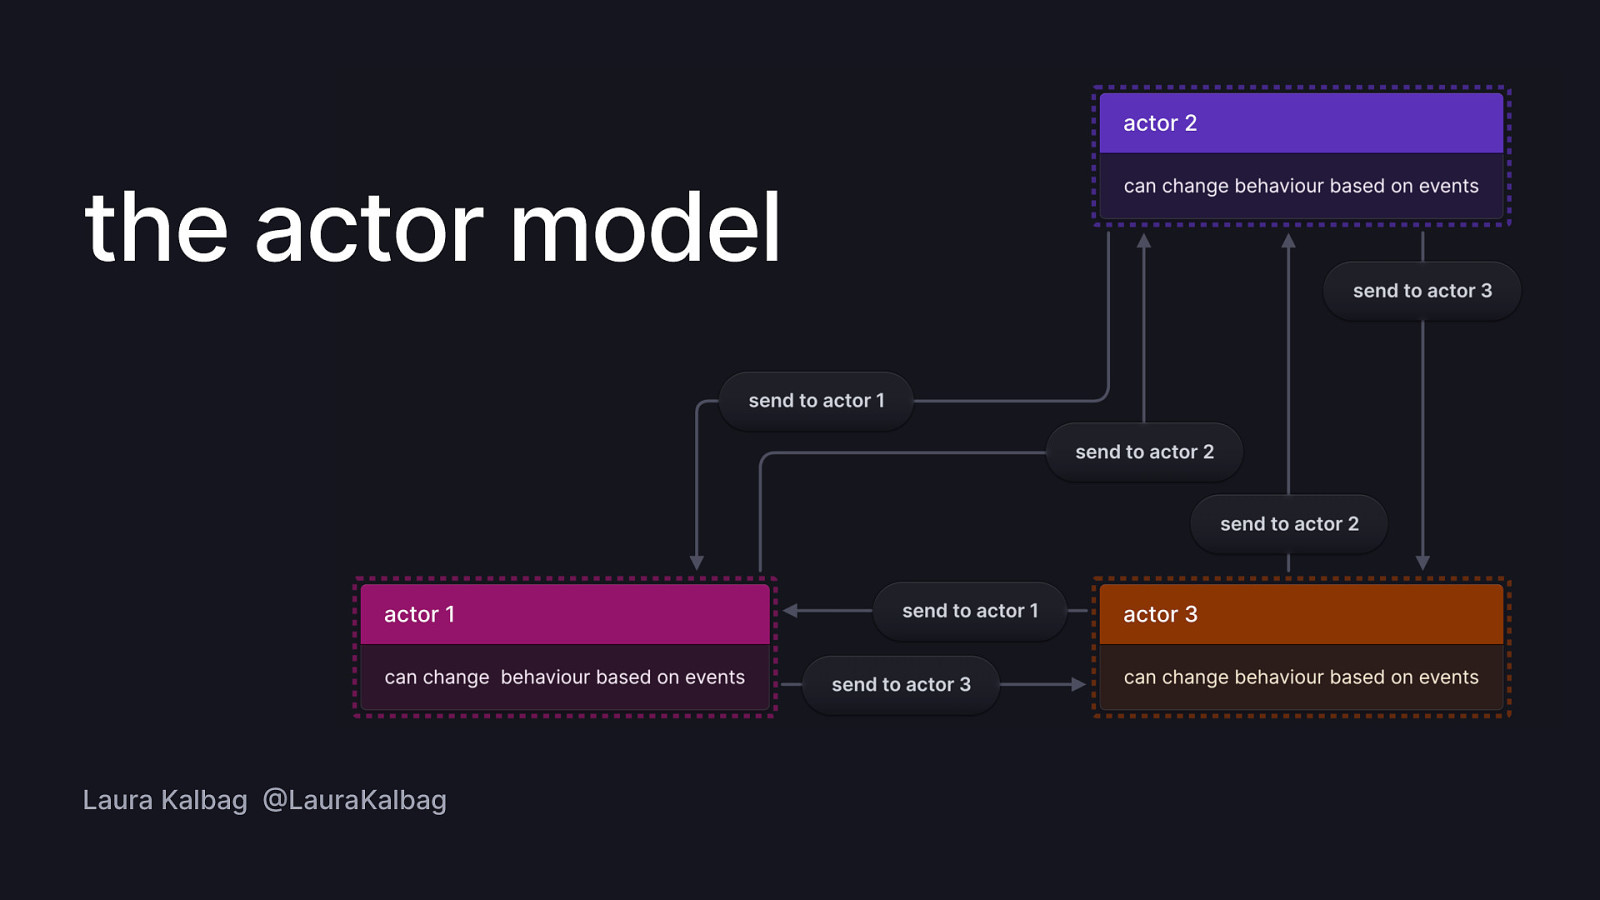
Another concept that works really well with statecharts is the actor model where everything in the system is an actor. An actor can send and receive events and change its behaviour based on those events. So we can make our logic more modular and maintainable by breaking it into actors that communicate with each other.
Basically when each statechart is running, it is an actor.

Modelling the state machine. You can find my state machine link in the Resources section!
I said earlier that statecharts can be used anywhere in your stack. And now hopefully you can see the potential for state machines for your UI. And here’s some backend workflow statecharts.
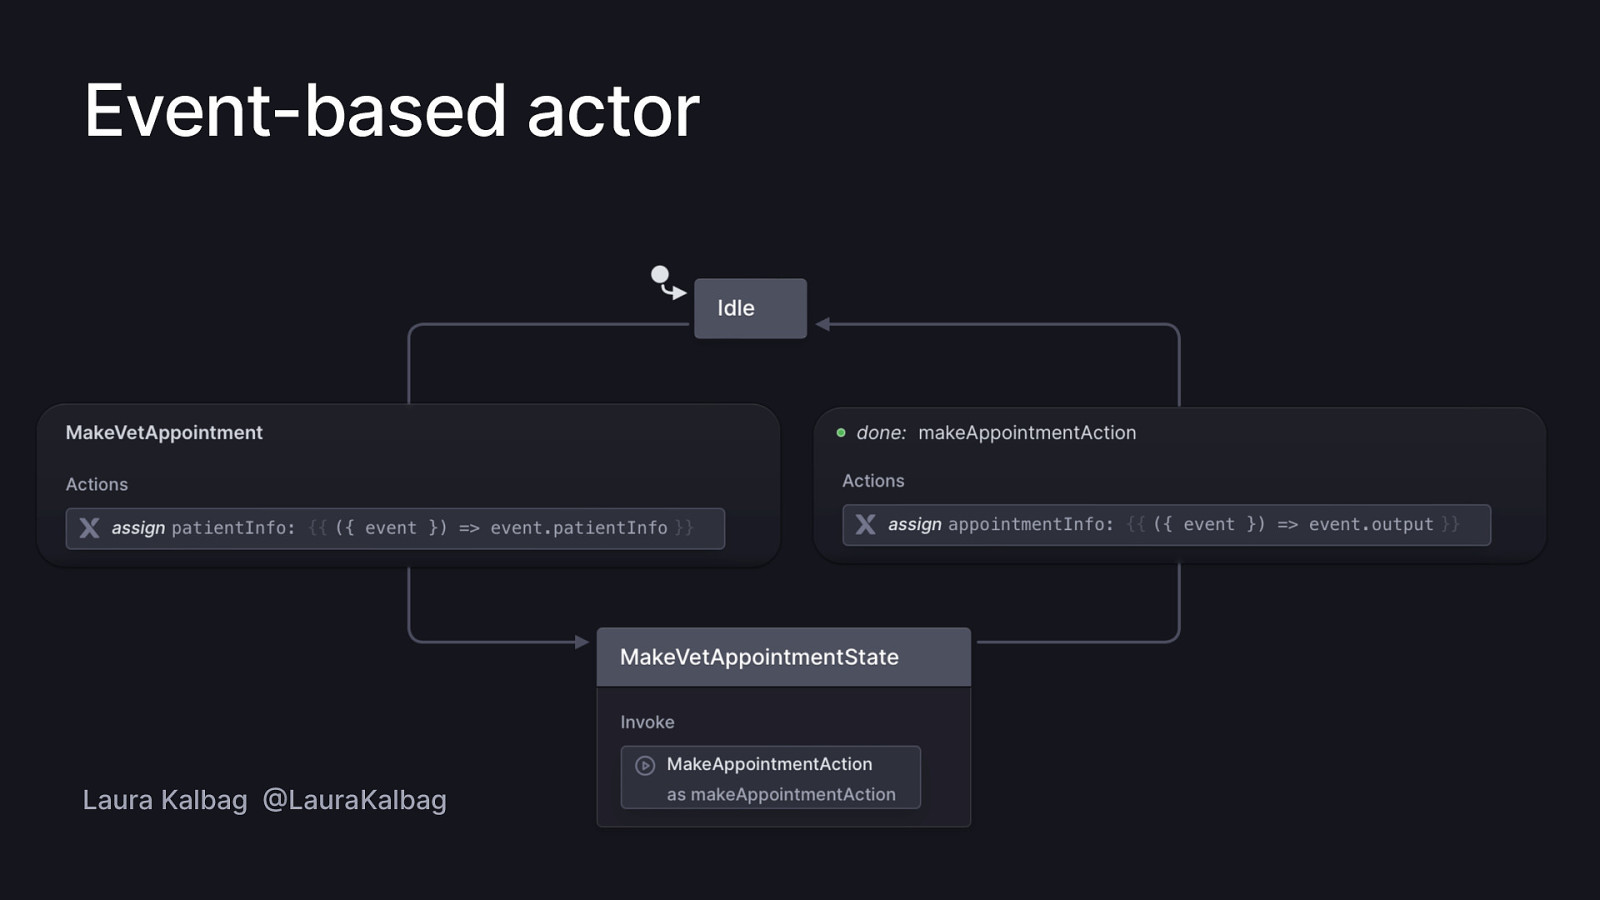
Here’s an event-based actor… It’s a common example of container environments where some of your services (aka actors) may not be exposed via a resource URI, and are accessible by submitting an event to the underlying container events manager.
This state machine represents a workflow for making a vet appointment. It starts in the “Idle” state, where it waits for a “MakeVetAppointment” event. When this event occurs, it transitions to the “MakeVetAppointmentState” state and triggers an action to make the appointment. Once the appointment is successfully made, it transitions back to the “Idle” state and stores the appointment information.
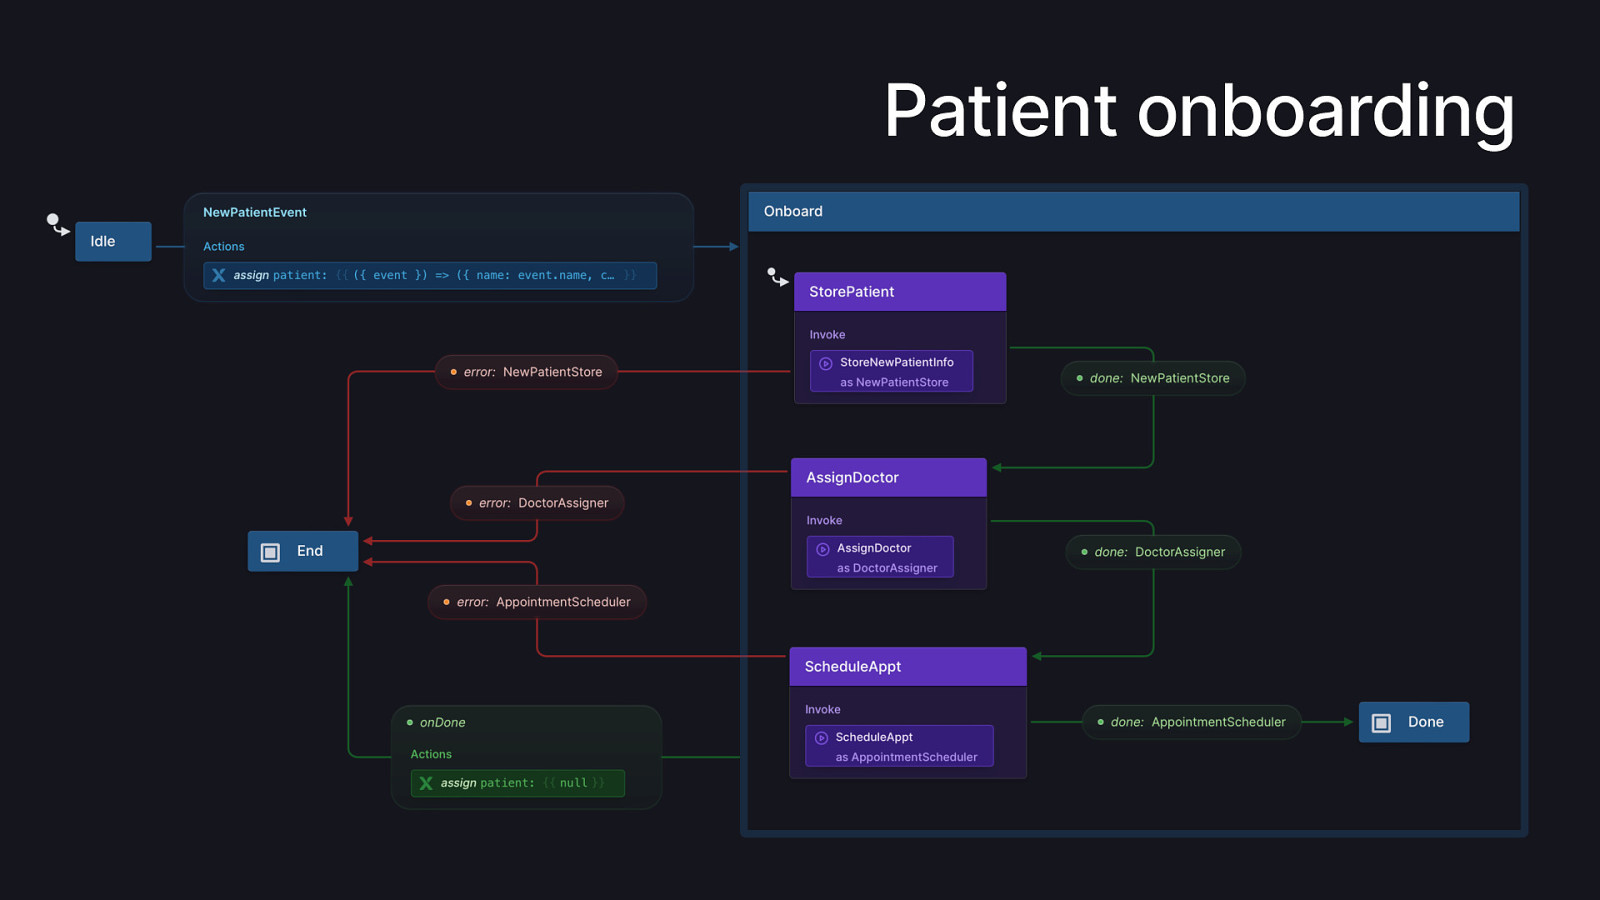
Here’s patient onboarding, where we might want to invoke three services (actors) simultaneously.
This state machine represents a patient onboarding process in a hospital or clinic. It helps guide the steps needed to onboard a new patient. The machine has different states that represent different stages of the onboarding process. The initial state is “Idle”, where the machine waits for a “NewPatientEvent” to be triggered. When the event is received, the machine moves to the “Onboard” state and stores the patient’s information. In the “Onboard” state, there are three sub-states: “StorePatient”, “AssignDoctor”, and “ScheduleAppt”. Each sub-state represents a specific task in the onboarding process. The “StorePatient” sub-state invokes a service called “StoreNewPatientInfo” to store the patient’s information. If the service is successful, the machine moves to the “AssignDoctor” sub-state. If there is an error, the machine goes to the “End” state. The “AssignDoctor” sub-state invokes a service called “AssignDoctor” to assign a doctor to the patient. If the service is successful, the machine moves to the “ScheduleAppt” sub-state. If there is an error, the machine goes to the “End” state. The “ScheduleAppt” sub-state invokes a service called “ScheduleAppt” to schedule an appointment for the patient. If the service is successful, the machine moves to the “Done” sub-state. If there is an error, the machine goes to the “End” state. Finally, when the onboarding process is completed, the machine moves to the “End” state, which represents the end of the process.
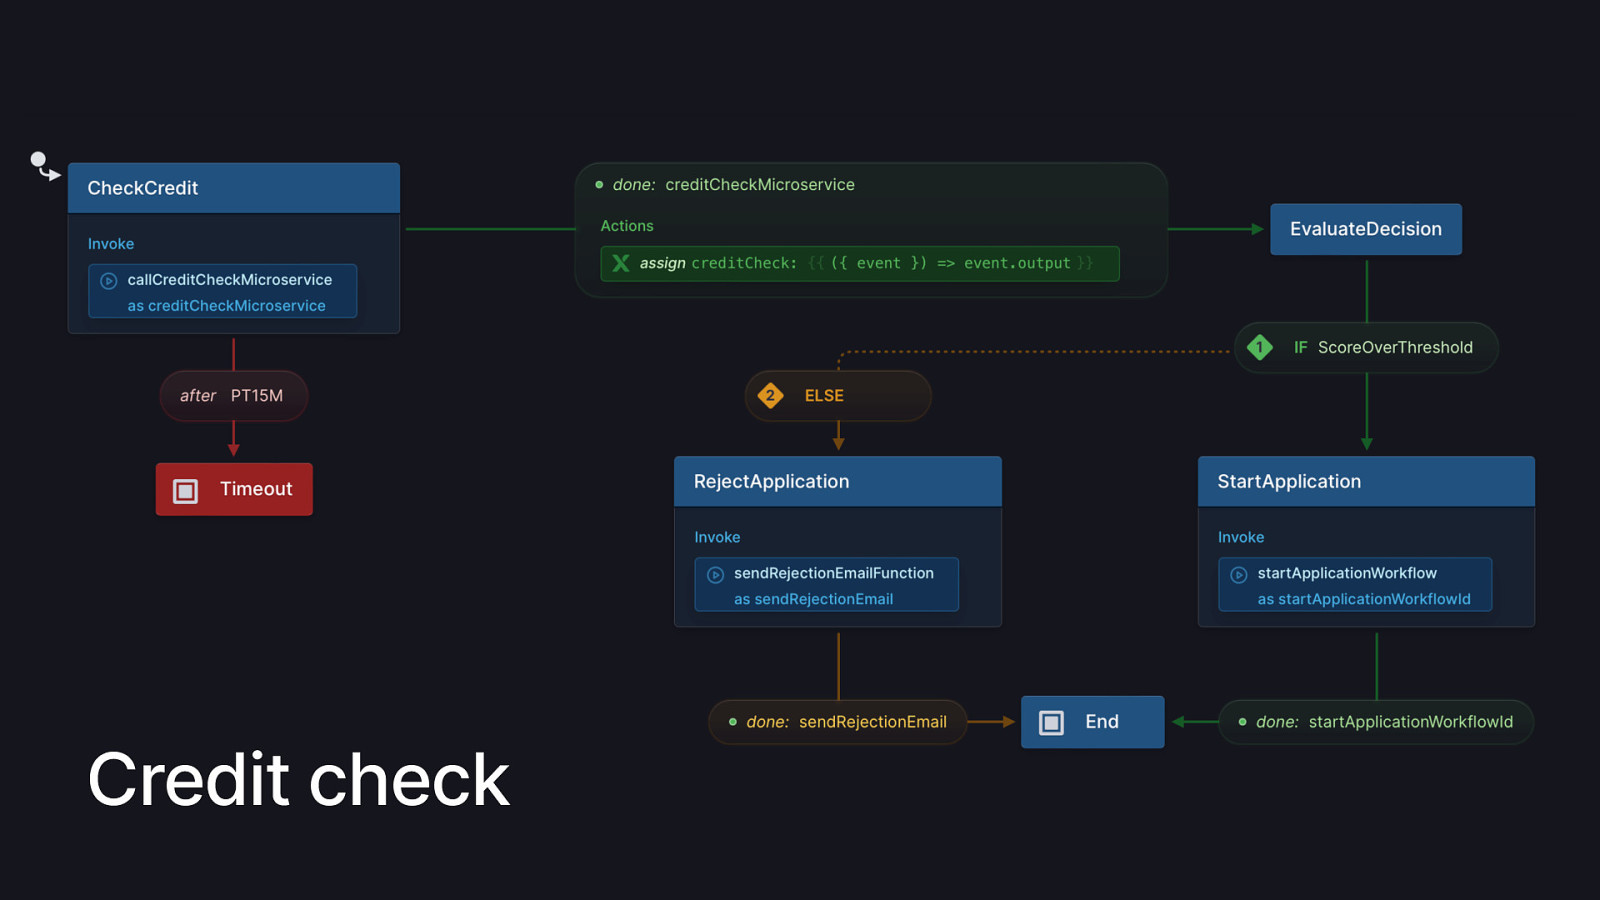
And here is a serverless workflow where you need to integrate with an external microservice to perform a credit check.
This state machine represents a simple workflow for a credit checking application process. It shows the different states and events involved in the process. The states are represented by blue color, the “happy” path events are in green, alternative paths are in yellow, and “failure” events and states are in red. The workflow starts with the “CheckCredit” state, where a credit check microservice is invoked. After a delay of 15 minutes, if the credit check is not completed, the workflow moves to the “Timeout” state. If the credit check is completed successfully, the workflow moves to the “EvaluateDecision” state. Here, based on the credit score, the workflow either transitions to the “StartApplication” state if the score is above a certain threshold, or to the “RejectApplication” state if the score is below the threshold. In the “StartApplication” state, an application workflow is started, and in the “RejectApplication” state, a rejection email is sent. Finally, the workflow ends in the “End” state. This state machine demonstrates concepts like delays, invocations, guarded transitions, and different states and events in a credit checking application process.
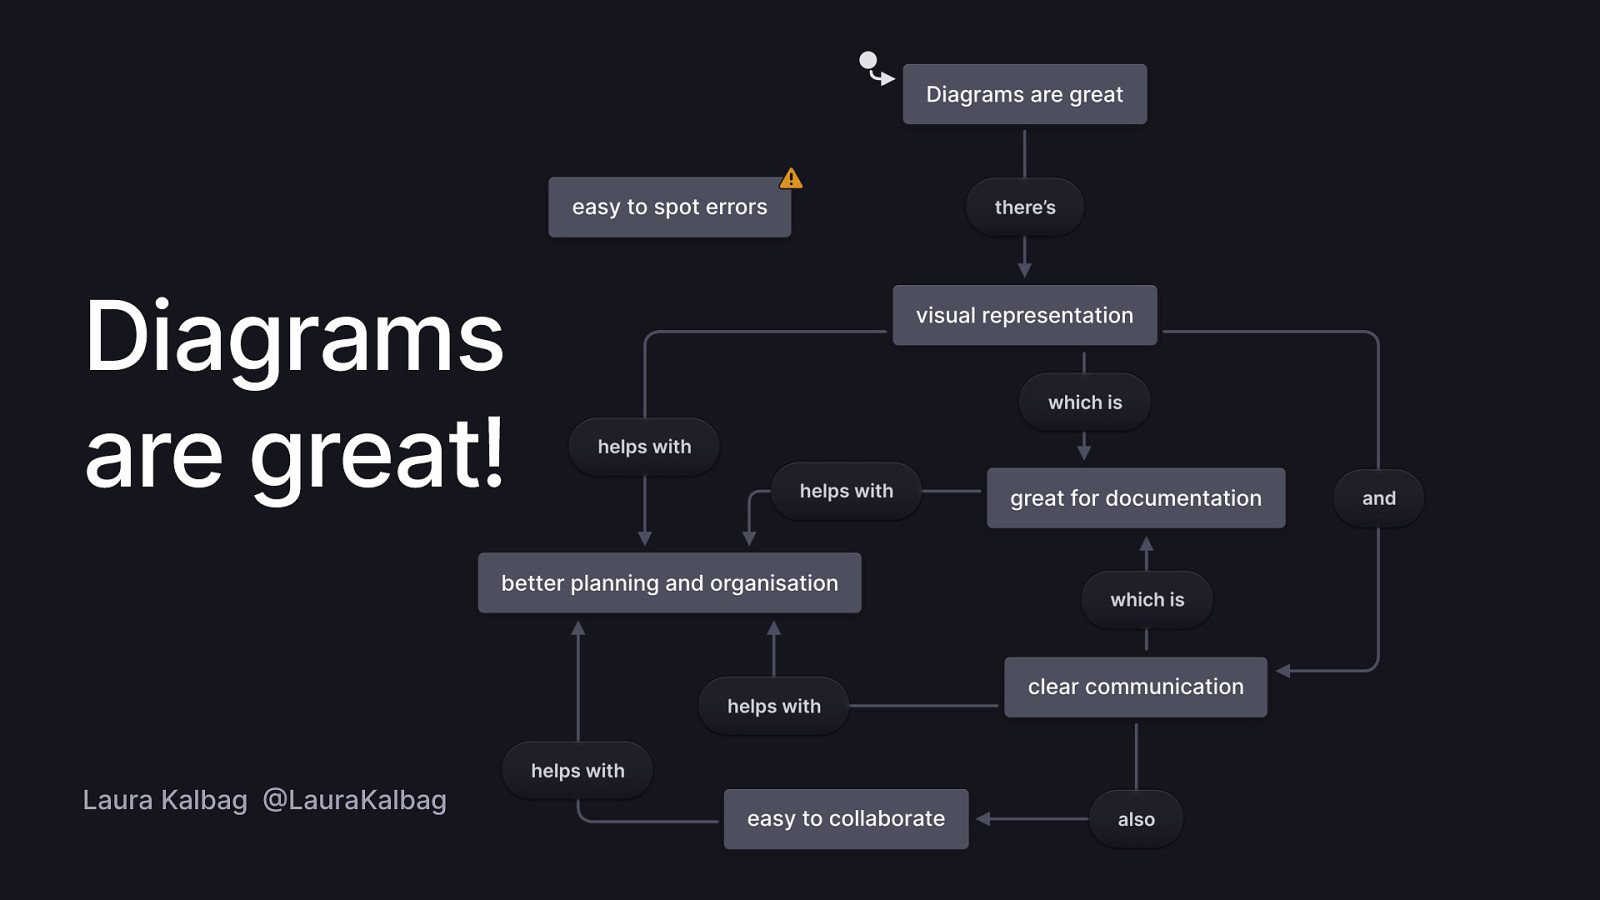
Through this demo you might start thinking “wow, this is easy to understand”, “Laura doesn’t even have to explain much”, “even Jim would understand this…” It’s because diagrams are great! There’s visual representation of code and clear communication, so it’s also easy to collaborate and easy to spot errors, which is great for documentation, and all this helps with better planning and organisation.
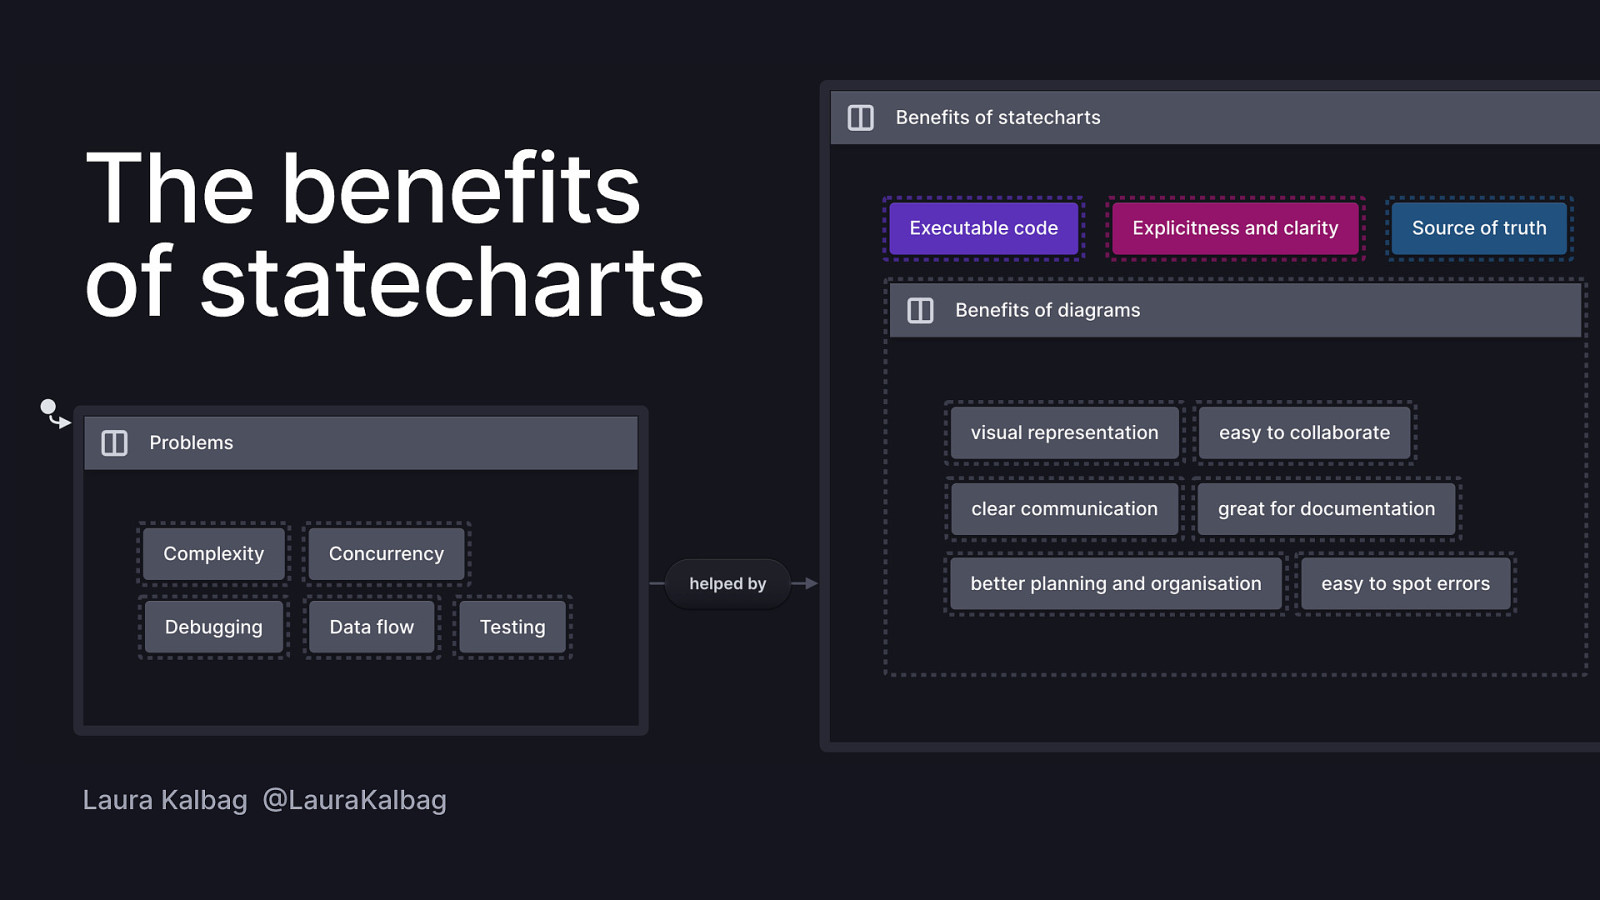
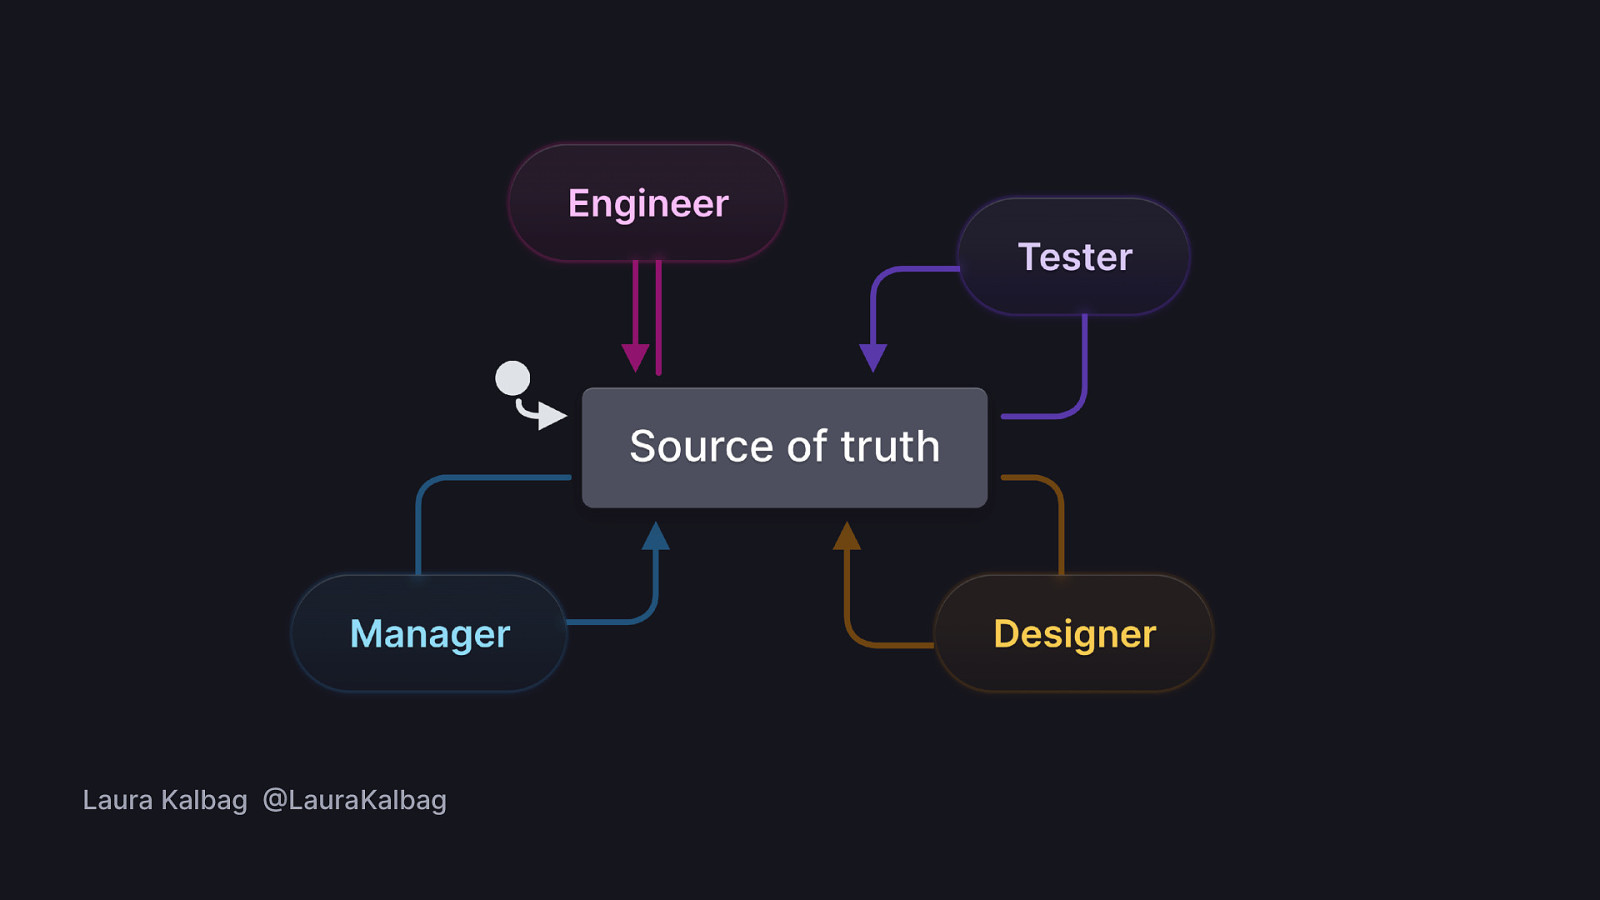
Statecharts provide all the benefits of diagrams but as executable code. Having your application logic be both visual and executable makes for living documentation and a logical source of truth. Everybody understands it, and it can be kept up to date.
Going back to the problems we have in software and development:

Implementing the state machine. You can find my demo code link in the Resources section!
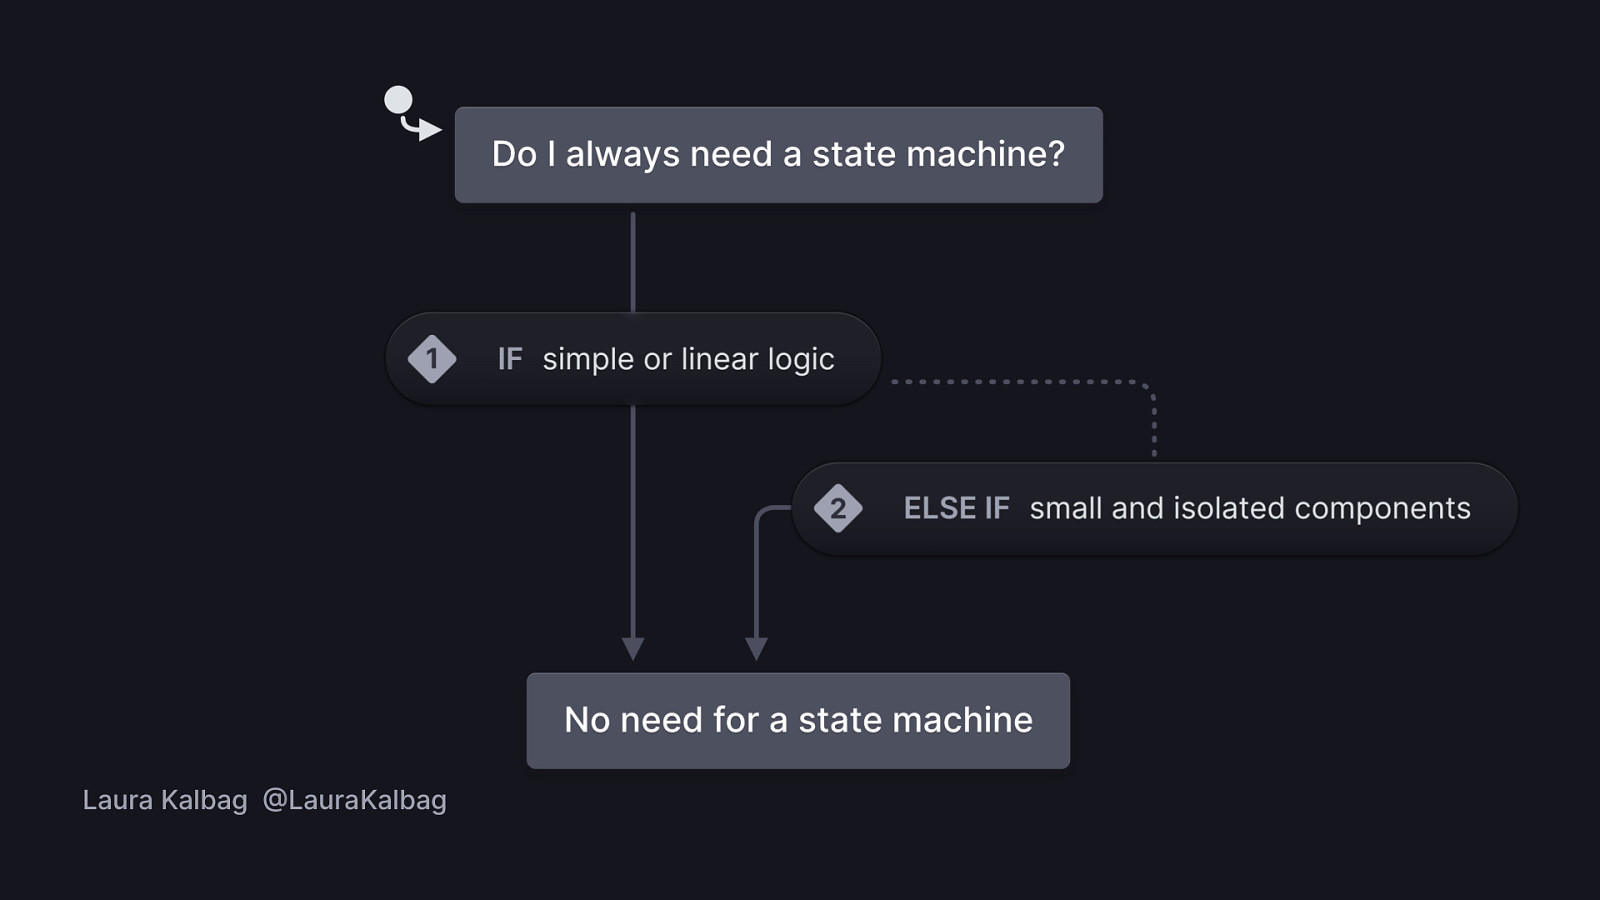
Do you always need a state machine? No, especially if you have simple and linear logic or small and isolated components.
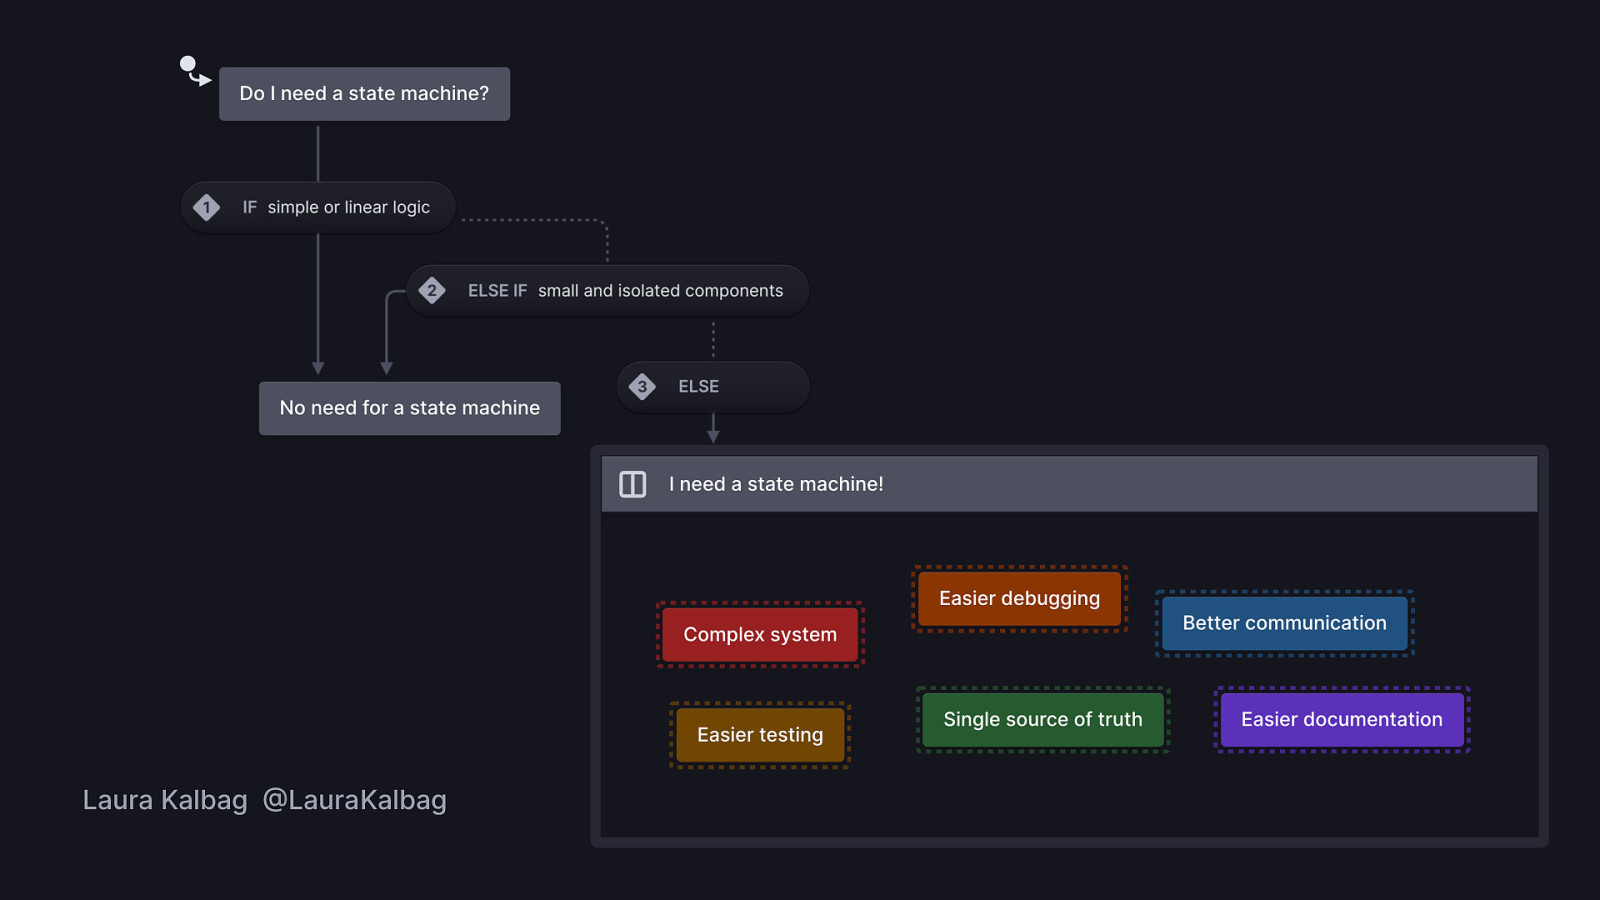
When do you need a state machine or statechart? The rest of the time… 😁 Complex systems, when you want make it easier to document, debug, and test, when you need to be able to communicate your app logic and share one source of truth with your team…
Everyone gets a better night’s sleep with state machines.