Making money with Project Fugu - building a cash register with web technologies

A presentation at HalfStack Vienna in September 2023 in Vienna, Austria by Niels Leenheer

Making money with Project Fugu - building a cash register with web technologies
Hi, my name is Niels Leenheer.

I am the co-founder and CTO of Salonhub.

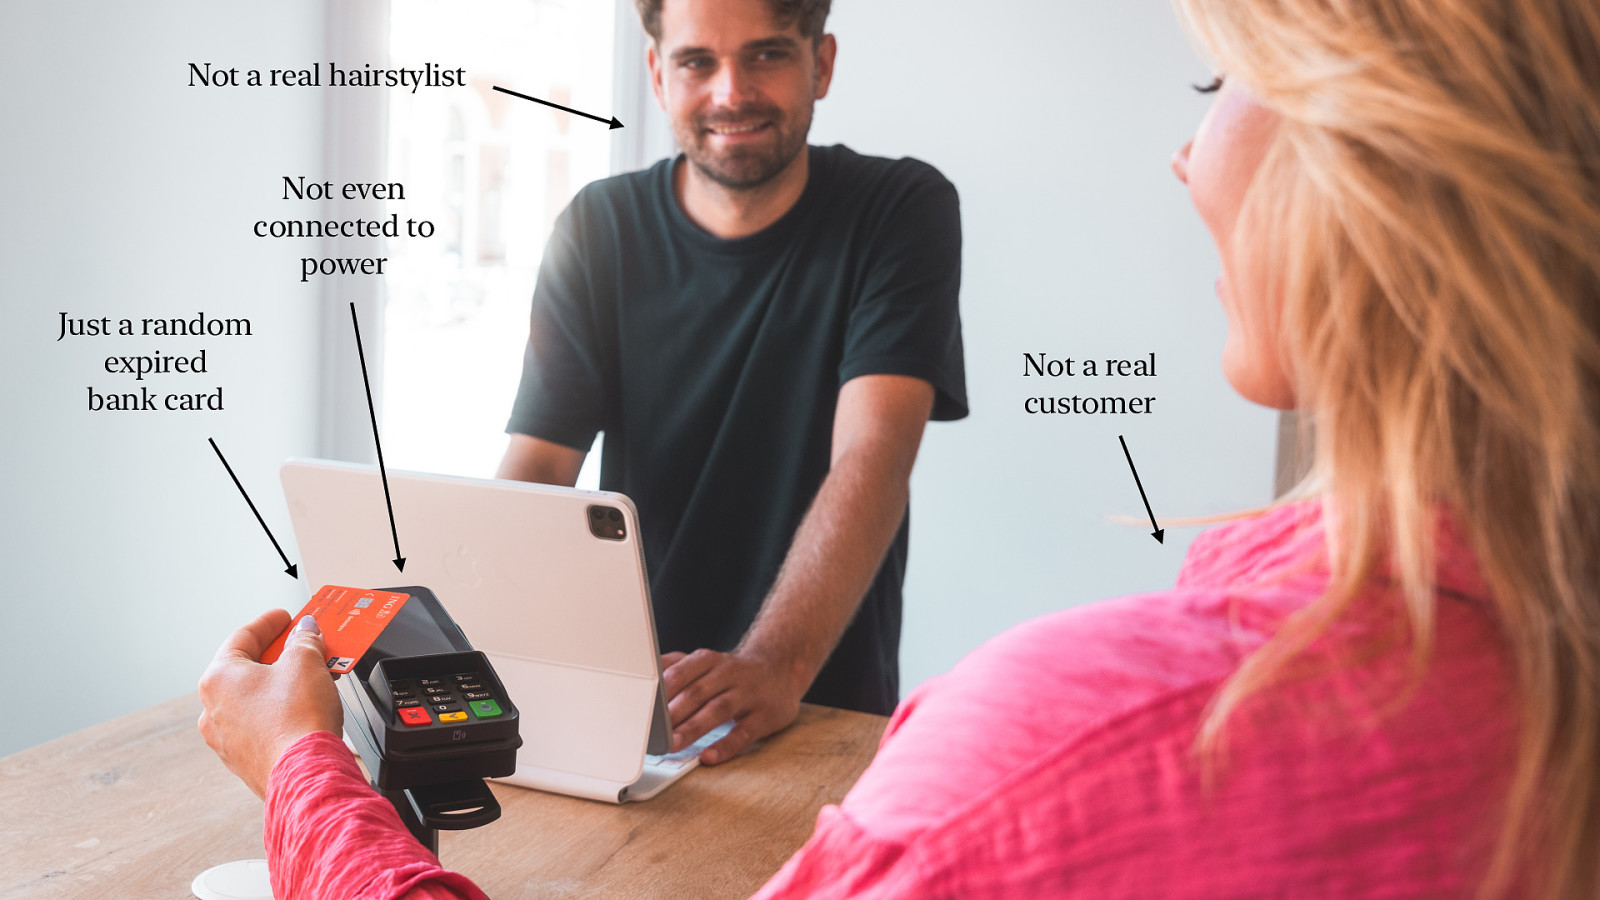
We make software for hair salons. You know the whole point of sale system and appointment booking system. Just look how happy these people are using our system. Clearly we make great software.
I don’t often talk about my job. I’ve done dozens of talks at conferences and often I don’t even mention my work at all. What I usually talk about is WebBluetooth and programming Lego cars with JavaScript. You know, fun stuff. And nobody wants to hear a 30 minute talk about the exiting world of hair styling. But today is an exception. No fun stuff today. Just a lot of frustration about 1980’s technology.
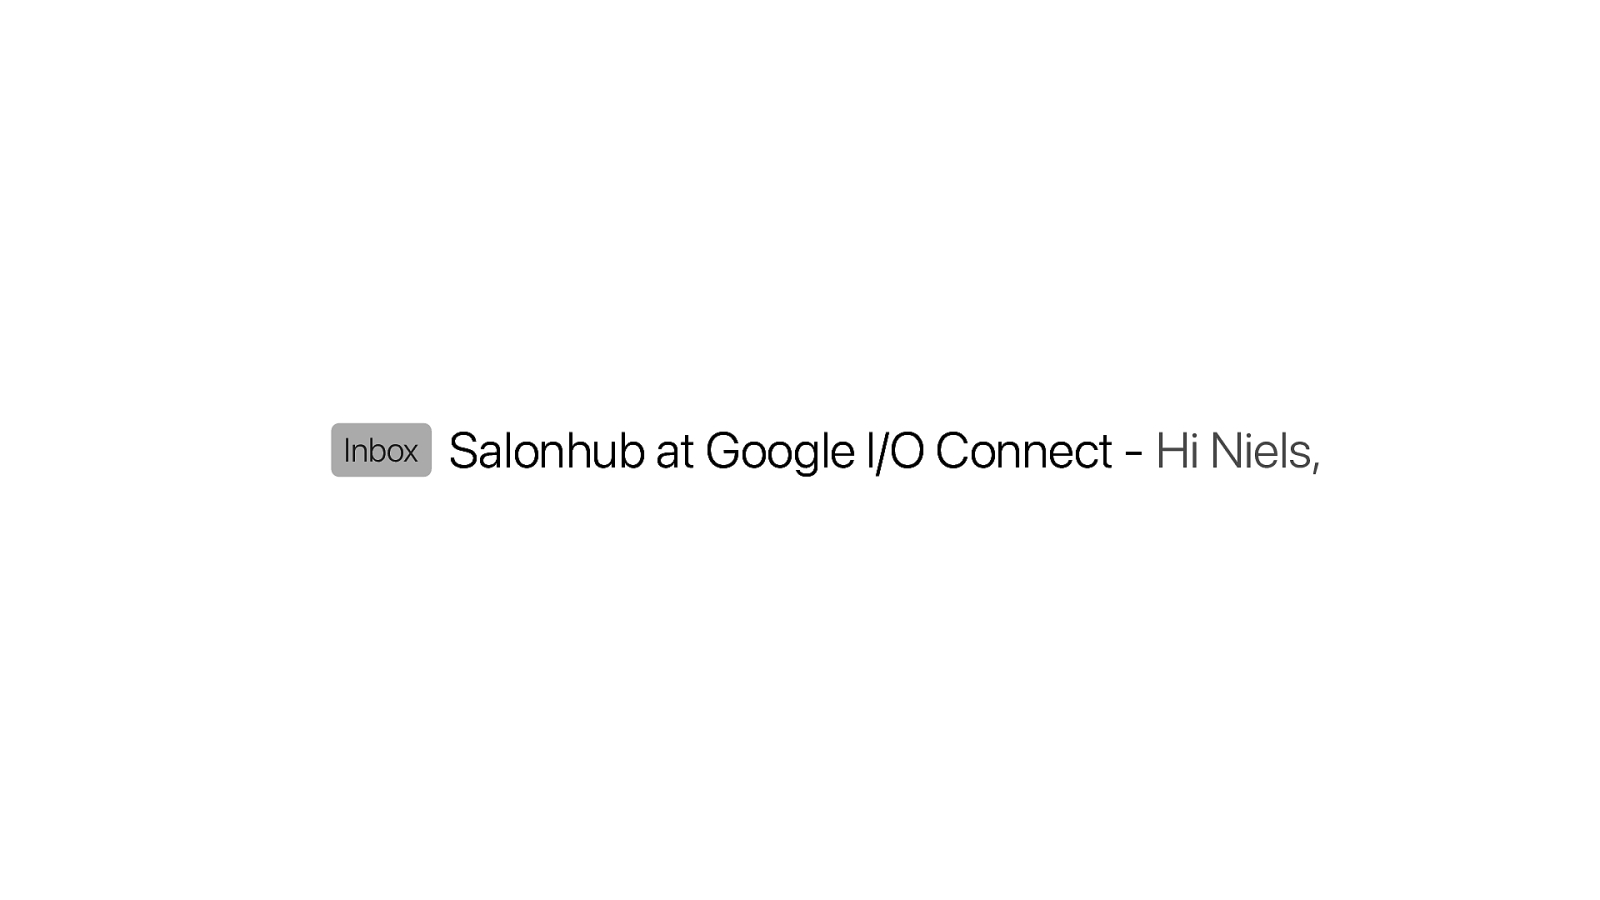
Earlier this year I got this email from Thomas at Google. I am a Google Developer Expert and I’ve spoken with him before about what we do at Salonhub and how I am building a completely browser based version of our cash register.

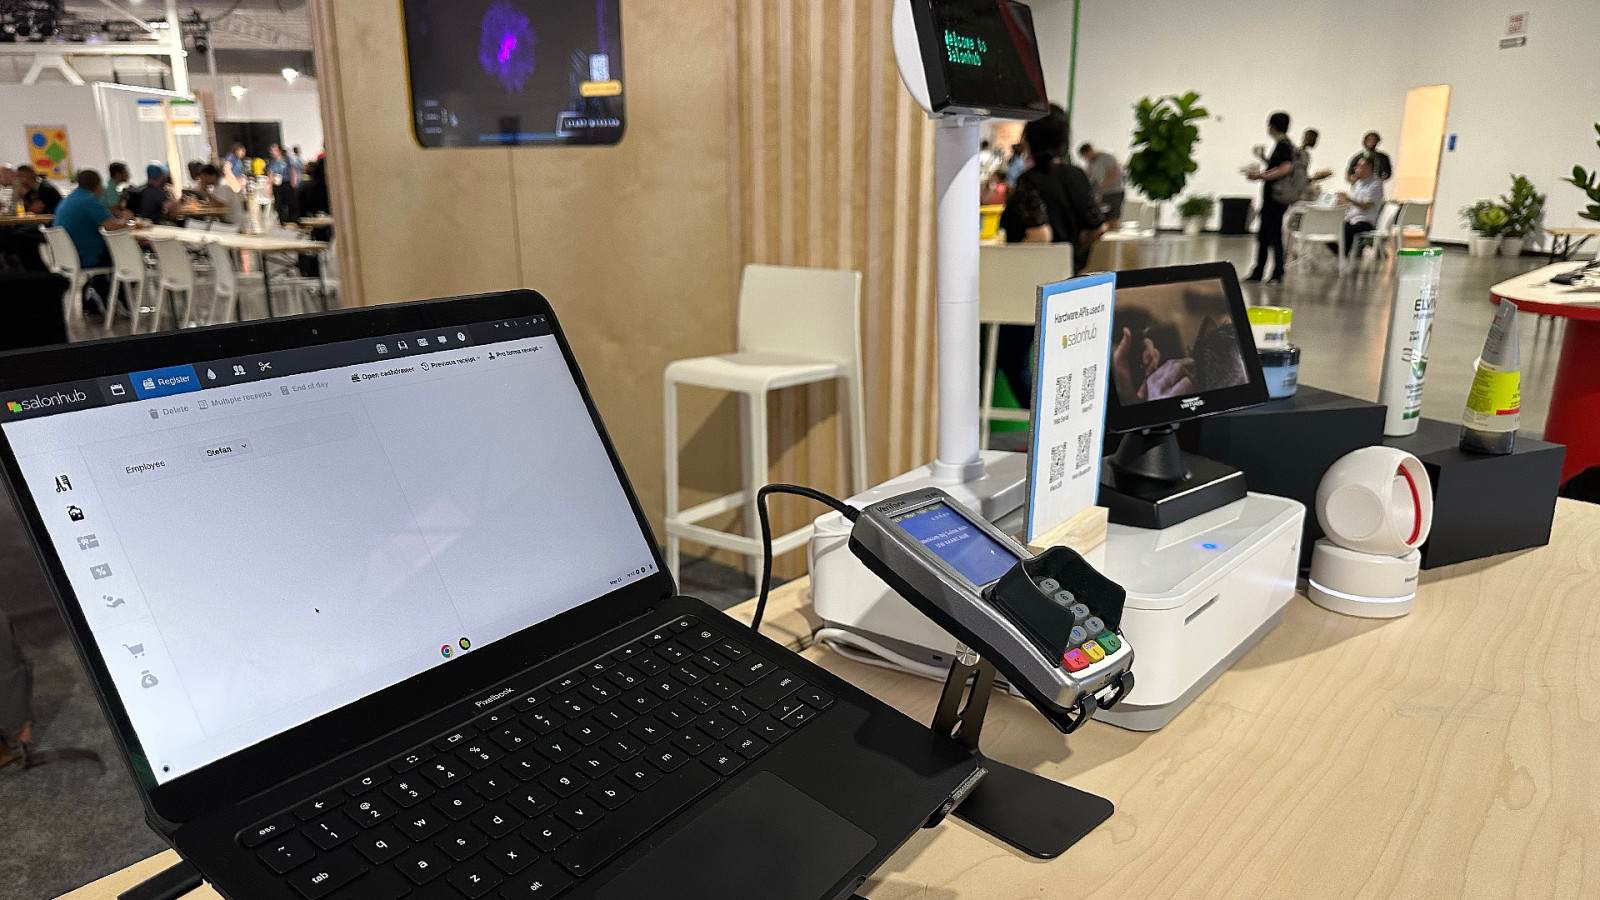
Well, it already is a web app, but what was missing was integrating it with all kinds of Point of Sale devices. You know, barcode scanners, receipt printers, cash drawer, payment terminals and customer displays and screens. We use Electron for that, but we want to move eventually to a PWA.
A couple of years ago that was simply not possible. But it is getting closer and closer. The puzzle pieces are falling in place. Thanks to Project Fugu and…
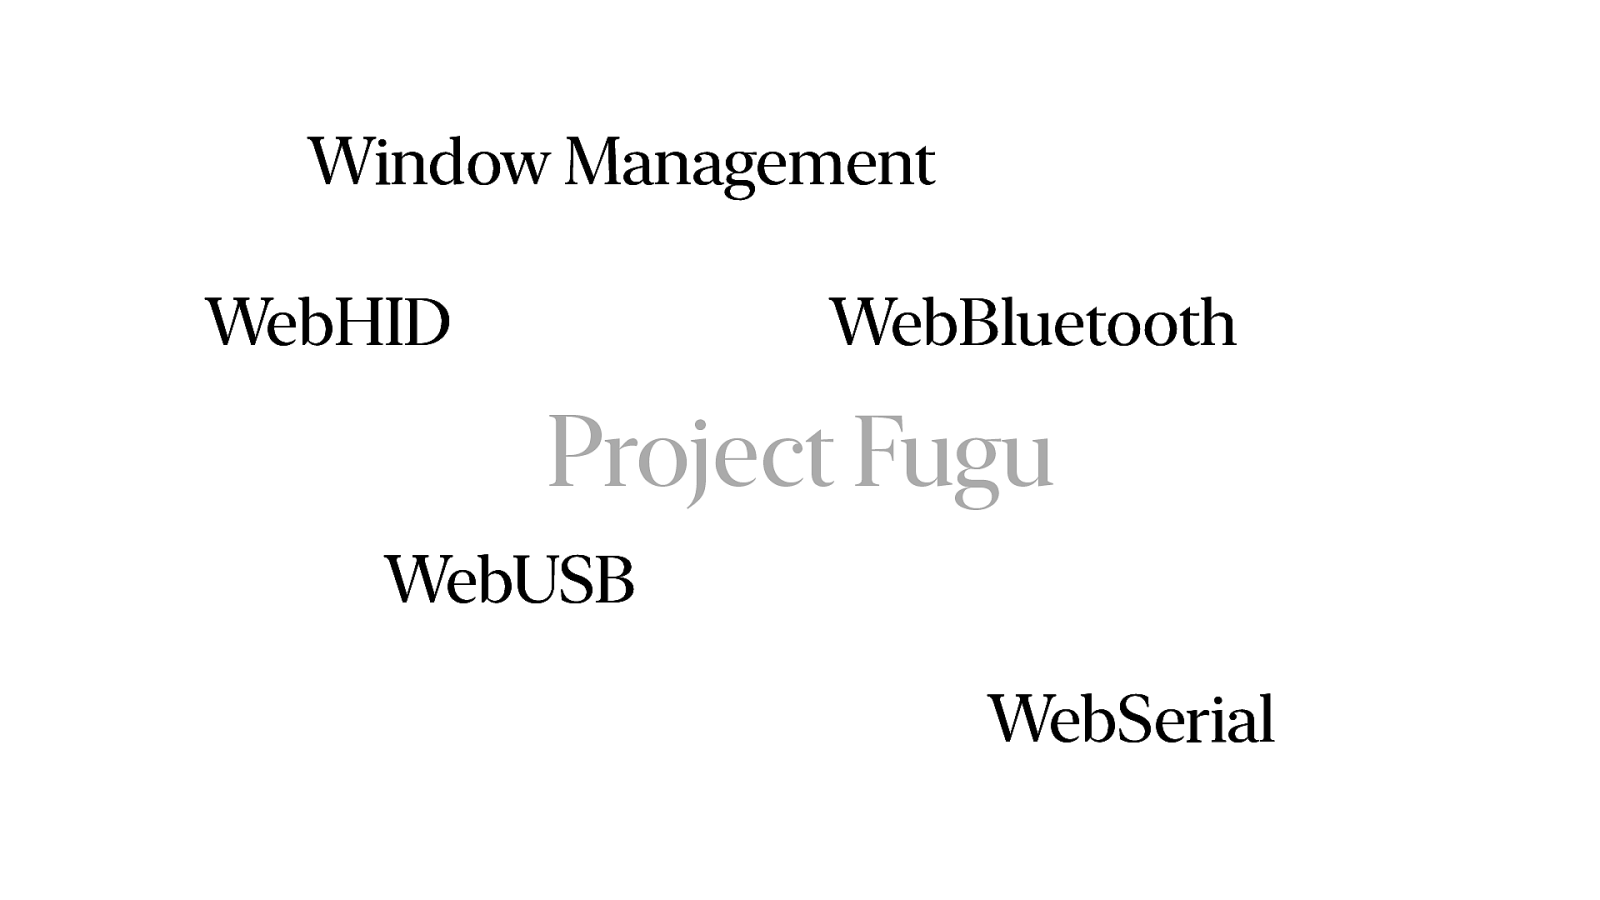
….the various hardware API’s like WebUSB, WebSerial, WebHID and more.
And his question was… could we make a demo version of our product that shows off these API’s and… oh..
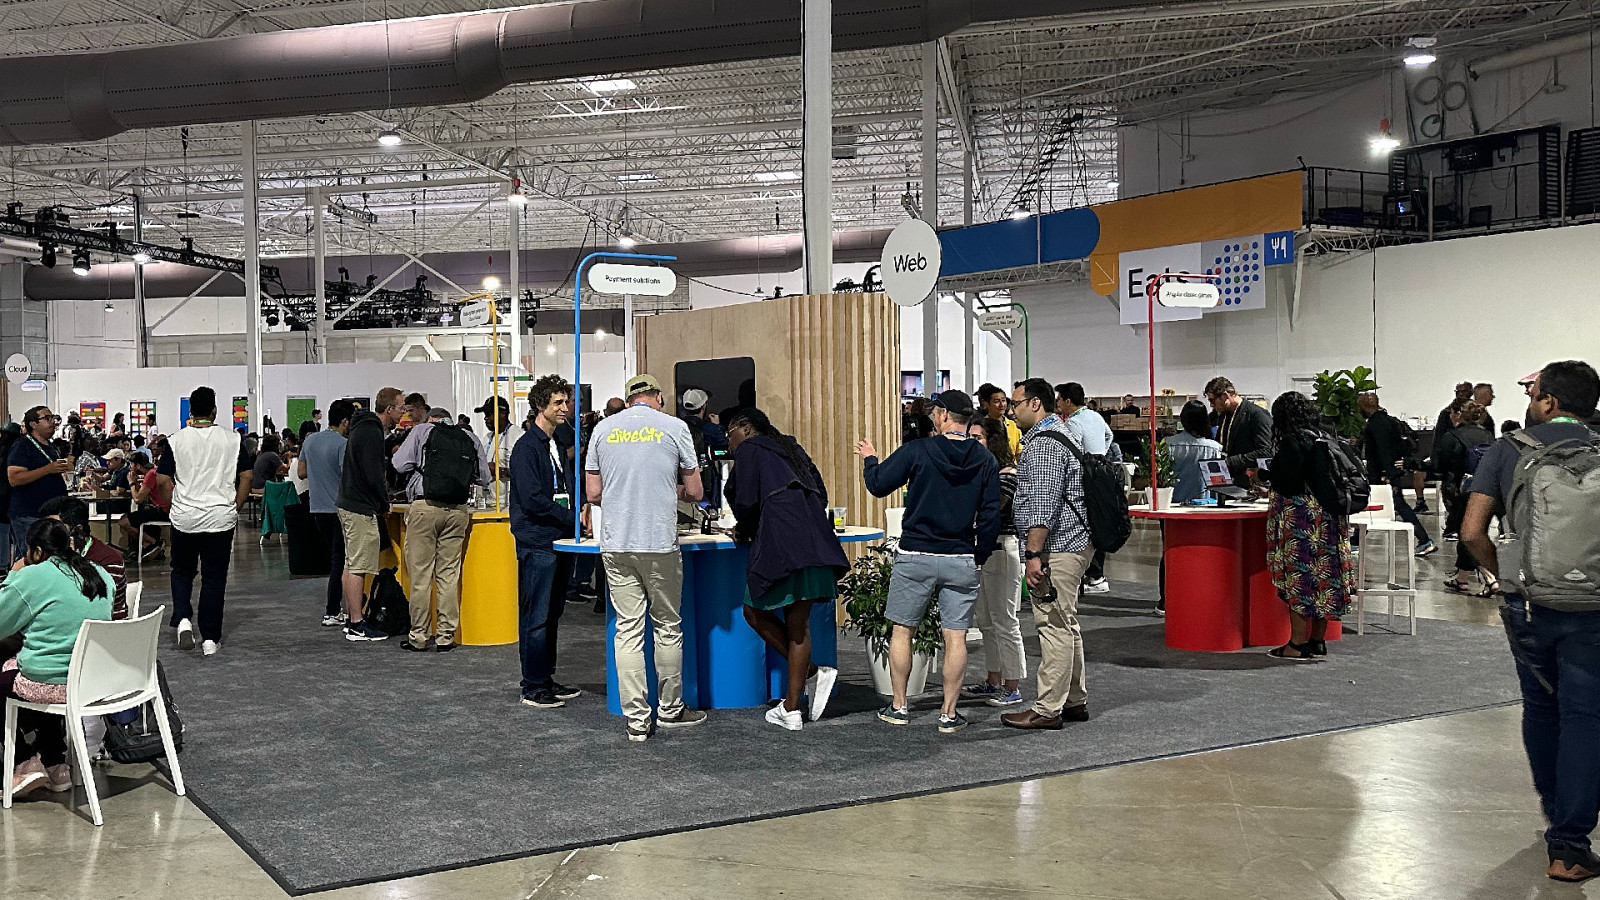
Could we do it in time for Google I/O Connect in Miami. In four weeks…
So… two weeks later…
We had a fully functioning demo that was completely browser based. Of course it wasn’t two weeks work. It was years in the making. And it gave me an opportunity to open source a lot of our code.

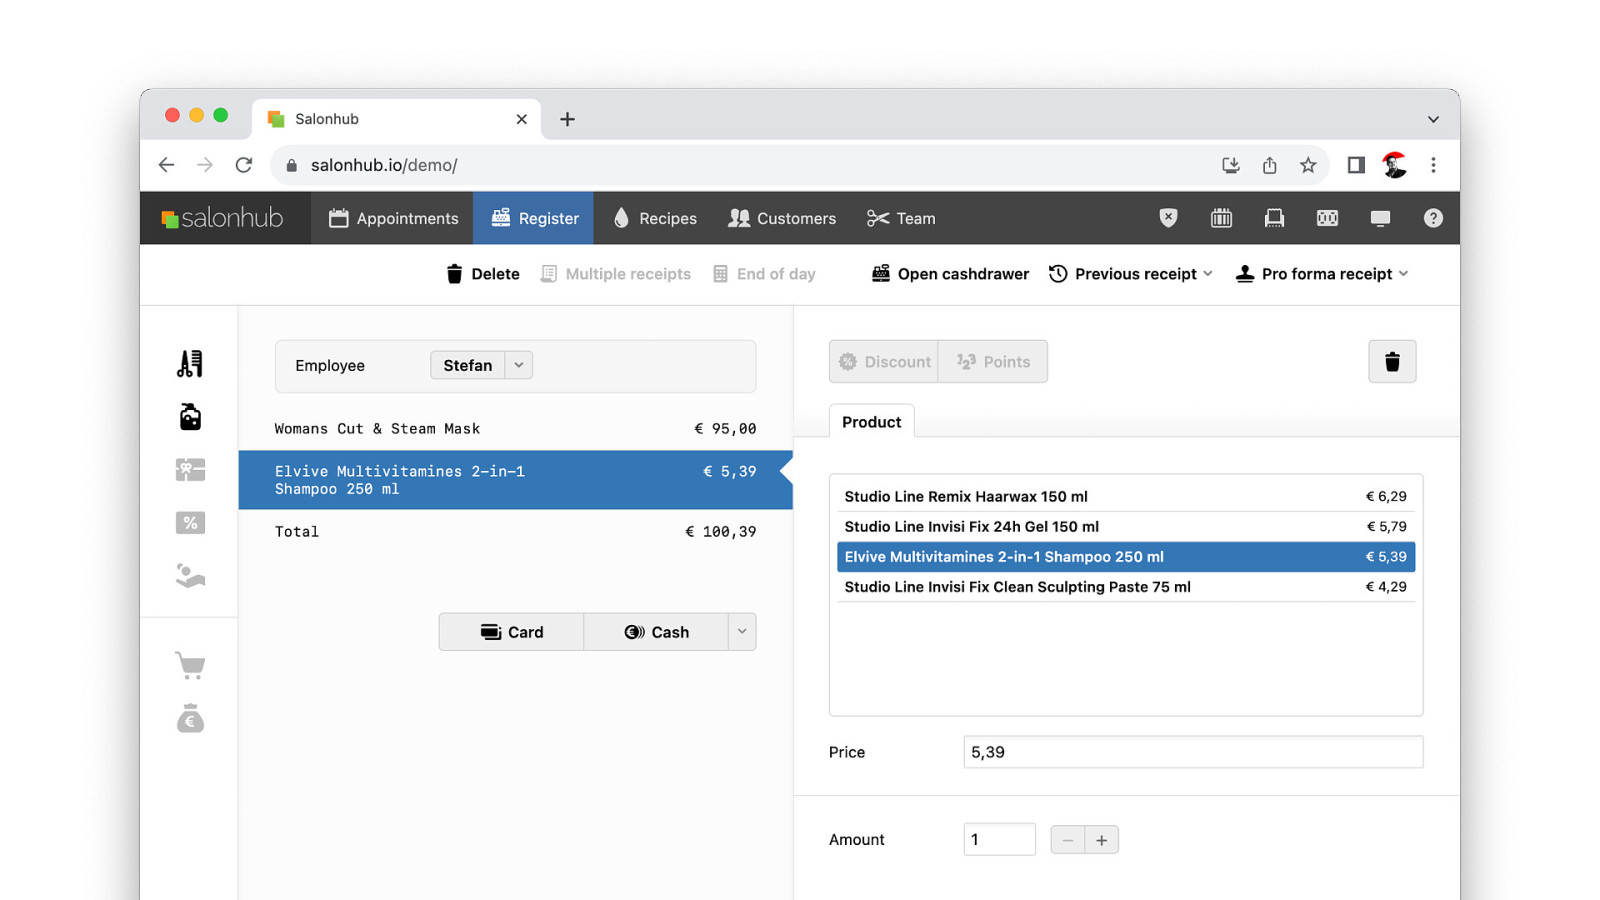
We could scan barcodes to add products. Items are shown on the customer pole. The receipt is visible on the display. And when we pay we can print a paper receipt.
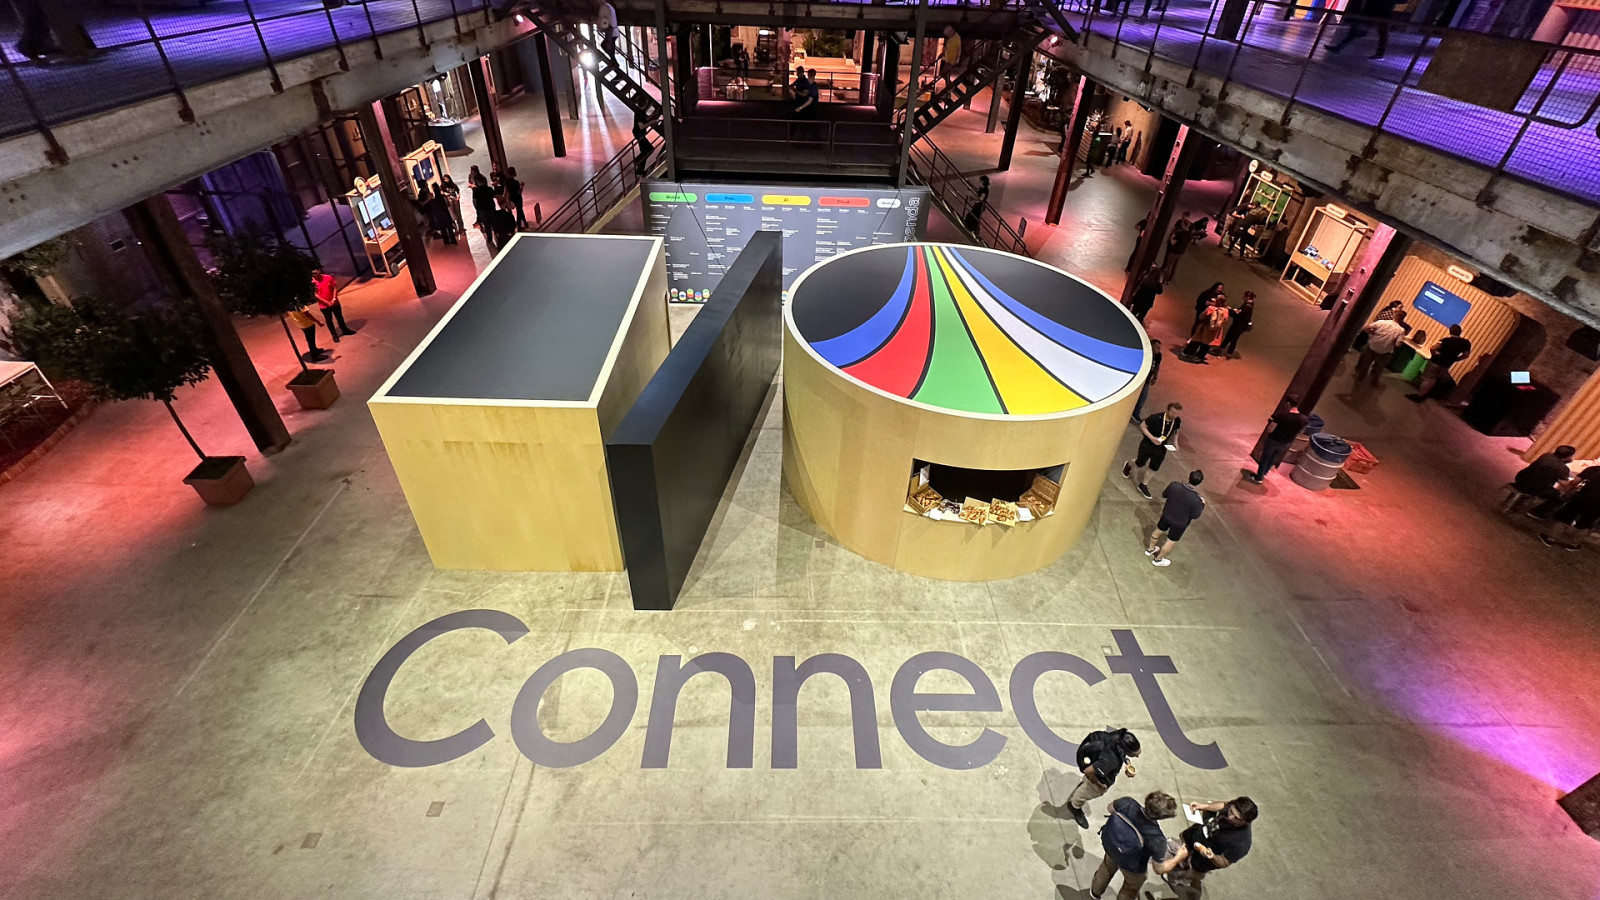
So we went to Miami.
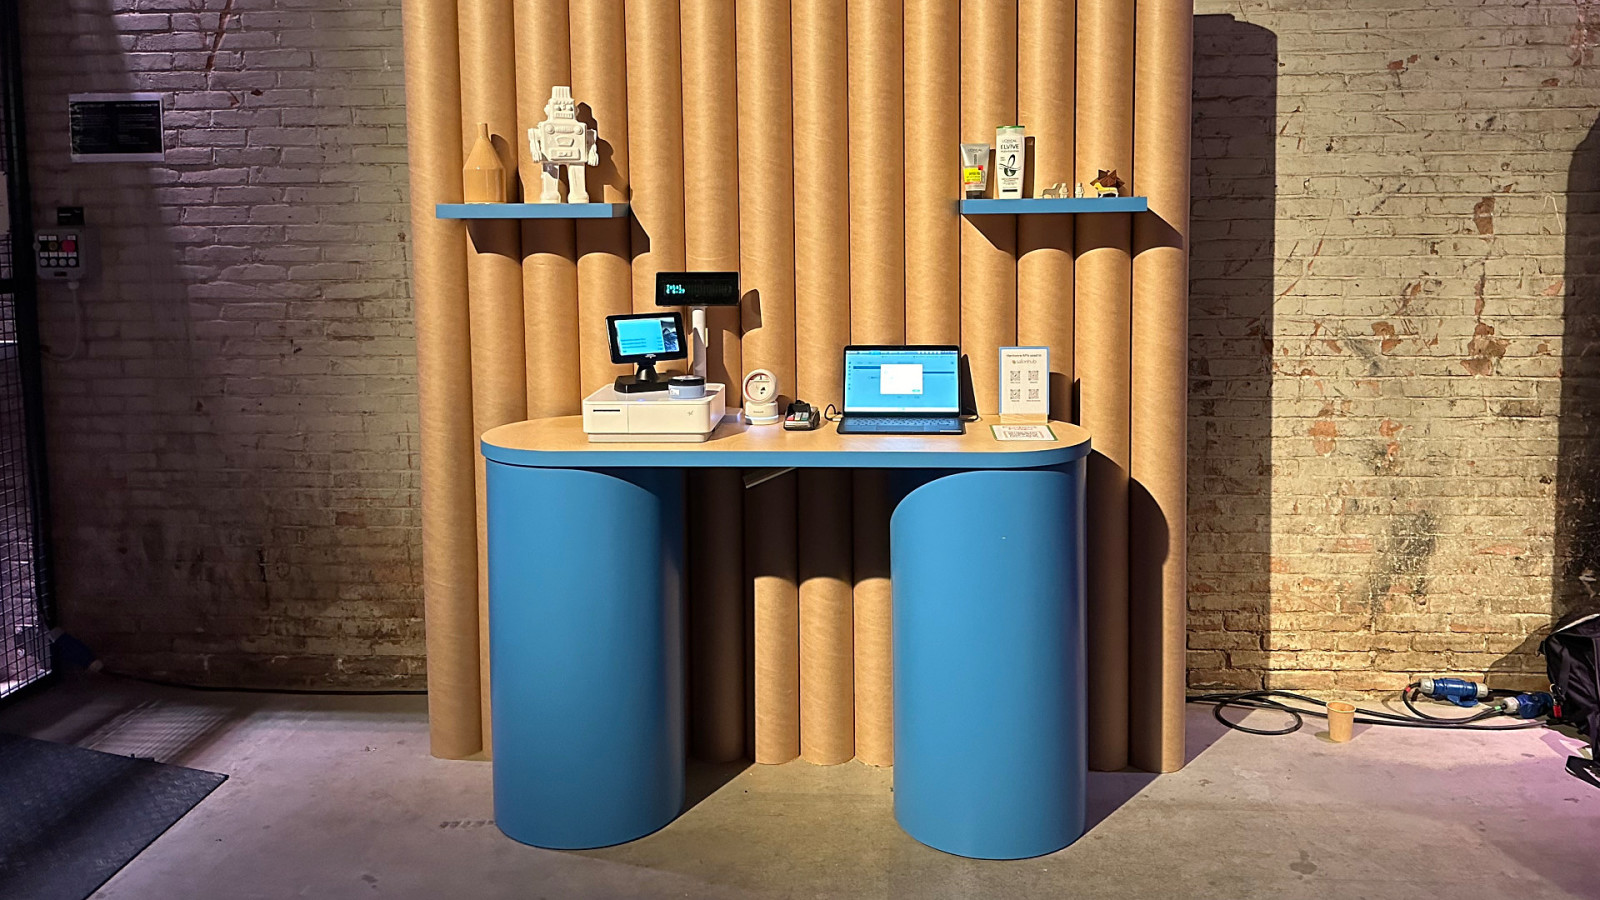
After that we went to Amsterdam.
Thomas took our demo to Bengalore and last week it was shown in I/O Connect Shanghai. All and all an amazing experience.

So, who wants to see it? And afterwards I’ll tell you how we created it.
Now that demo was maybe a bit underwhelming. You scan barcodes, you print a receipt. We see that every day in pretty much every store or shop. But for a PWA this is big.
How did we build it? Like I said it was years in the making. I’ve been playing with this in some way or form for the last 10 years.
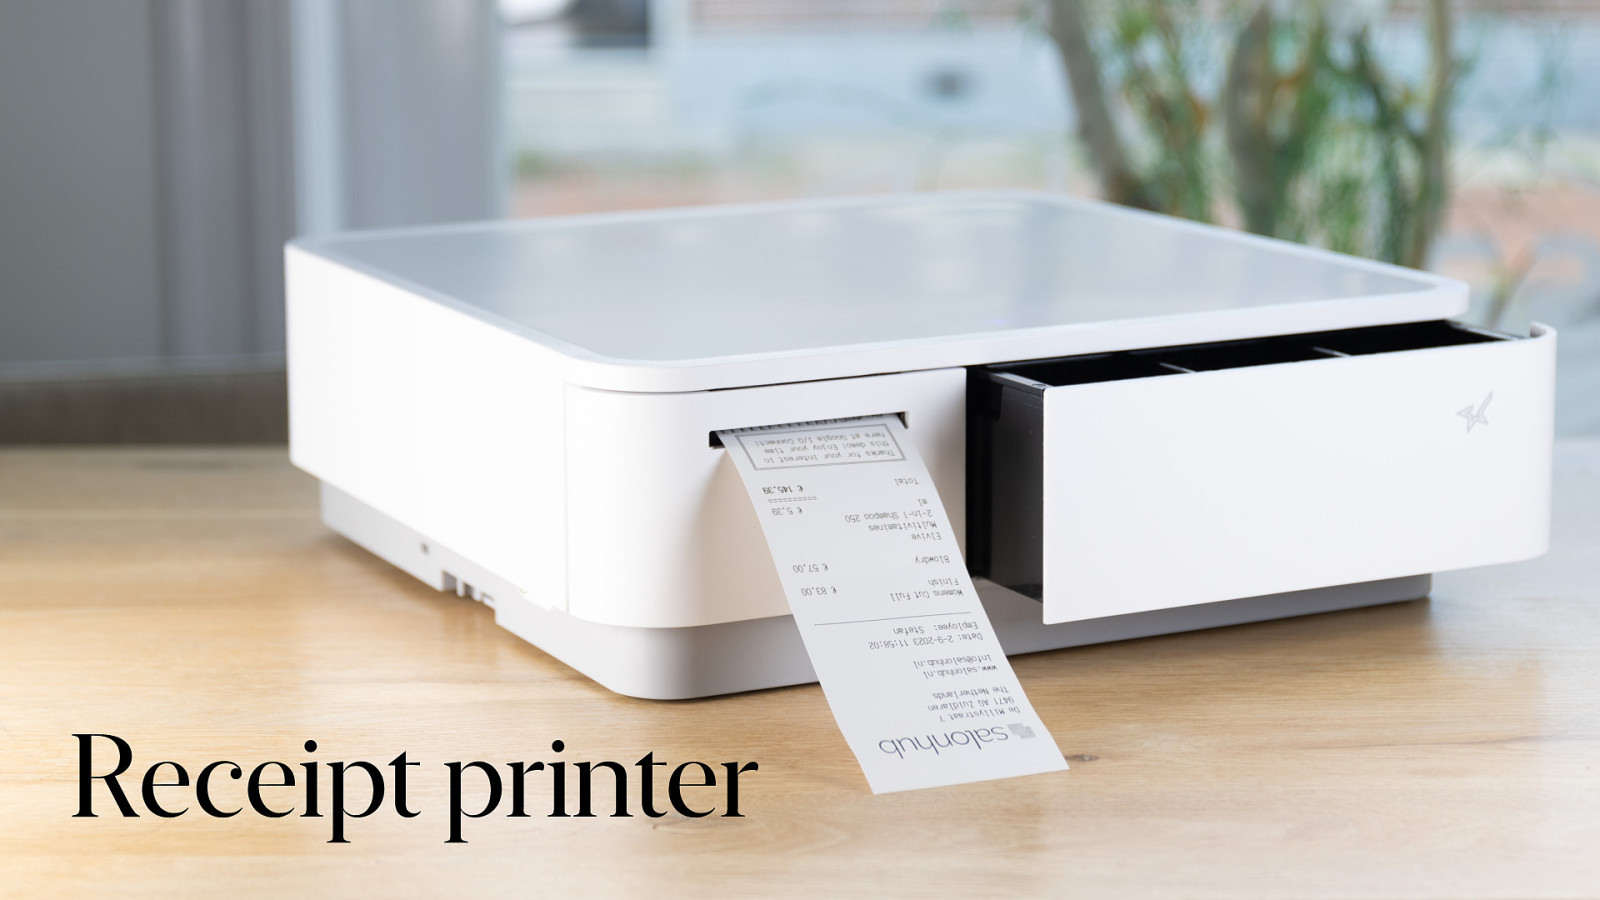
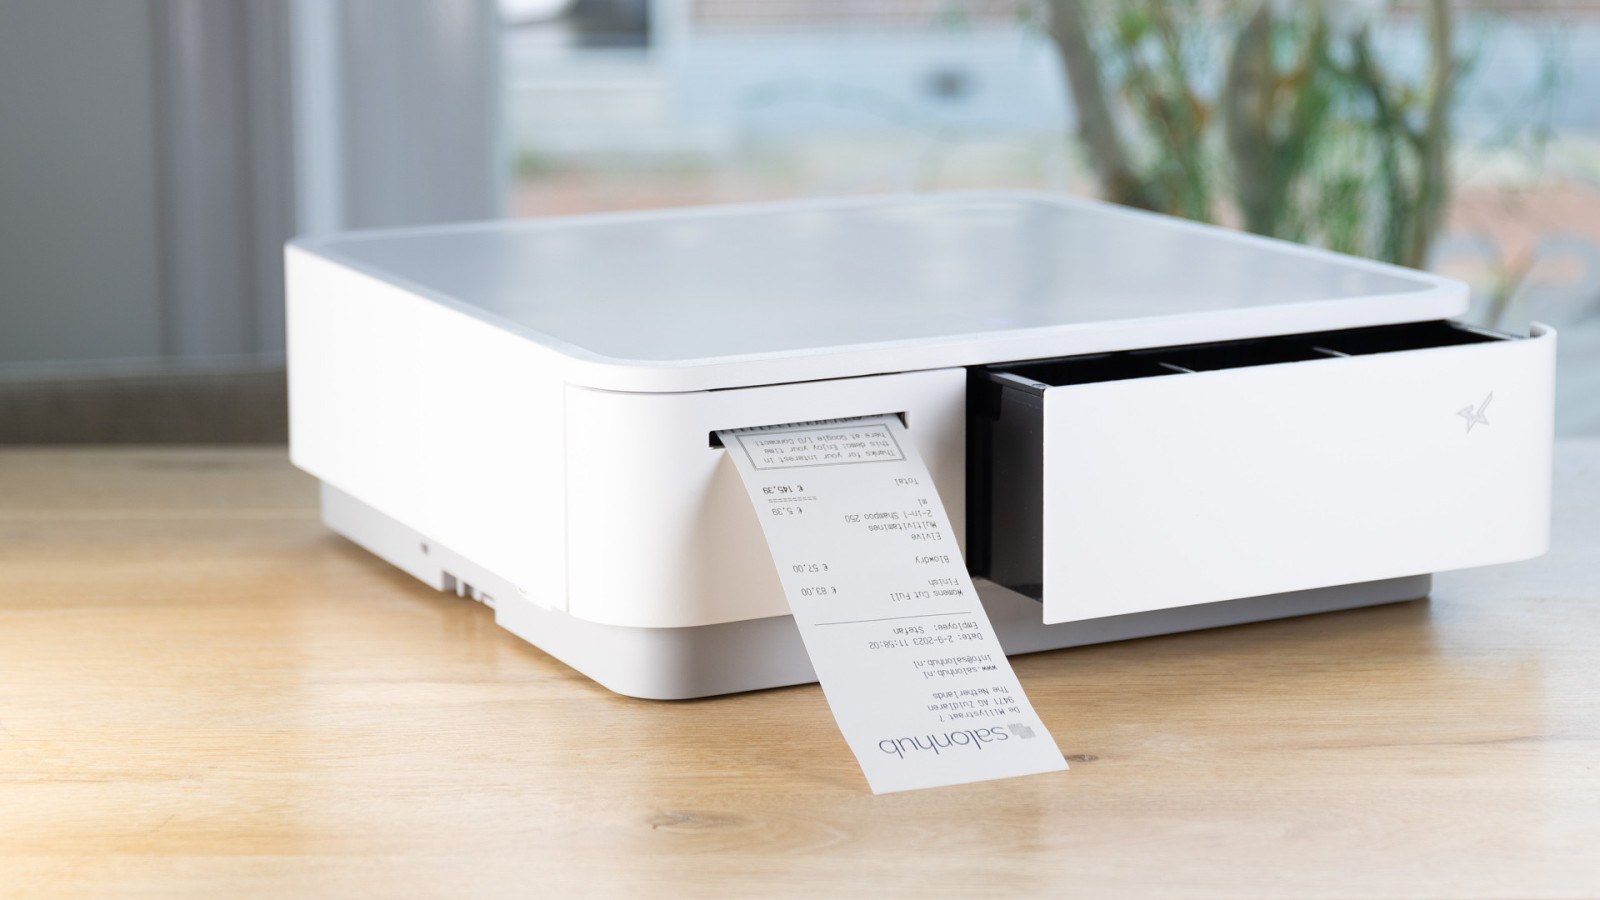
Let’s start with receipt printers. This is an essential part of a cash register. Nowadays most are USB, but they still sell serial or even parallel port versions. And you’ve got mobile versions using Bluetooth and even networked versions.
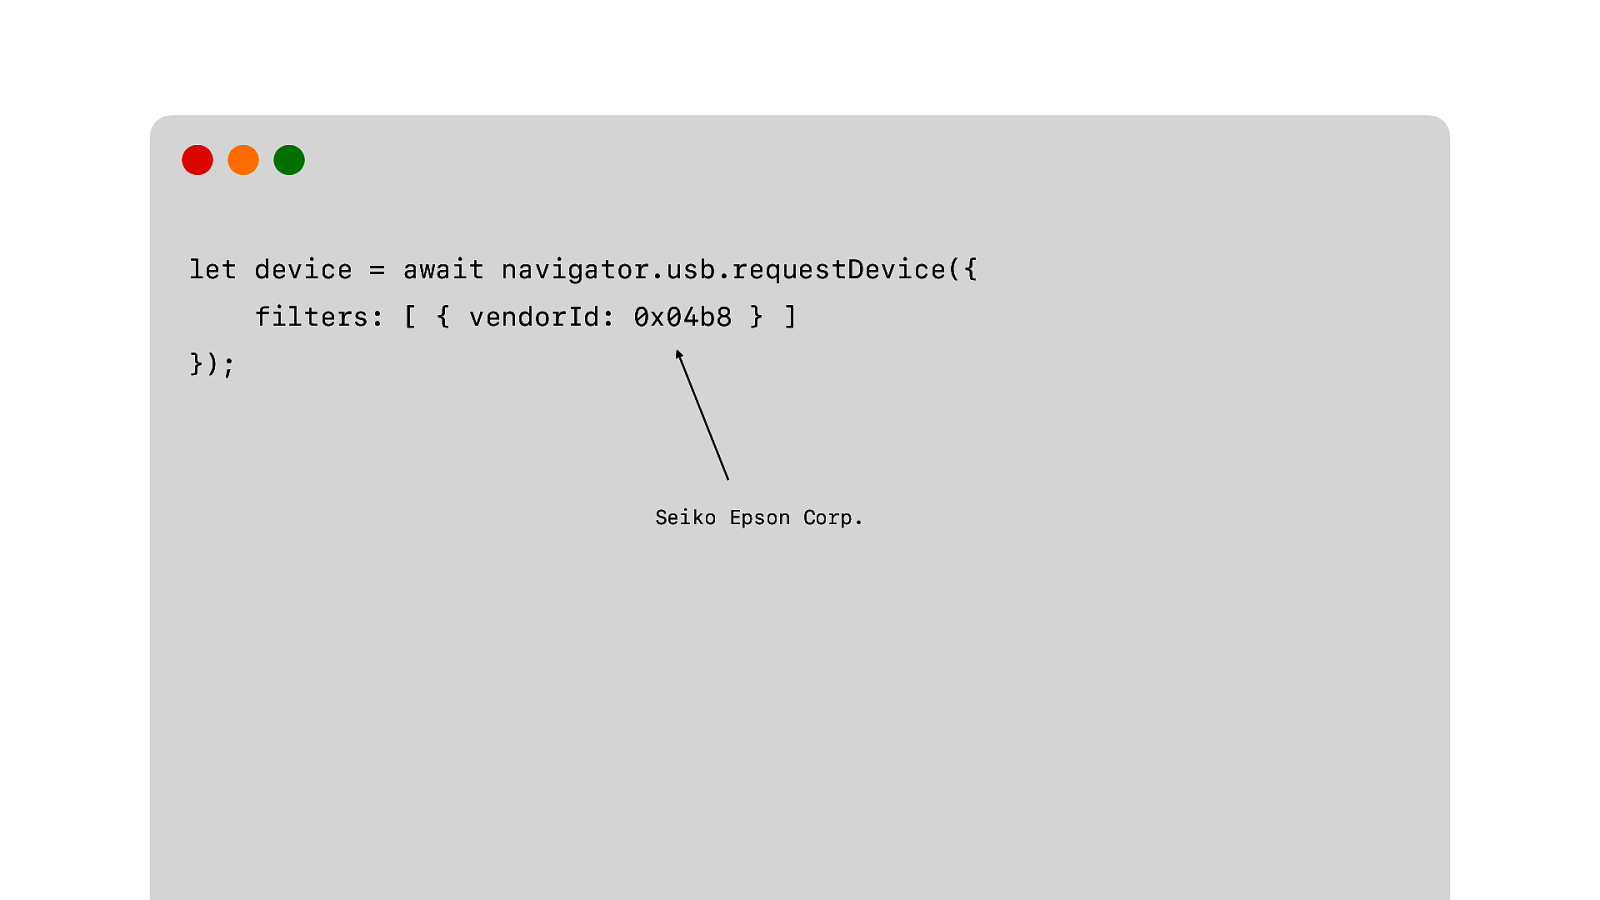
But the one we’re using is a USB device. So we’re going to use WebUSB. The API allows us to request a device with specific filters. The user then gets a list of all devices that they can choose from. And the browser then gets access to the device that is chosen.
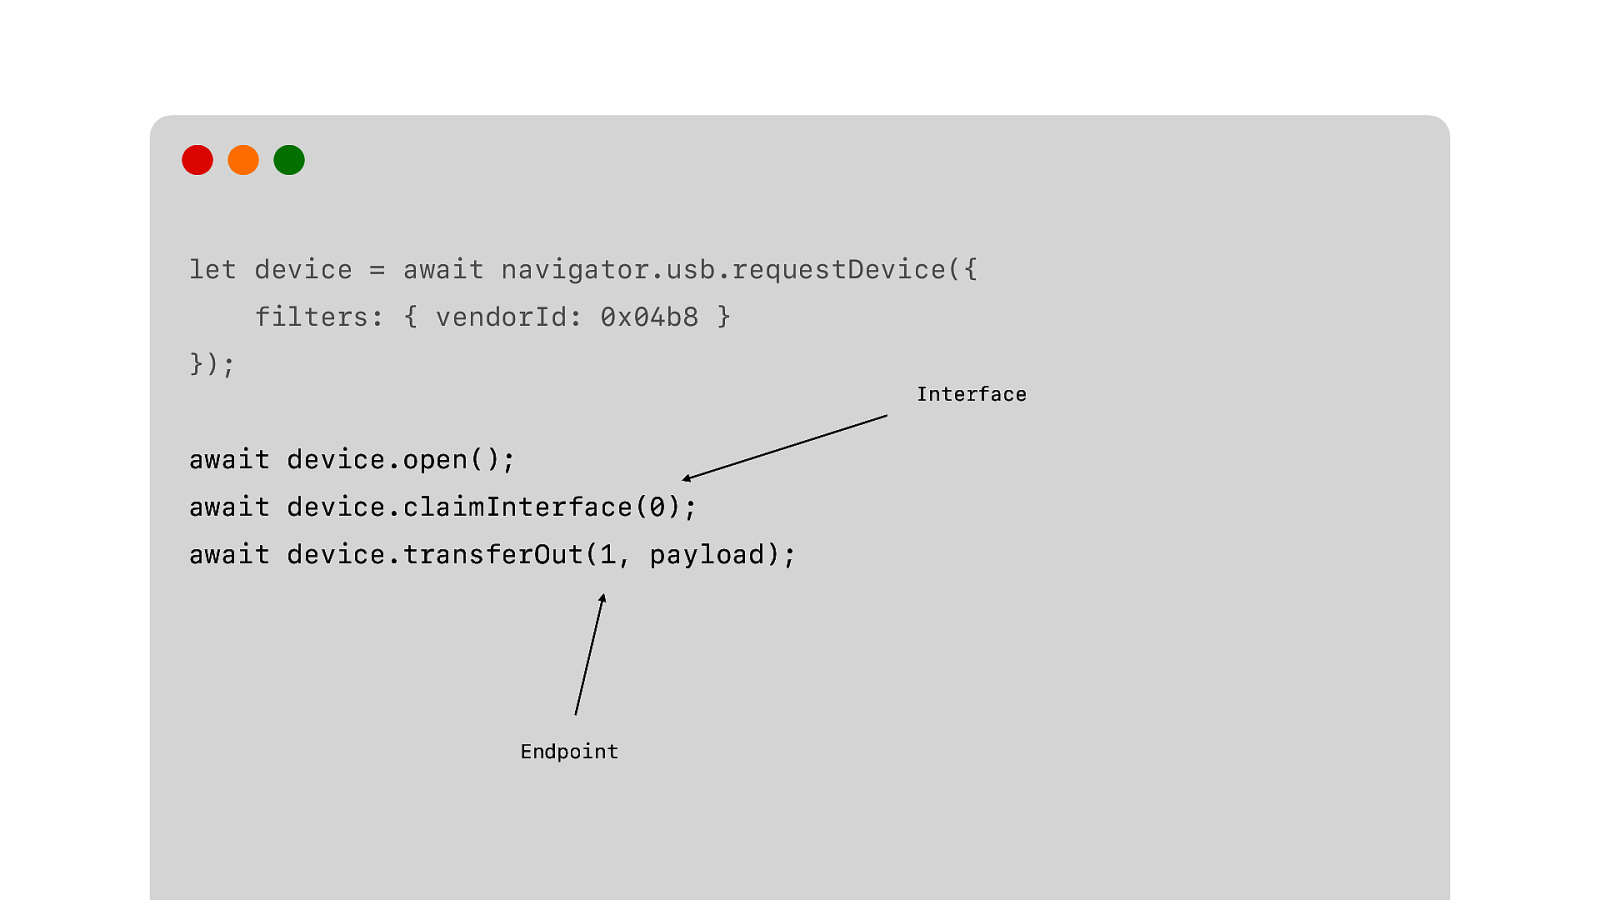
Then we have to open the device. Claim the interface and transfer out our data to the endpoint.
Yeah, this may require some extra explanation.
USB devices have one…

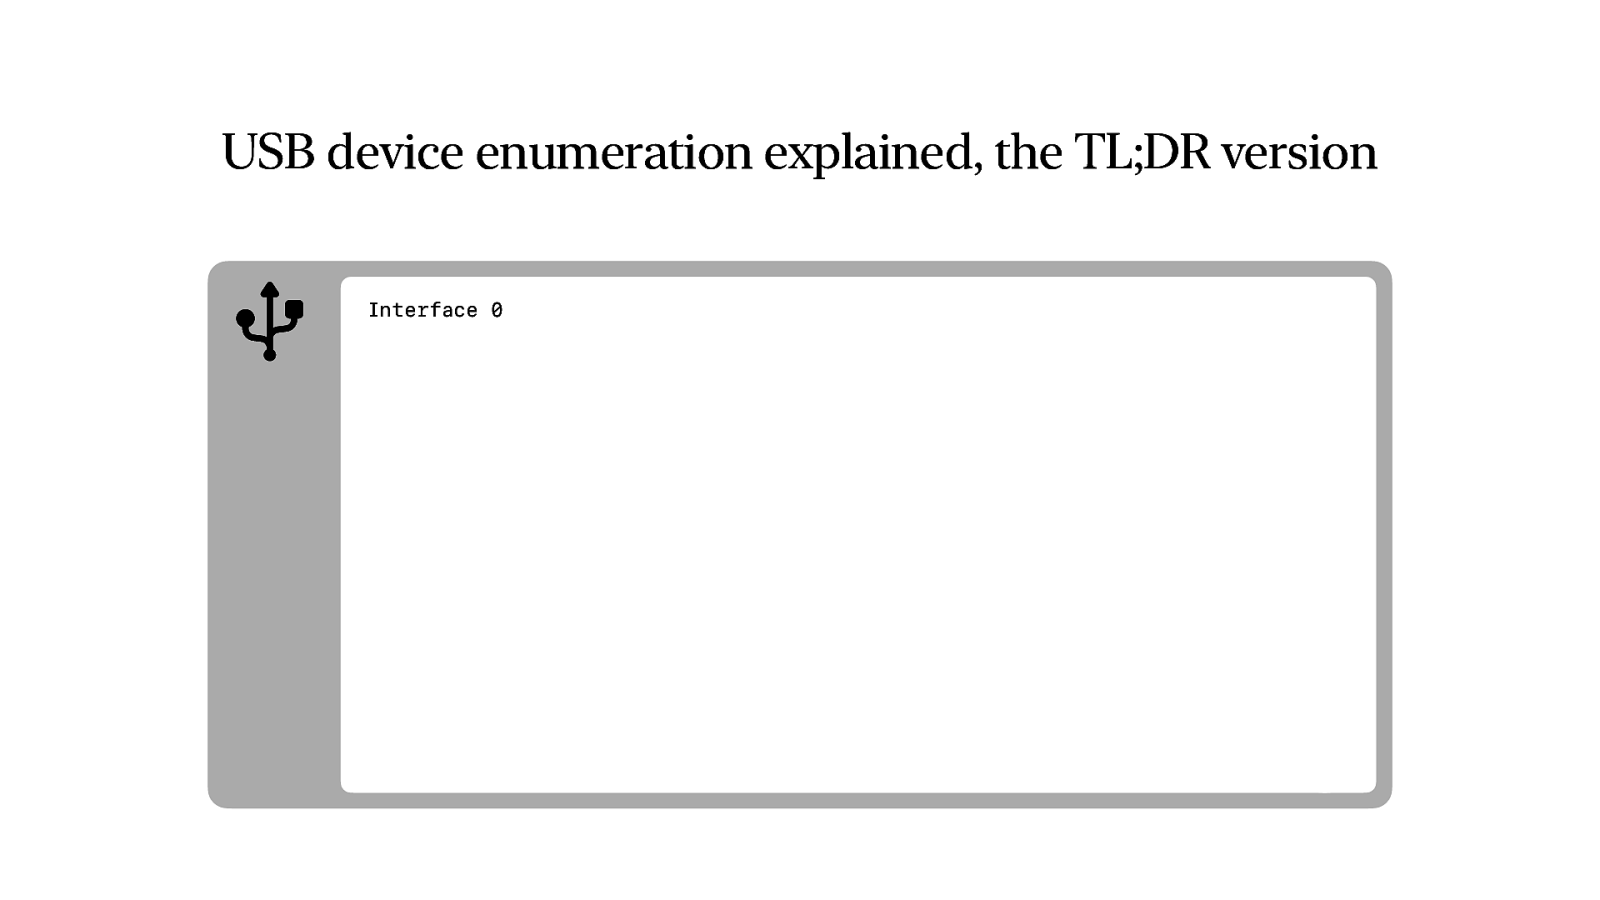
… or more interfaces. This usually depends on functionality. Most have one interface, but if you have a device that combines multiple functions, like a scanner and printer combination, you would usually have one interface for the printer and one for the scanner.
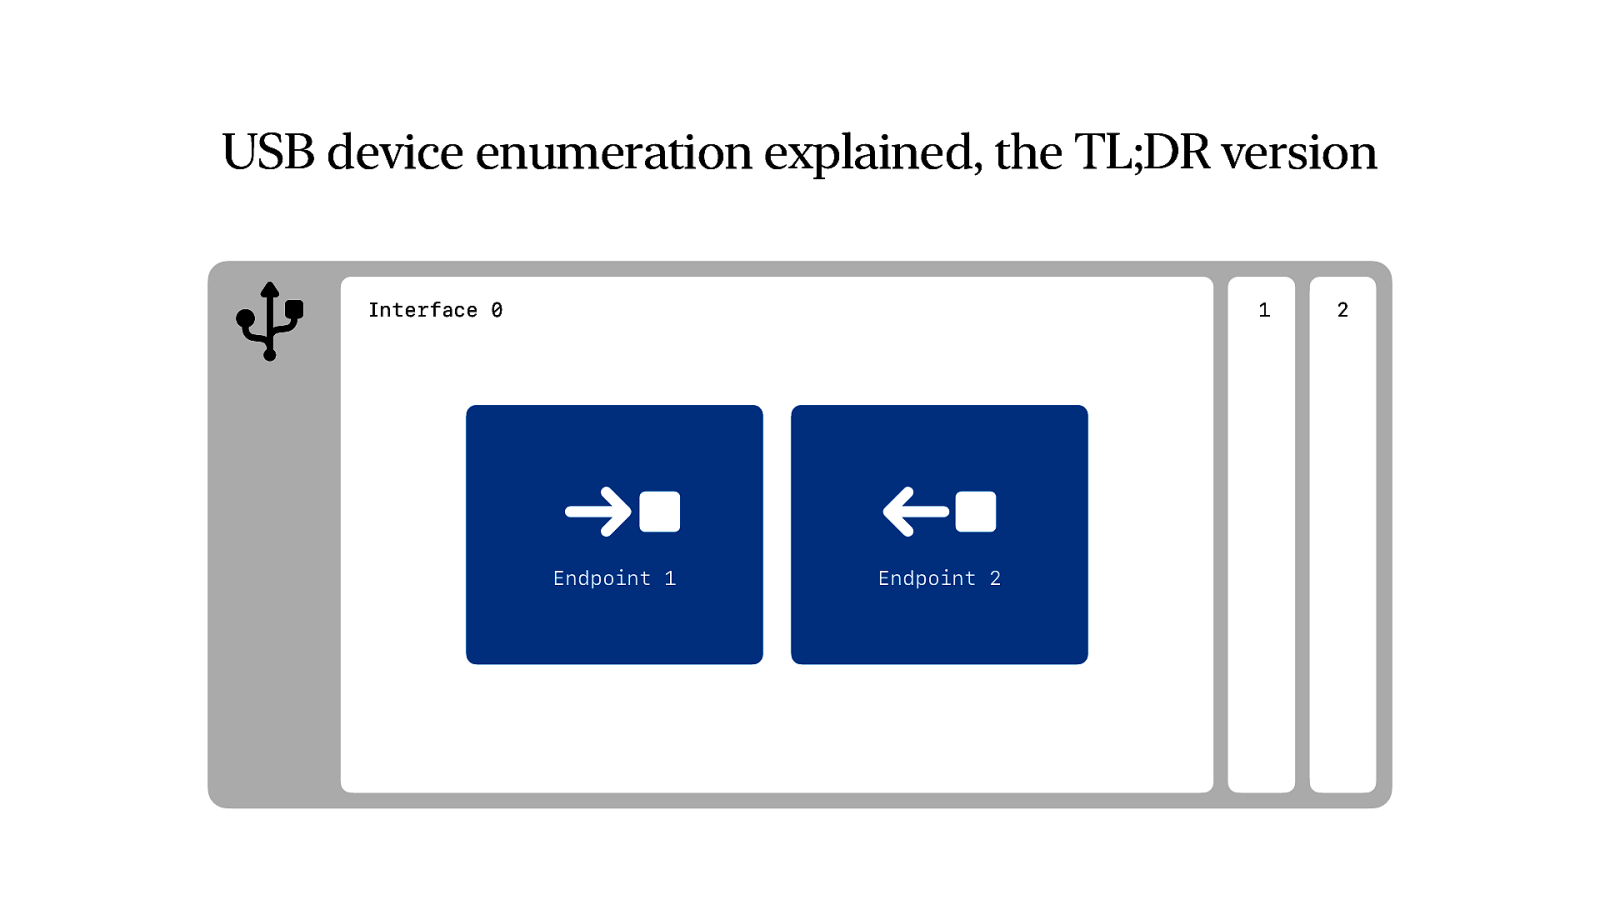
And each interface has one or more endpoints. Endpoints can be use to send data, or receive data. So in case of a printer you have two endpoints, one for sending what you want to print and one for receiving, for example, status information about how much paper you have.

So we claim the right interface. And we claim it, so we can use the device exclusively and there are no other applications that can interfere while we use it. And then we send the data using the proper endpoint.
And now we can talk to our printer, but we still have no idea about what to tell it. We need to learn their language first.
Let’s say we want to print this. A couple of lines. One line in bold text. And then cut the receipt. If we were to do this with the web platform, this would be really, really simple.
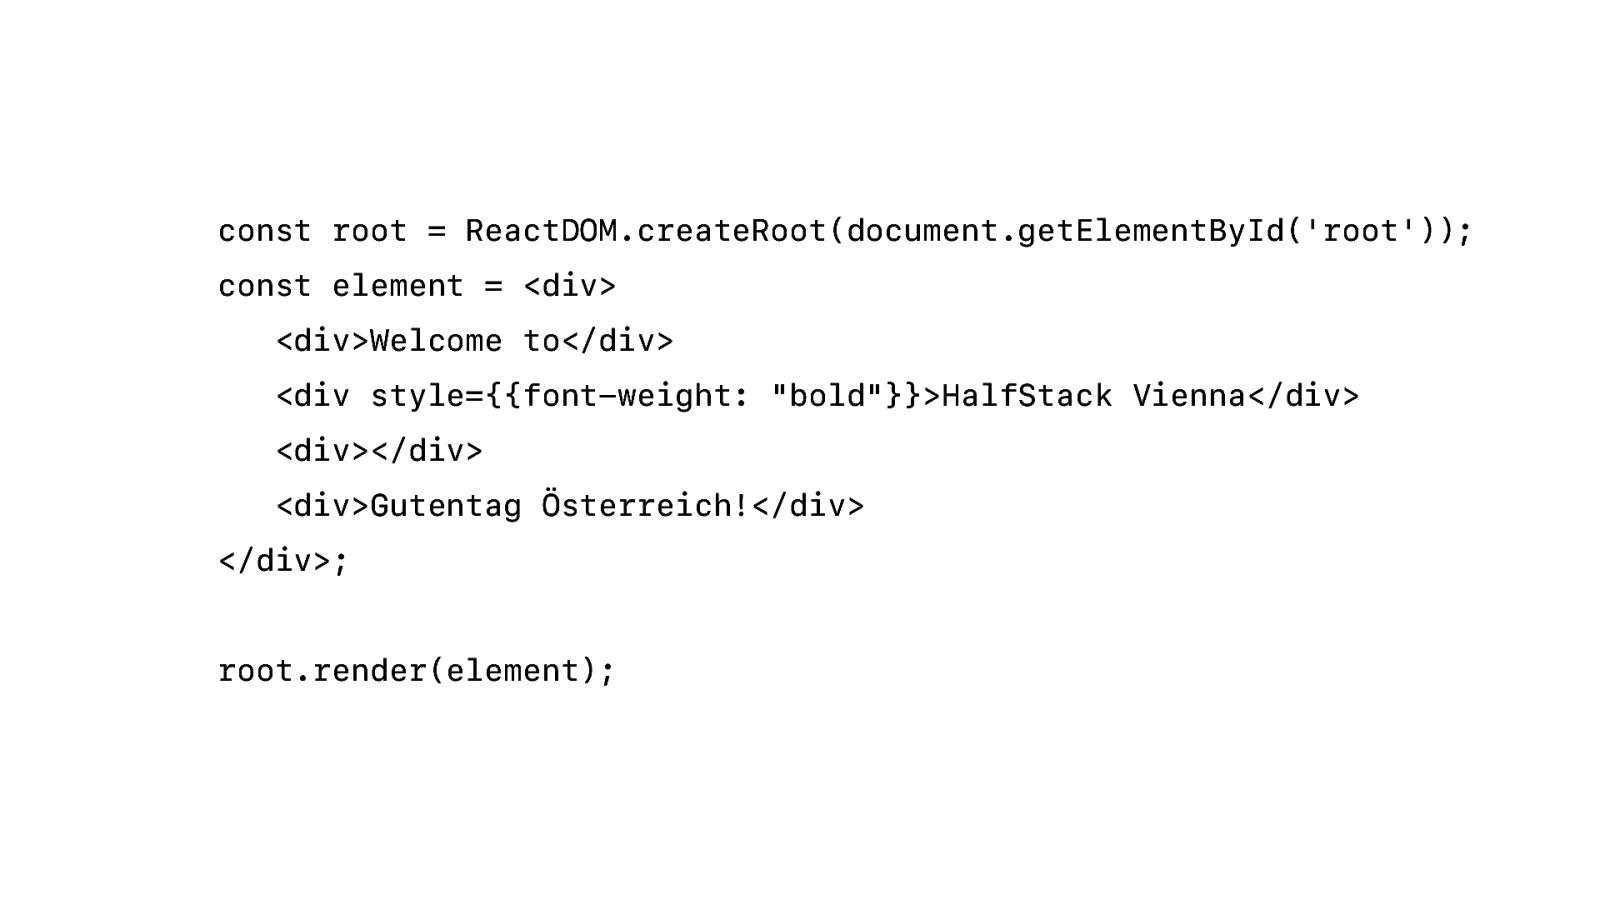
Just npm install react. Add some div’s to the root and style one with some inline css. Simple….
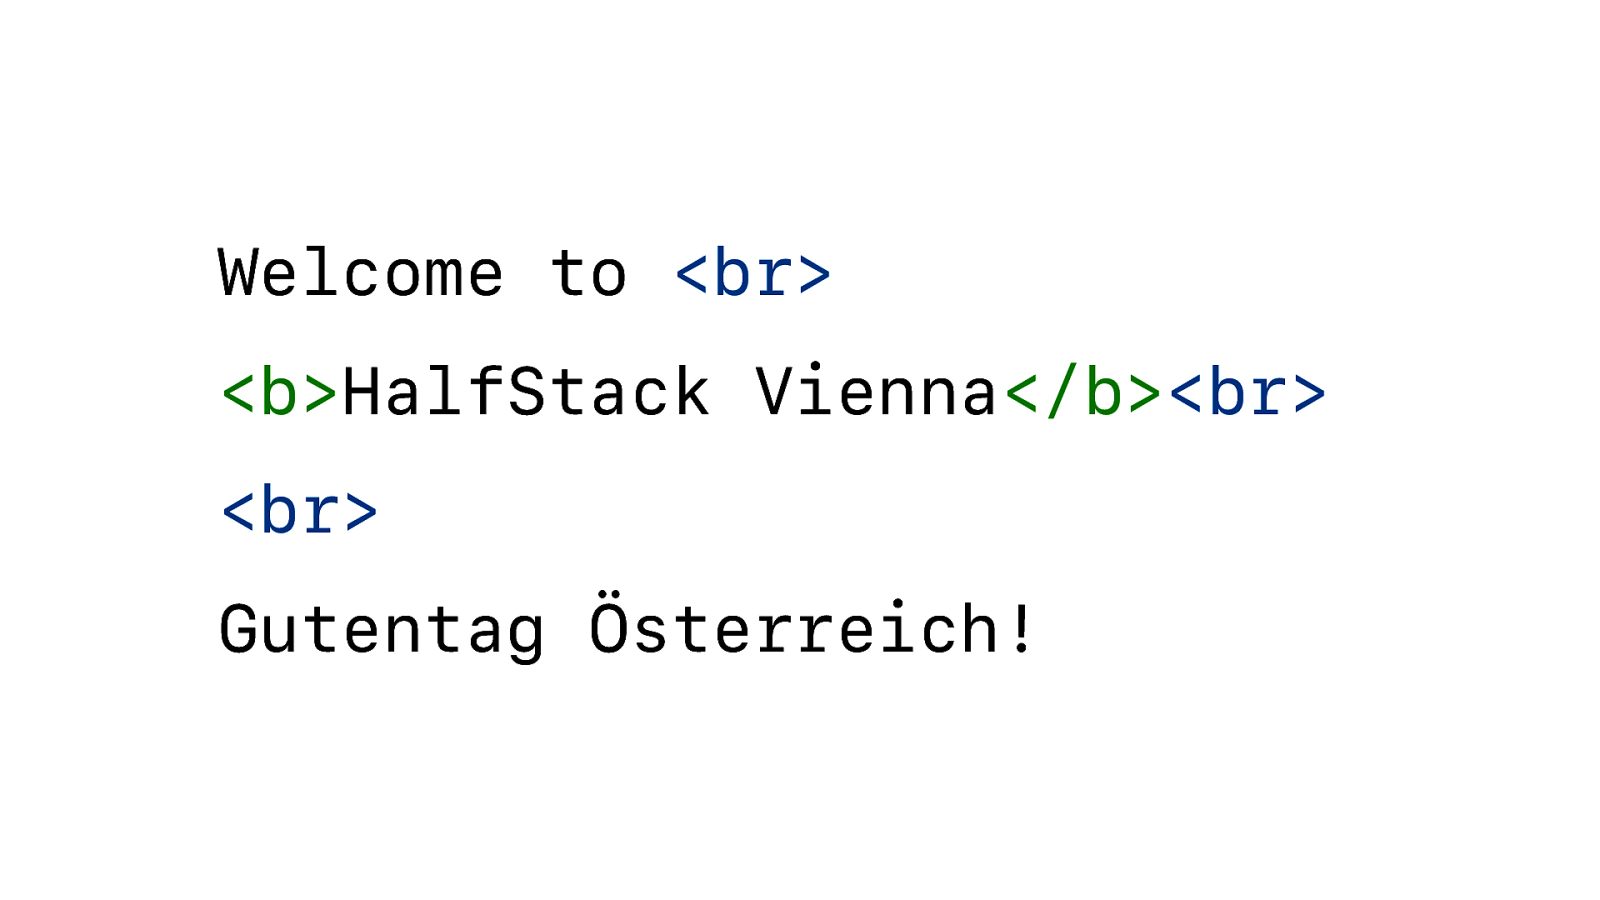
Okay, okay. Sometimes the web is also more complicated than necessary. Let’s use some proper HTML. And I am keeping it simple here. Just a couple of <br> and <b> tags. And that is it. But that is not how printers do it. The language printers use long predate HTML.
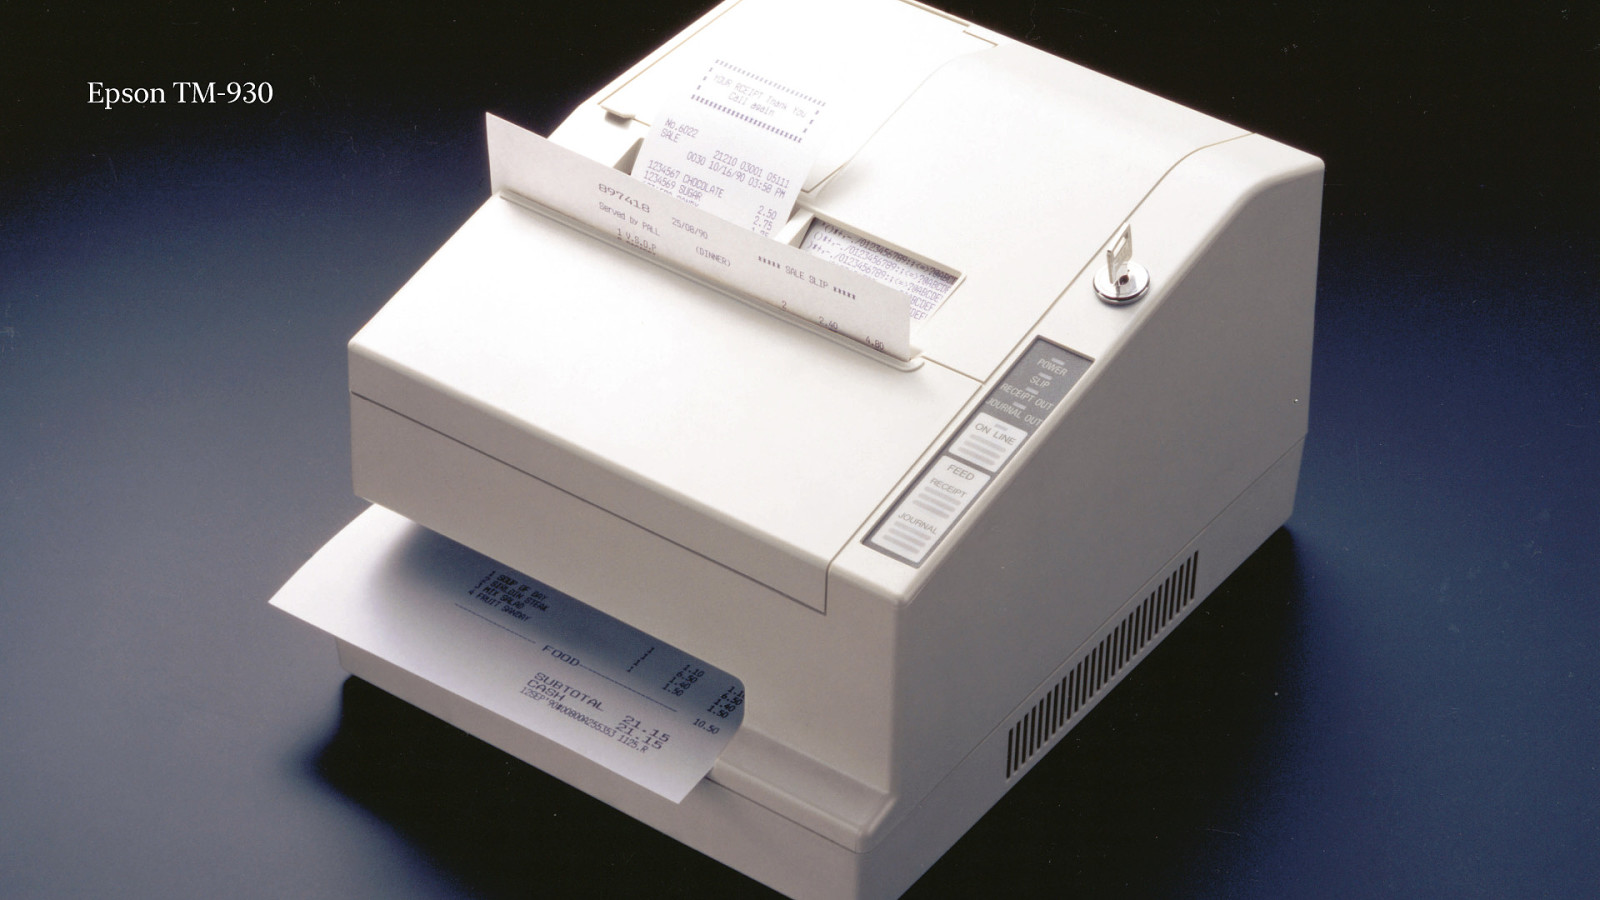
Let’s travel back to 1990. Epson is launching their first receipt printer. Nowadays all receipt printers use thermal paper, but back then it used dot matrix technology. And Epson was famous for creating the MX-80 dot matrix printer back in 1980.
So they took a shortcut and basically used the ESC/P language from that dot matrix printer and adapted it a bit and called it ESC/POS. And that is what receipt printers have been using ever since.
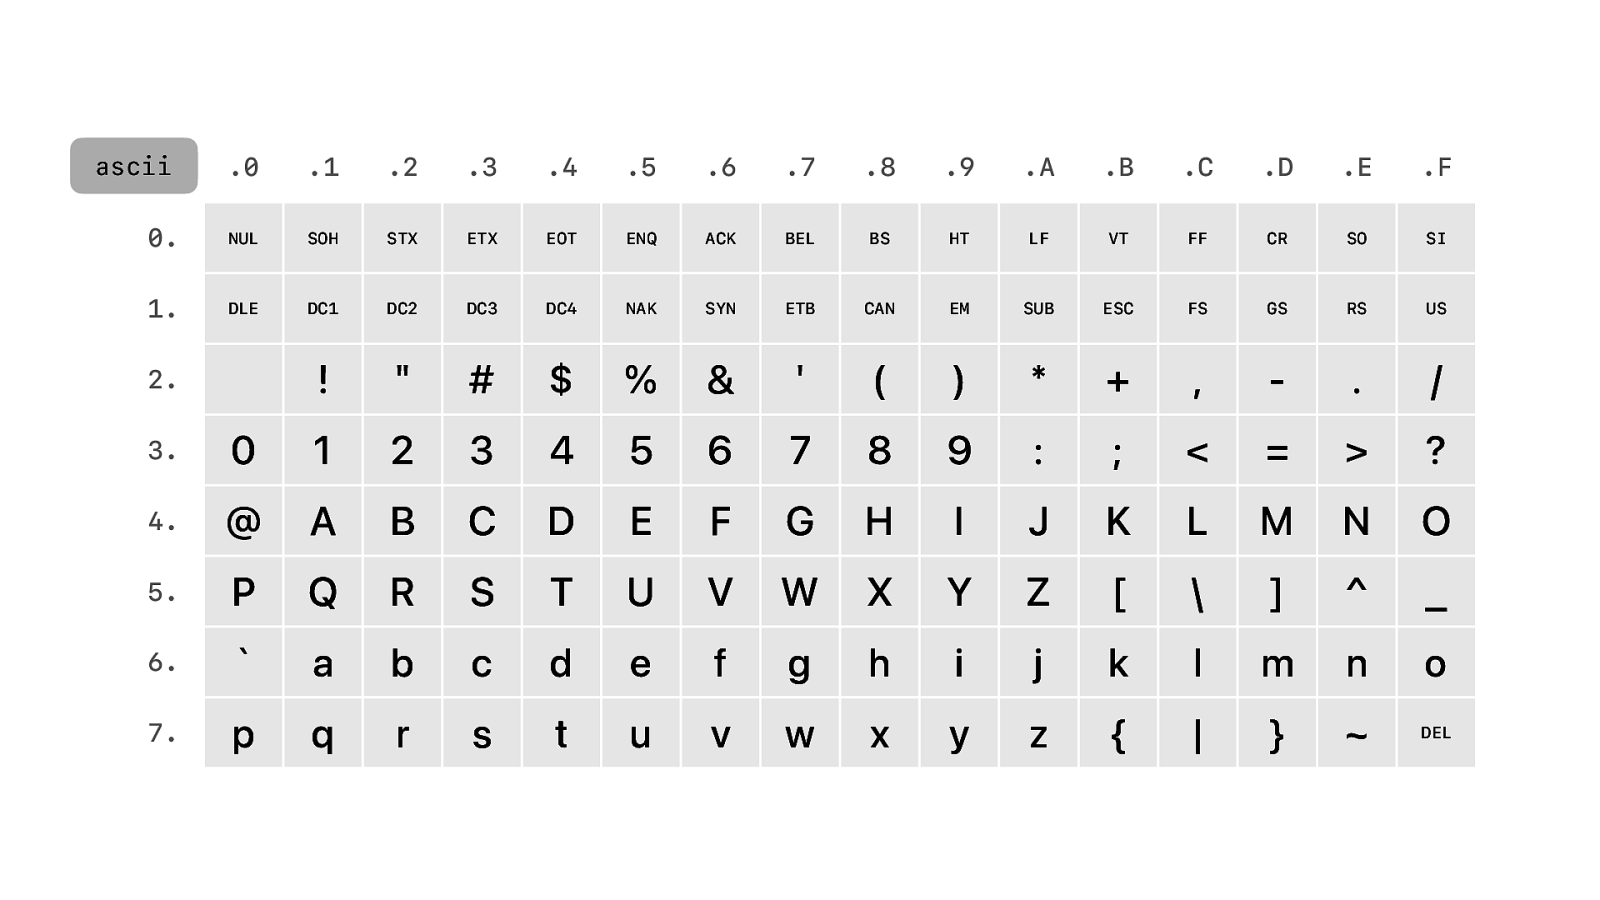
And the language is basically 7 bit ASCII. And with ASCII we have all the printable characters you would ever need. 26 of them. A to Z. And you get numbers. Some special characters. But that is not all, you also have lowercase version of A to Z… Whoooowww. What more do you need… It is the American Standards Code for Information Interchange after all.
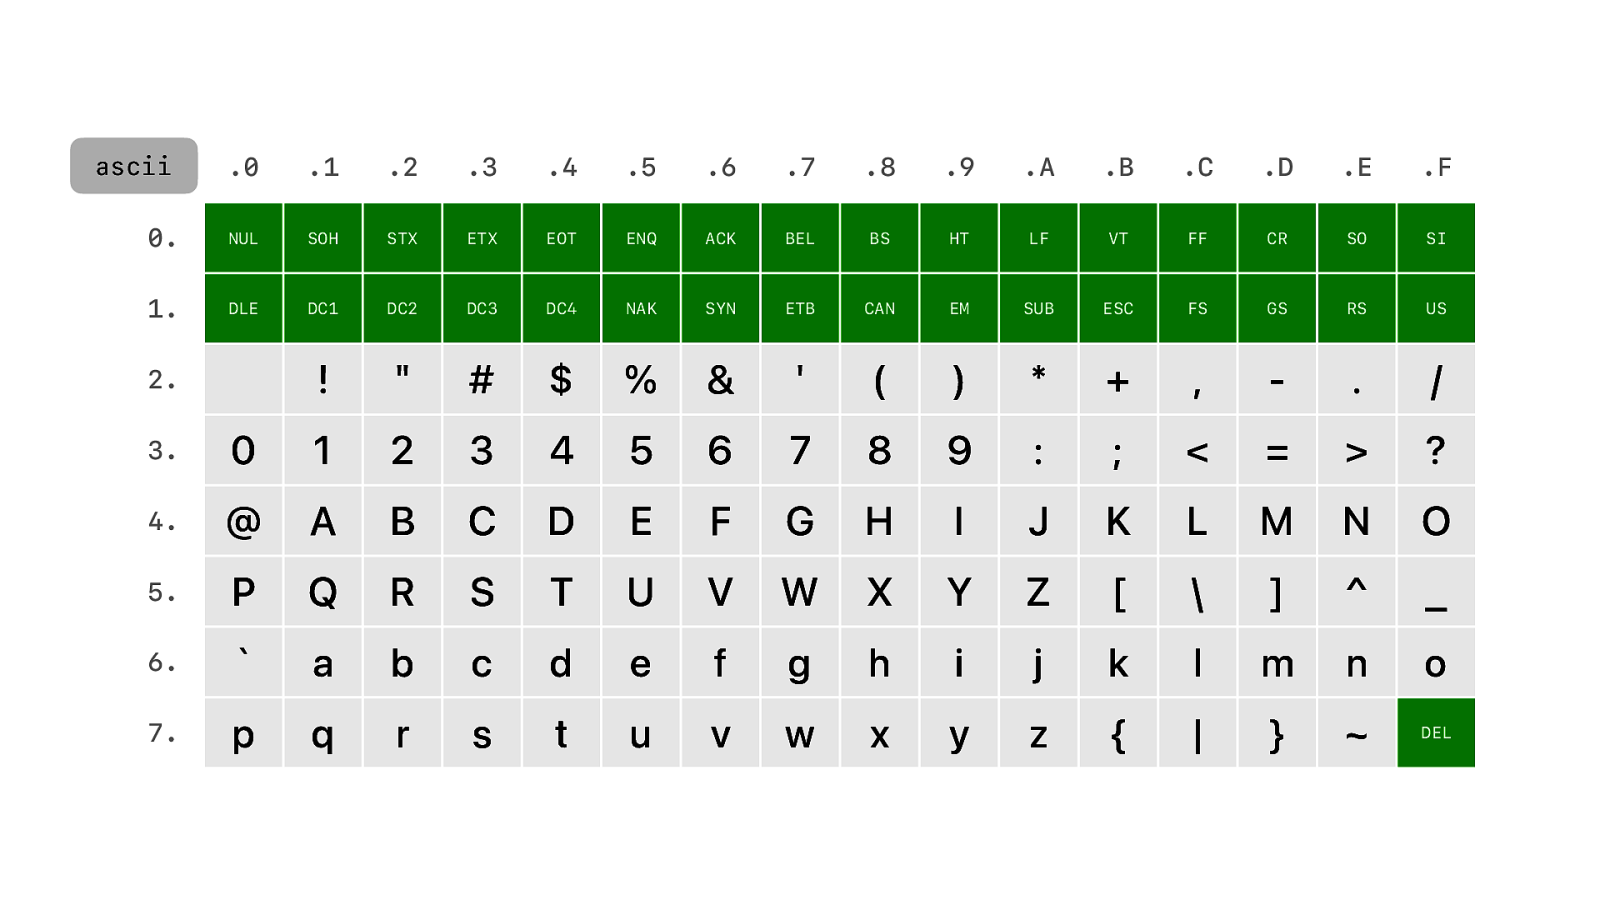
And we have some control characters for data transmission, including LF or Line Feed. Or what we nowadays commonly call a newline.
So we can just send this to the printer and it will work. But this is not entirely what we wanted. It’s not bold… and… there seems to be something missing…
So, let’s fix the bold part first. We’re not using tags, like HTML, but we send a special escape character that signals to the printer that what follows is a command.
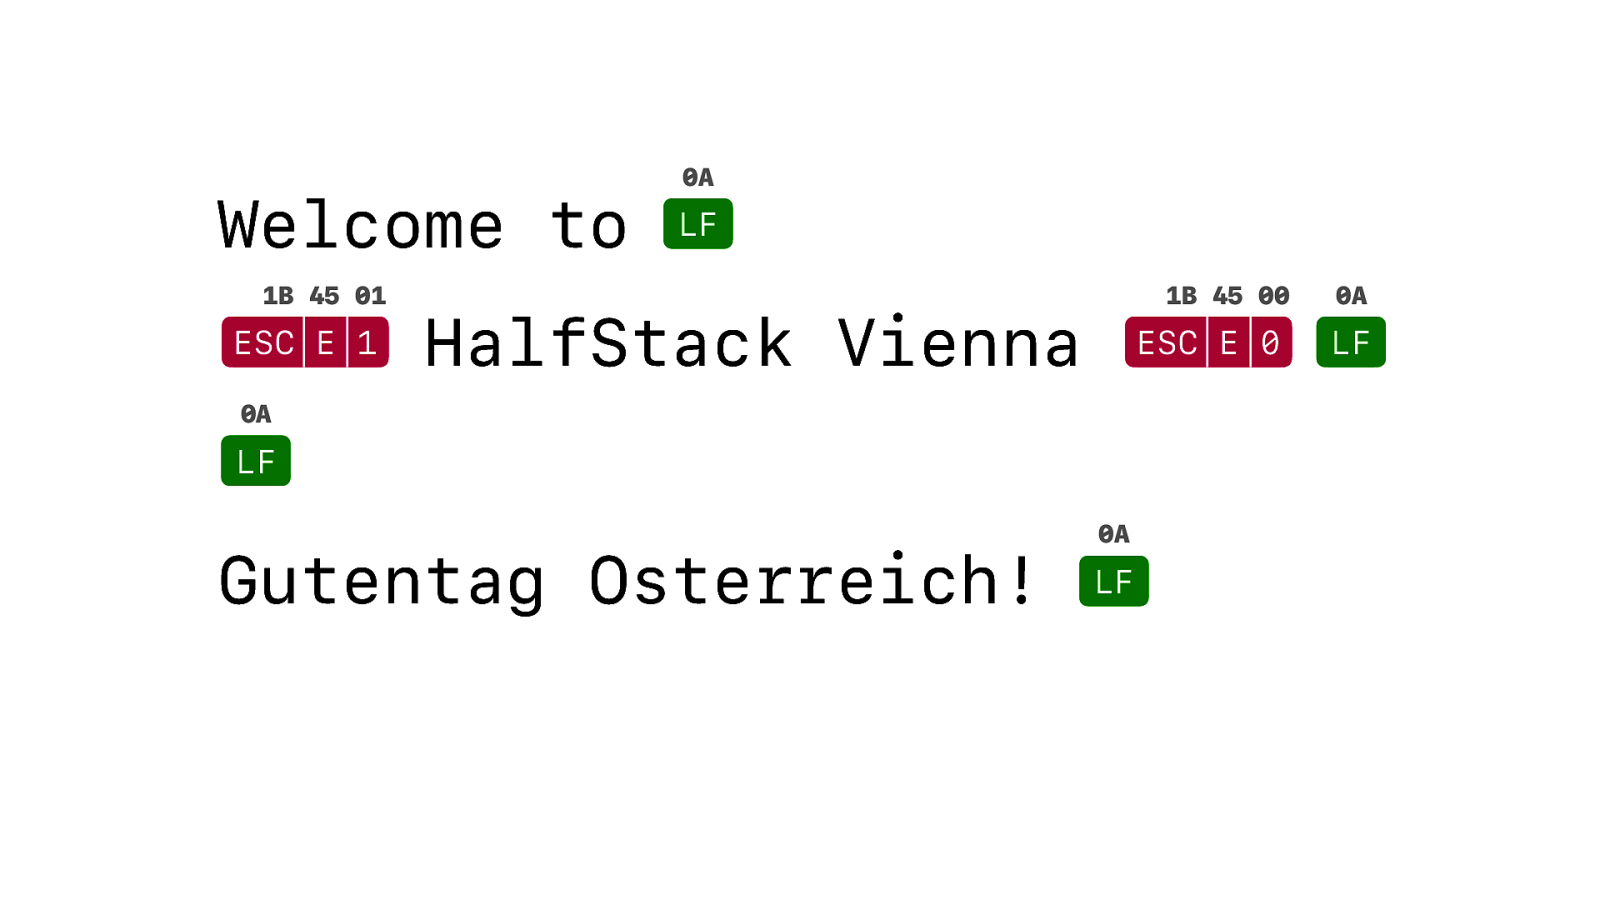
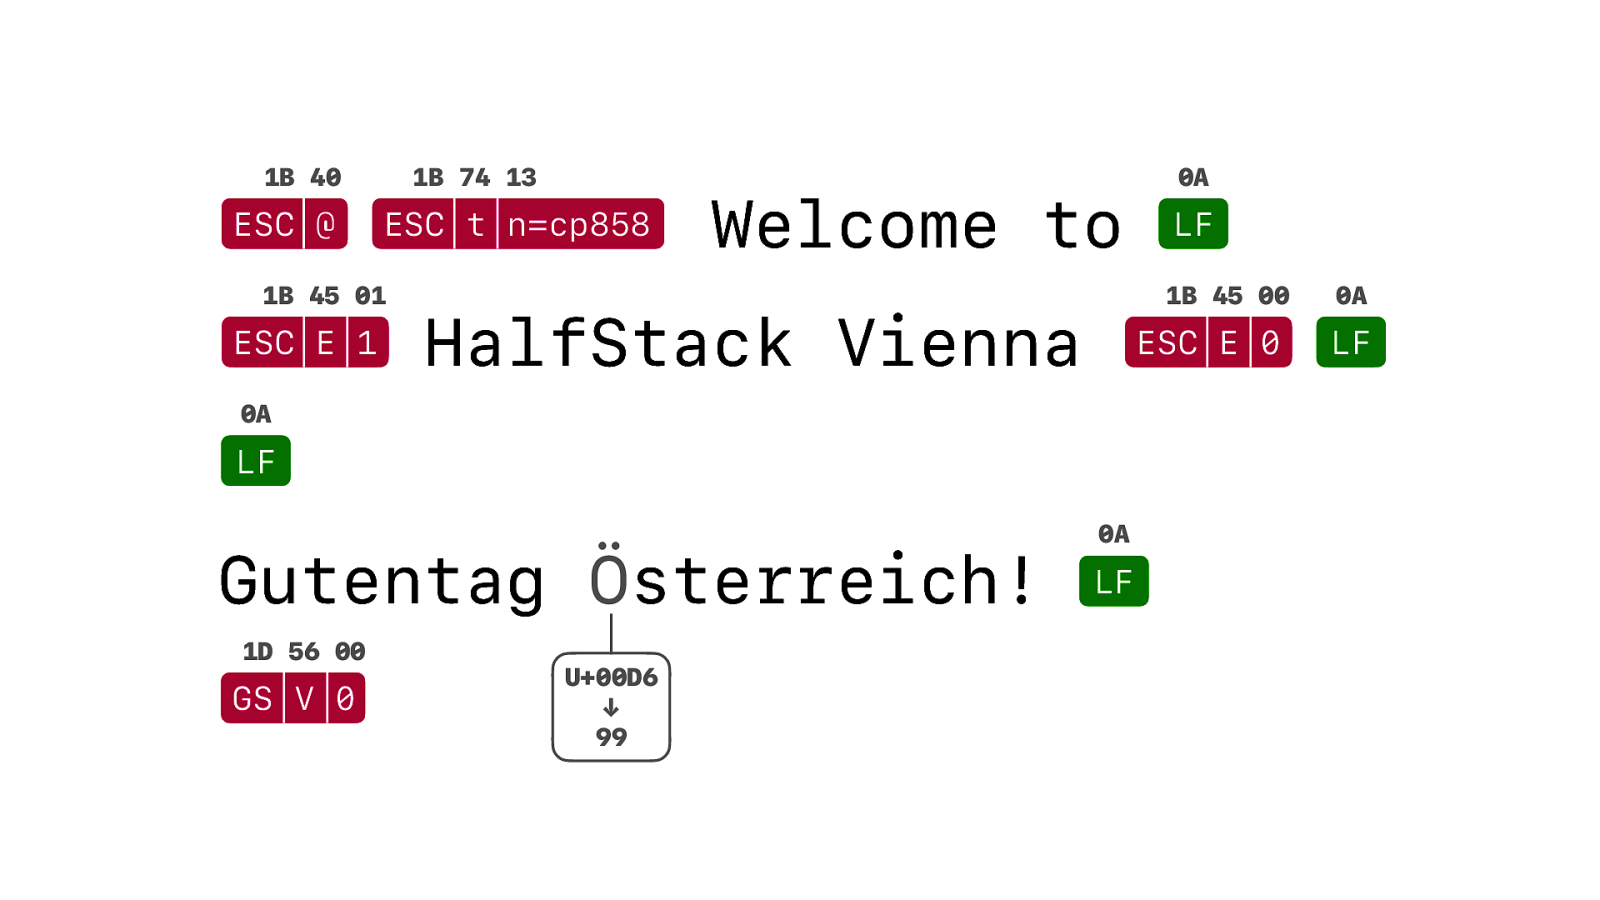
ESC E-for-emphasis. And 1 to turn emphasis on. That makes the text bold. And ESC E 0 is to turn it off.
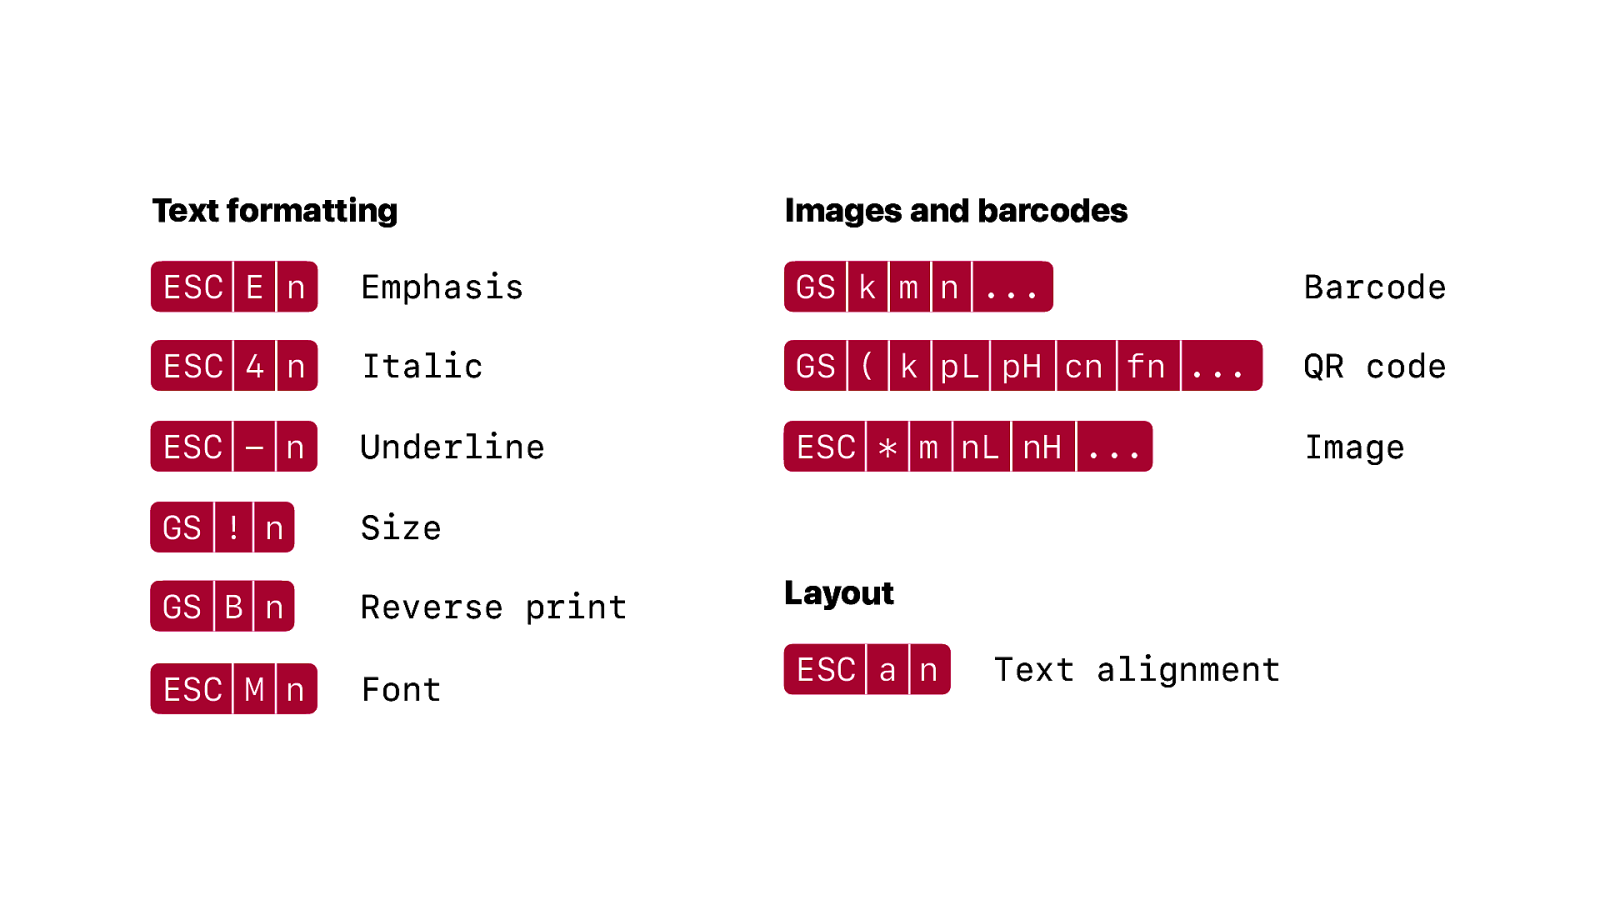
And there are many commands for all kinds of formatting and commands for inserting things like barcodes and images. Too many to list here and too many to go into details.
There is a manual. In fact there are multiple manuals. From different manufacturers and even from the same manufacturer for different generations of printers. And they don’t all agree.
We need to send a command for cutting the paper. GS V 0. But we’re not done yet.
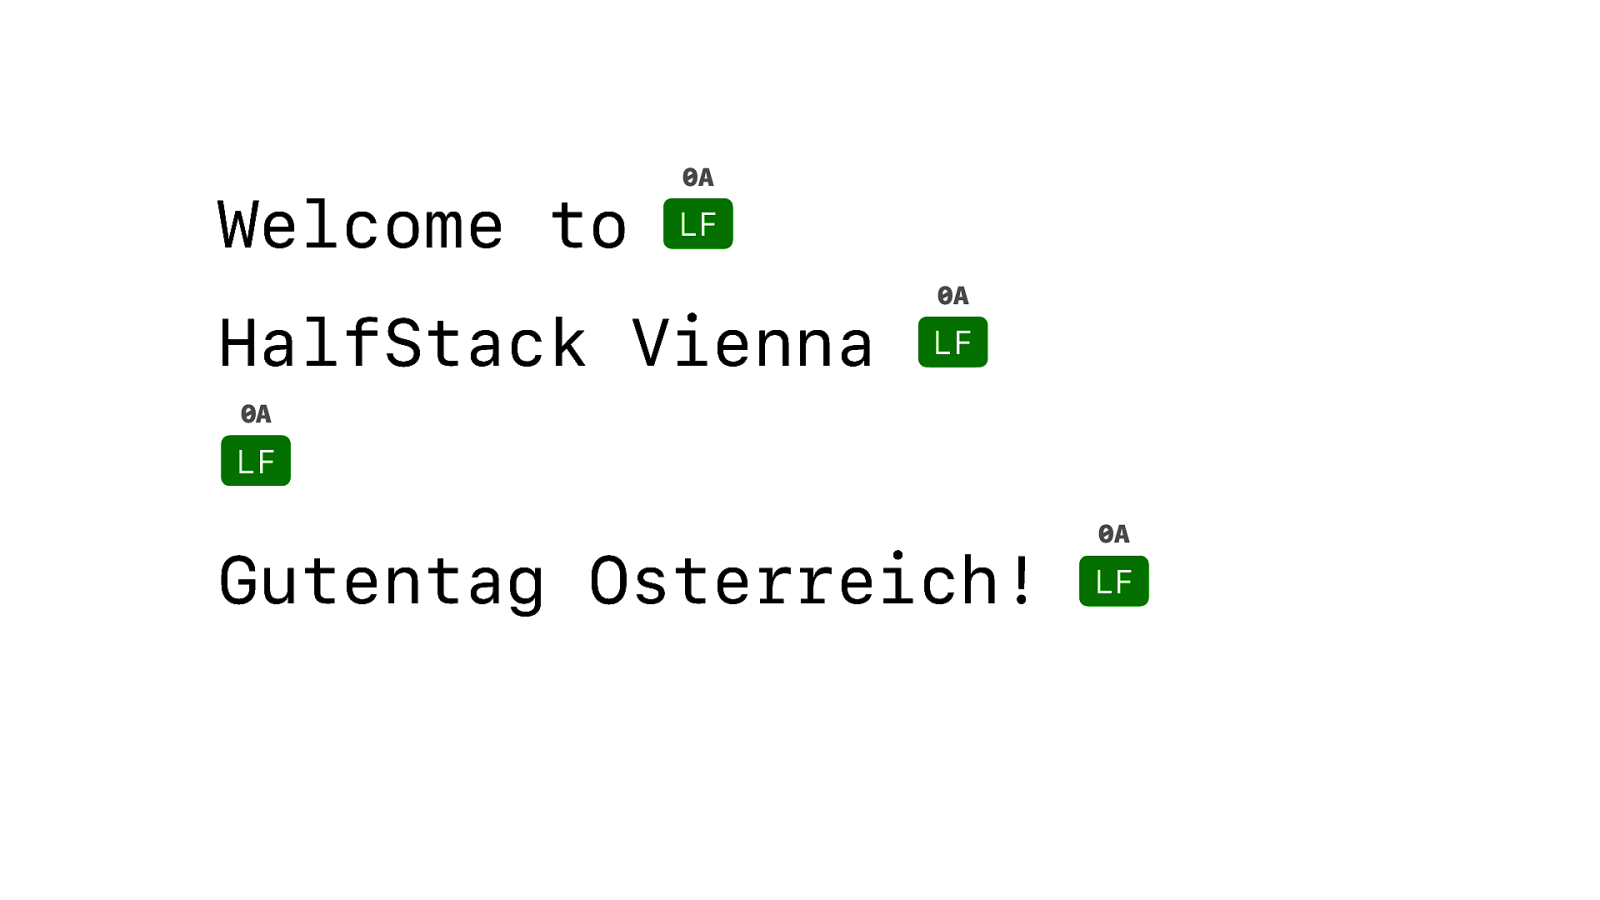
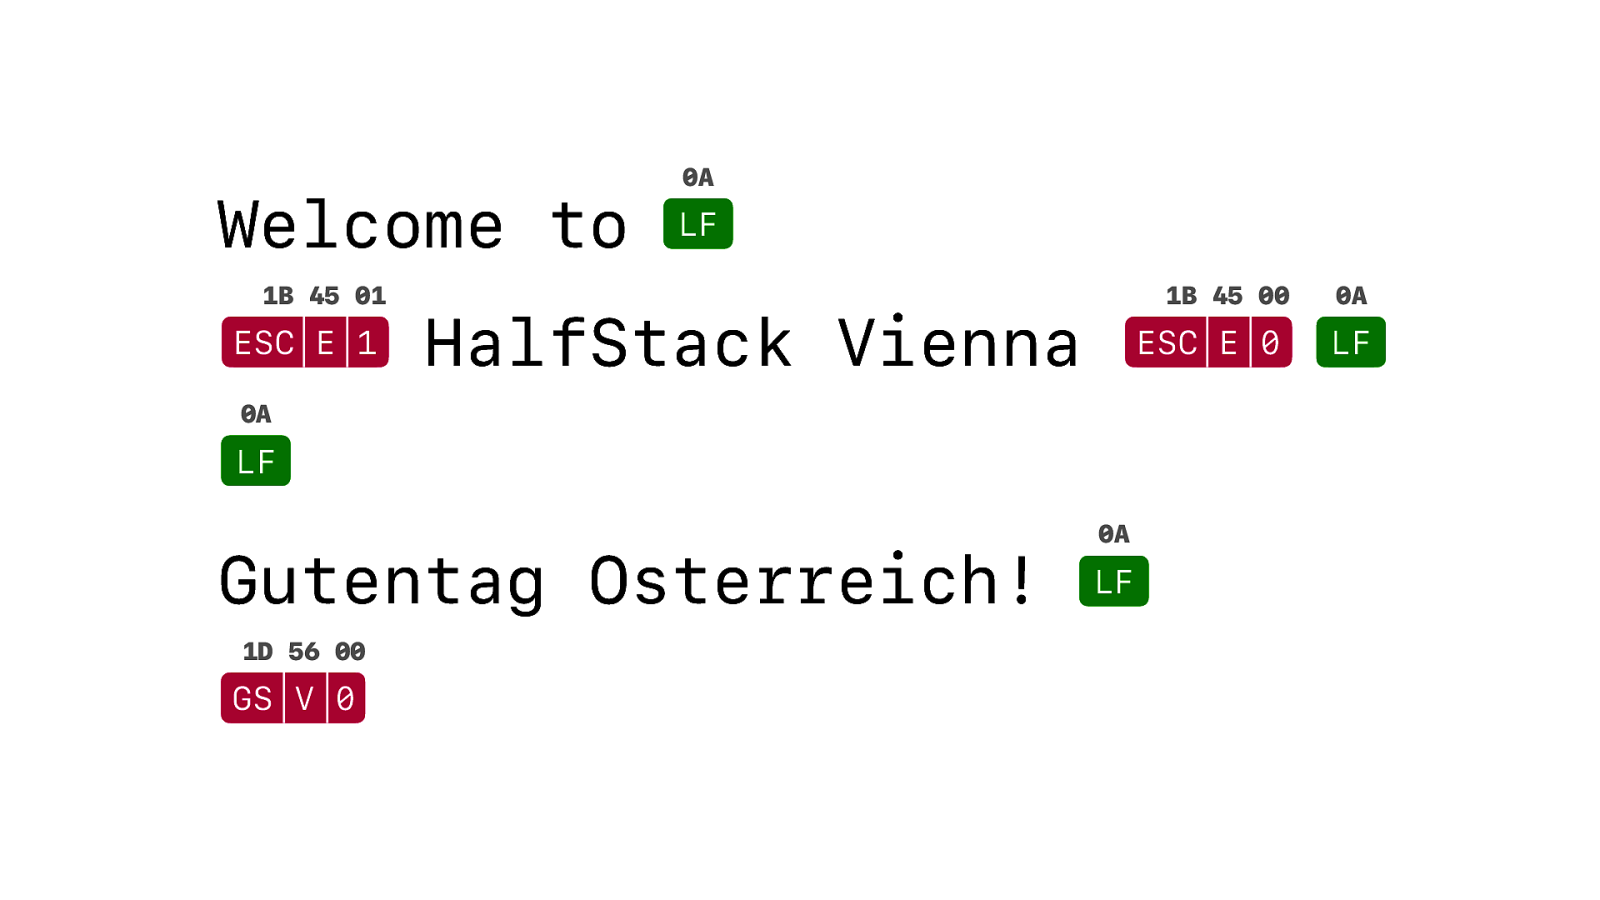
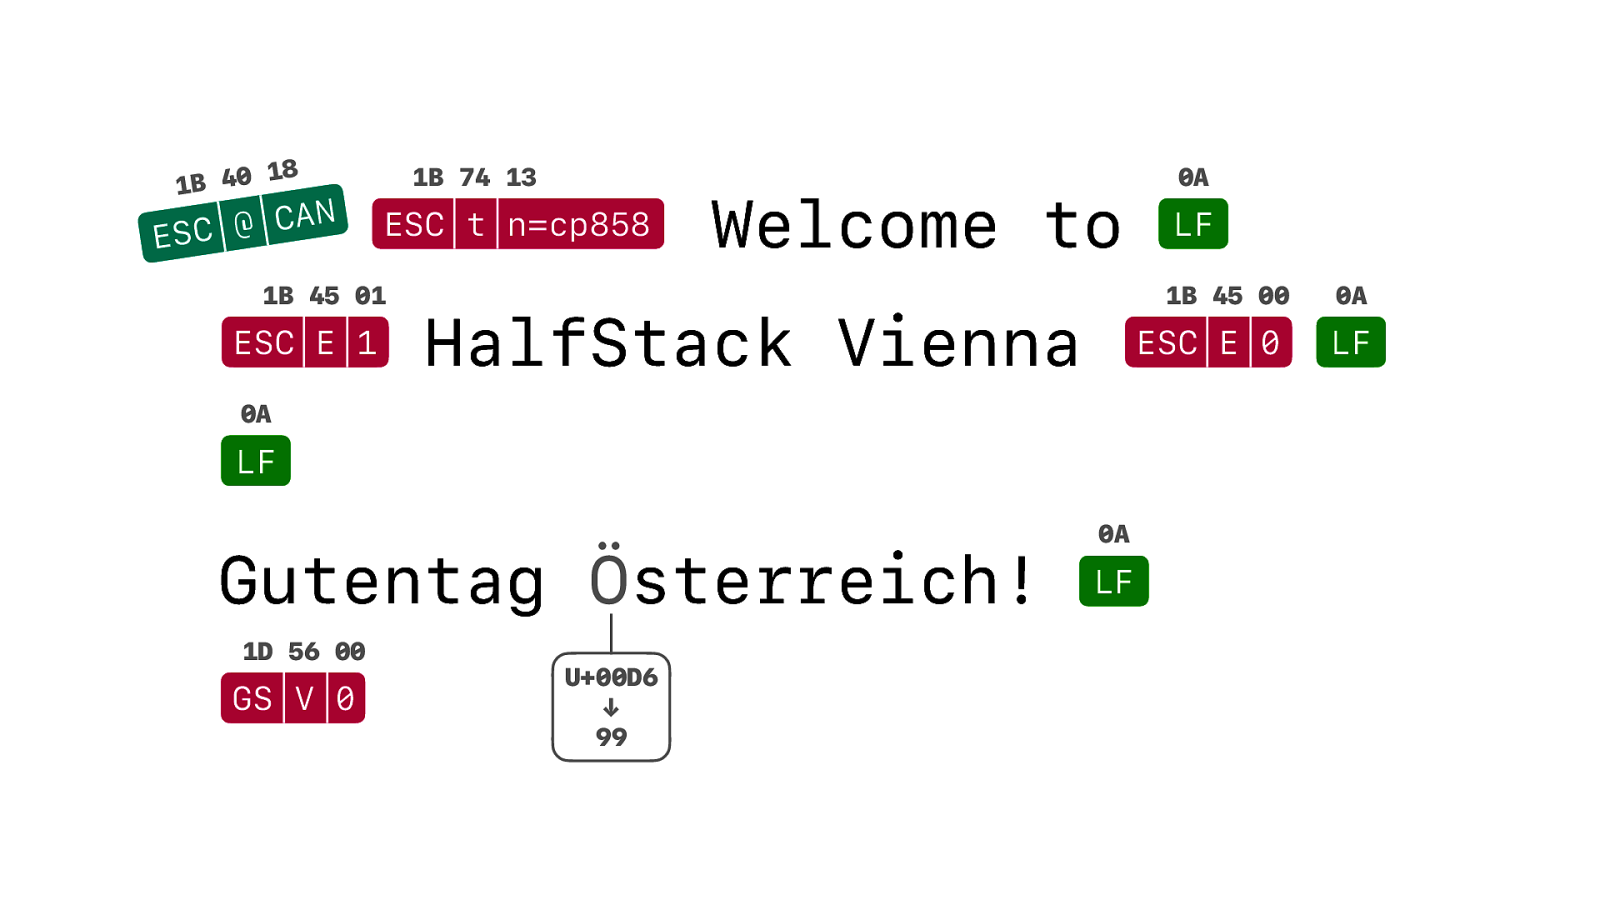
First we need to initialise our printer. We forgot to do that. And by initialising we make sure the printer is back to the default state and we don’t have the styles of the previous user of the printer interfering with what we want to do. And then we need to fix that O. It is supposed to be an O-with-an-umlaut.
Two dots above the O. But… ASCII does not contain an O-with-an-umlaut… So we need to go on a tangent and talk about internationalisation before Unicode. Internationalisation in the 1980’s.

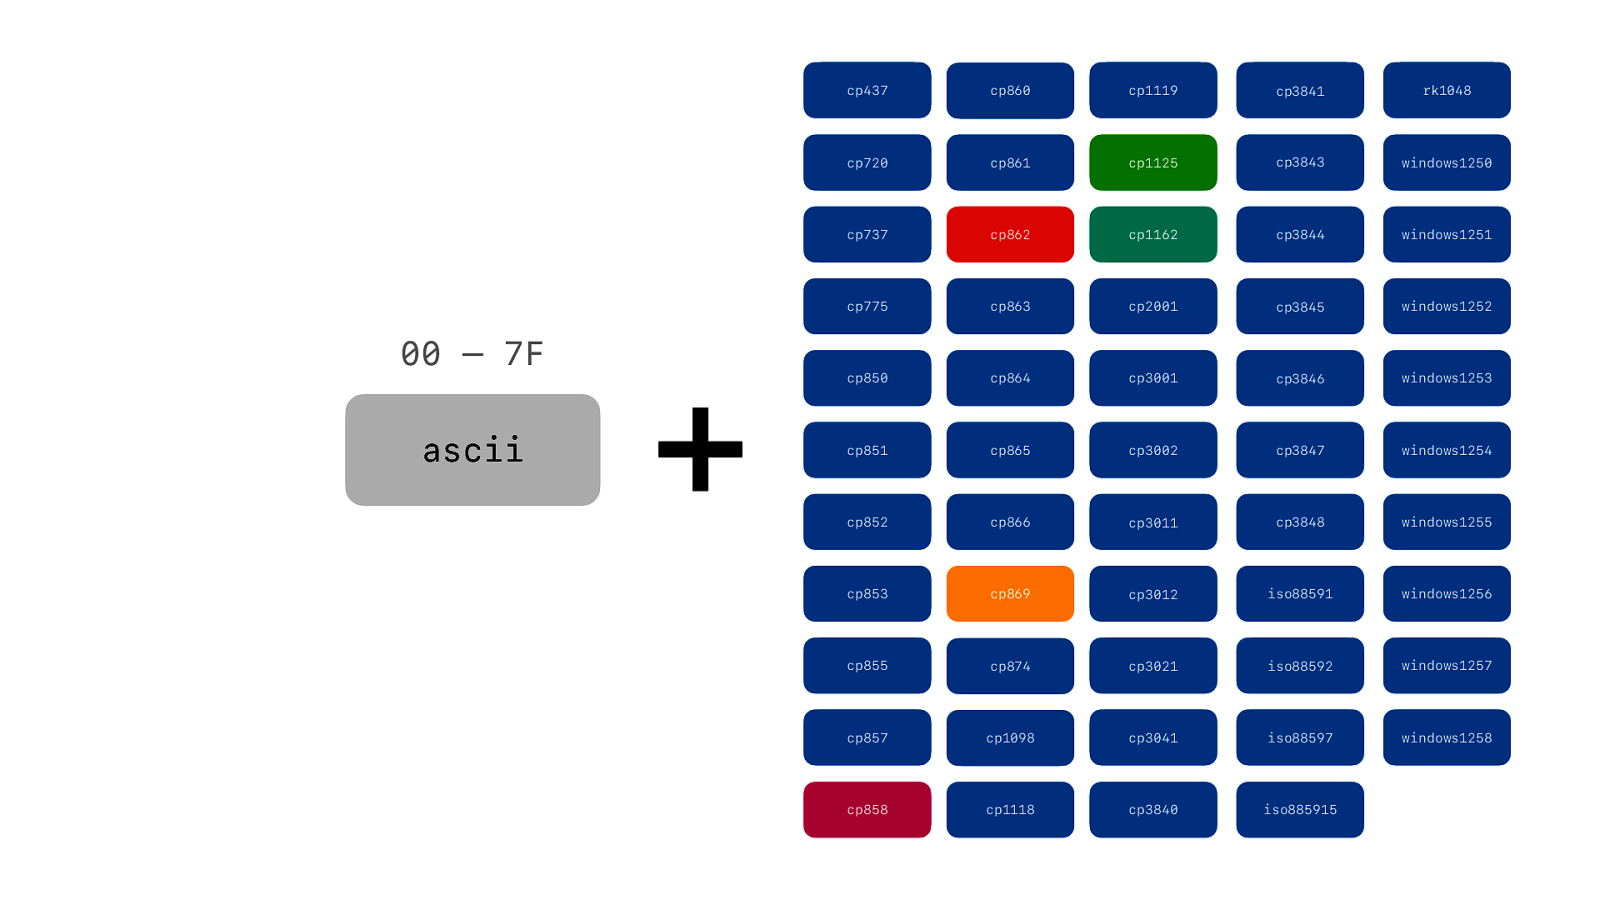
So ASCII is just 7 bits. That means just 128 different characters and we still have another 128 left over.
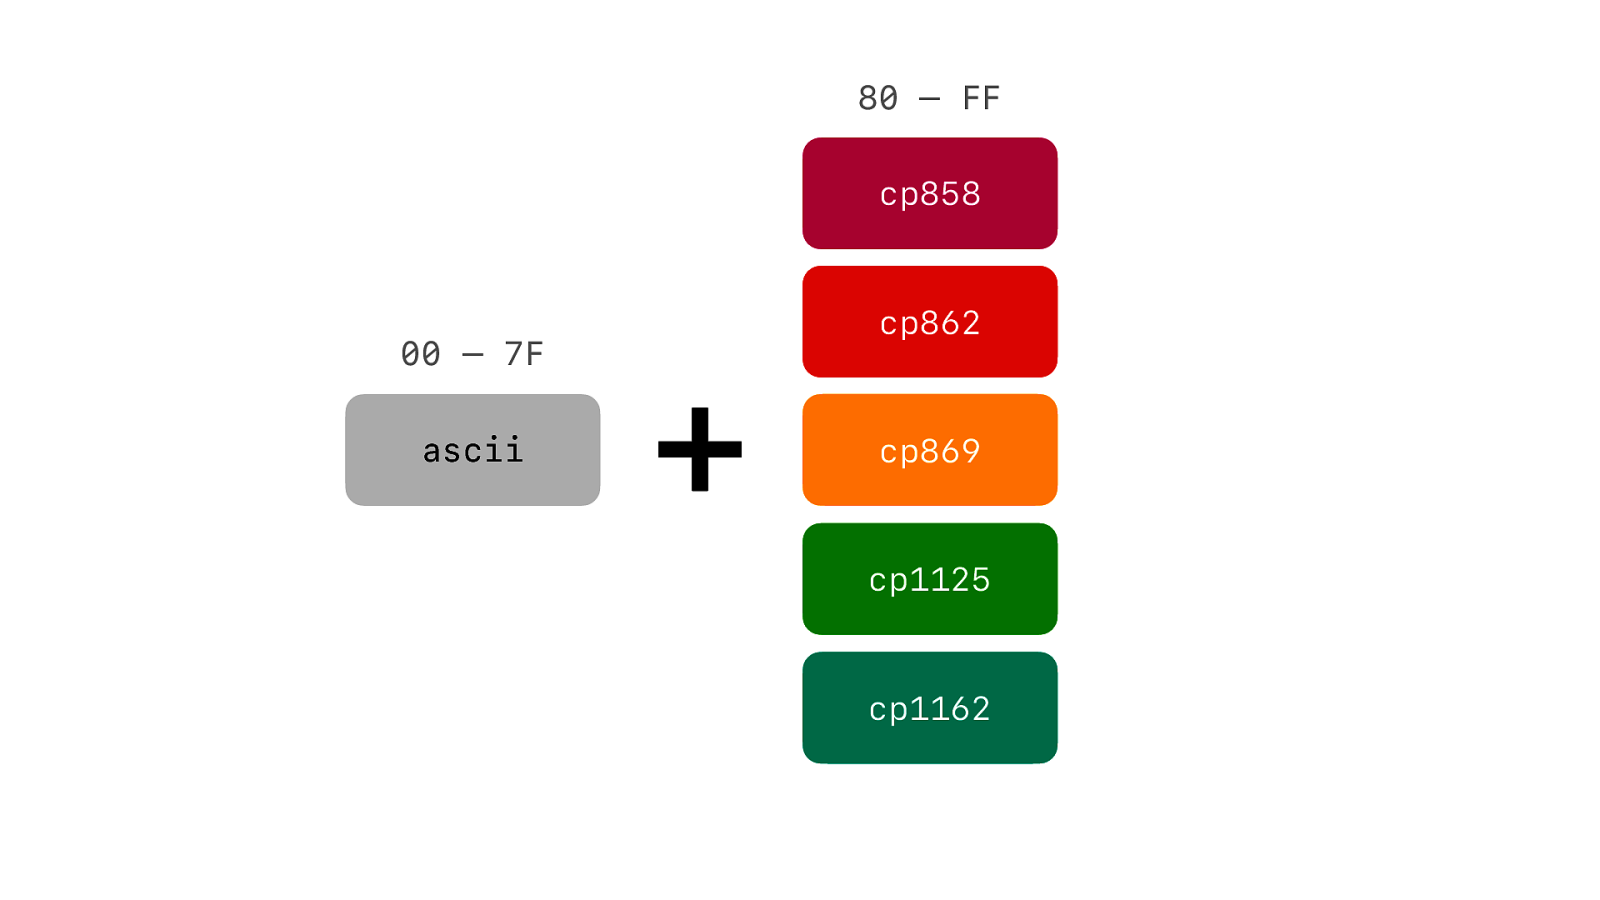
And for that we have codepages. We can swap out a different set of 128 characters that are in the upper range of an 8 bit byte.
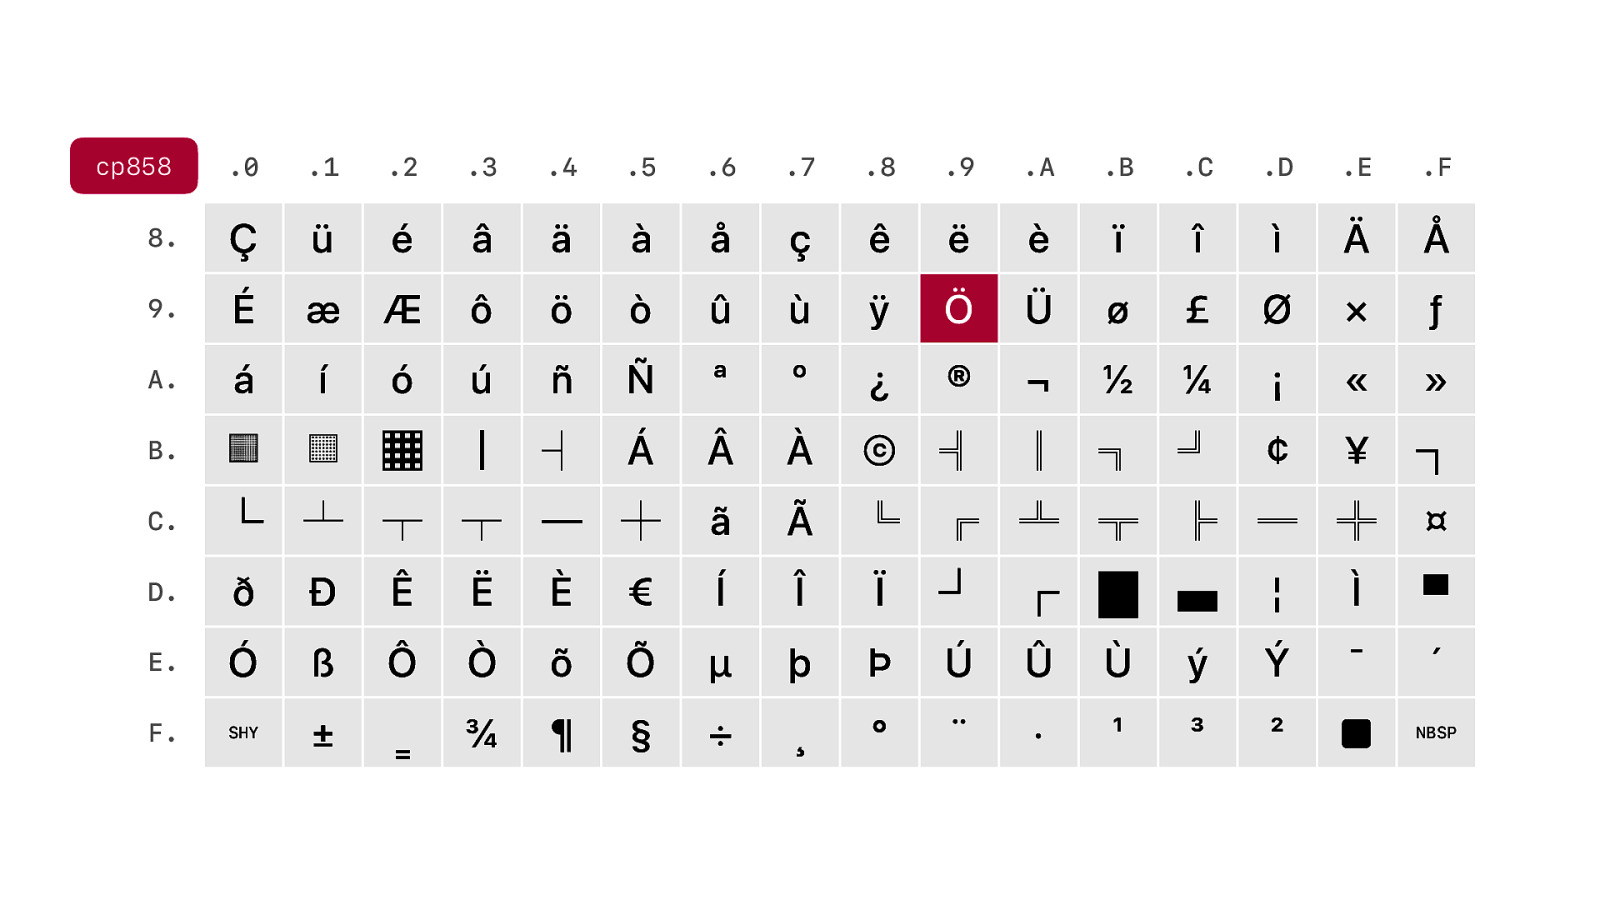
It can be Western European, which contains the character we want.
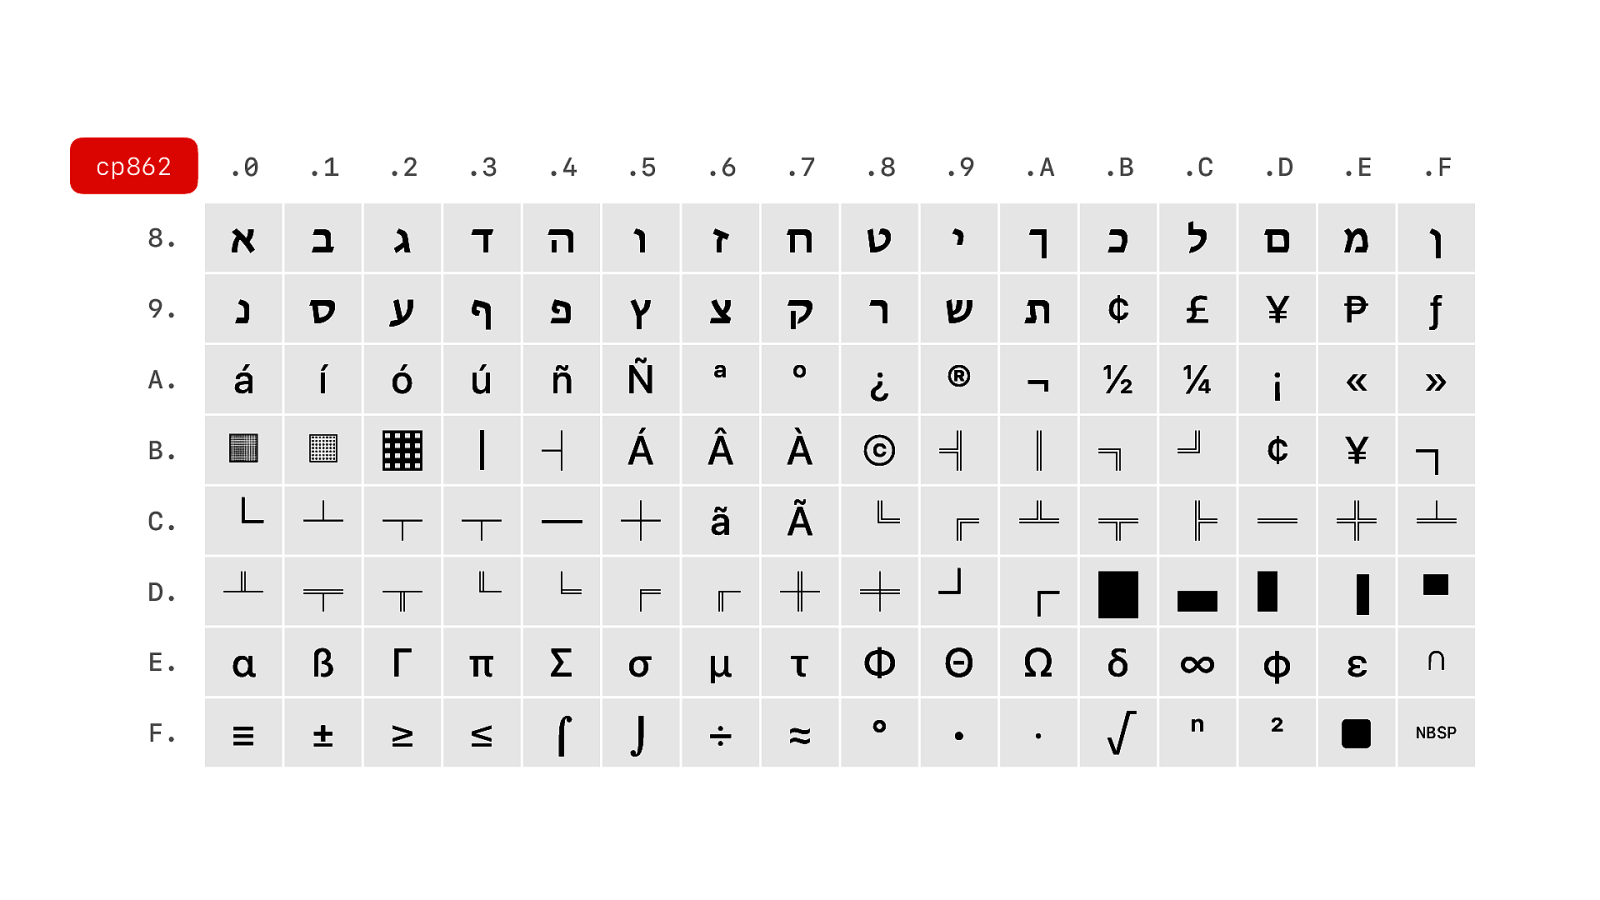
Or Hebrew…
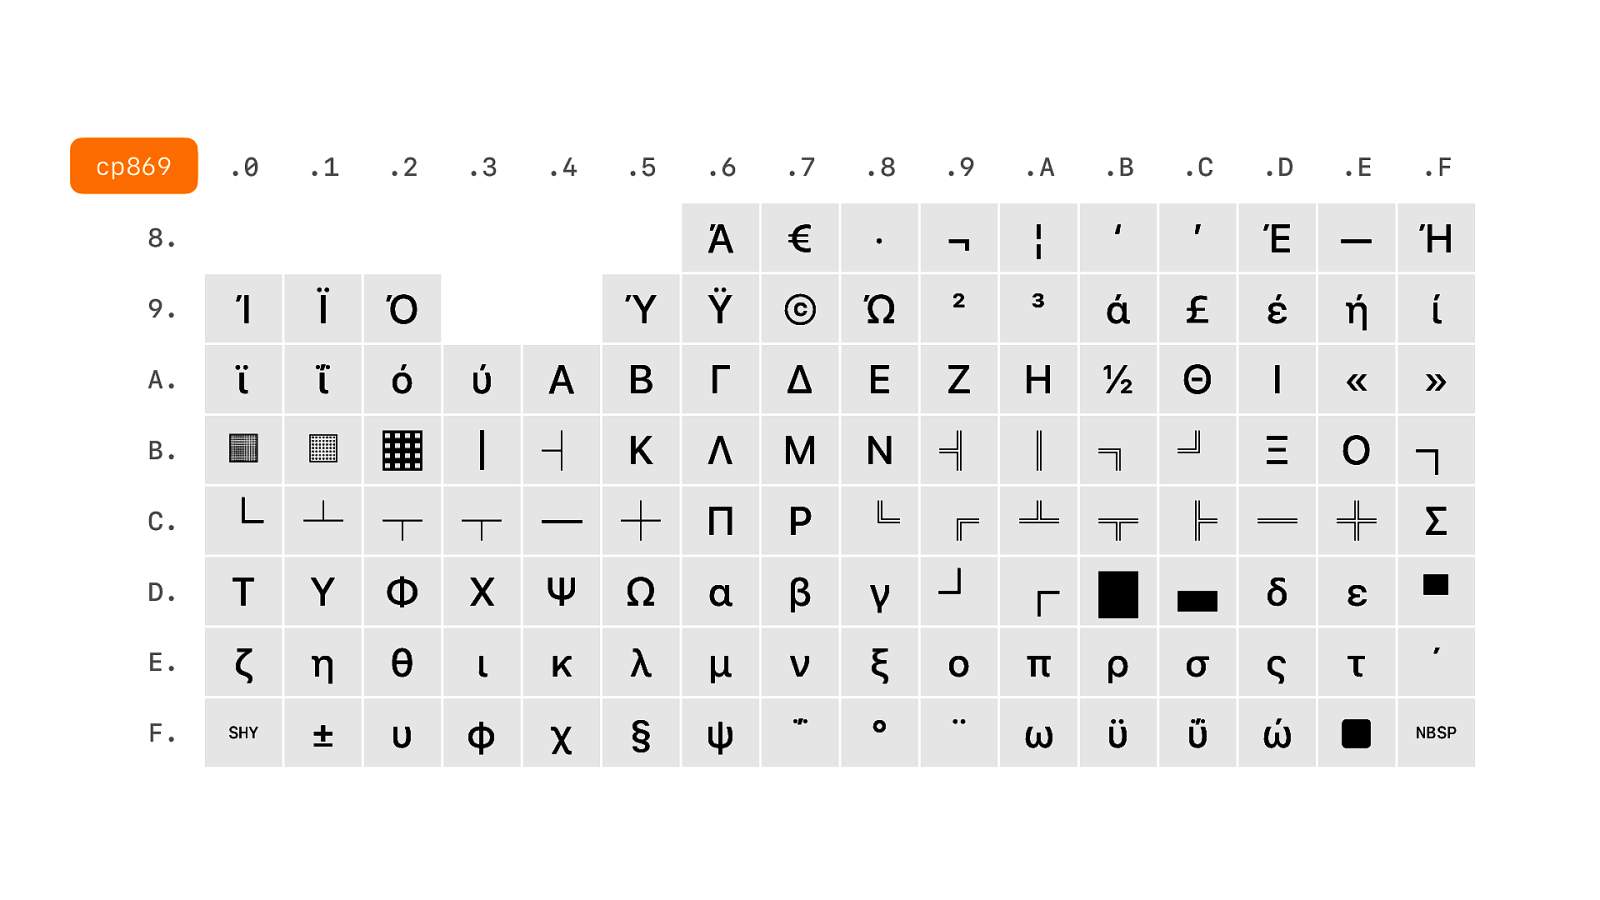
Or Greek…
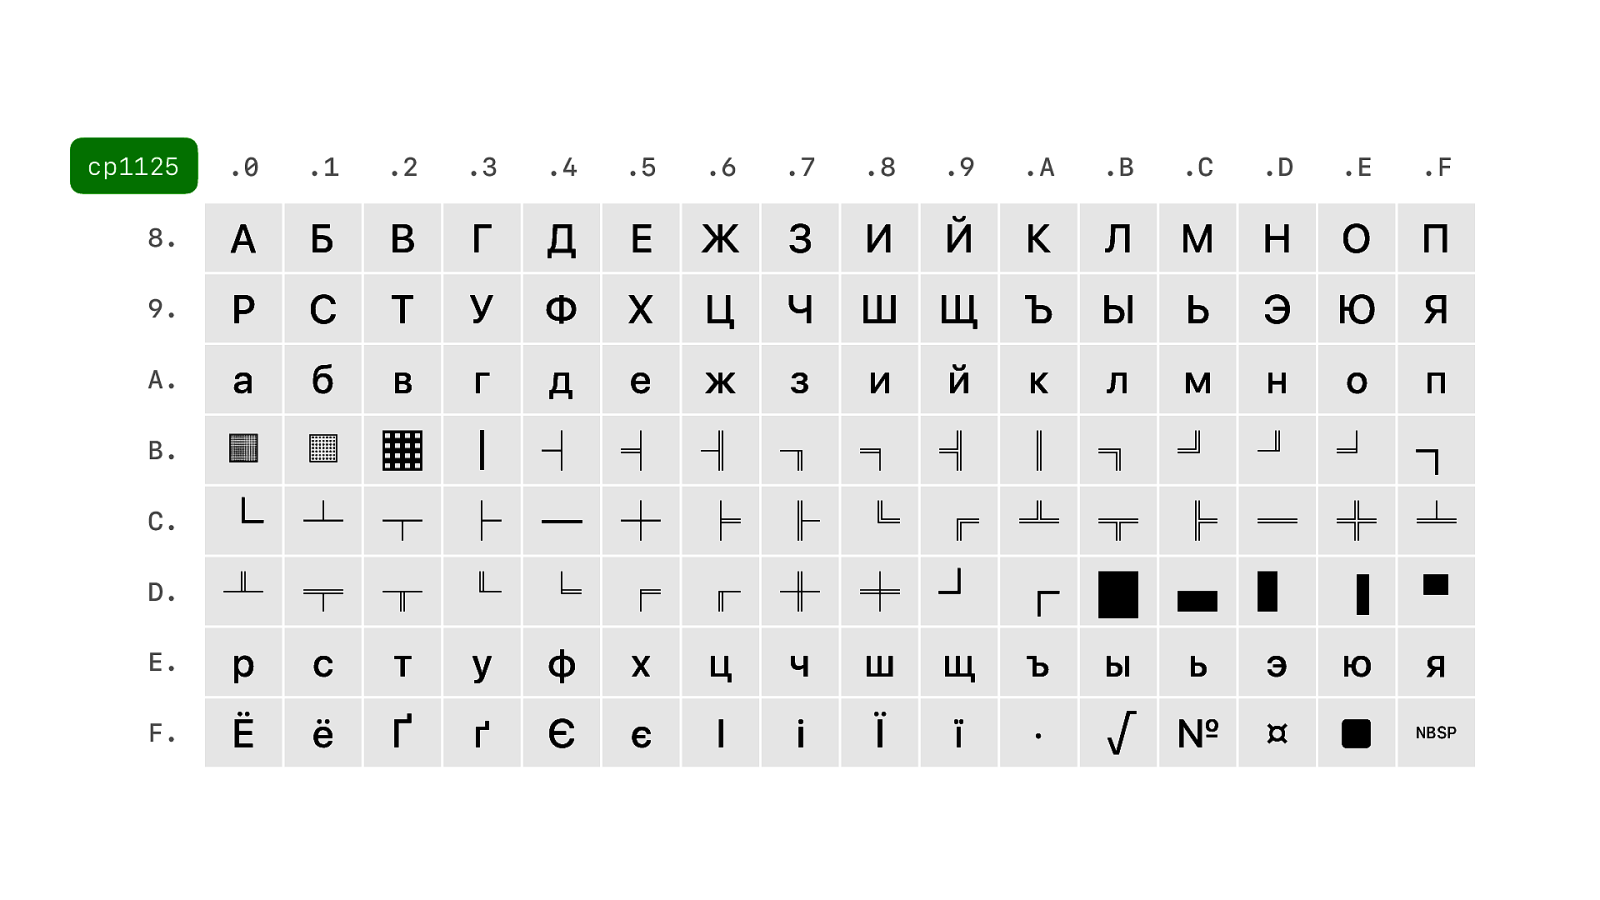
Ukrainian, which has its own codepage, which is different from Russian, because Ukrainian uses number of different characters.
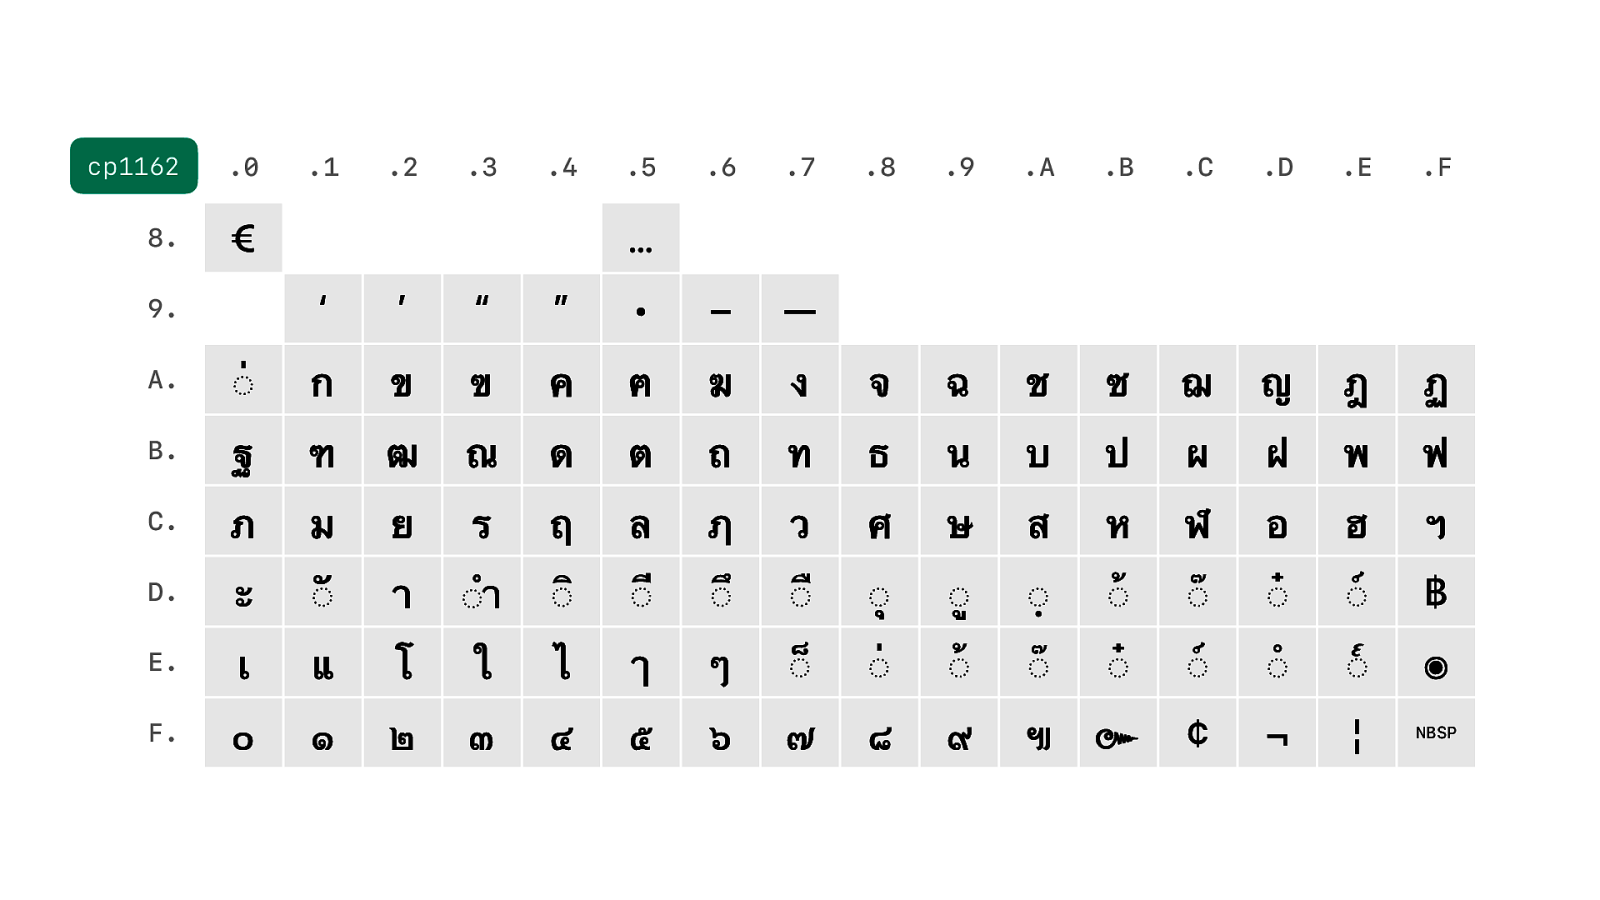
Or even Thai…

We have some many codepage. So….
…many codepages.

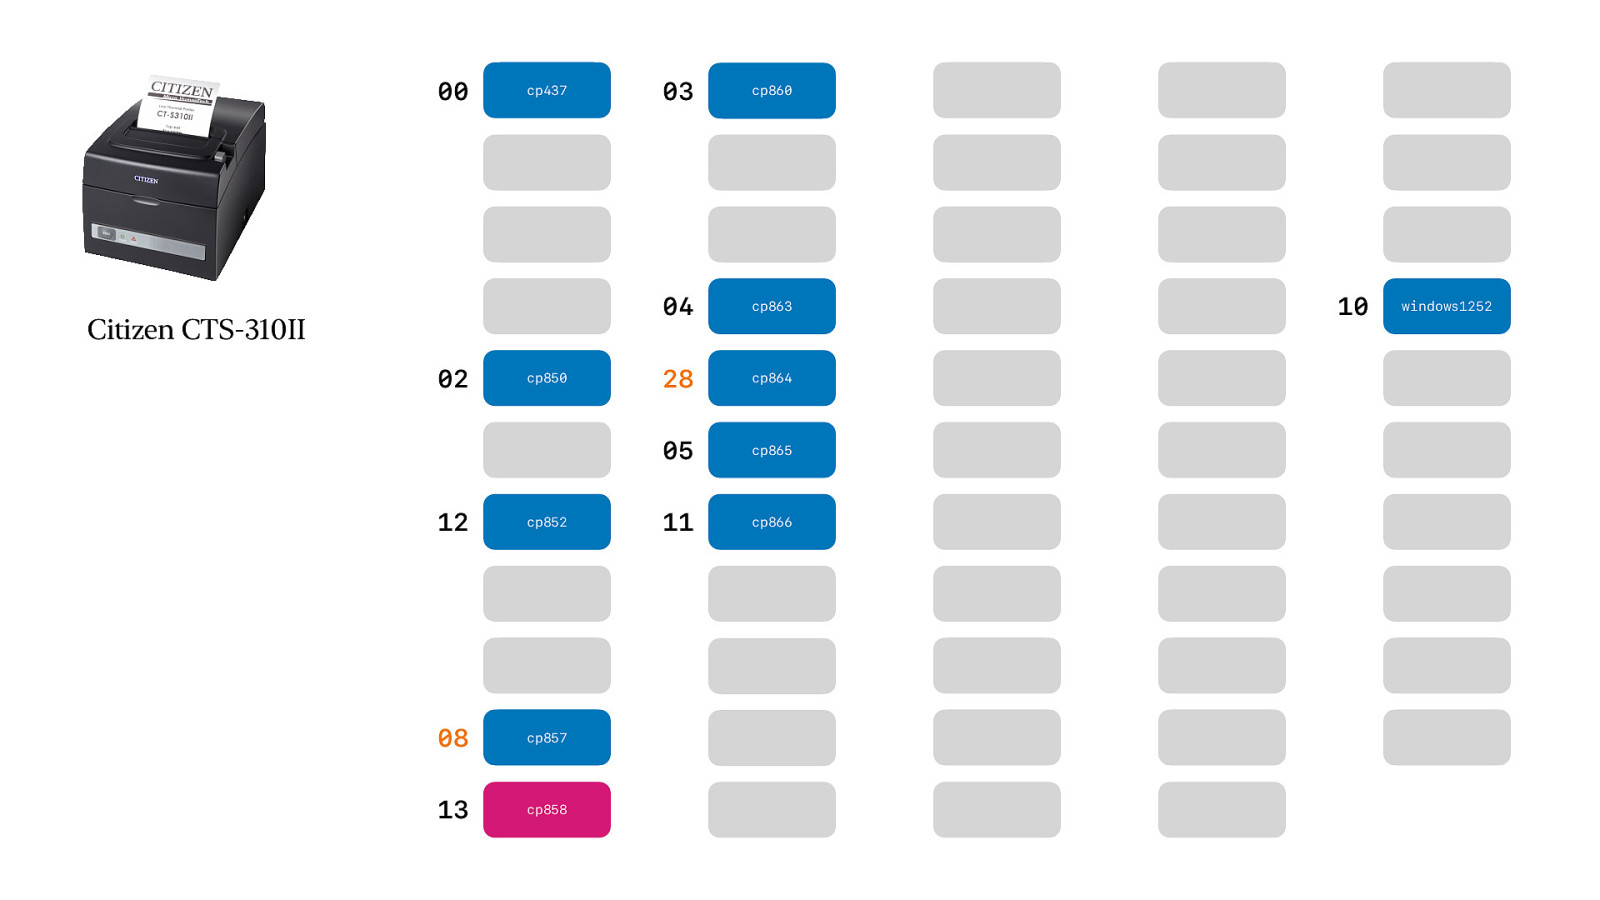
But we want codepage 858, which contains our O-with-an-umlaut.

But to get that O-with-an-umlaut we need to look up the value in our code pages. And in this case we need to send hexadecimal 99. If we were to use a different codepage hex 99 would have a different character associated with it.
Luckily there is a library to do that. But unfortunately the codepages used by printers can be pretty obscure, so it only supports a fraction.
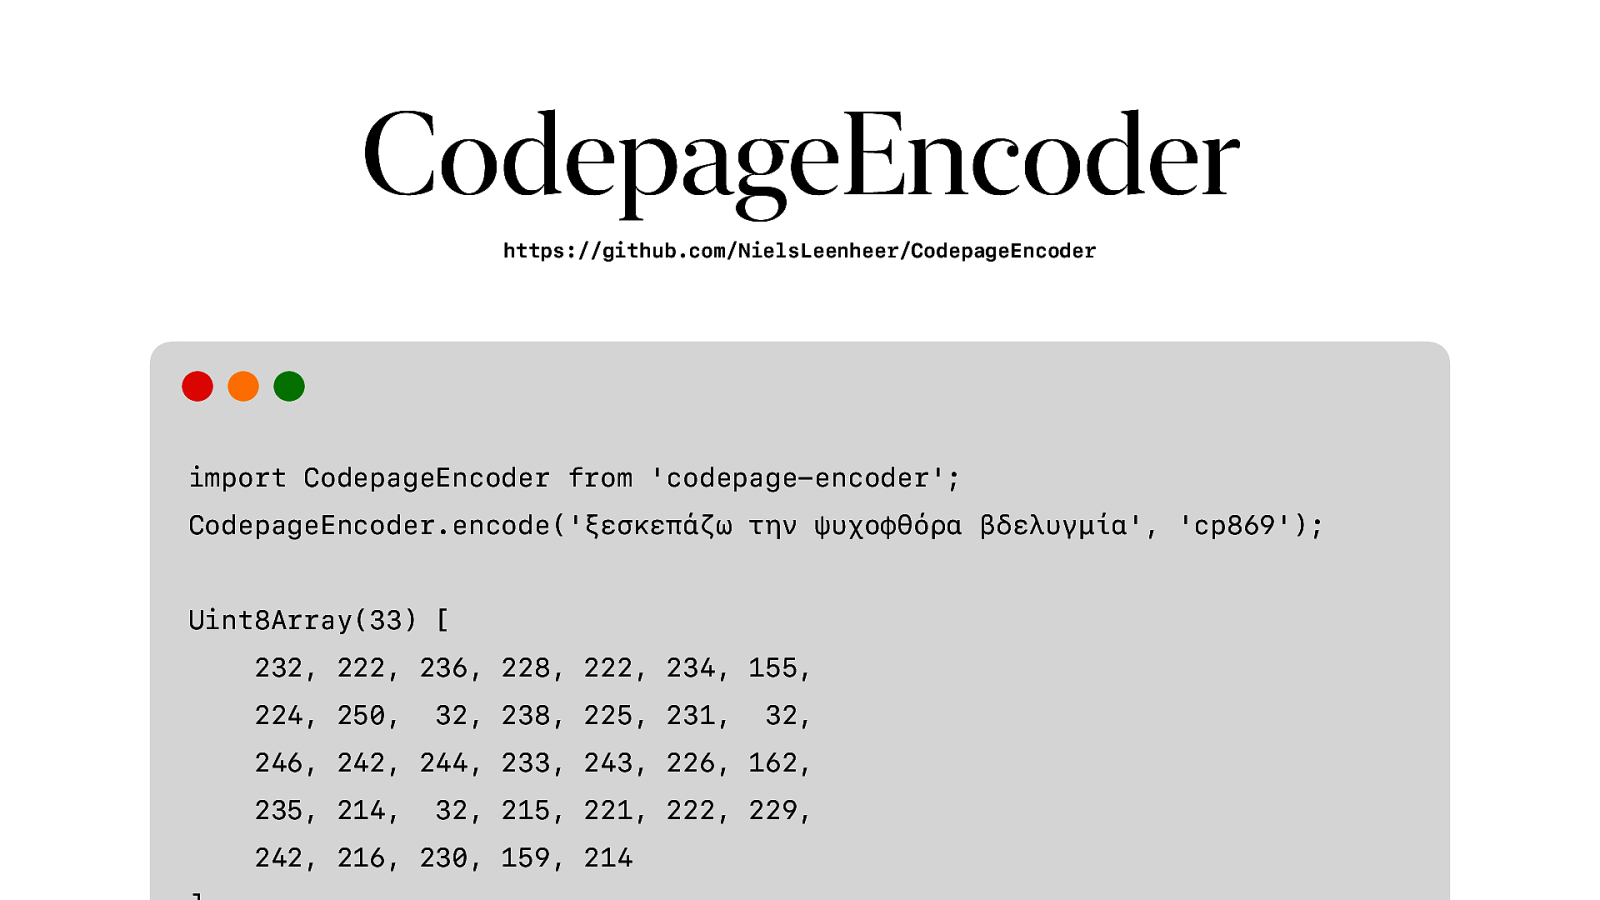
So I created a library called CodepageEncoder, specifically for receipt printers. And it even allows us to things like automatically choosing the right codepage and for the characters you want to print and switching on the fly when needed.
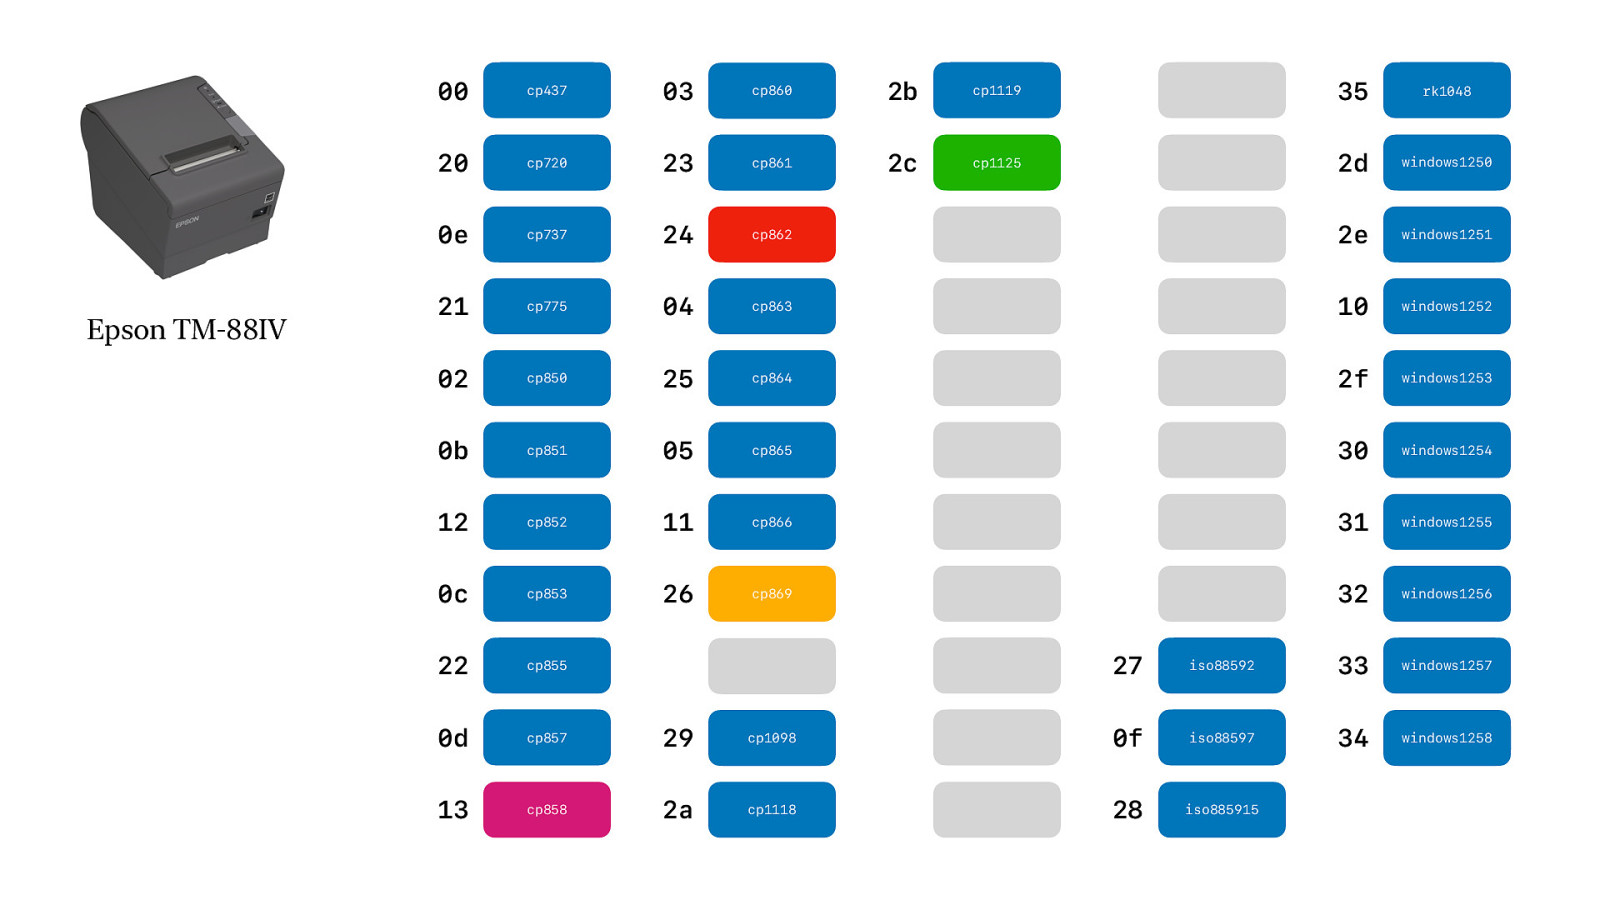
Of course, not every printer supports every codepage.
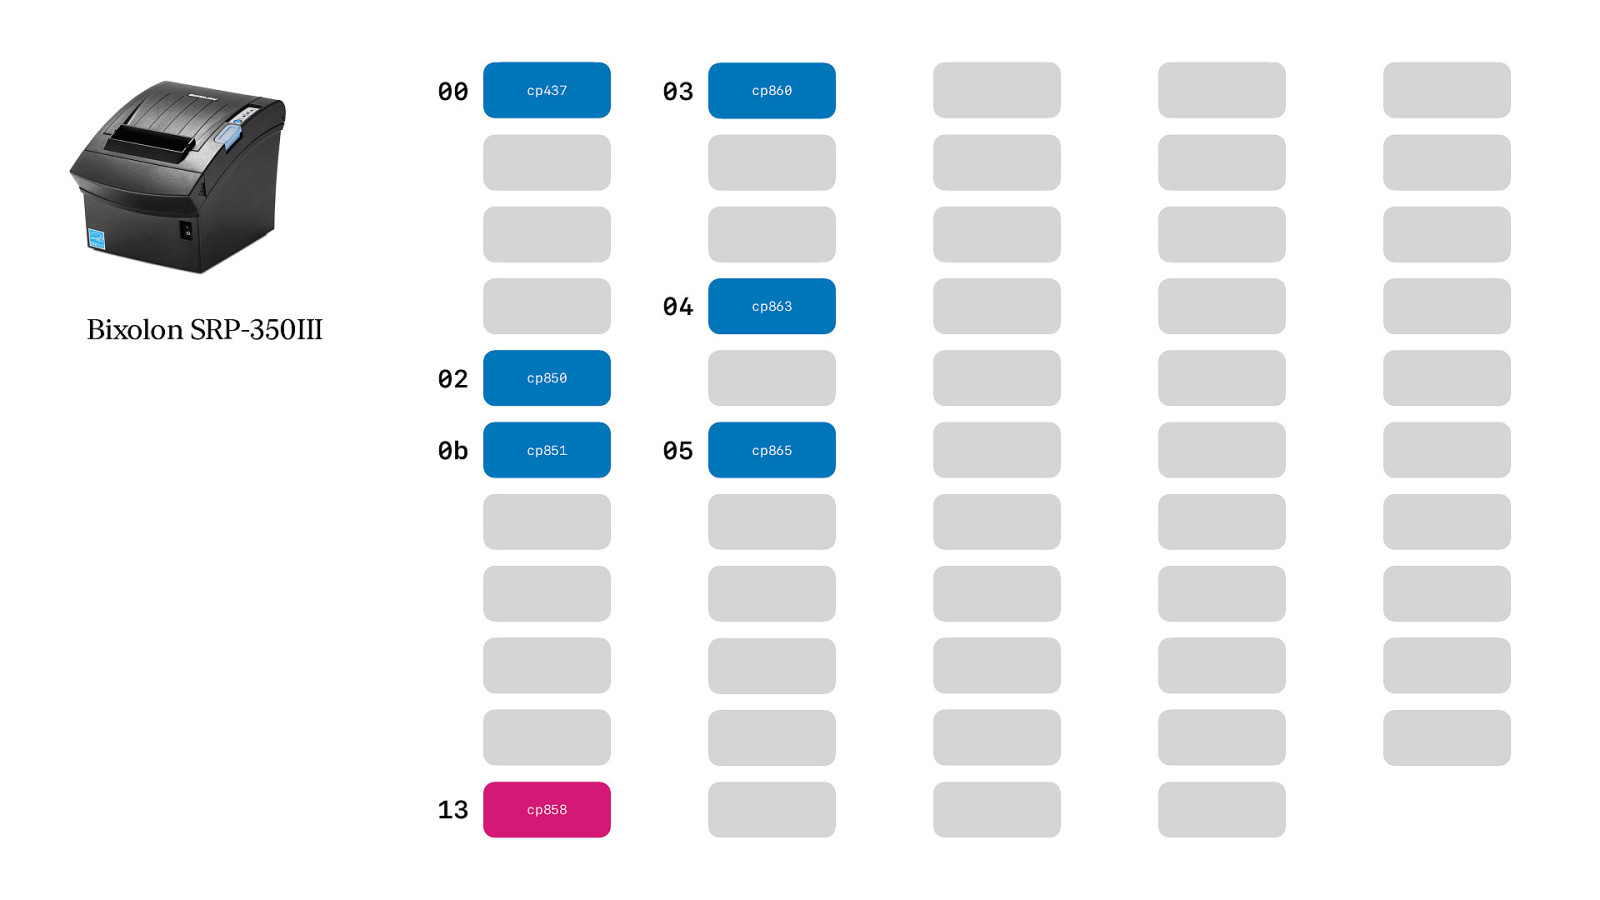
Some support less
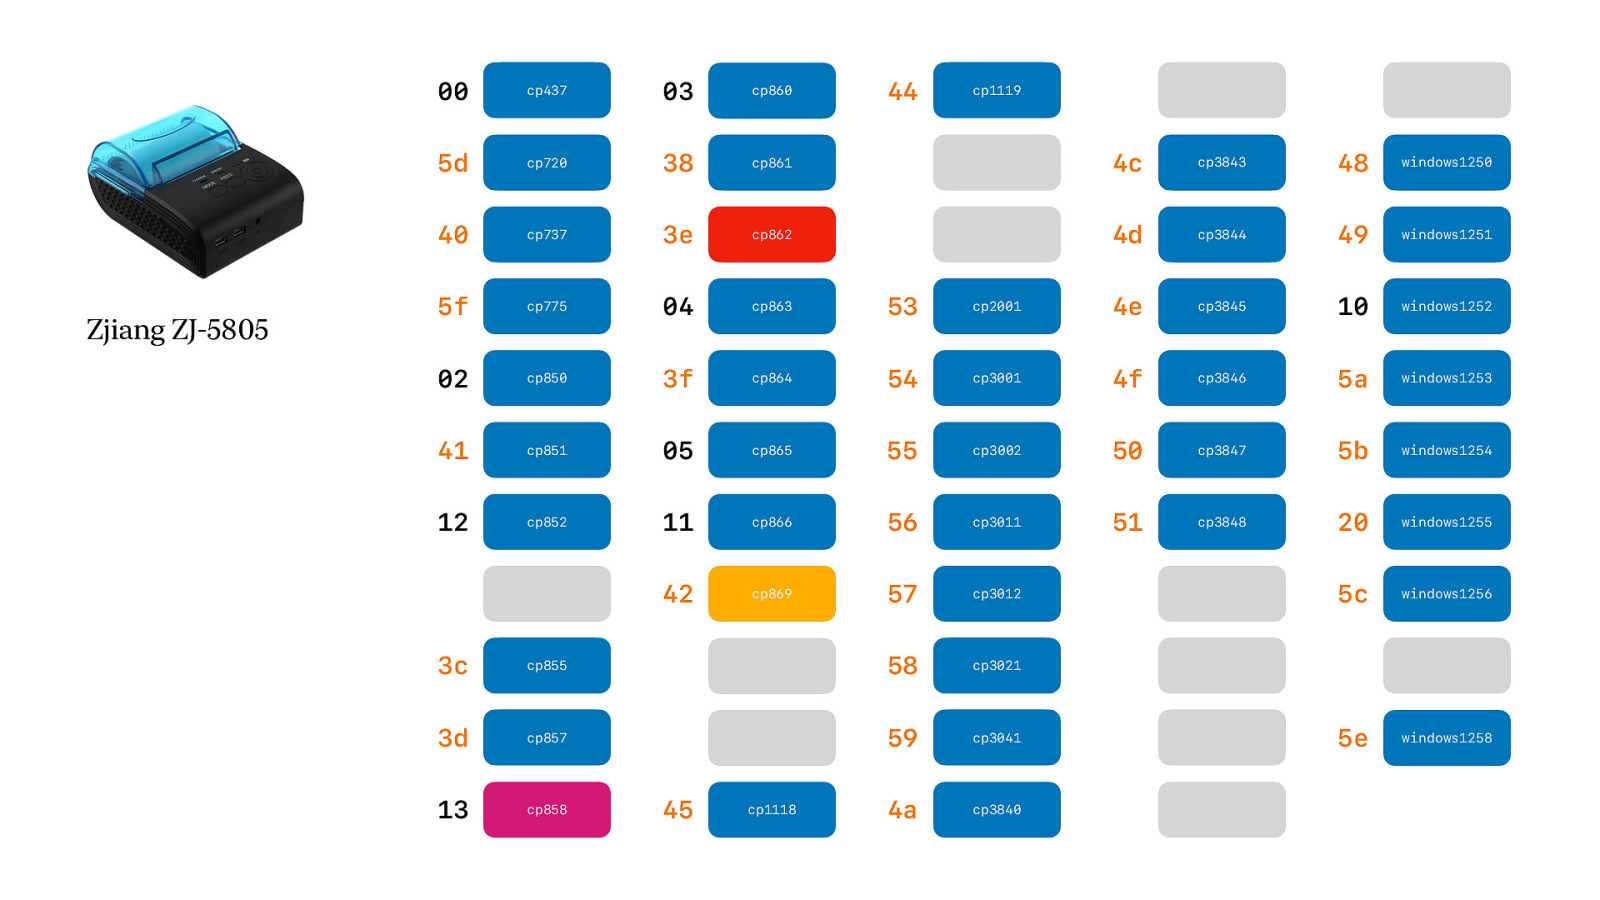
Some support more, but use a different identifier than what Epson does. And Epson created ESC/POS, so why…. Why!? It is really annoying.
But it is not just cheap Chinese printers that do that…

But wait… what about cash drawers. As you can see with this receipt printer there is an integrated cash drawer. How do we open the cash drawer?
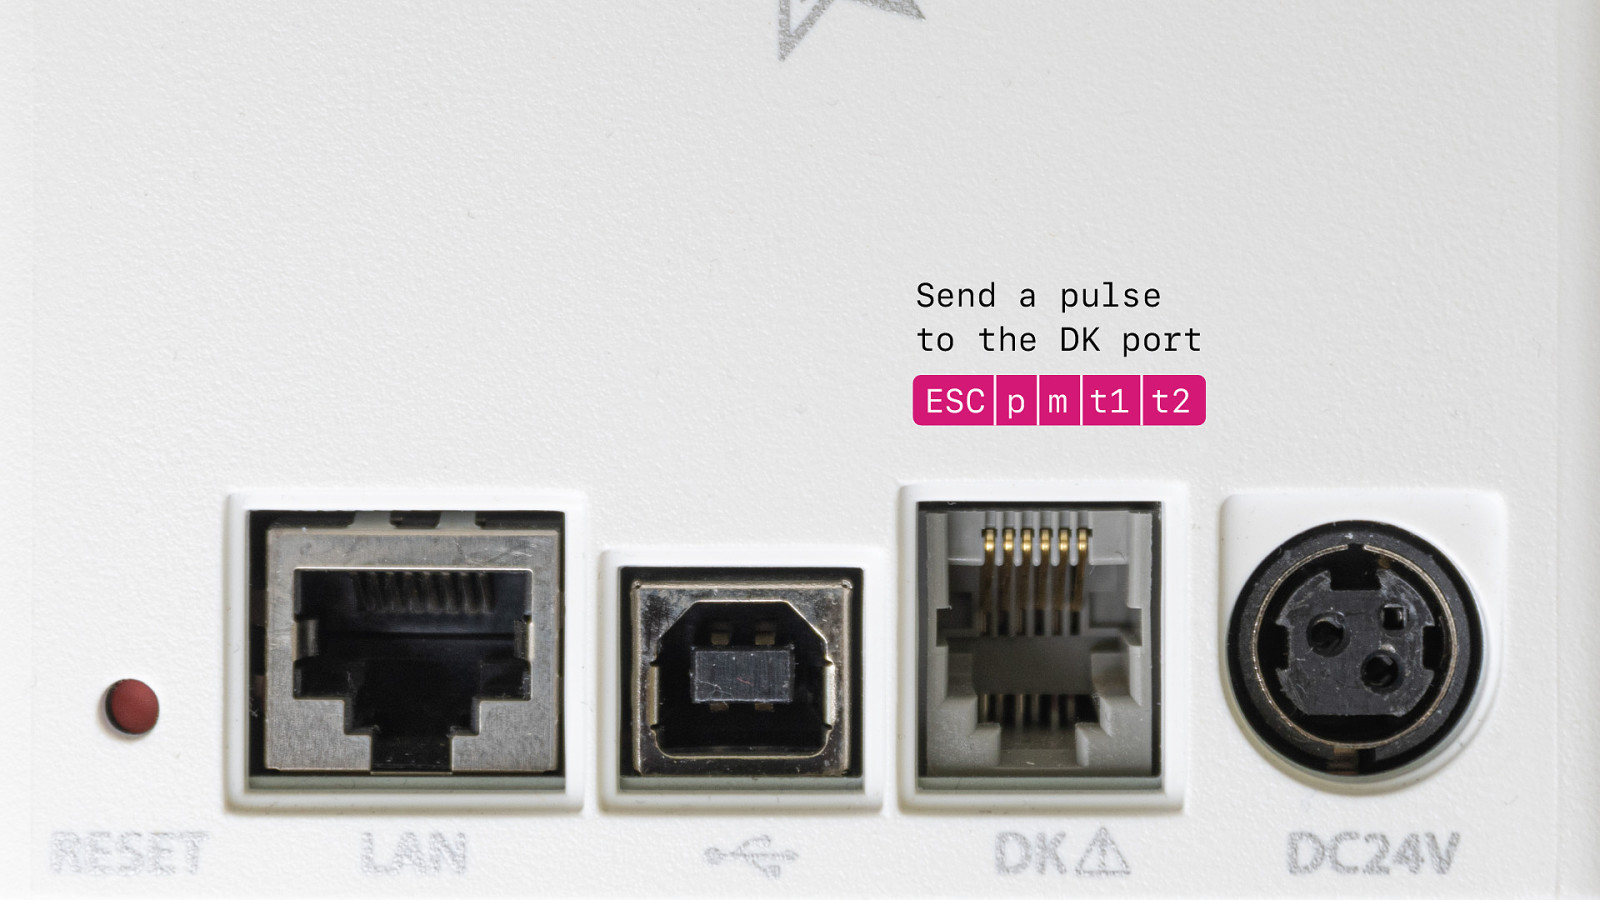
Well, all receipt printers have a DK port. You connect your cash drawer to that port and then you can tell the printer to send a pulse to that port and that activates the solenoid in the cash drawer and it opens. And with the combined printer / cash drawer it works in the same way. So the cash drawer is not really a different device, it is a function of the receipt printer.
When I started this journey I really wished there was somebody who would that created a JavaScript library to make my life easier. And there were libraries, but mostly server side, badly written, PHP or Python. Or JavaScript, but for Node. Not for the browser. So I created one.
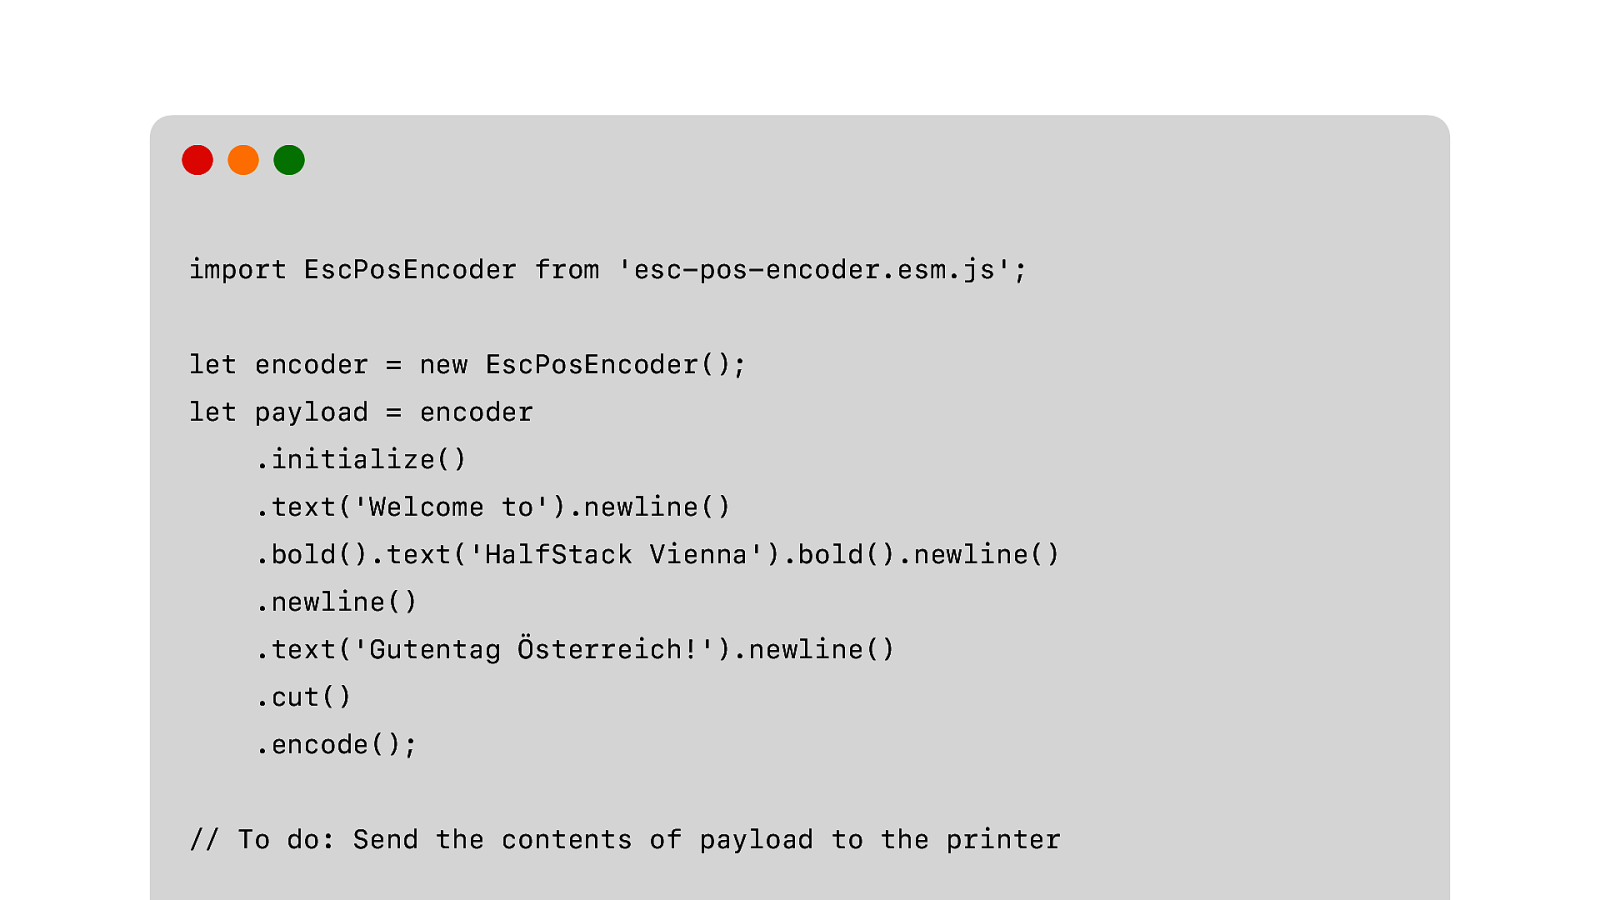
And to get the receipt that we want we just need to do this. This is much easier and you can forget everything I just mentioned in the last 15 minutes.
But wait… it can’t be that simple.
No of course not. I mentioned all printers support ESC/POS, but yeah… I lied.
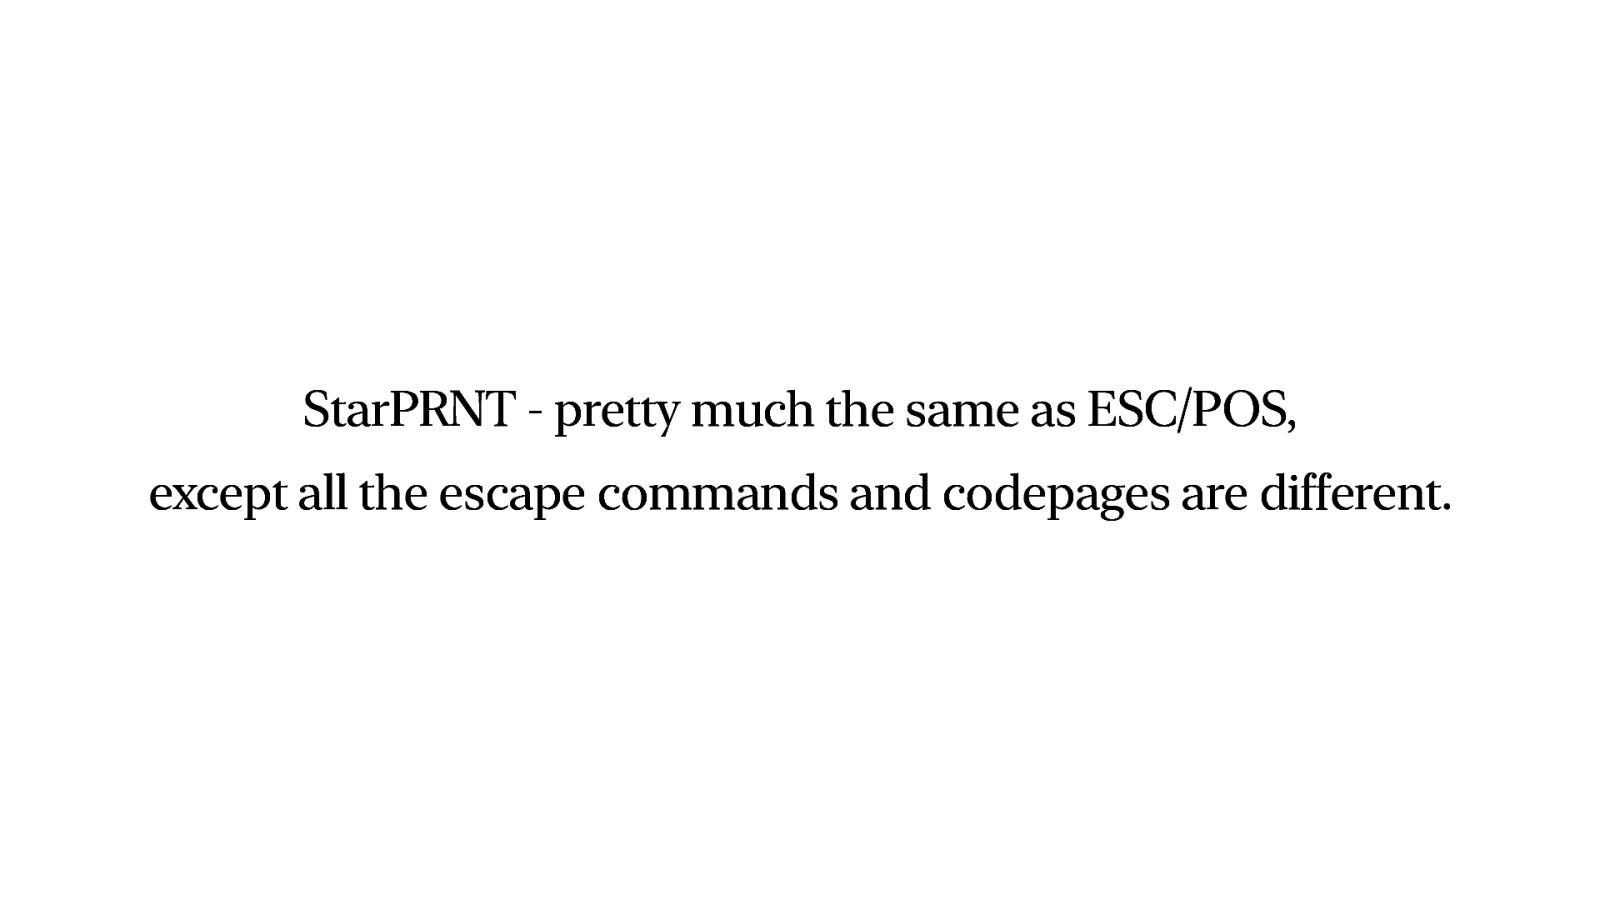
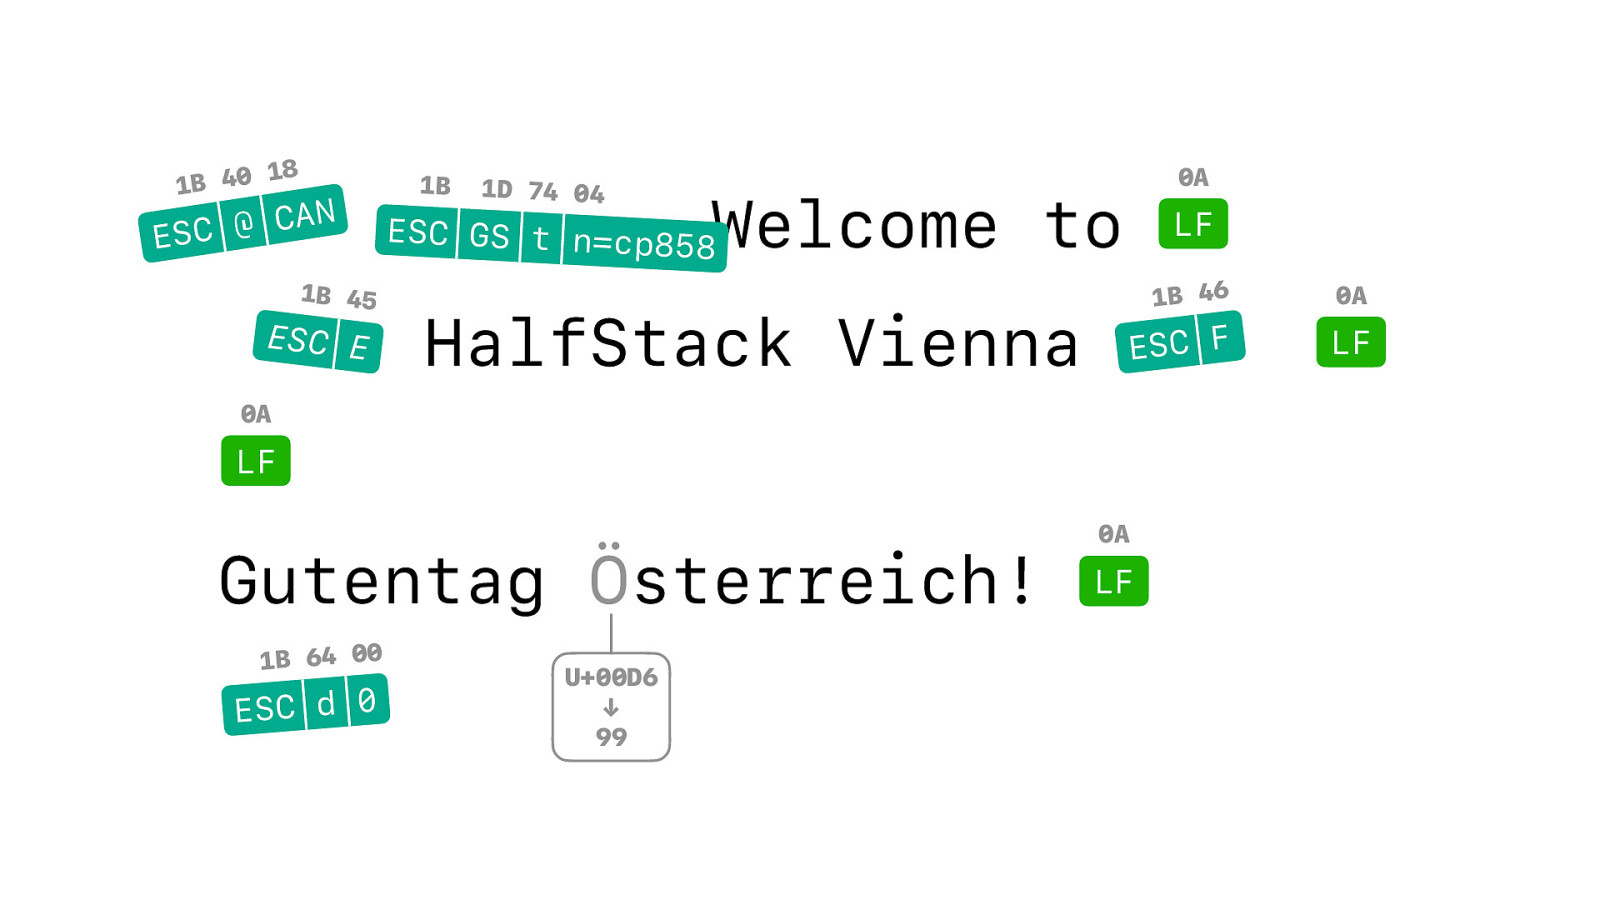
Introducing StarPRINT. Exactly the same as ESC/POS, except that everything is different. Great!
Instead ESC @ we now need to initialise…
with ESC @ CAN… because…. We can?
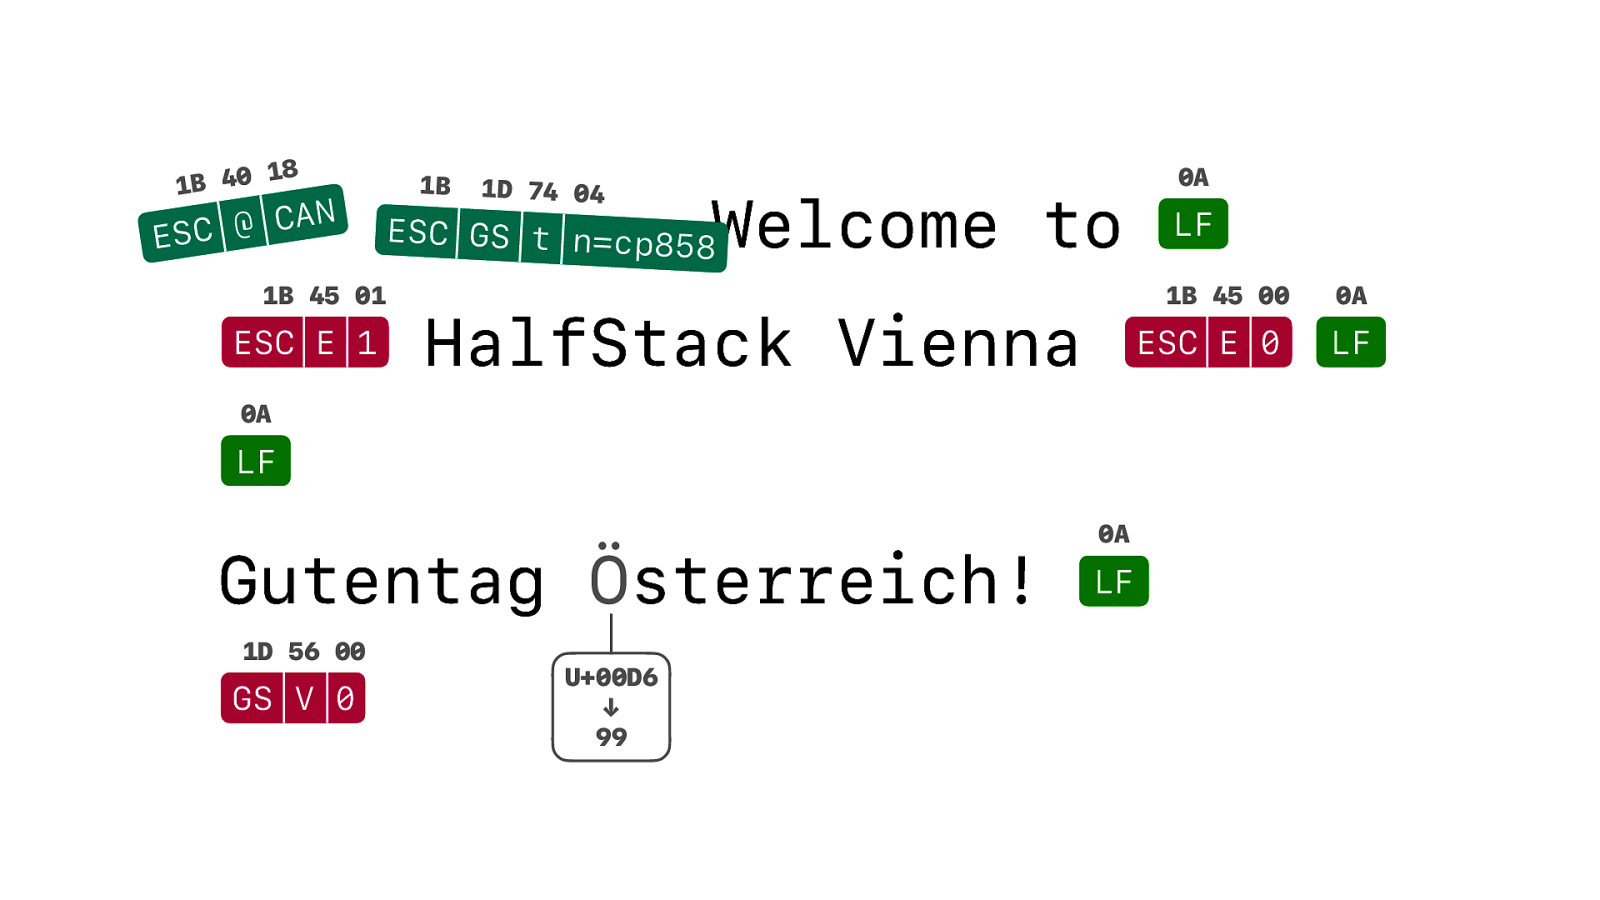
ESC t turns into ESC GS t….
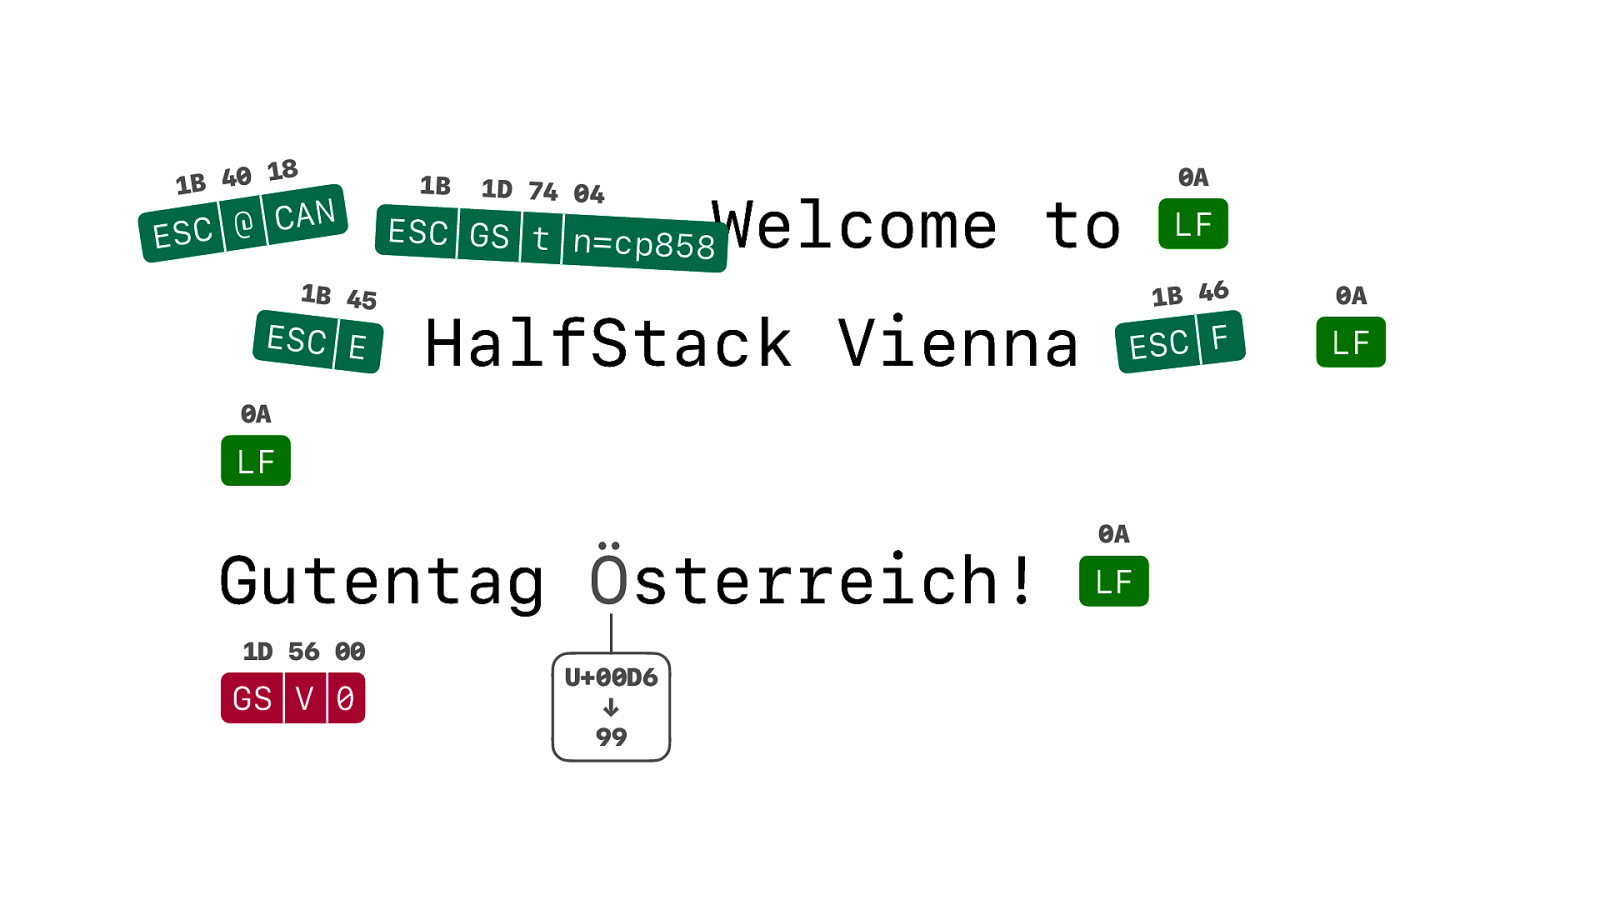
And instead of ESC Emphasis On and Off. You now just have ESC Emphasis and ESC F for ehh…. F this.
So if you have a Star printer, EscPosEncoder is completely useless. You need something specifically for StarPRNT. But there was nothing. I could not find one single library for StarPRNT.
So I created a library called StarPrntEncoder….
But don’t use it… I’ll get back to that.
There were several points during this almost 5 year long journey that I just wanted to give up. There are no standards. And I haven’t even talked about different methods of image encoding. Barcode support that differs between even models from the same manufacturer. Printers that use 203 dpi, or 180 dpi. How many characters can fit on one line? Yes, that can be 44, or 42. Or 35. Or 32. It depends. It’s a big mess.
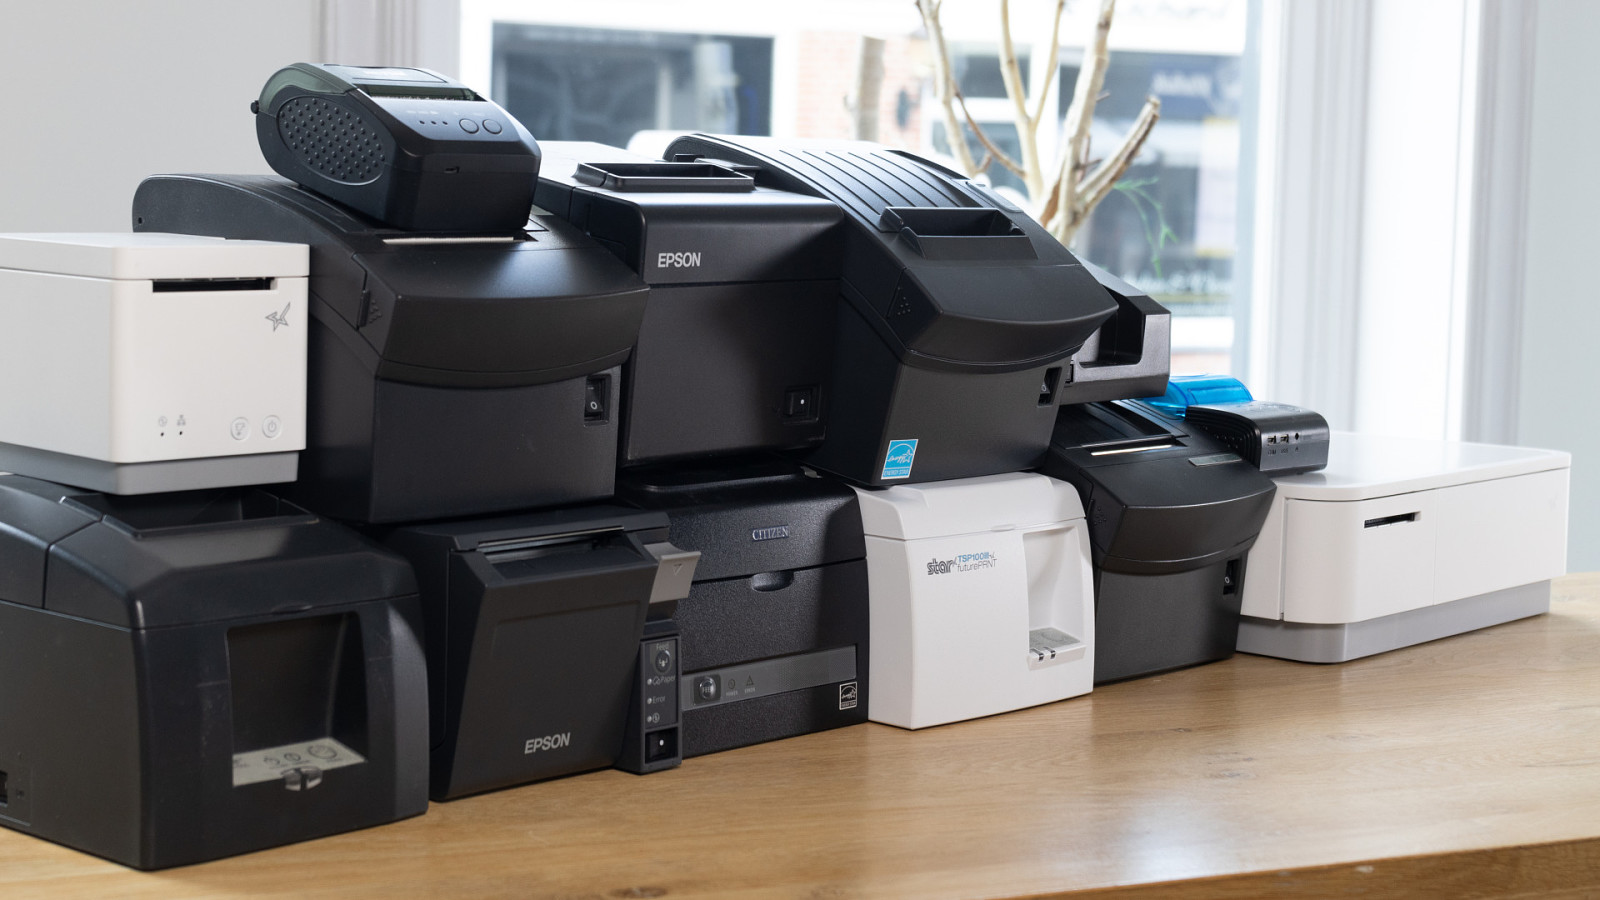
This is how my office currently looks like. I’ve got more receipt printers than what is considered healthy. It’s starting to mess with me and and every shop or store that I visit I try to look for the model and make of their printer. Wondering if I should get one more.

If somebody says to you: “You don’t need another receipt printer. You already have more than enough receipt printers”. Just ignore them. You don’t need that kind of negativity in your life.
The result this madness is a library called ThermalPrinterEncoder that supports both ESC/POS and StarPRNT. It supports all the different resolutions and codepage mappings. And it’s backwards compatible with EscPosEncoder.
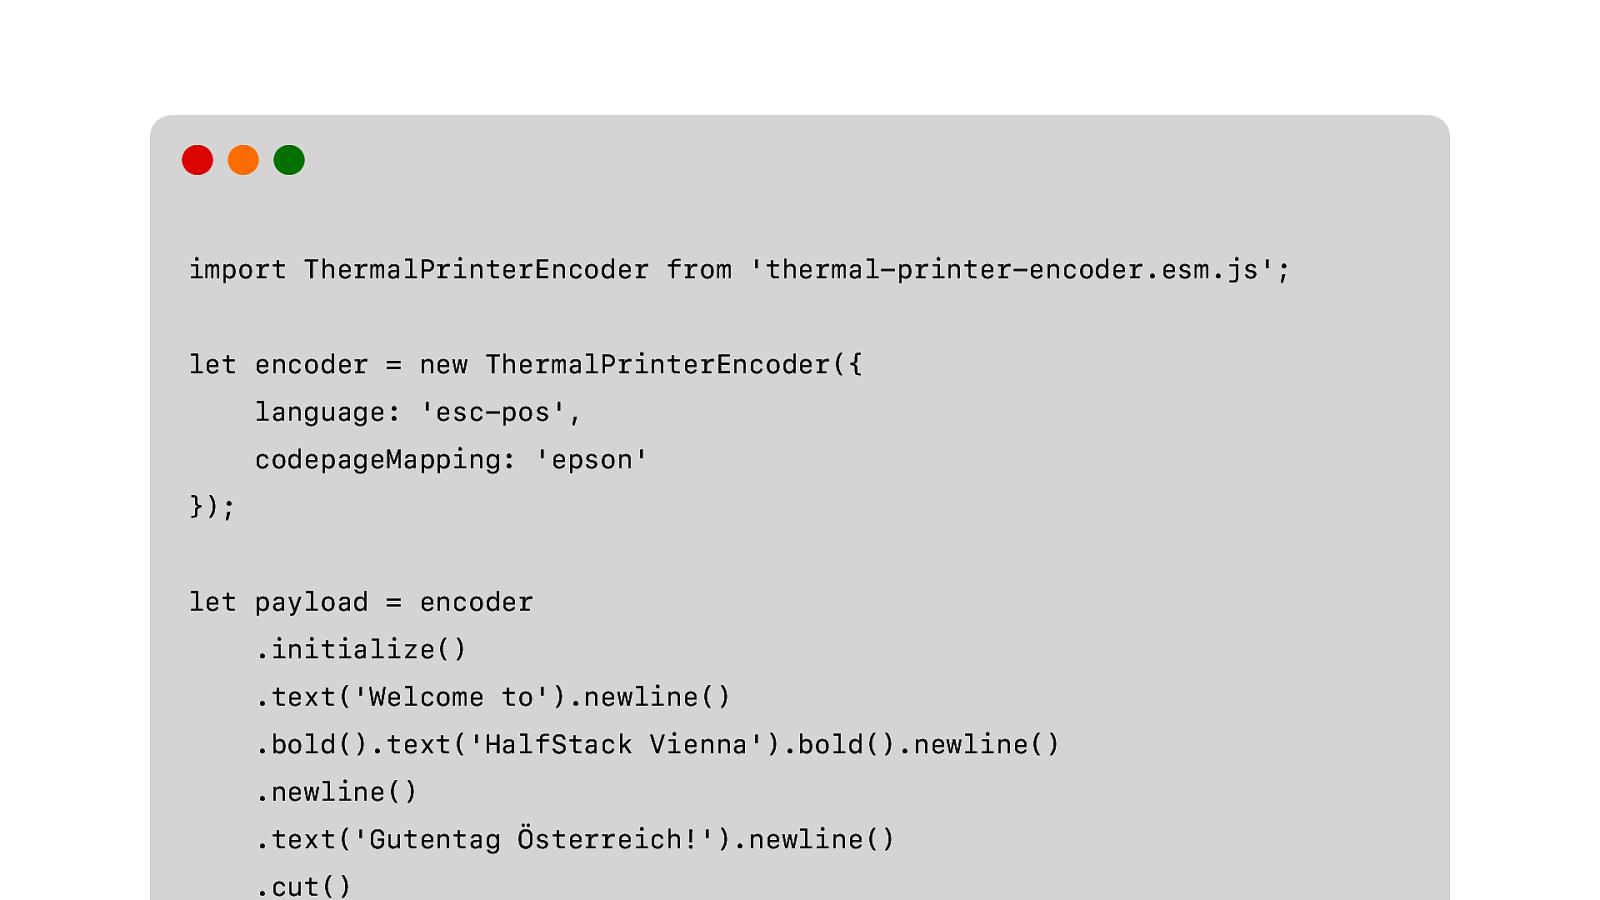
So, if we want to print our original receipt. This is how we do it.
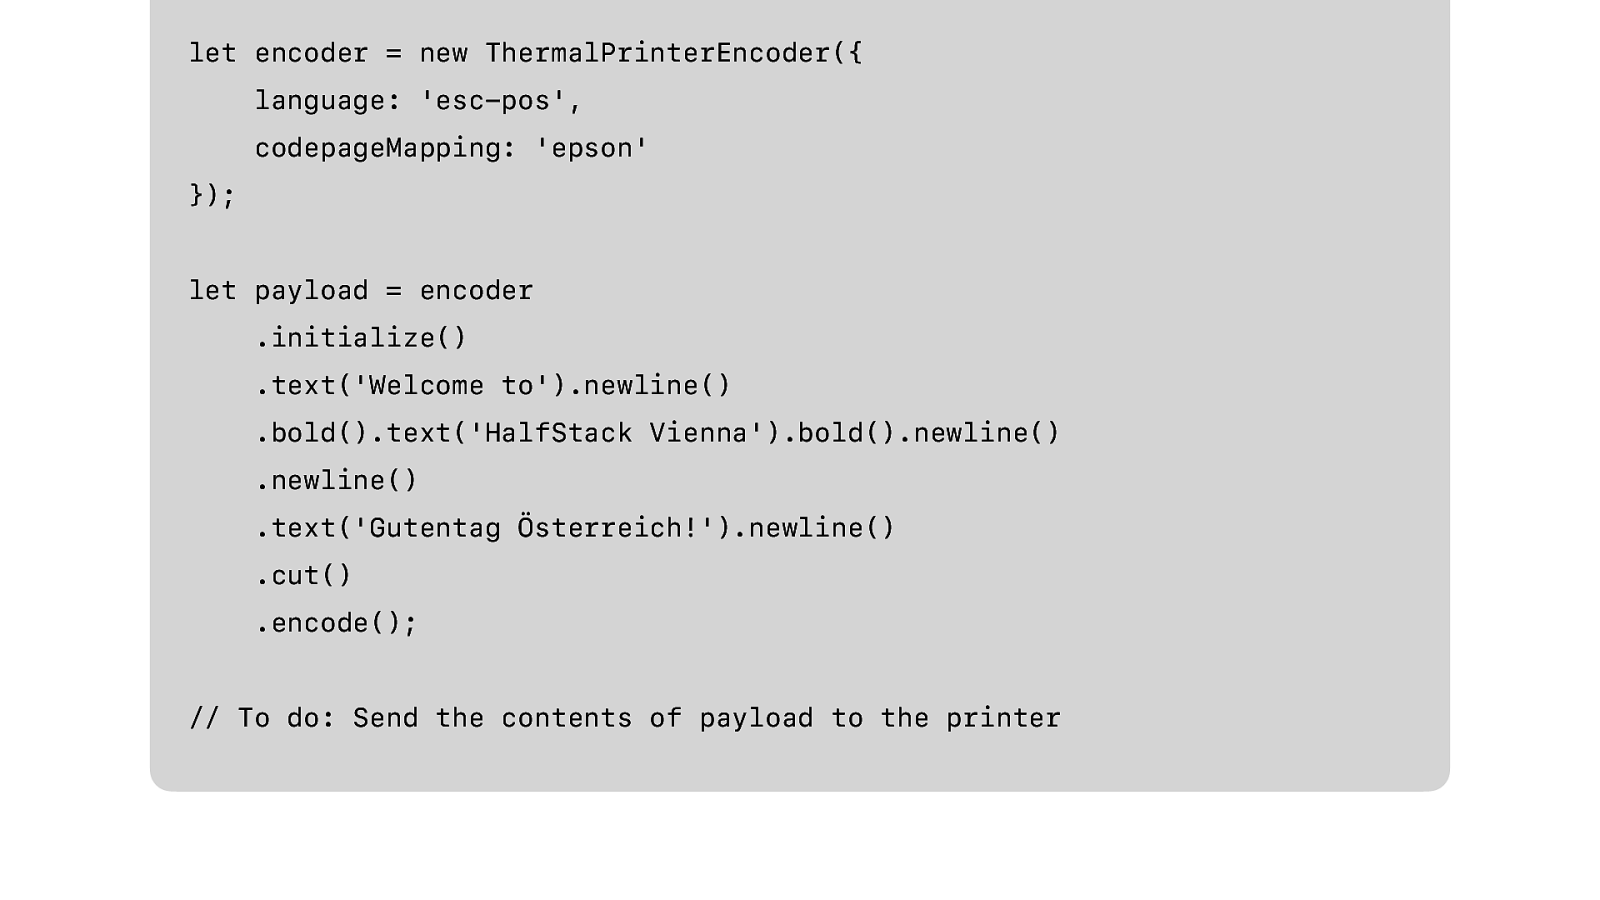
And send the payload to the printer. Any receipt printer, StarPRNT or ESC/POS.
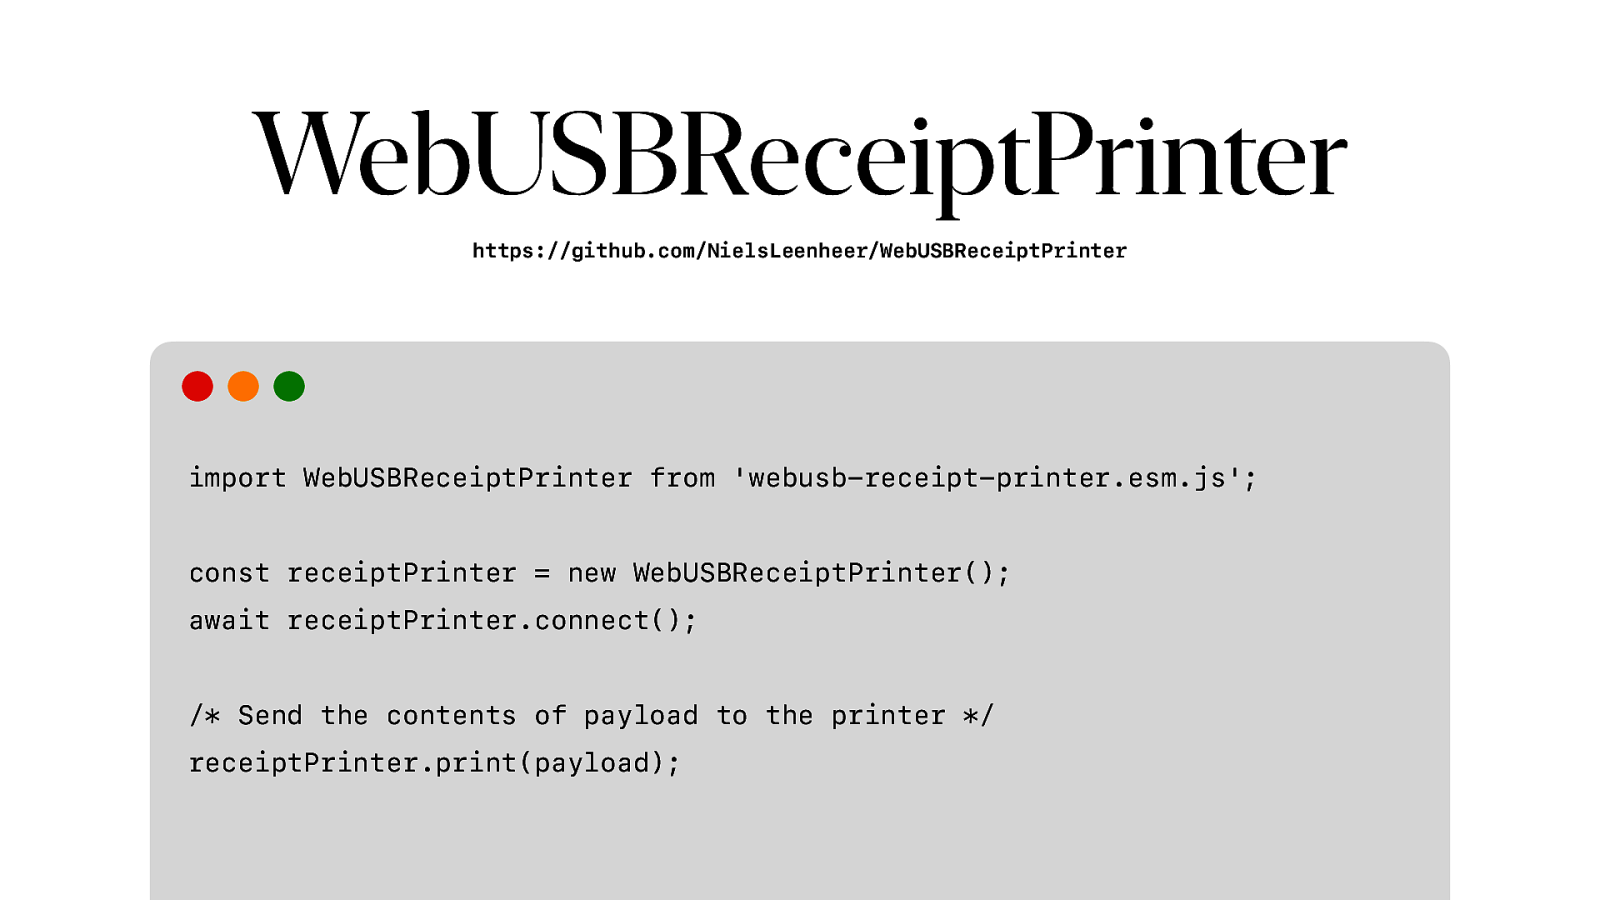
As a companion to ThermalPrinterEncoder, I created a library that wraps WebUSB and allows you to simply connect to any supported printer and print. No need to worry about endpoints and interfaces.
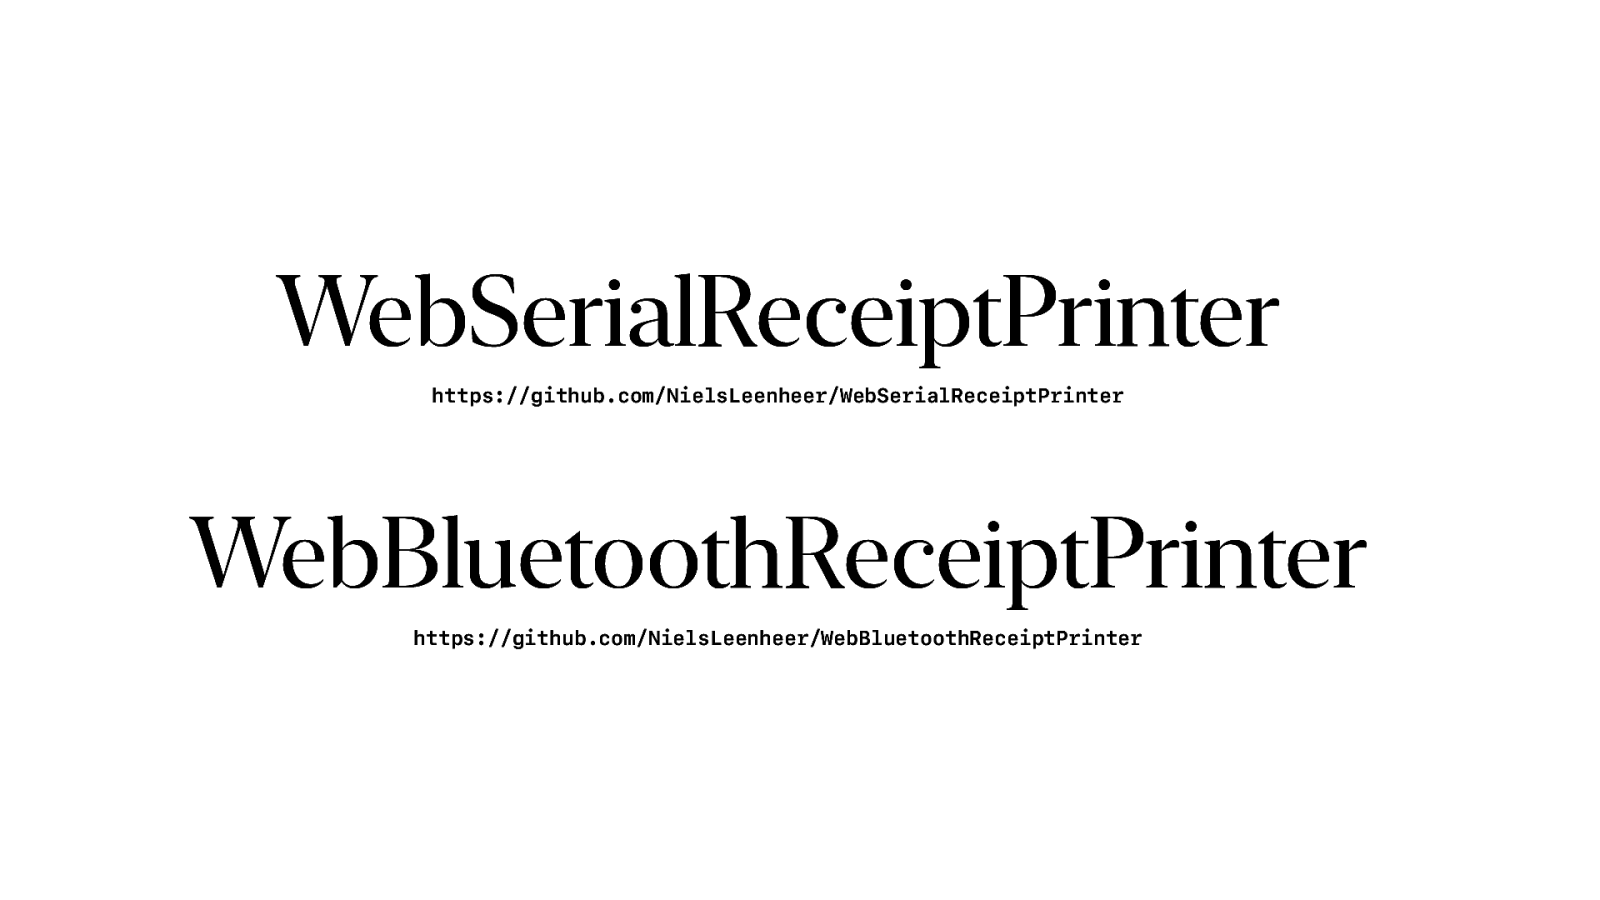
And it is actually a set of libraries, with both WebSerial and WebBluetooth versions, that use the same API.
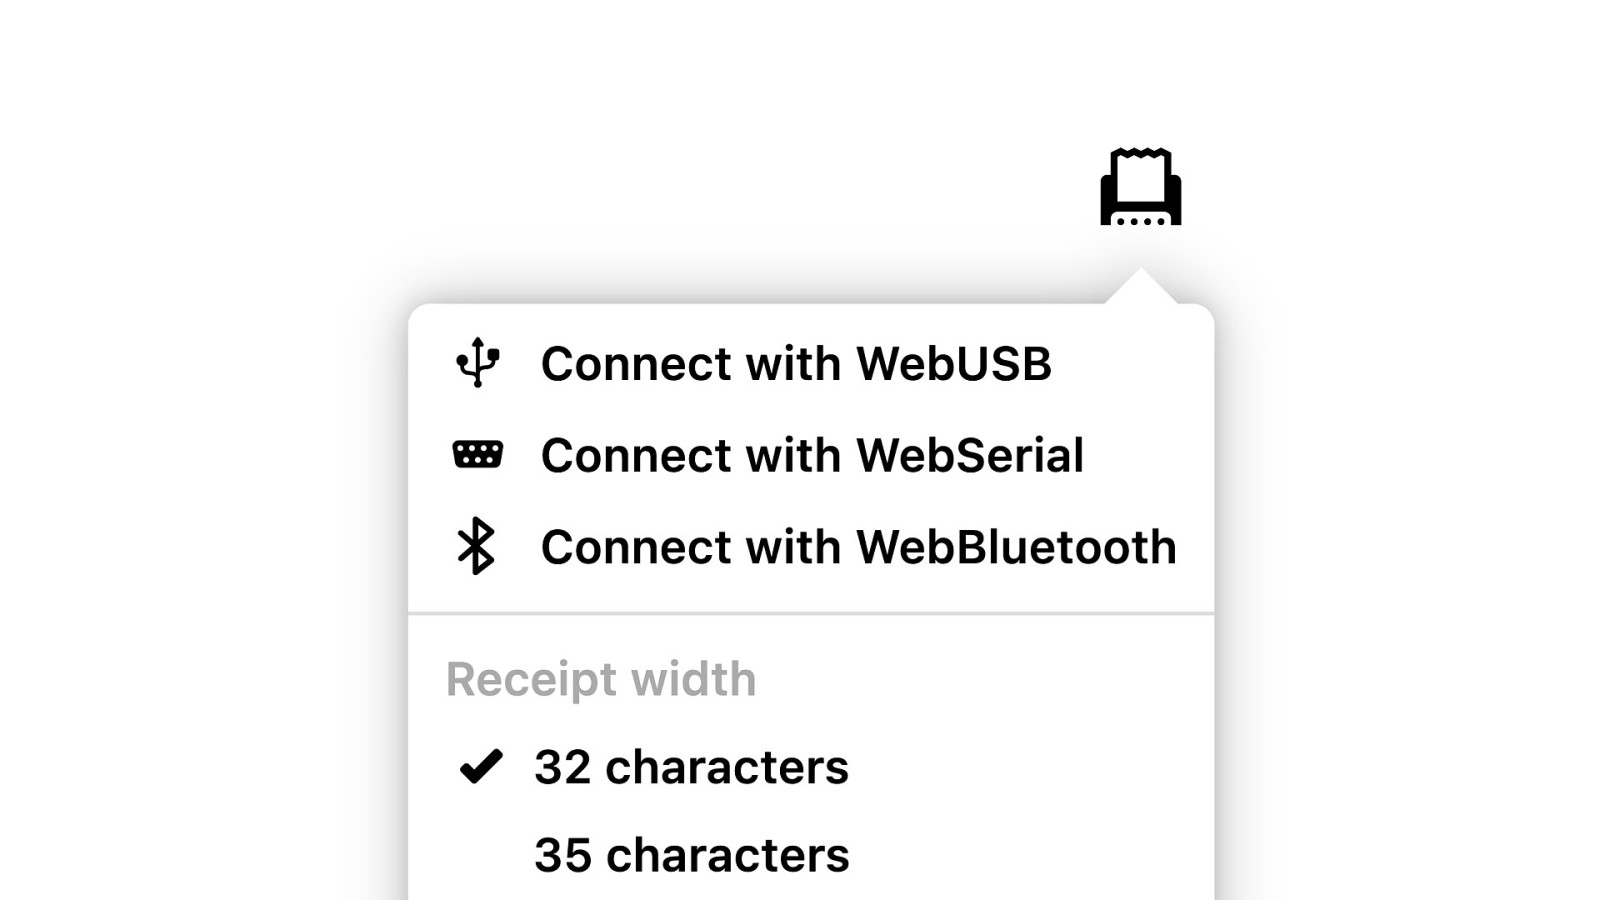
And that allows me to support all three protocols in our demo. The difference is just which library is instantiated.
So now we’re done with printers. We’re done with ESC/ POS and codepages. We can finally discuss some of the other devices.
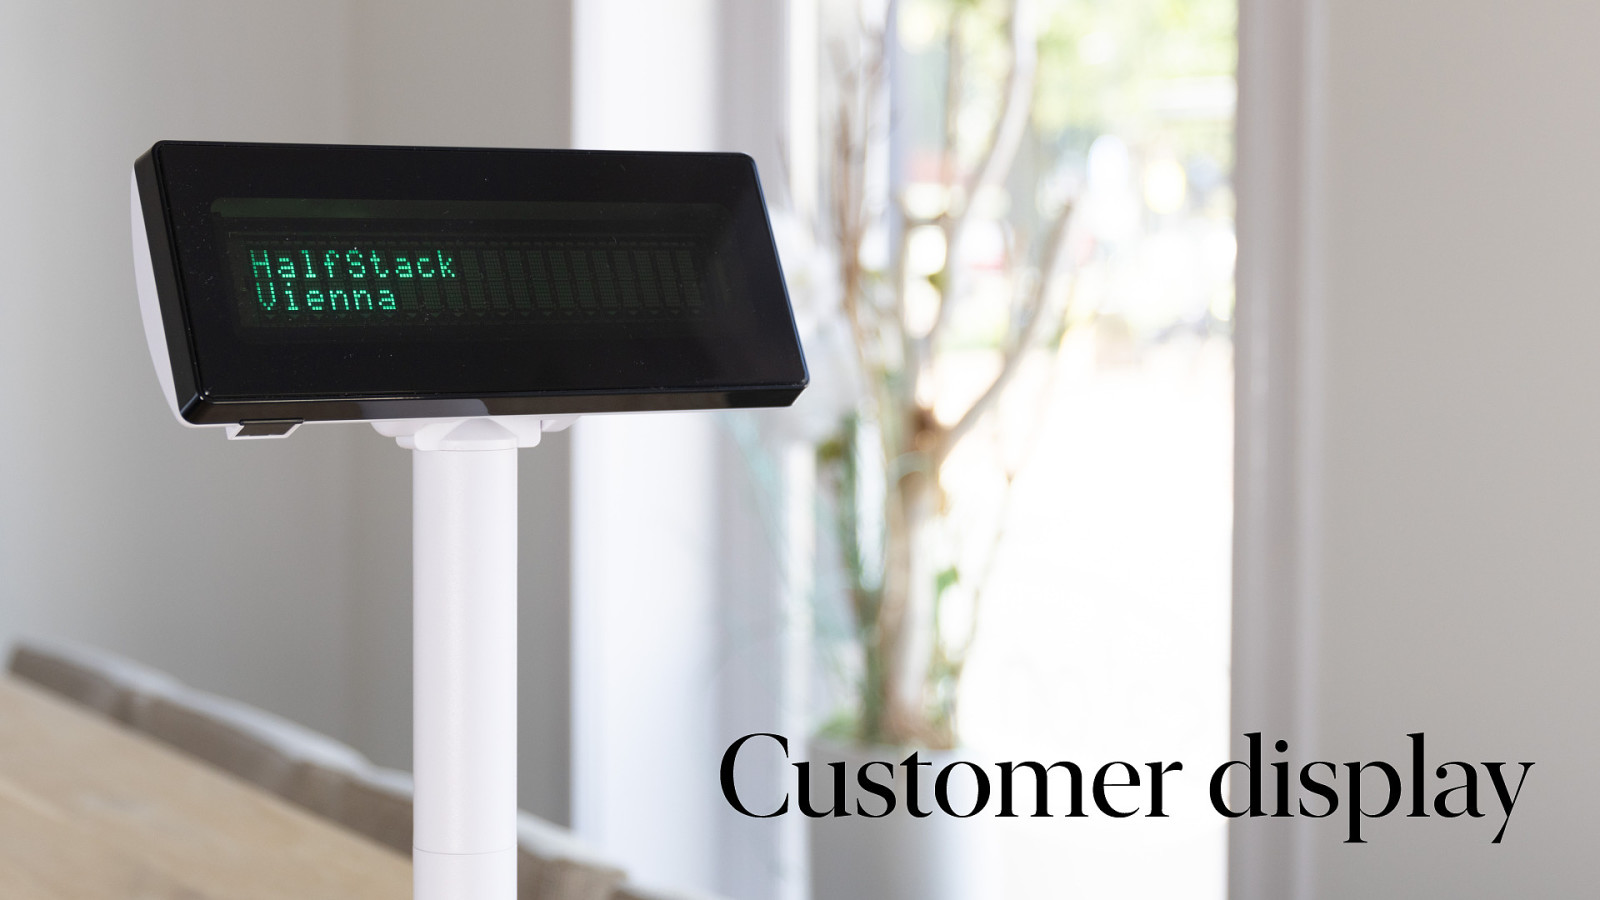
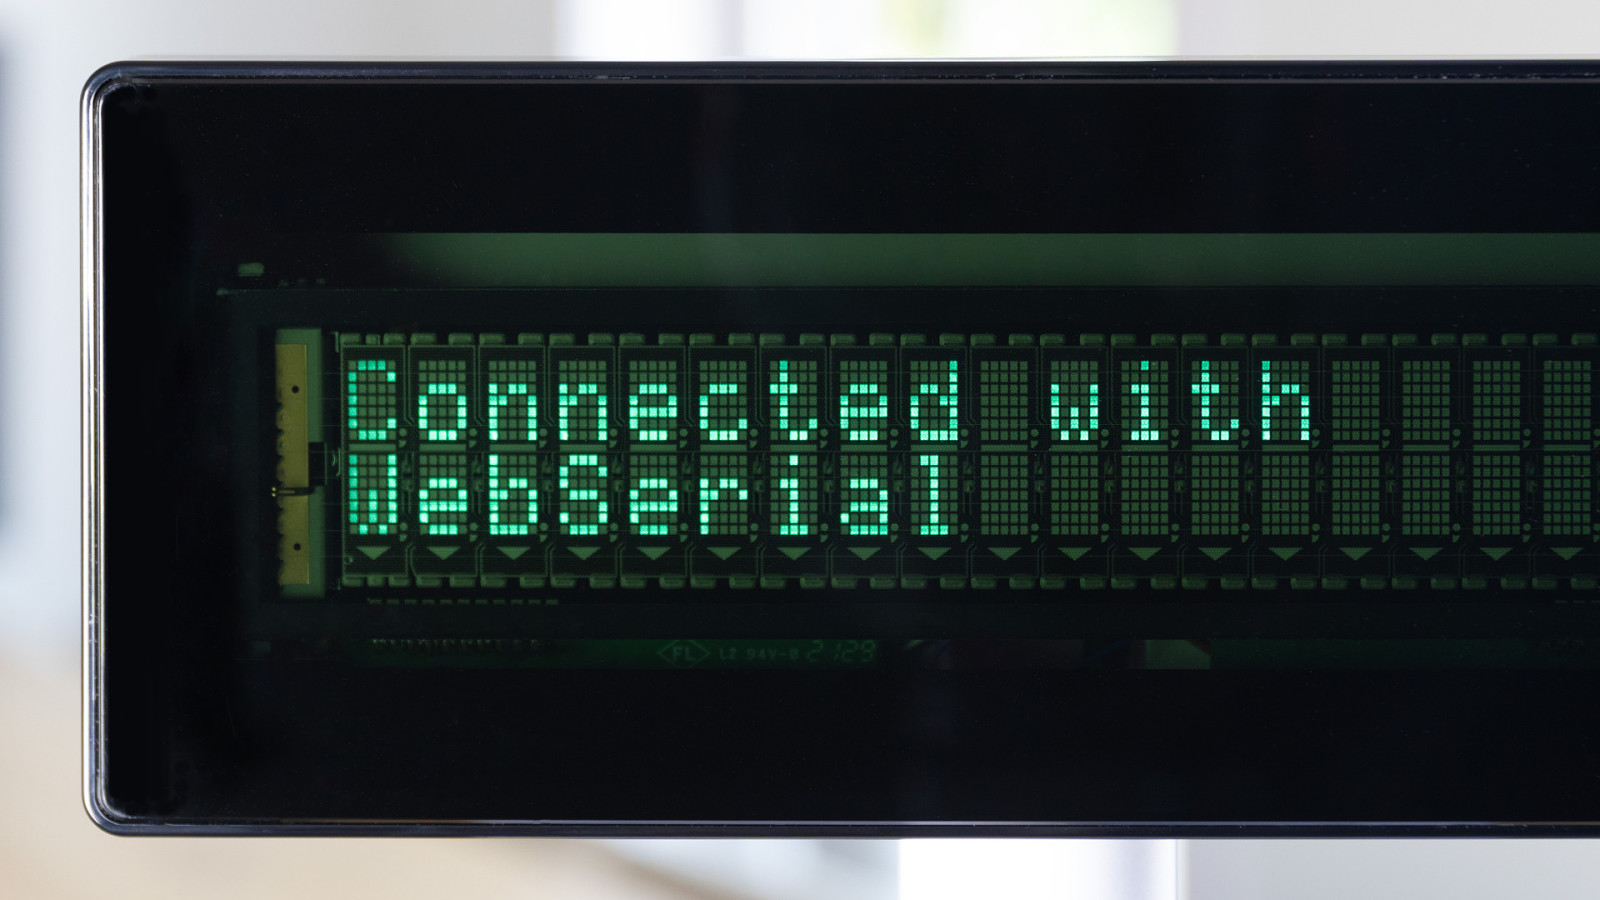
Like this customer display. It is basically two lines of 20 vacuum fluorescent characters that we use to show the current item added to the receipt and the price, so that the customer can check if the cashier added the right item for the right price.
So the import question. Do we need to learn another obscure language from the 80s? What language do customer displays speak?
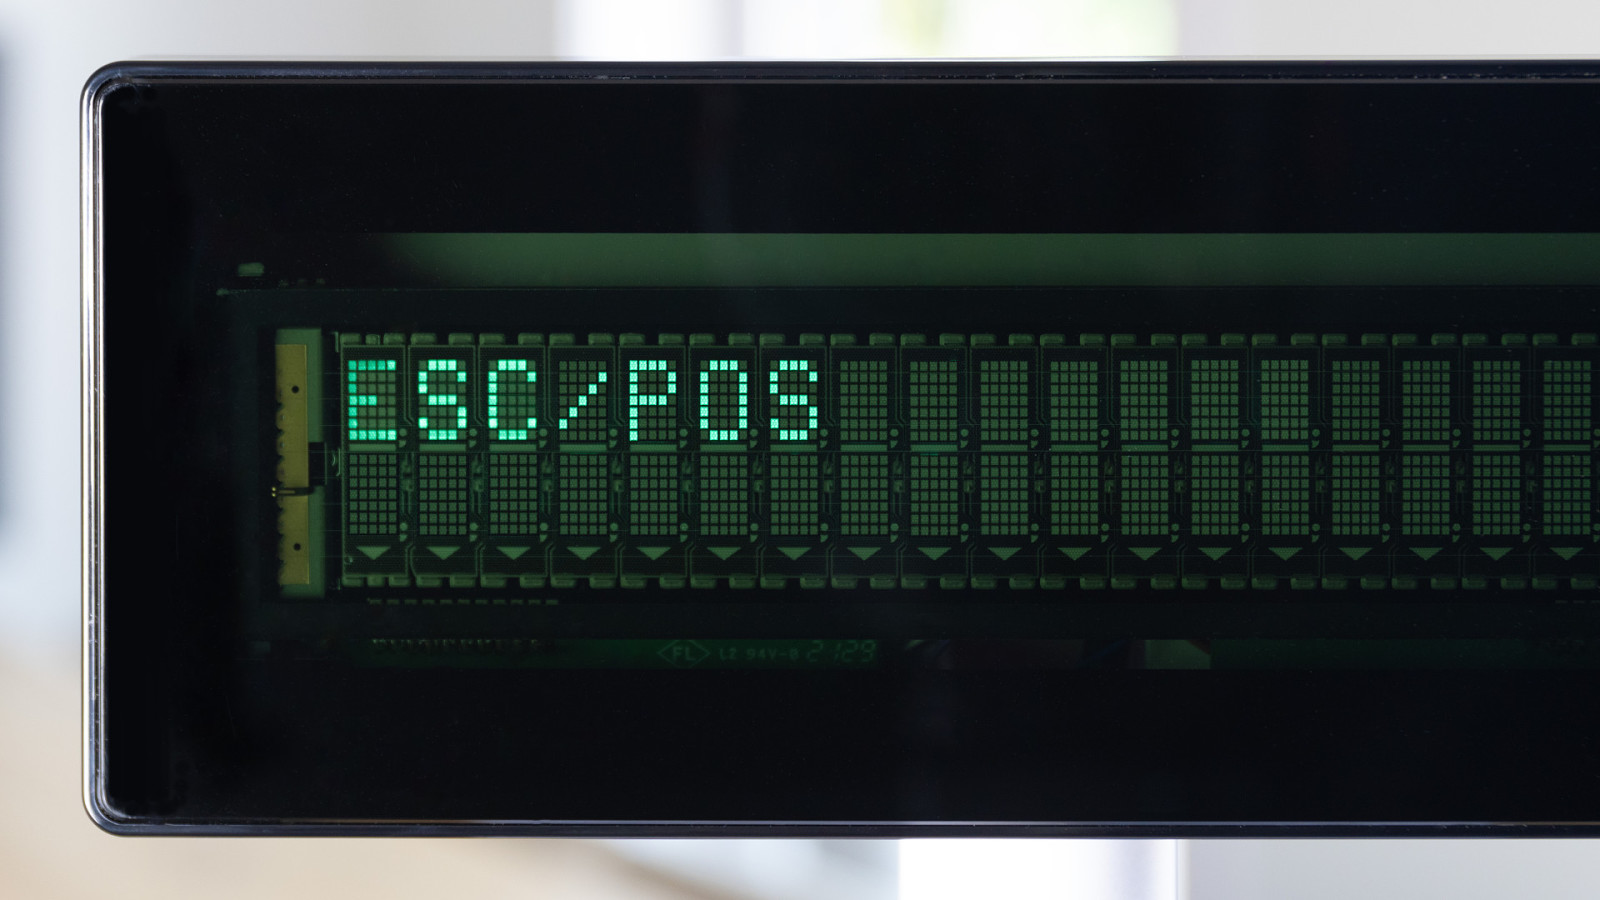
Ehh… yeah. They speak printer. The next question would obviously be…. Why?
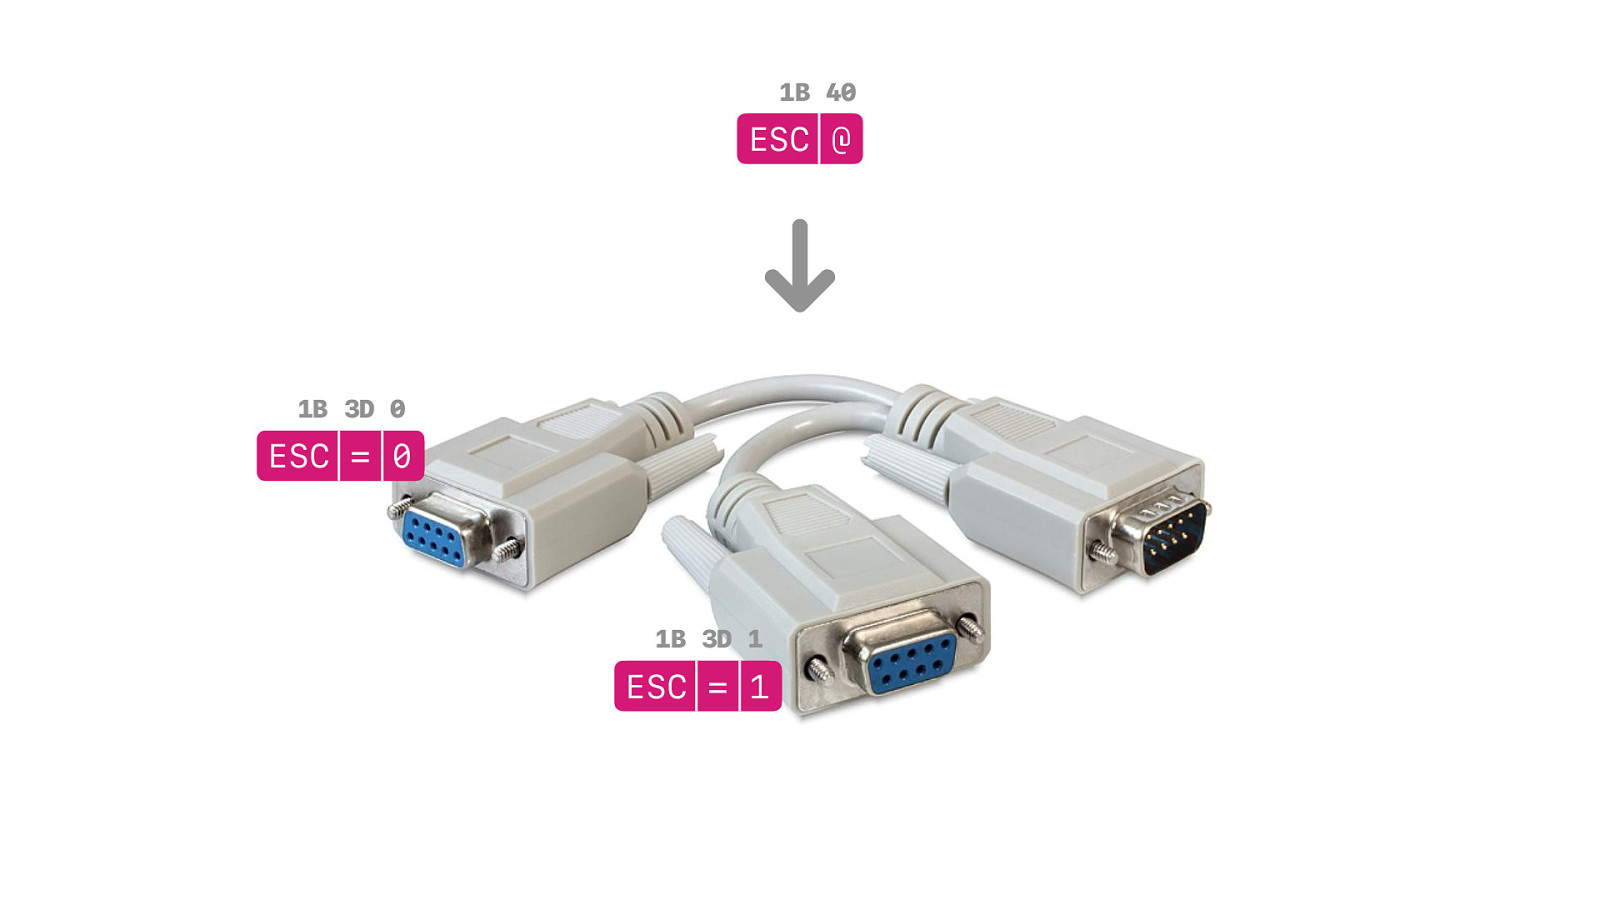
And the reason is again found in the 1980s… Because computers back then usually only had one serial port. So if you had two devices, you needed share that port. And to make that sharing work, both need to work together and speak the same language.

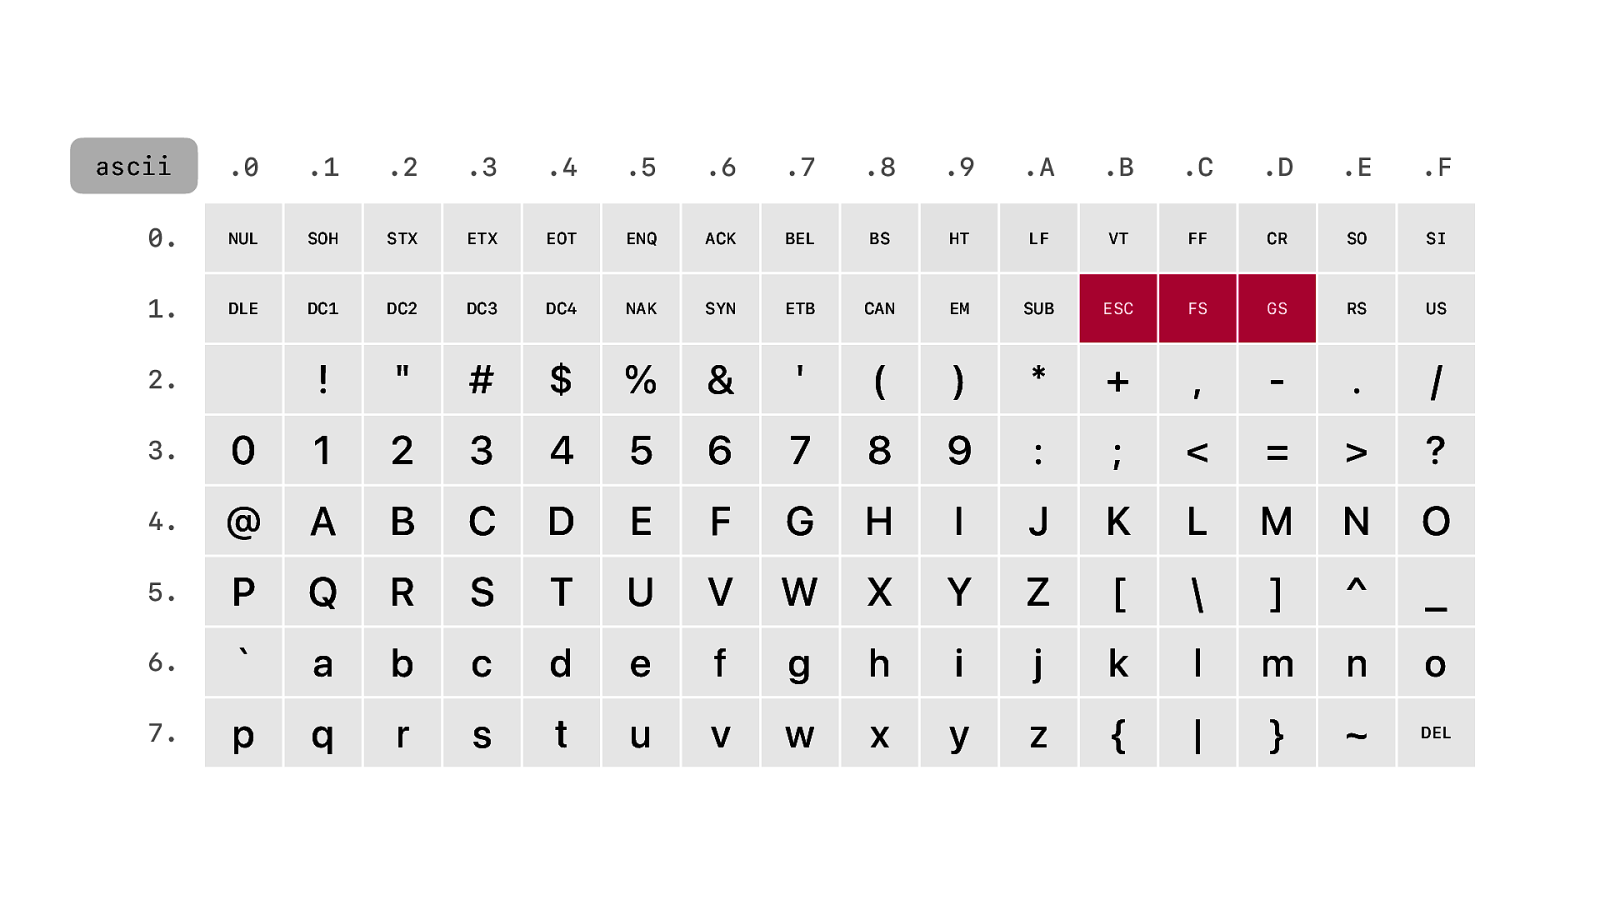
So when you initialise your printer and display, both are active. Everything you print is also shown on the display. But you can send ESC = to turn off the printer, or turn off the display. When you turn it off, it will ignore everything it receives, until the next initialisation where you can make another choice.
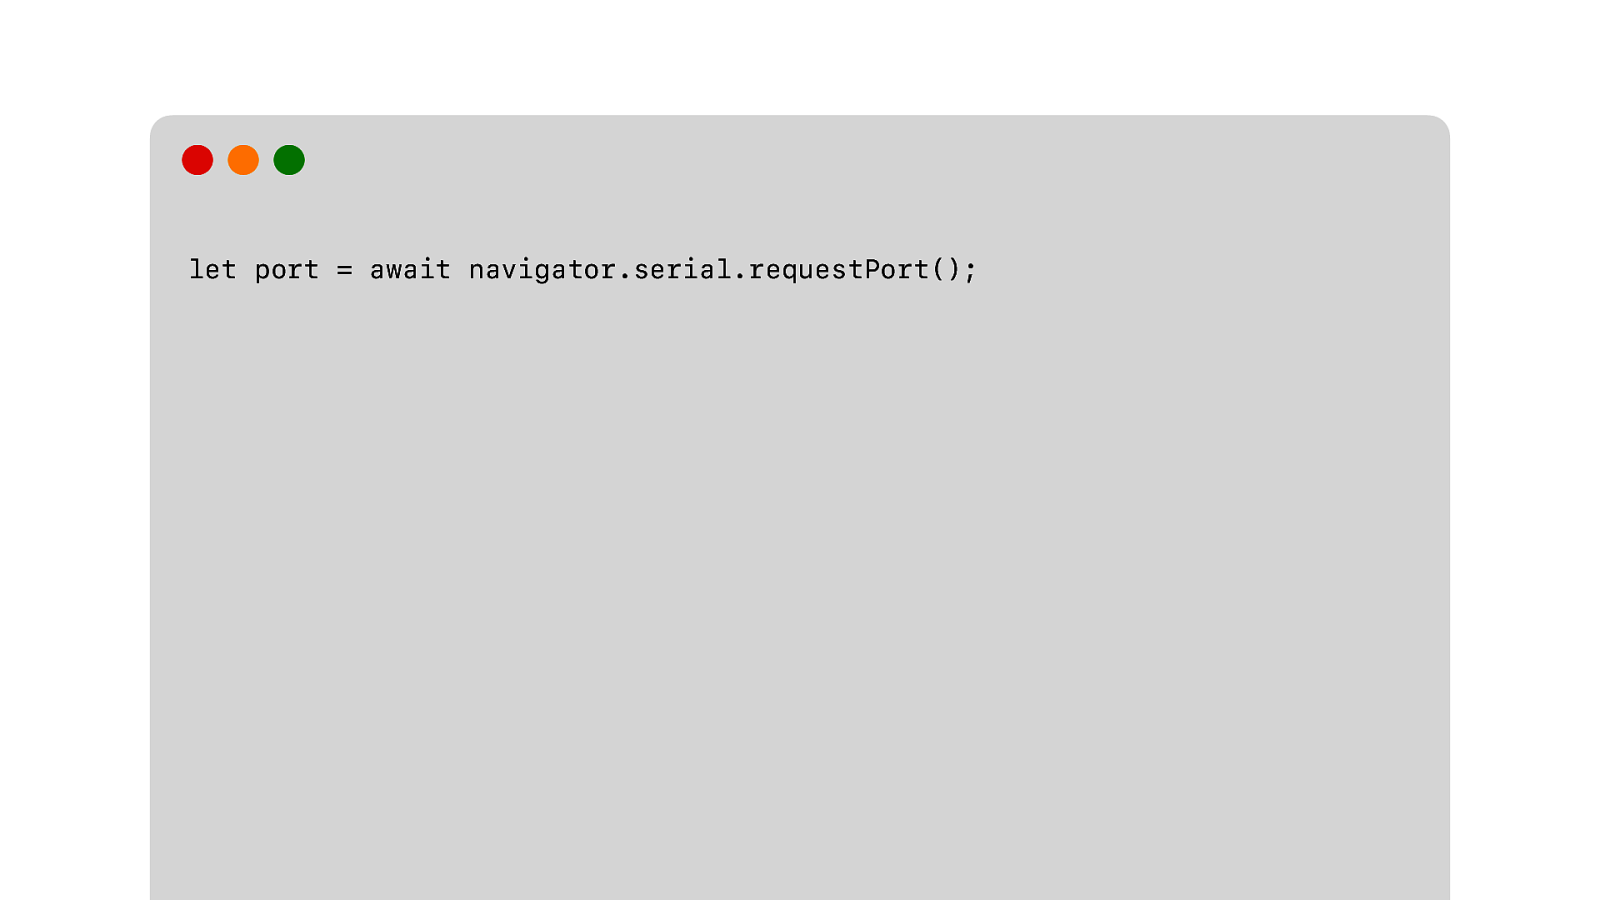
So WebSerial. We request a port. The user selects the right port from the list of available ports.
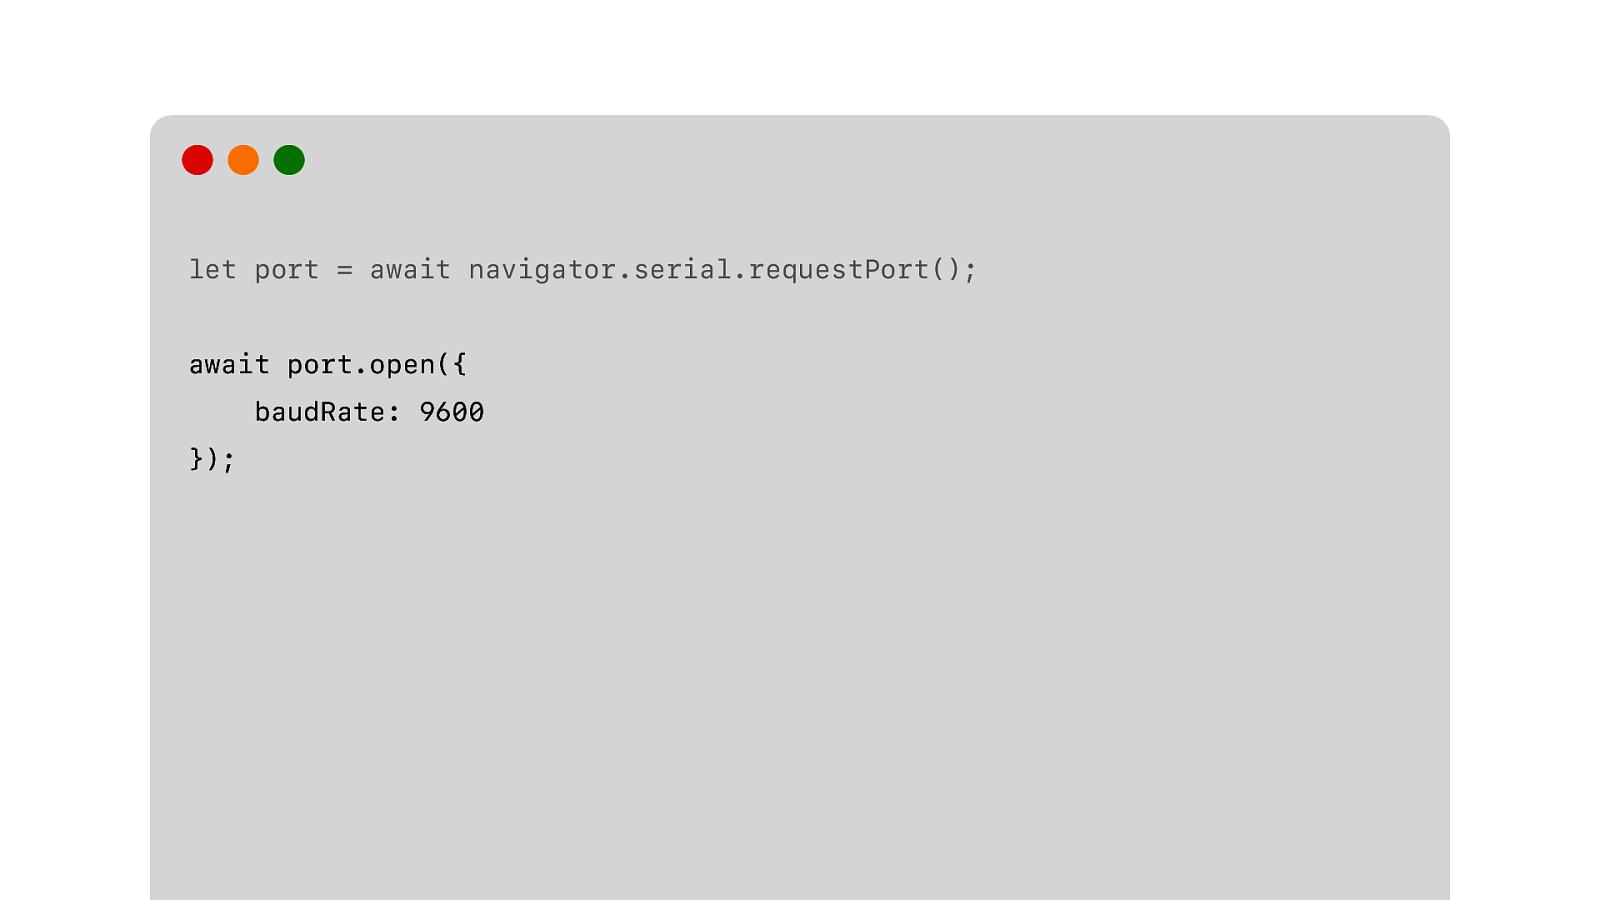
We open the port… specify the right speed.
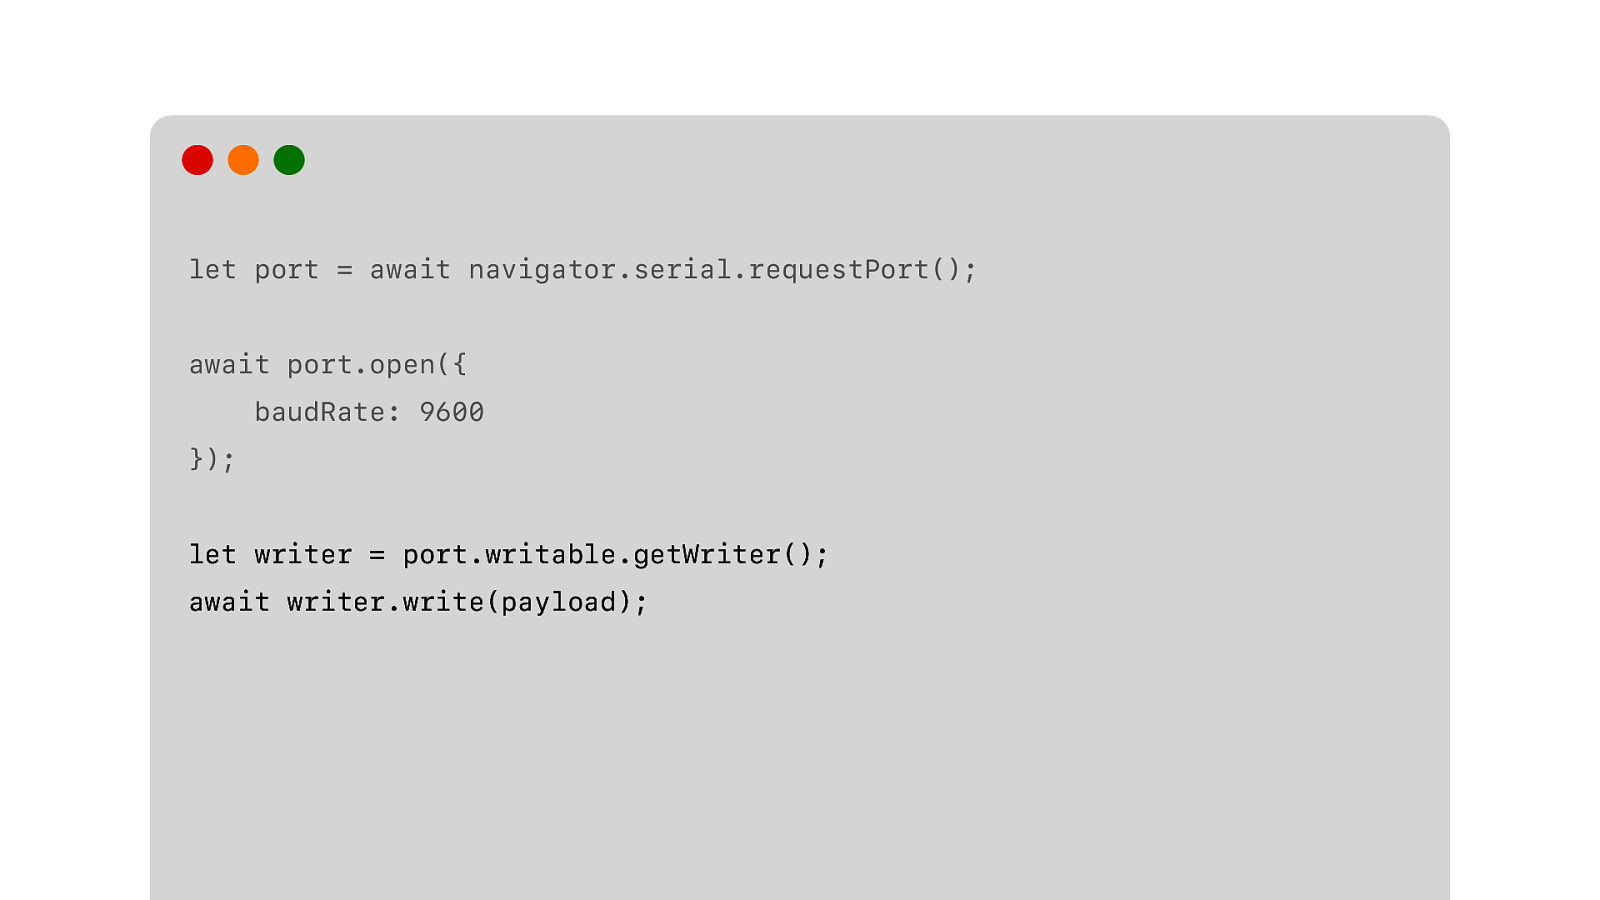
We get our writable stream for sending data to the device… and we write our payload to the stream, effectively sending it to the printer.
And that is it. Well… we still have to deal with codepages, still need to deal with ESC/POS….
But wait… This isn’t right. Our display is connected using USB. Why is it using WebSerial? And not WebUSB? Because of the 1980s…
And to see why, we need to look at USB classes.
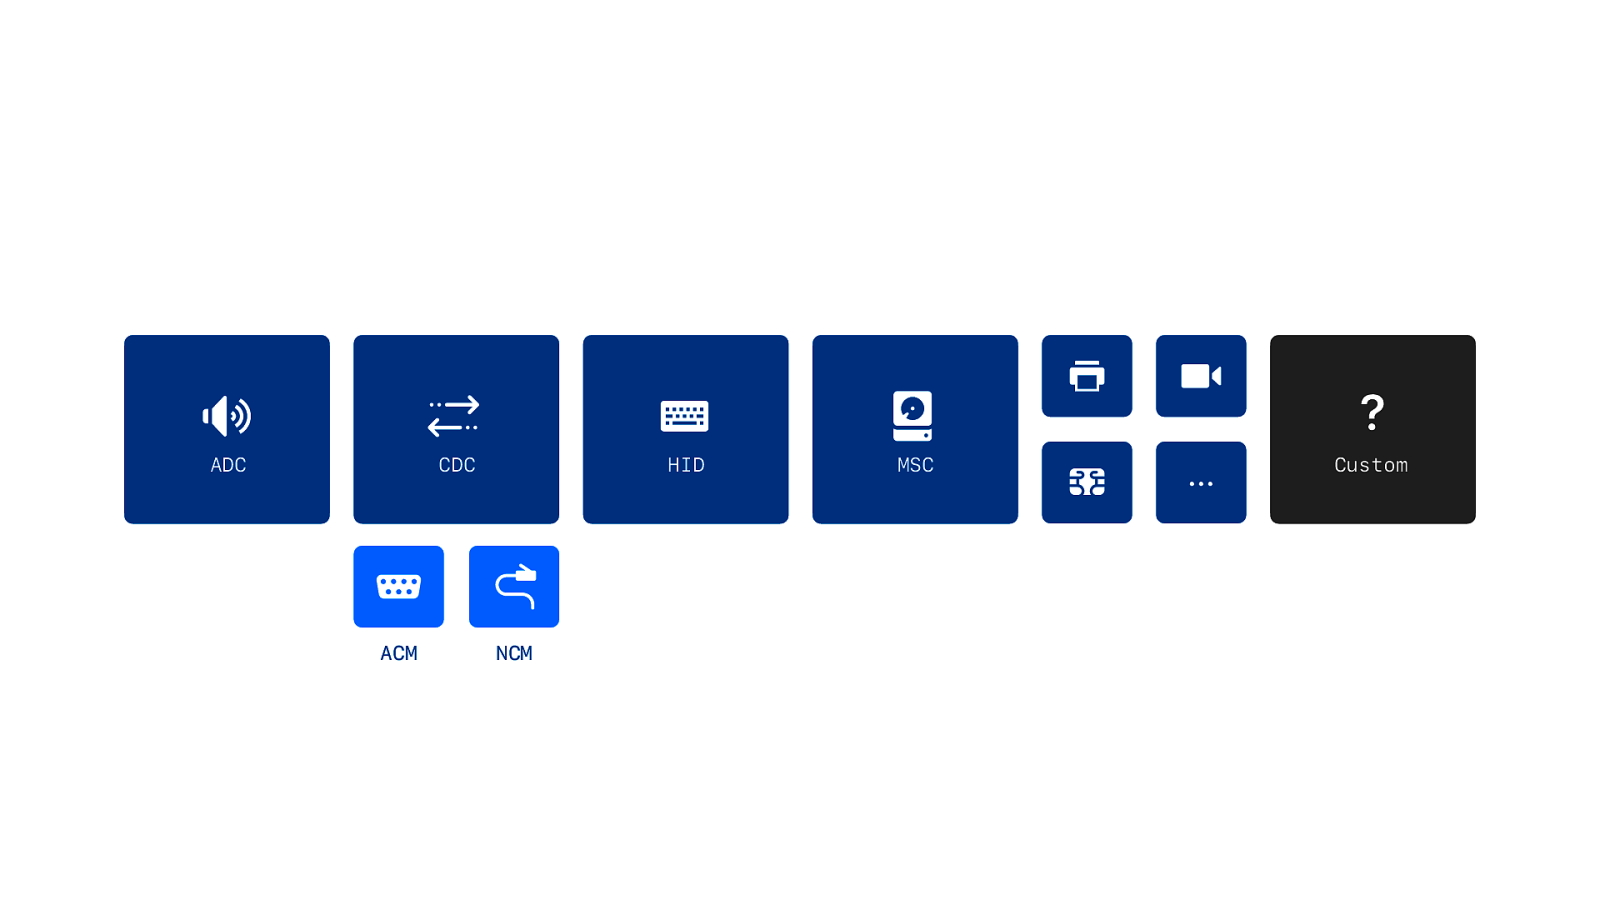
USB defines a number of default classes. If you have a device that uses these default classes you don’t need to install a driver. It just works. ADC for audio. Human Input Device or HID for keyboards and mice. Mass storage for hard drives. And many more. And we have CDC for communication, which includes ACM - which is a modern replacement for legacy serial port communication.
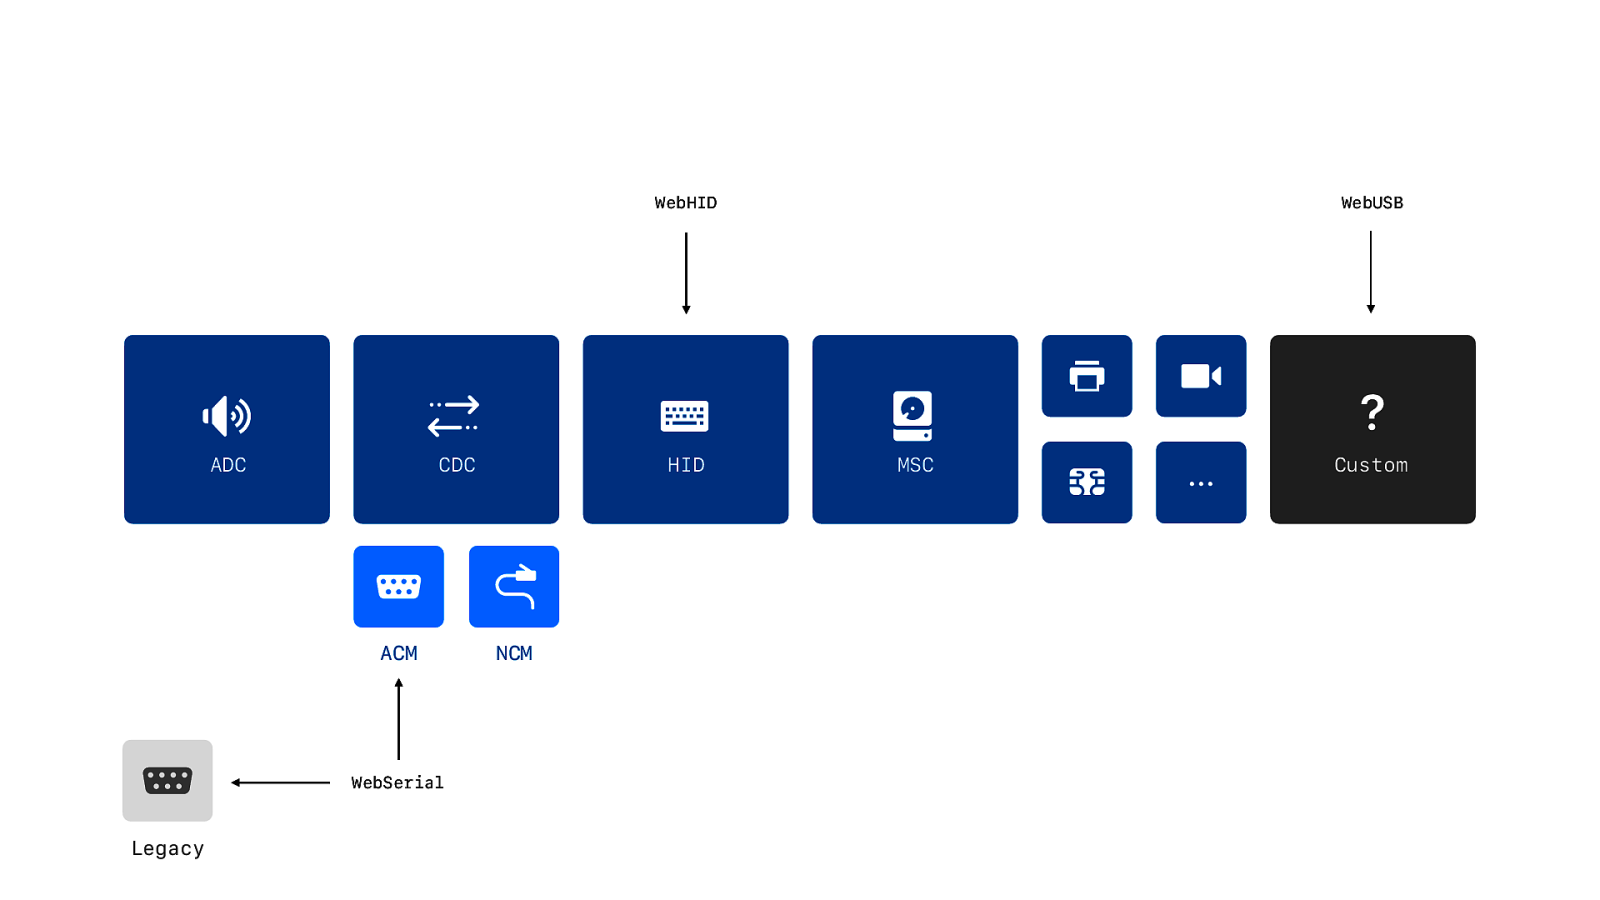
Some of these classes have low level API’s. Like WebHID for HID, WebSerial for legacy serial devices, but also the ACM class. And we have WebUSB for all other devices that do not fit into these classes. So this is why we need WebSerial, even though it is USB, and not WebUSB.

But ACM is a replacement and not backwards compatible, so USB to serial port dongles don’t use ACM. In fact most USB serial devices don’t use ACM. They just took their old 1980s serial port device and added a custom Serial to USB chip from FTDI or Prolific with a custom driver.

And the driver creates a virtual serial port. And you use WebSerial for any type of serial port. Legacy, ACM or virtual. But… it is the custom class… so in theory you could write a WebUSB implementation… You’d be really crazy to do it. It would be completely useless… But you could.
So I did… But don’t use it.
So in conclusion. Almost nobody uses actual legacy serial ports anymore. But for some USB connected devices you still need to use WebSerial.
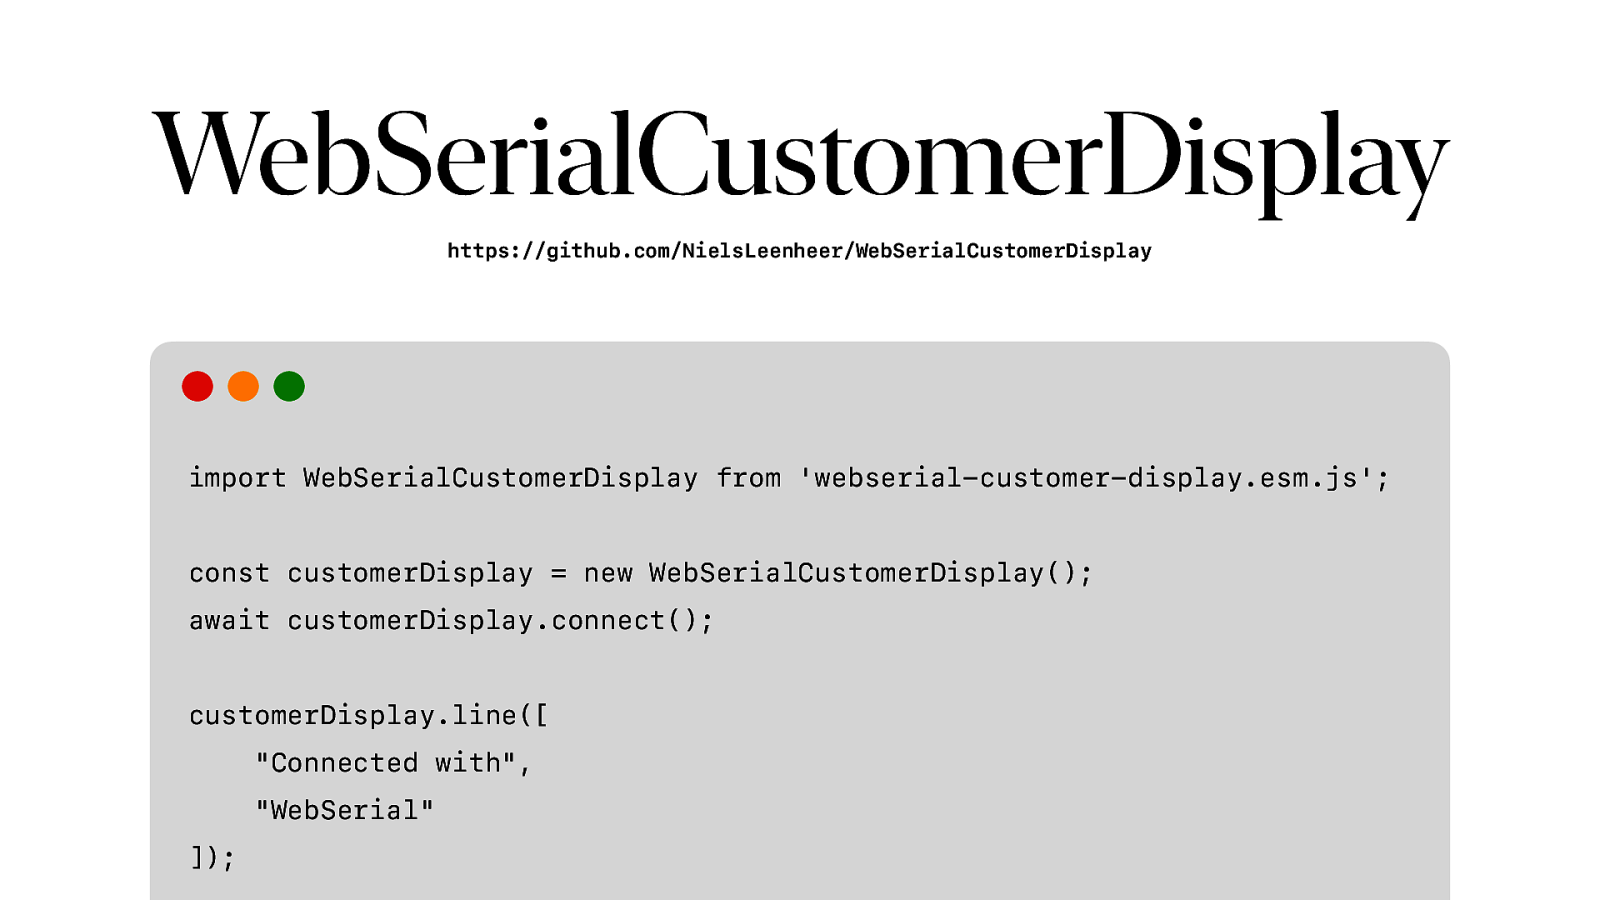
So I created a library that uses WebSerial to connect to that display and show some simple text. It will handle the codepages and ESC/POS encoding for you.
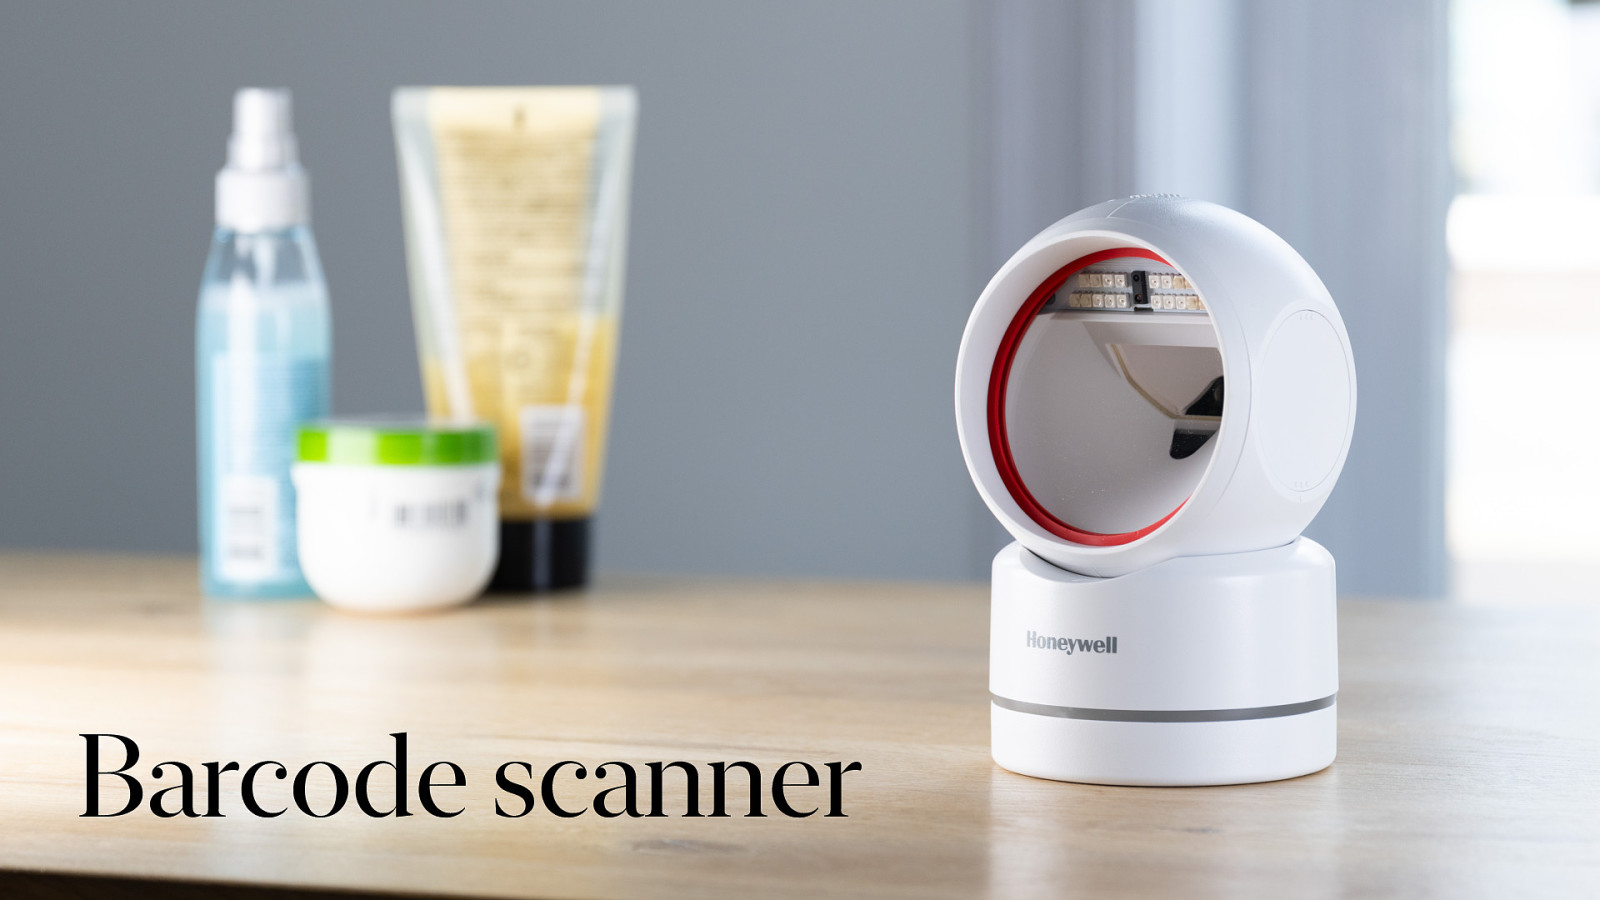
And that brings us to barcode scanners. And that is really easy. We do not need to do anything to support barcode scanners, because…
Barcode scanners are just keyboards.

When you scan a barcode they just literally type out the numbers of the barcode. So you could use keyboard events. Of course you need to figure out what belongs to the barcode and where it starts and ends, but that could be solved. Well, maybe not perfect, but good enough… Next…
Oh, but a barcode scanner is a HID device… what if we could use WebHID to get the actual barcodes instead of the keystrokes.
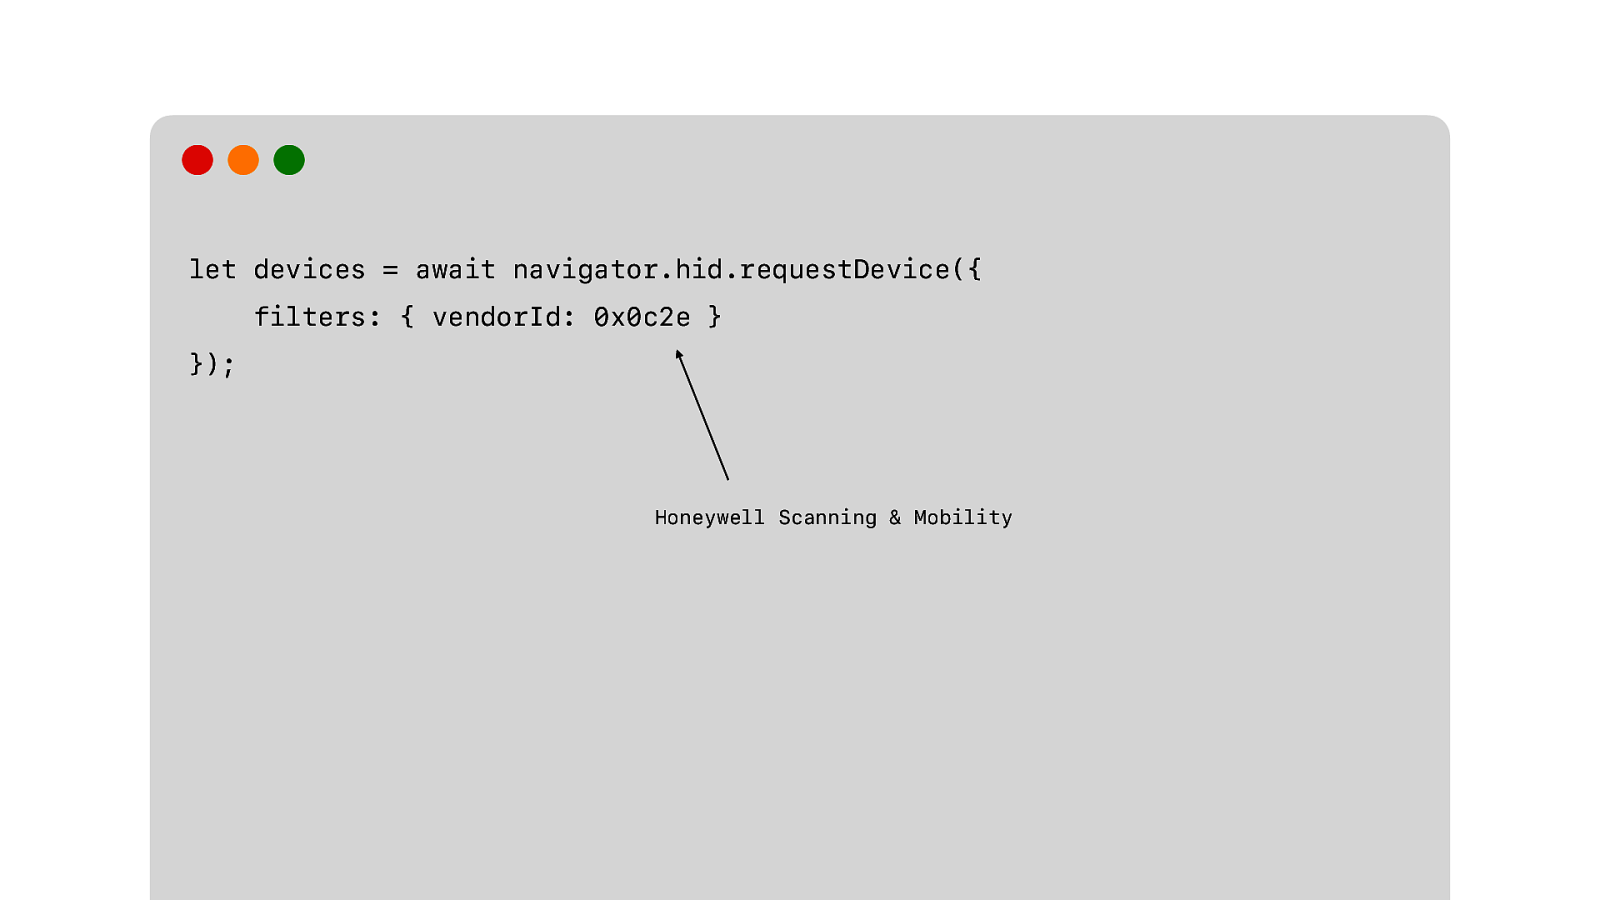
We request the device. The user selects the barcode scanner from a list of matching devices.
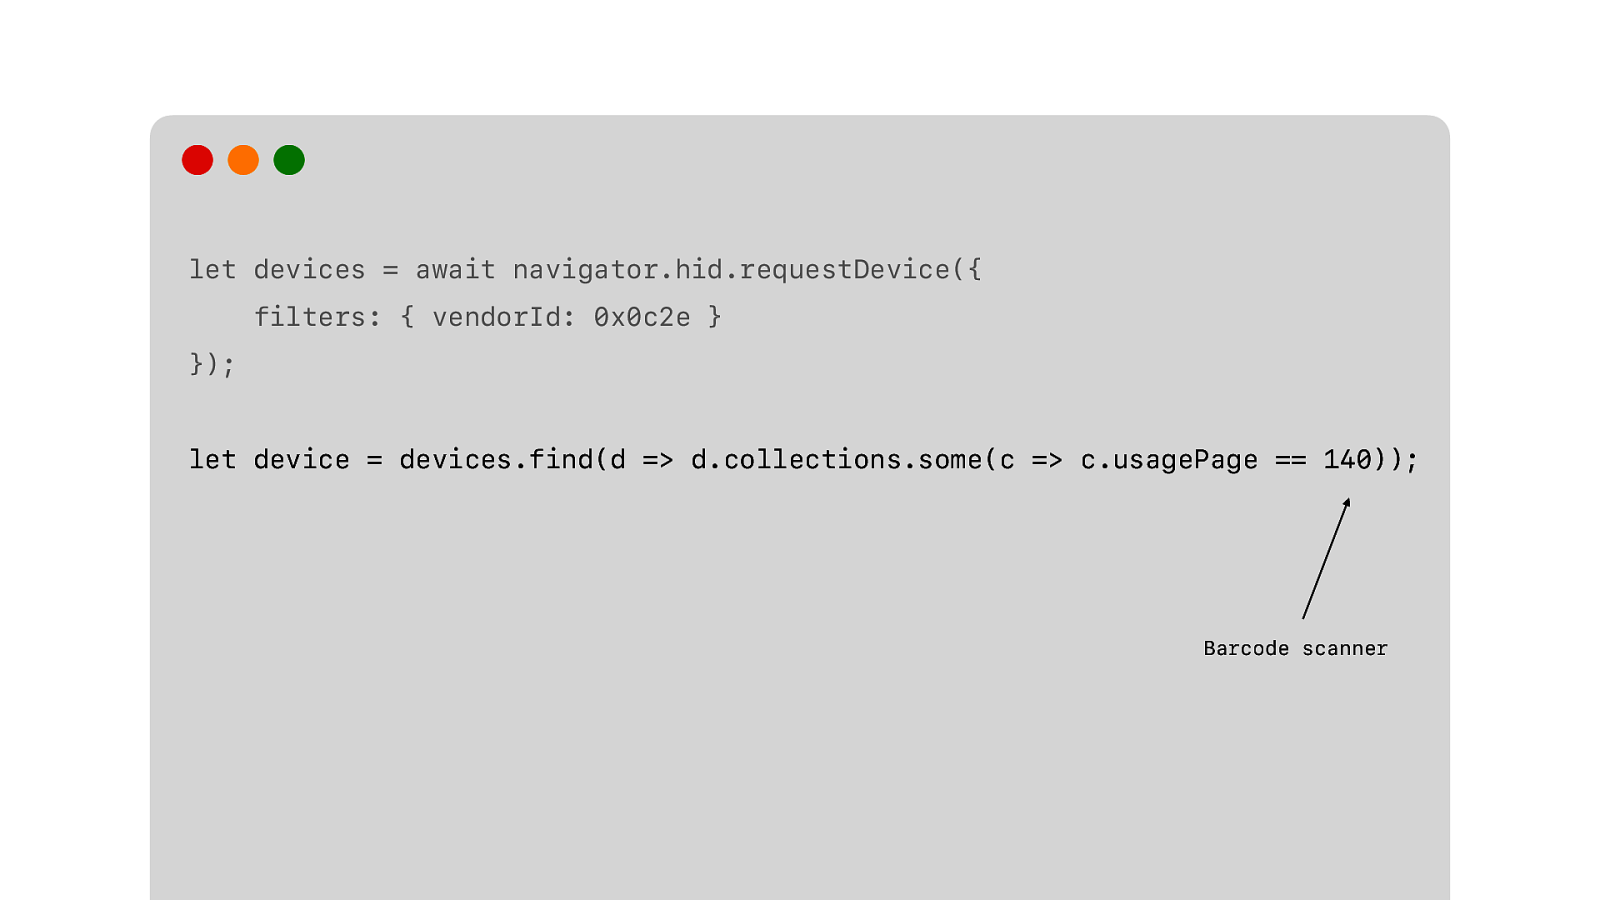
And we actually get back a list of devices, because most HID devices are composite devices. This barcode scanner, also. It is a keyboard… like we just said. And a barcode scanner. So we need to figure out which device is the barcode scanner part, and not the keyboard part.
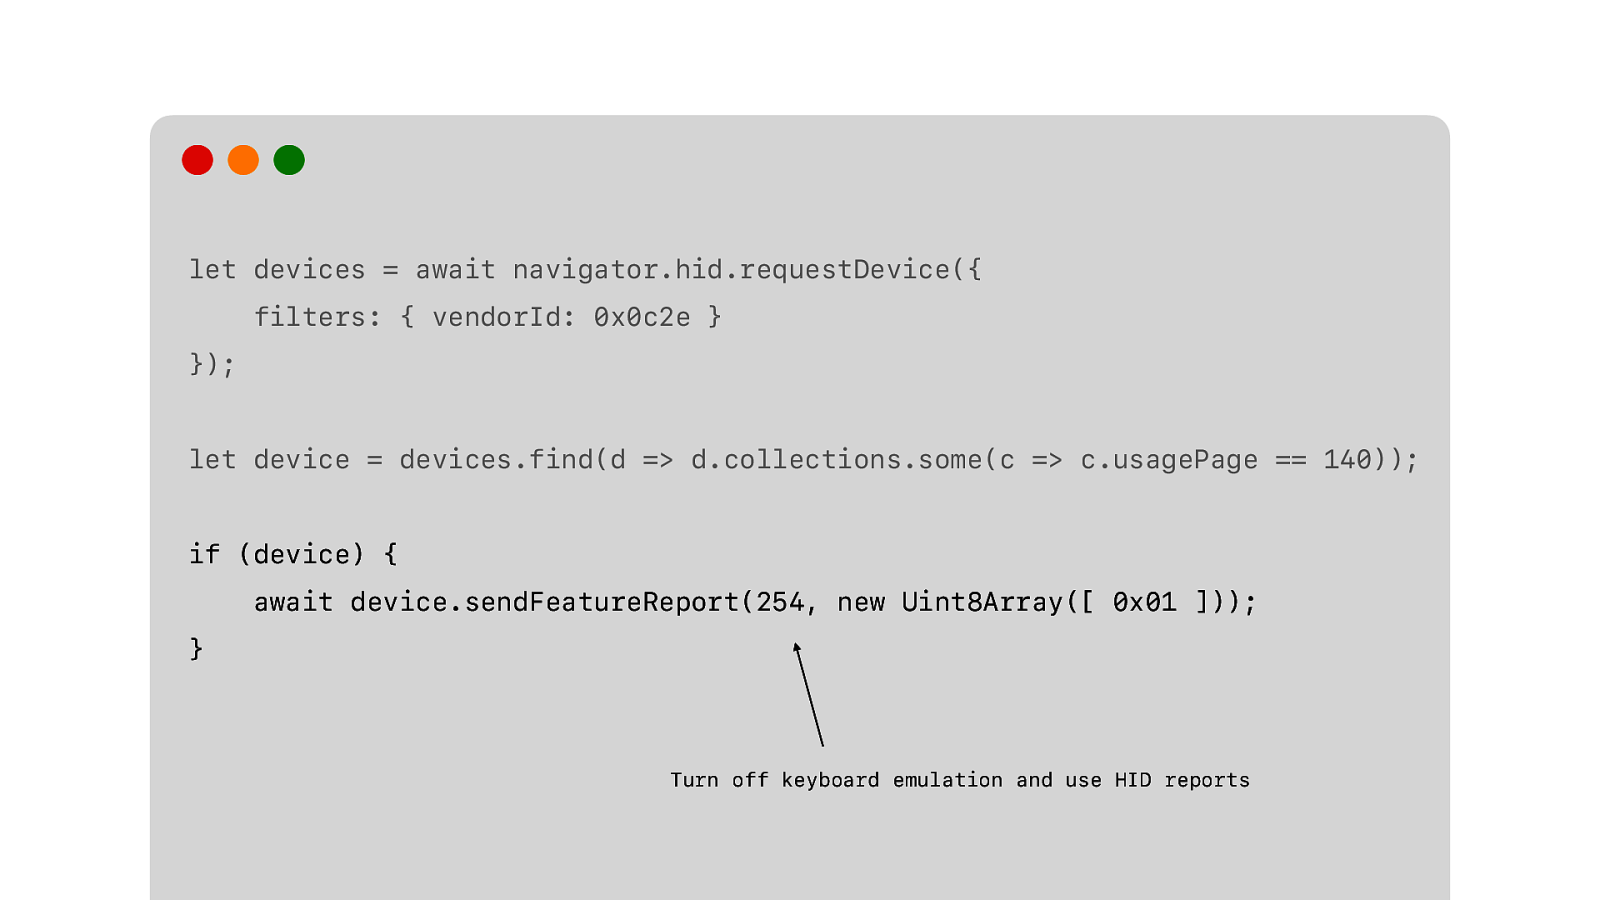
Then we need to tell it to turn off the keyboard emulation and use plain HID reports instead.
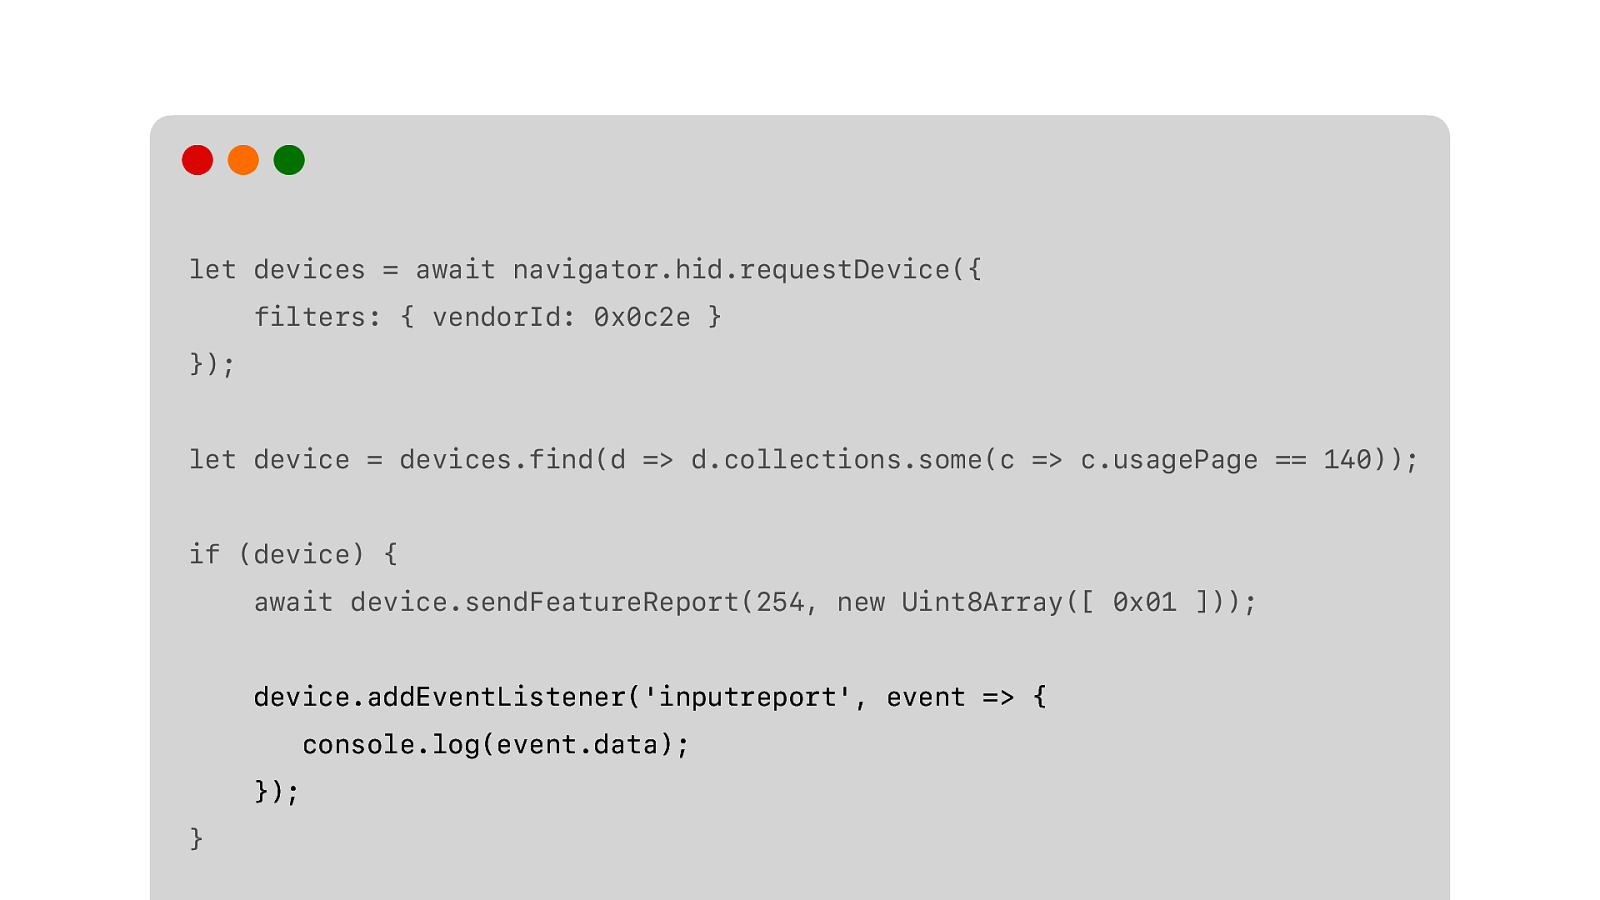
And listen for the input reports.
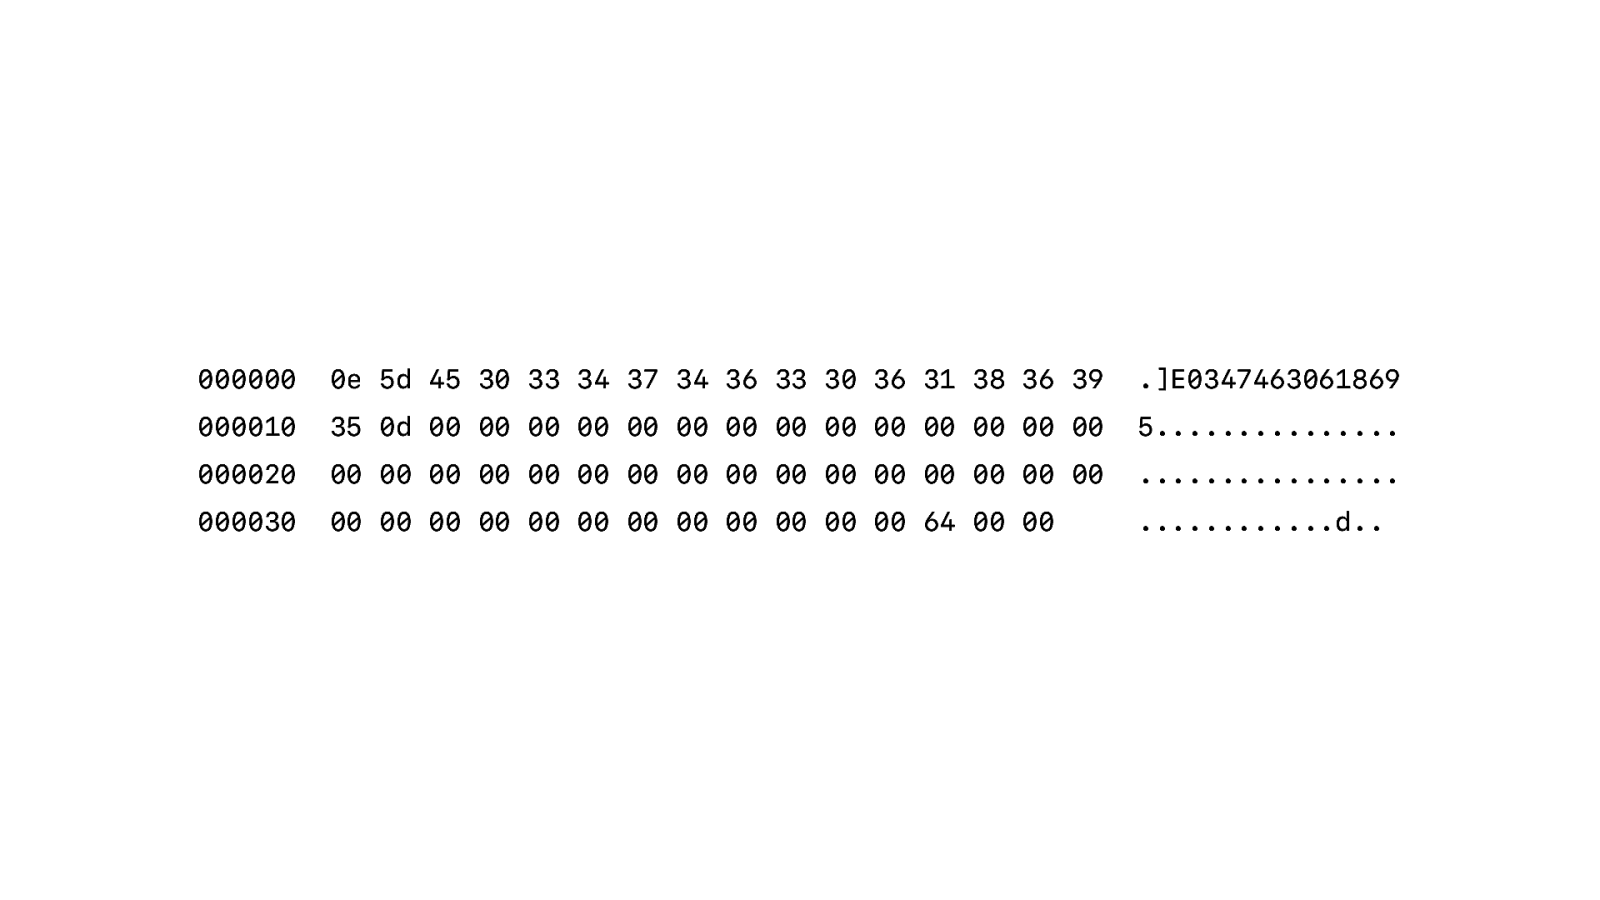
And then we get this back.
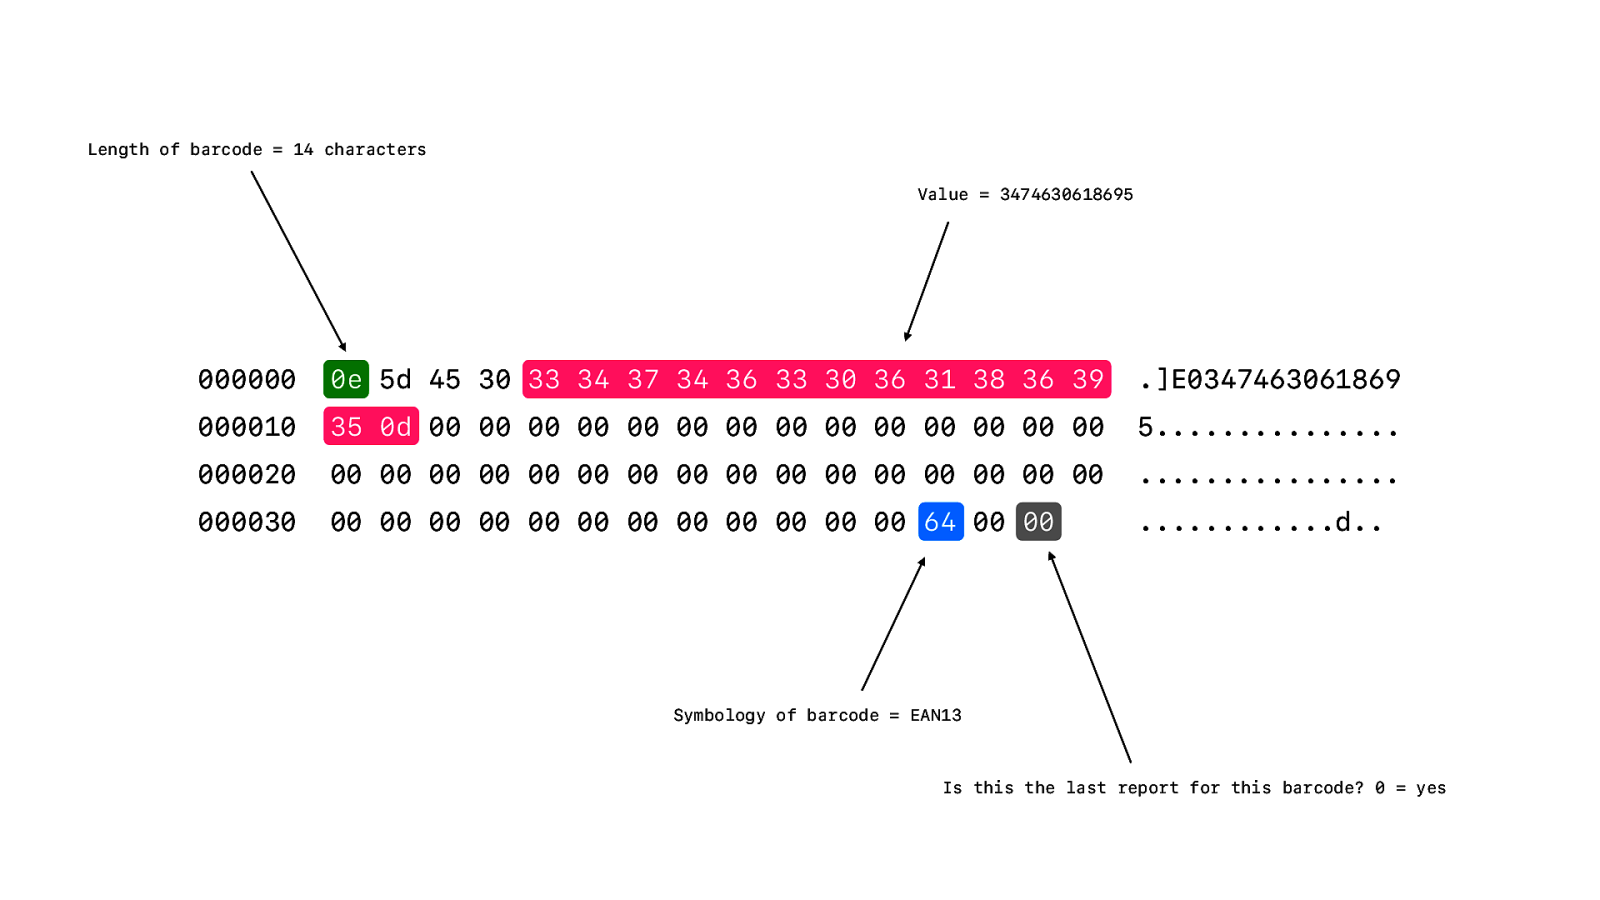
And we just need to parse this and extract the value of the barcode.
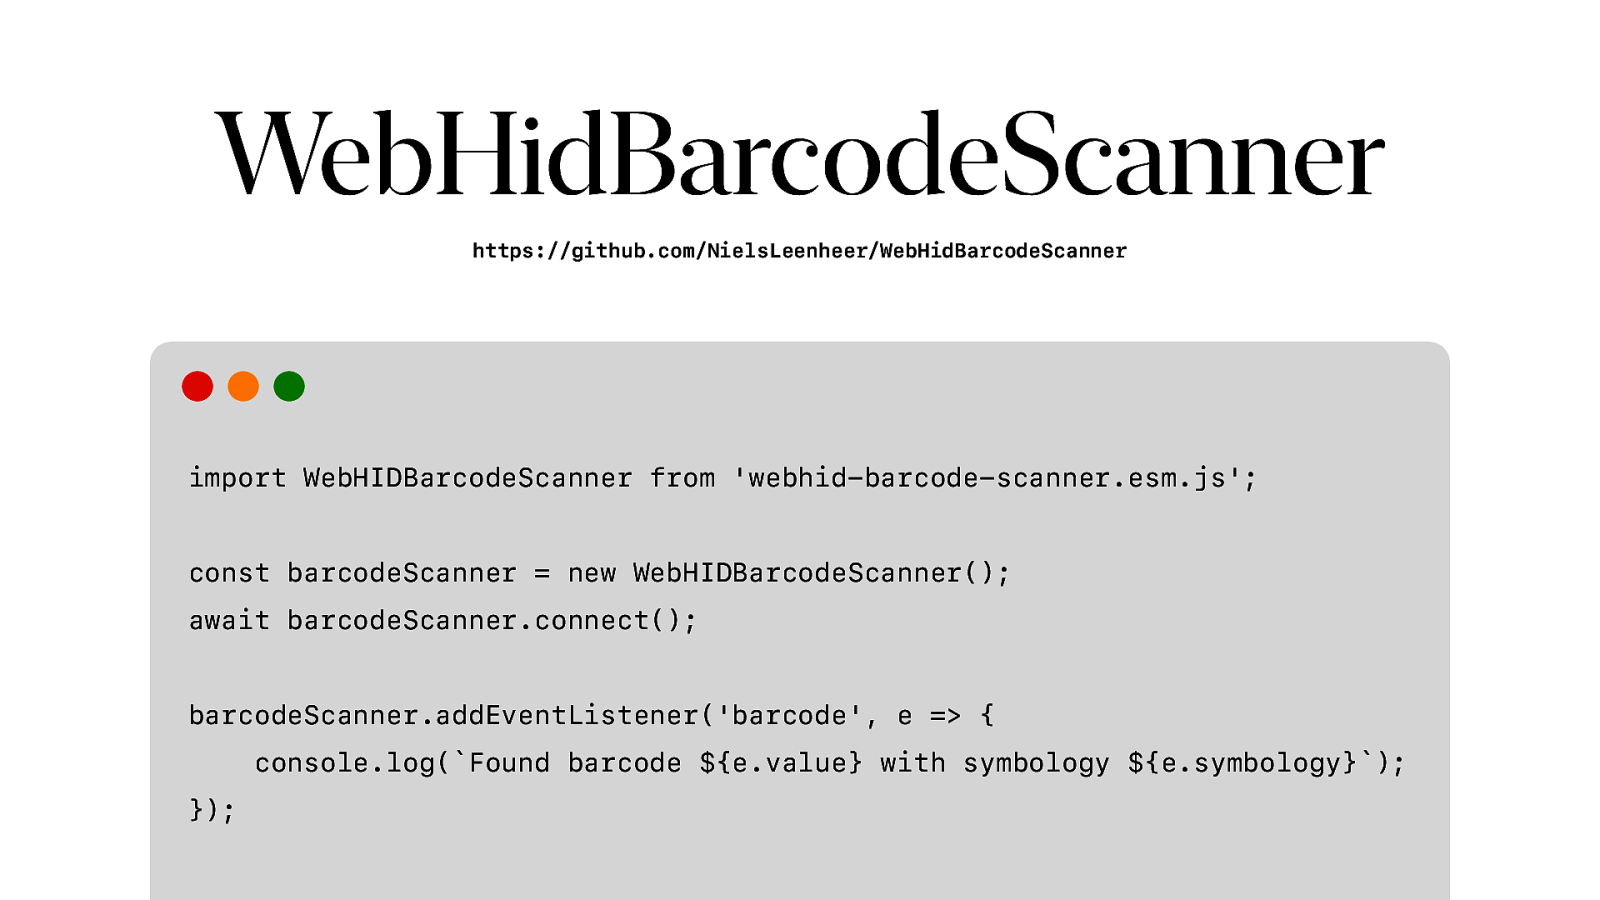
But you don’t need to do any of that, because I have this library for you.

And if you have a serial based scanner, I also have a similar library that uses WebSerial instead.

And that was our final device. The demo still uses so many more Project Fugu API’s, but that is all we have time for today.
Now think back to the demo we did at the start. It looked so simple. Underwhelming even… And then we went down into the rabbit hole.

We’ve always used web technologies for our app. But we used wrappers around it for integrating hardware. About 5 years ago we transitioned away from Adobe AIR to Electron and I wish we could have moved to PWAs back then. But now all the puzzle pieces are in place. But this is what I love about Project Fugu. It really allows us to move towards a future where we don’t need Electron for our application.

But Project Fugu is not just about cash registers or hardware. It is about all kinds of API’s to make the web more capable and making sure that PWA’s can compete with native applications. Be it on mobile or on desktop. And for us that really works. And it might work for you too.

Thank you! And thank you for letting me vent all my frustrations about 1980’s technology.