HOW TO MAKE YOUR STUPID DEVICES SMART

A presentation at Home Assistant Conference 2020 in December 2020 in by Pieter Brinkman

HOW TO MAKE YOUR STUPID DEVICES SMART
Pieter Brinkman – Home automation enthusiast since 2010 www.pieterbrinkman.com @pieterbrink123 /in/pbrink pbrink#0262 HOME ASSISTANT CONFERENCE 2020
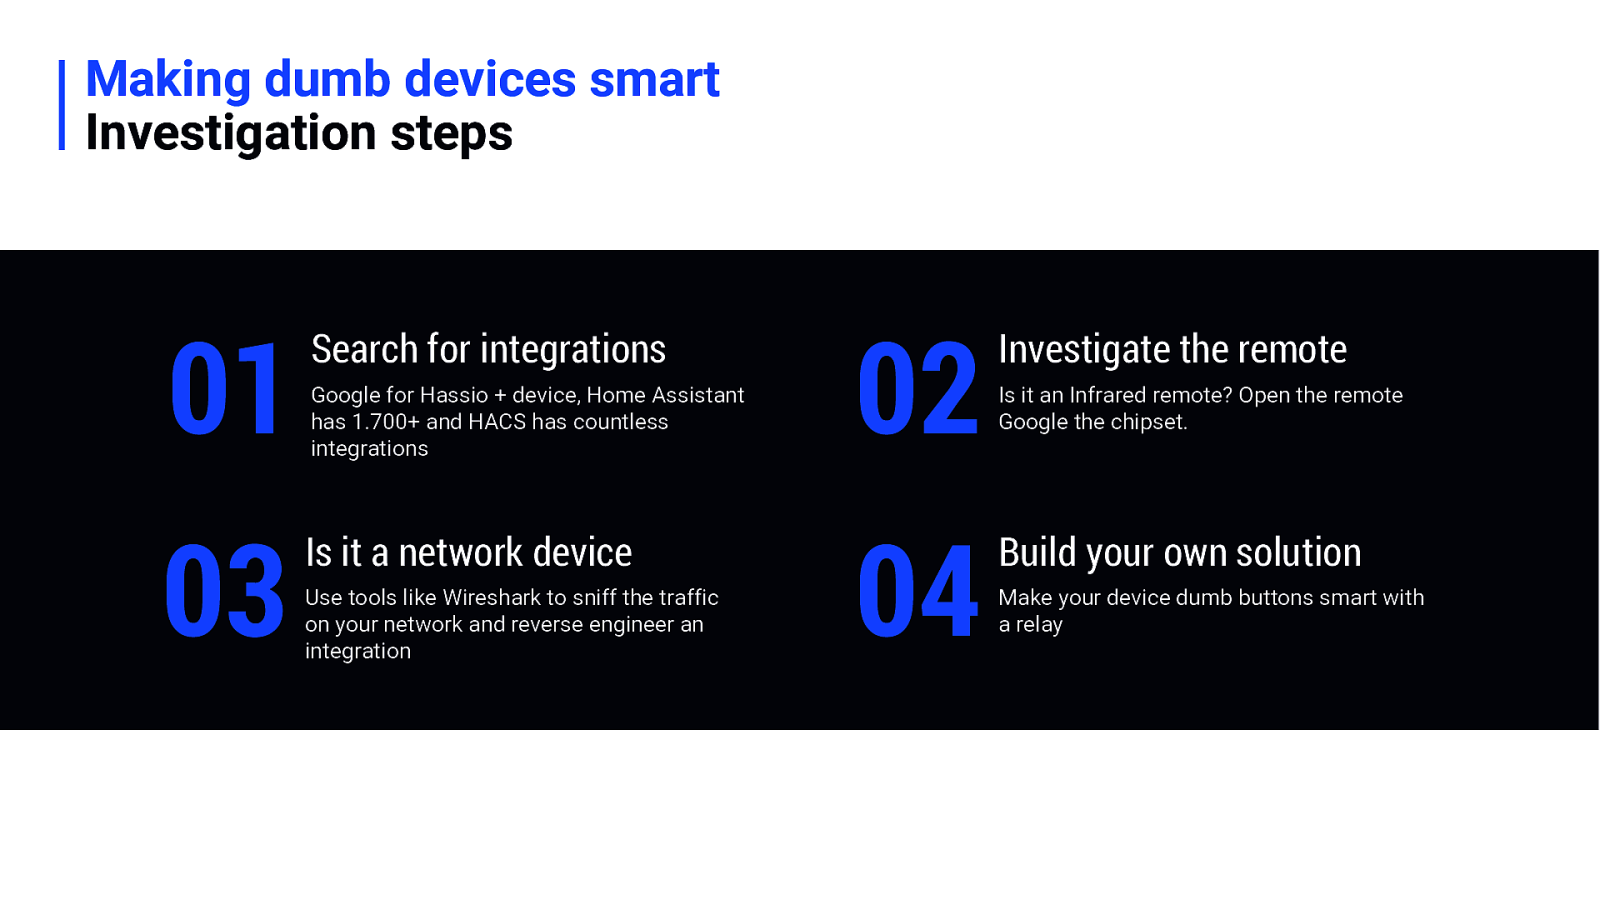
Making dumb devices smart Investigation steps 01 03 Search for integrations Google for Hassio + device, Home Assistant has 1.700+ and HACS has countless integrations Is it a network device Use tools like Wireshark to sniff the traffic on your network and reverse engineer an integration 02 04 Investigate the remote Is it an Infrared remote? Open the remote Google the chipset. Build your own solution Make your device dumb buttons smart with a relay
Fireplace investigation 01 Use RFXcom to catch 433Mhz signal remote signal No results
Fireplace investigation 01 Use RFX com to catch 433Mhz signal remote signal 02 Googled “Bellfire home automation” Found the manufacture WiFi module, with no open API
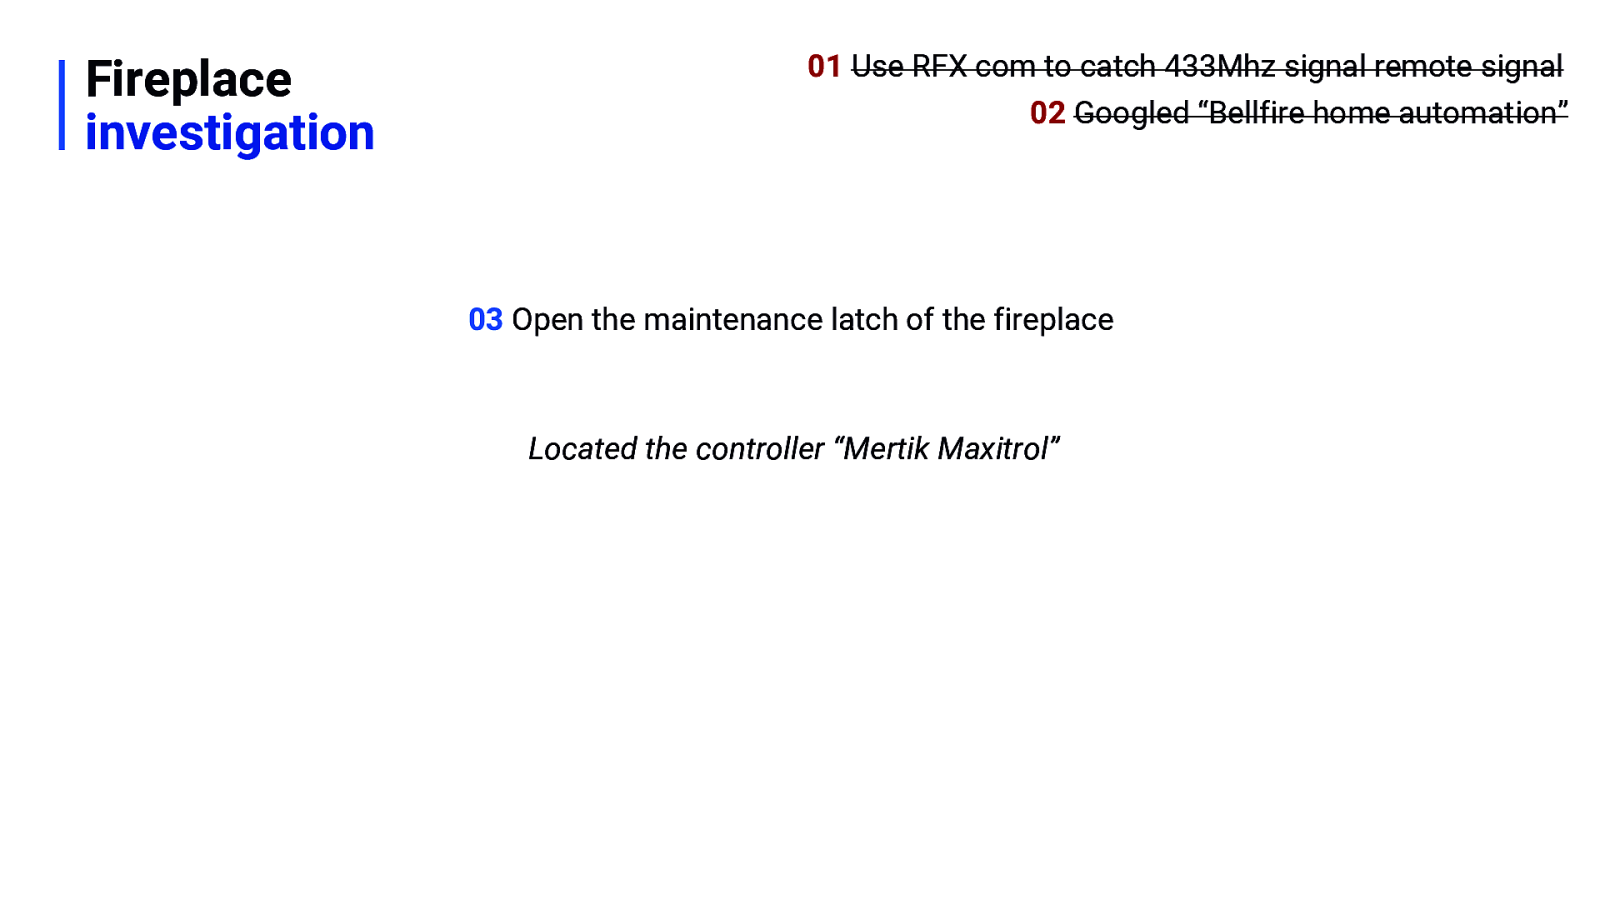
Fireplace investigation 01 Use RFX com to catch 433Mhz signal remote signal 02 Googled “Bellfire home automation” 03 Open the maintenance latch of the fireplace Located the controller “Mertik Maxitrol”
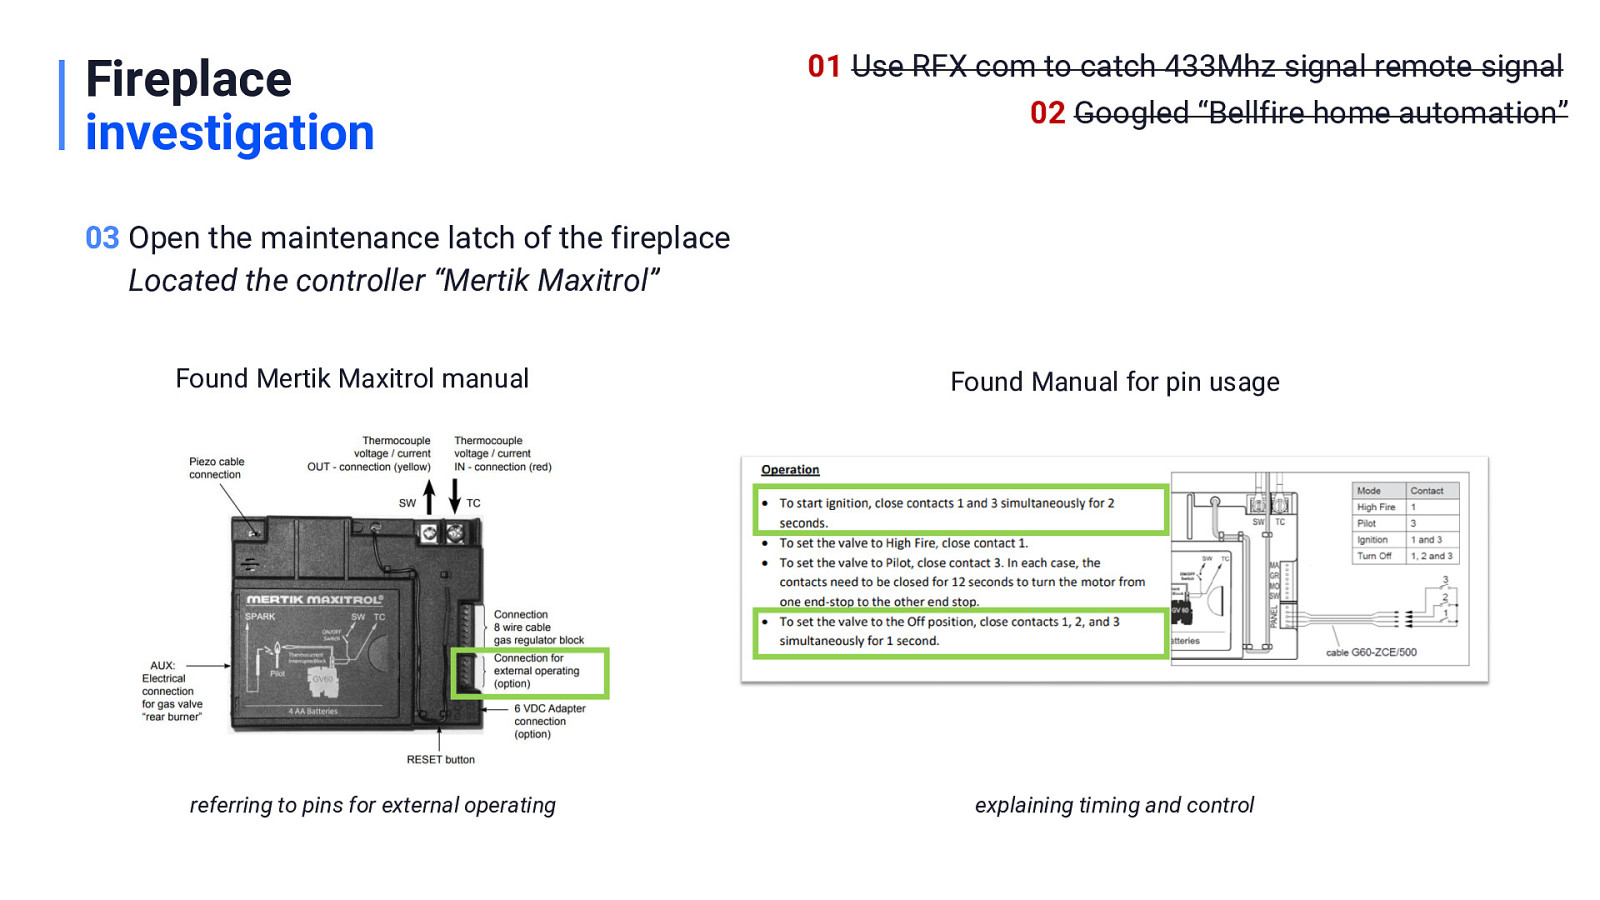
Fireplace investigation 01 Use RFX com to catch 433Mhz signal remote signal 02 Googled “Bellfire home automation” 03 Open the maintenance latch of the fireplace Located the controller “Mertik Maxitrol” Found Mertik Maxitrol manual referring to pins for external operating Found Manual for pin usage explaining timing and control

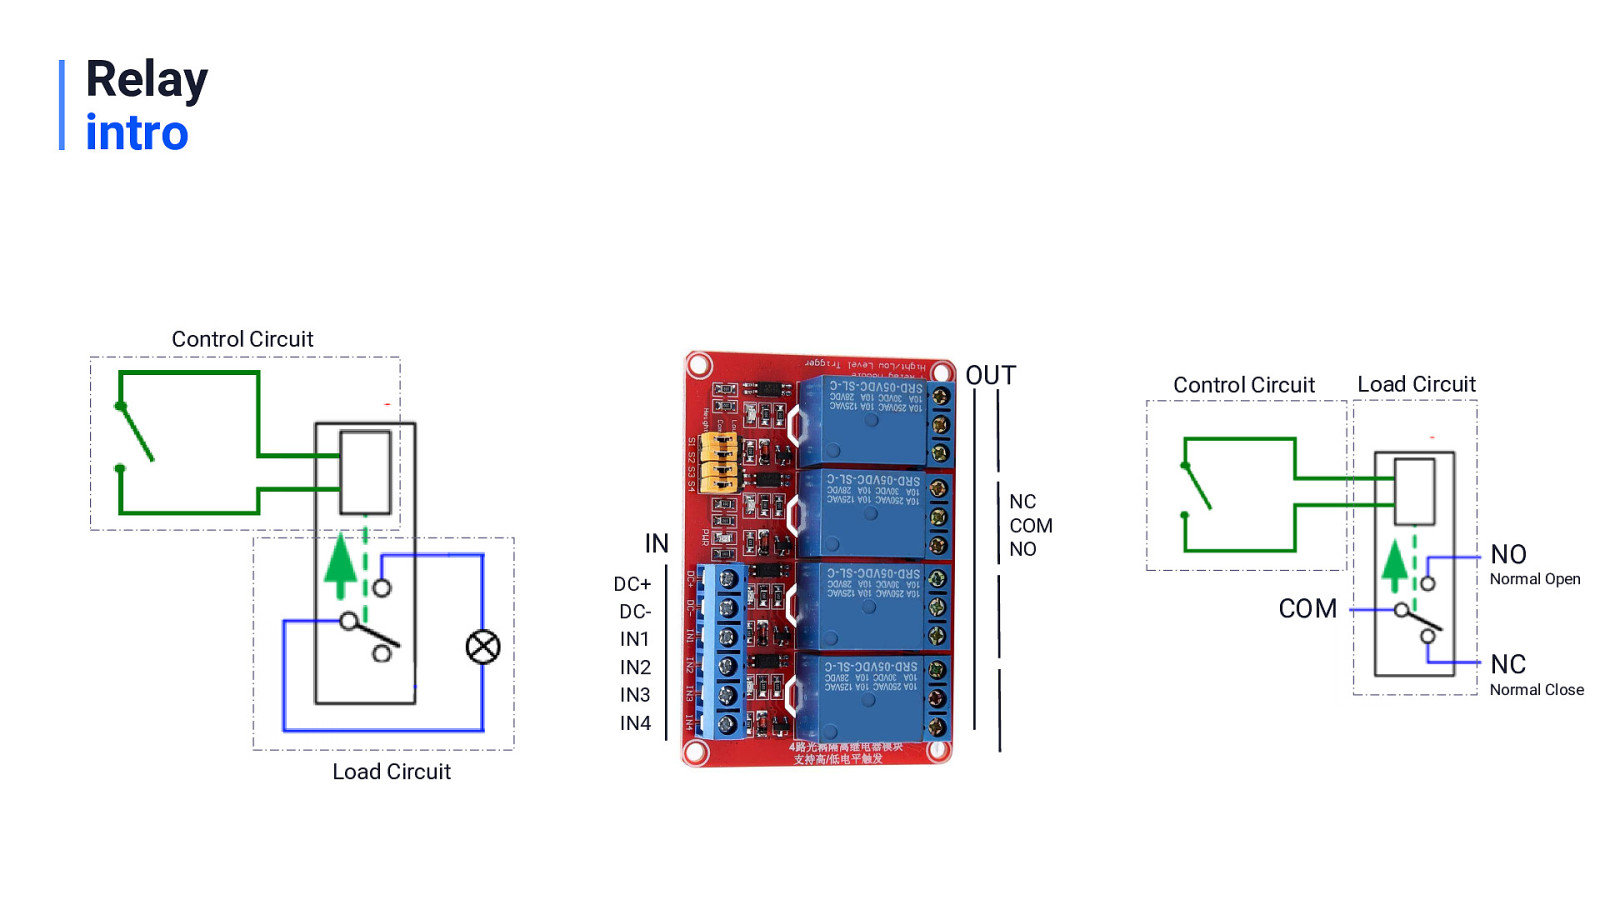
Relay intro Control Circuit OUT IN DC+ DCIN1 IN2 IN3 IN4 Load Circuit Control Circuit NC COM NO Load Circuit NO Normal Open COM NC Normal Close
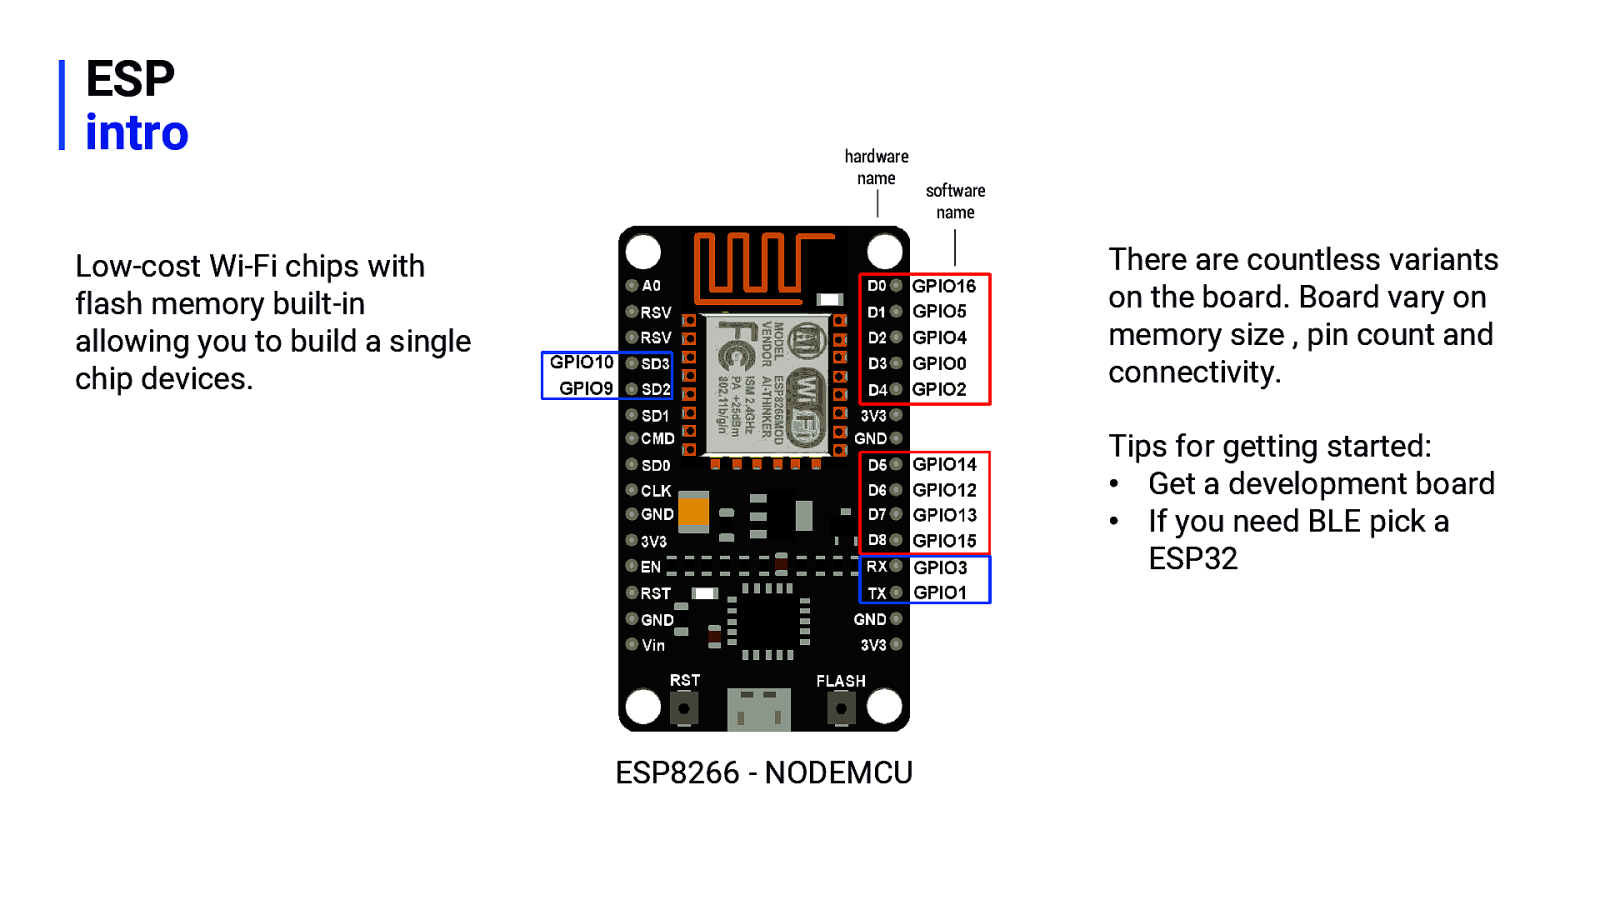
ESP intro hardware name software name There are countless variants on the board. Board vary on memory size , pin count and connectivity. Low-cost Wi-Fi chips with flash memory built-in allowing you to build a single chip devices. Tips for getting started: • Get a development board • If you need BLE pick a ESP32 ESP8266 - NODEMCU
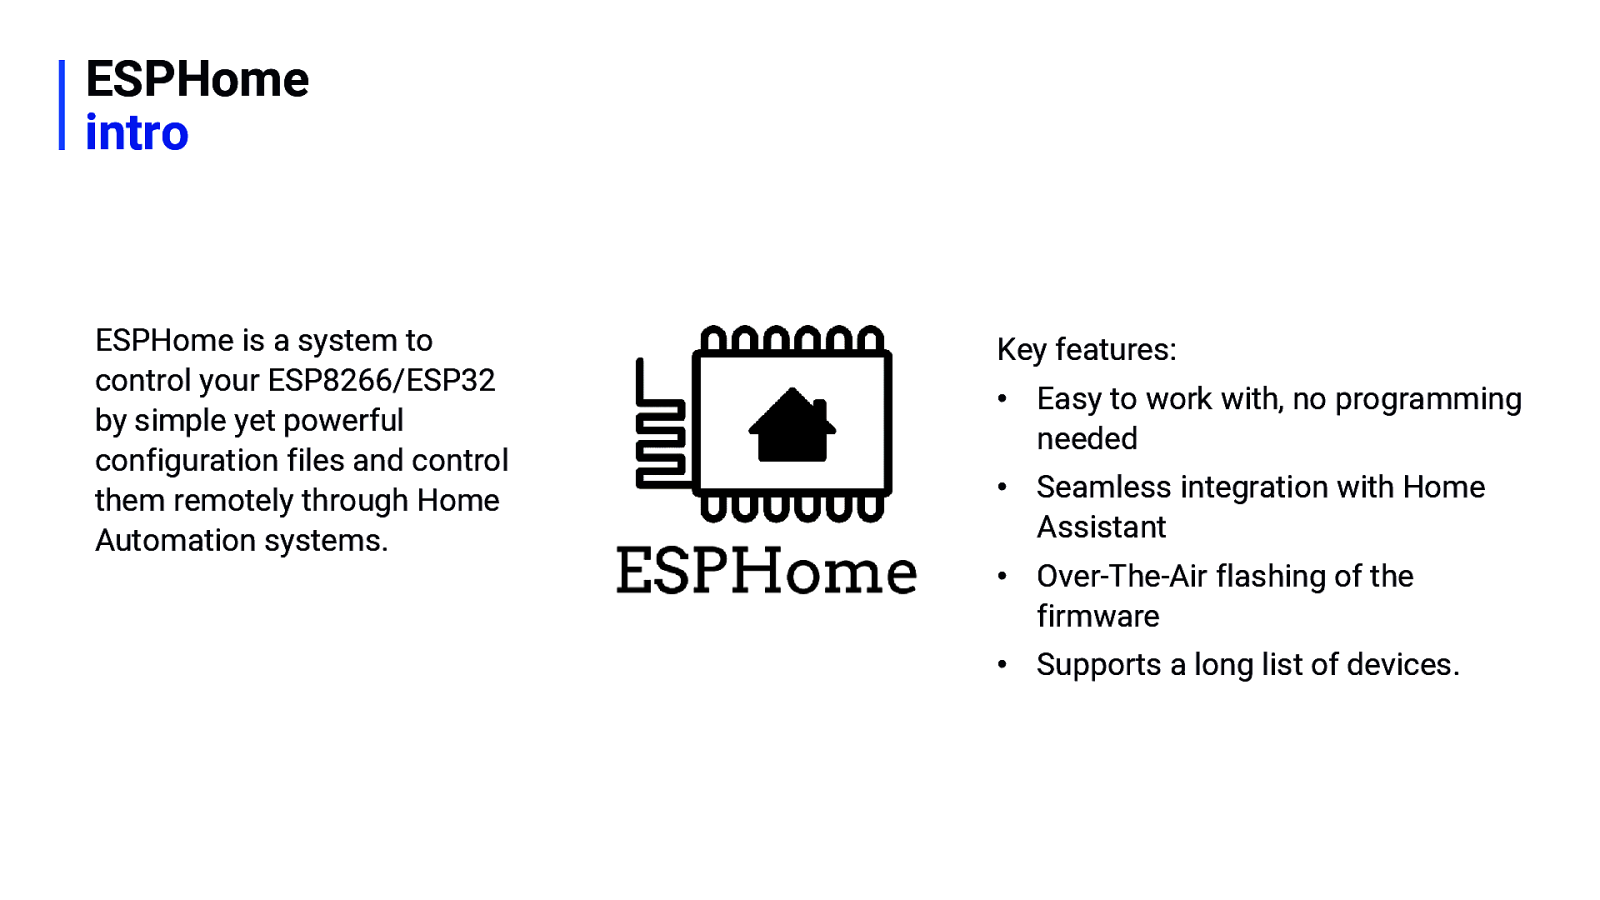
ESPHome intro ESPHome is a system to control your ESP8266/ESP32 by simple yet powerful configuration files and control them remotely through Home Automation systems. Key features: • Easy to work with, no programming needed • Seamless integration with Home Assistant • Over-The-Air flashing of the firmware • Supports a long list of devices.
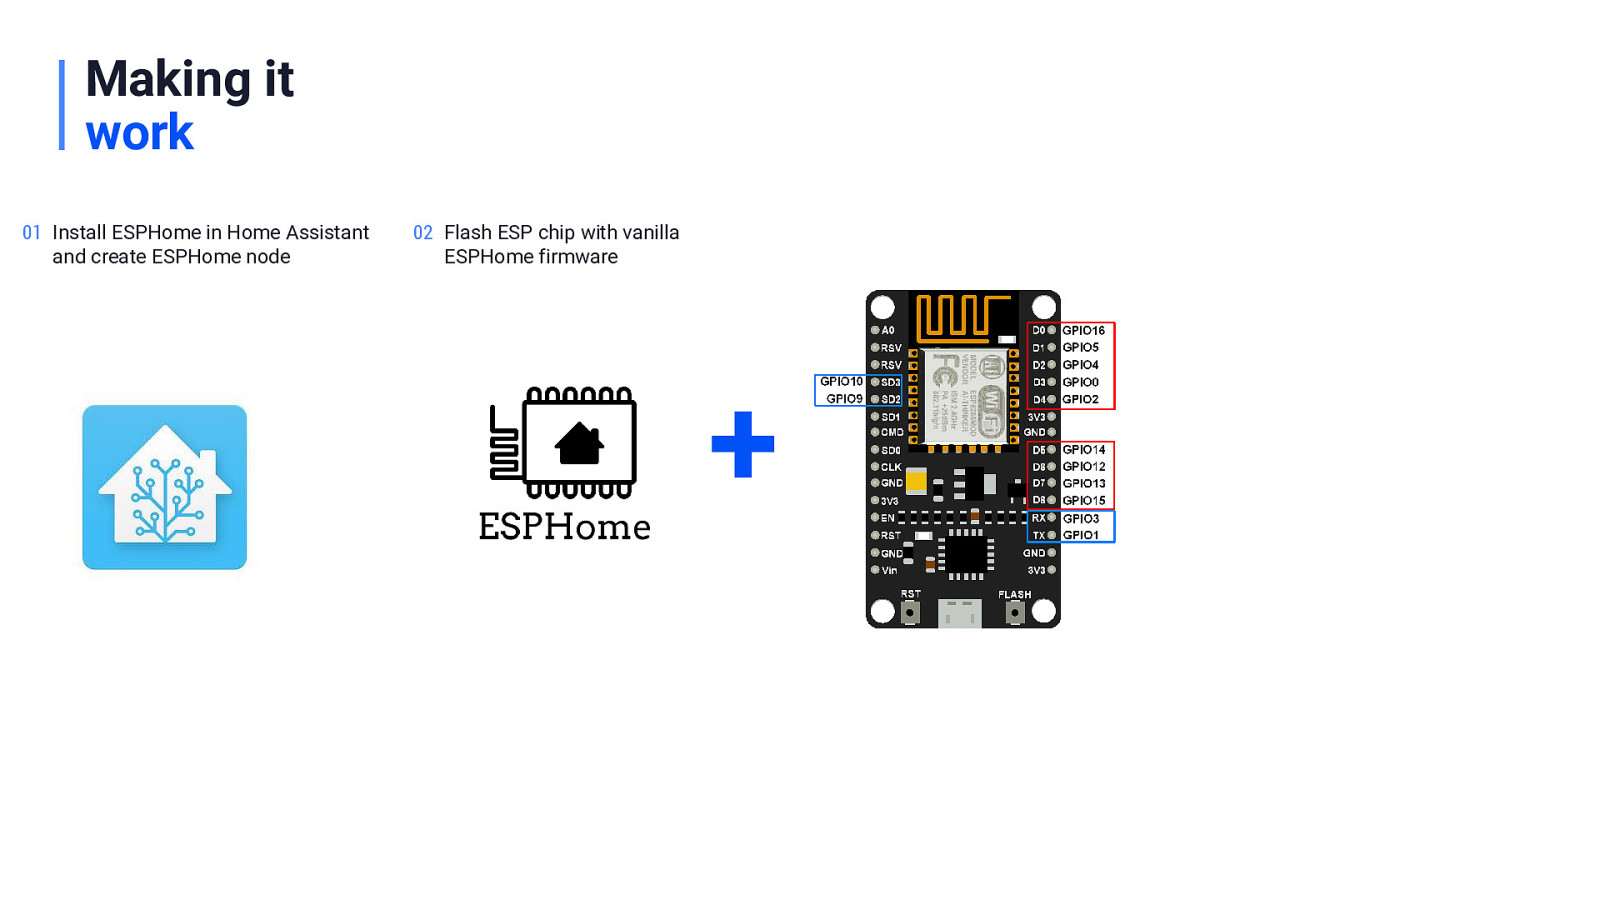
Making it work 01 Install ESPHome in Home Assistant and create ESPHome node 02 Flash ESP chip with vanilla ESPHome firmware +
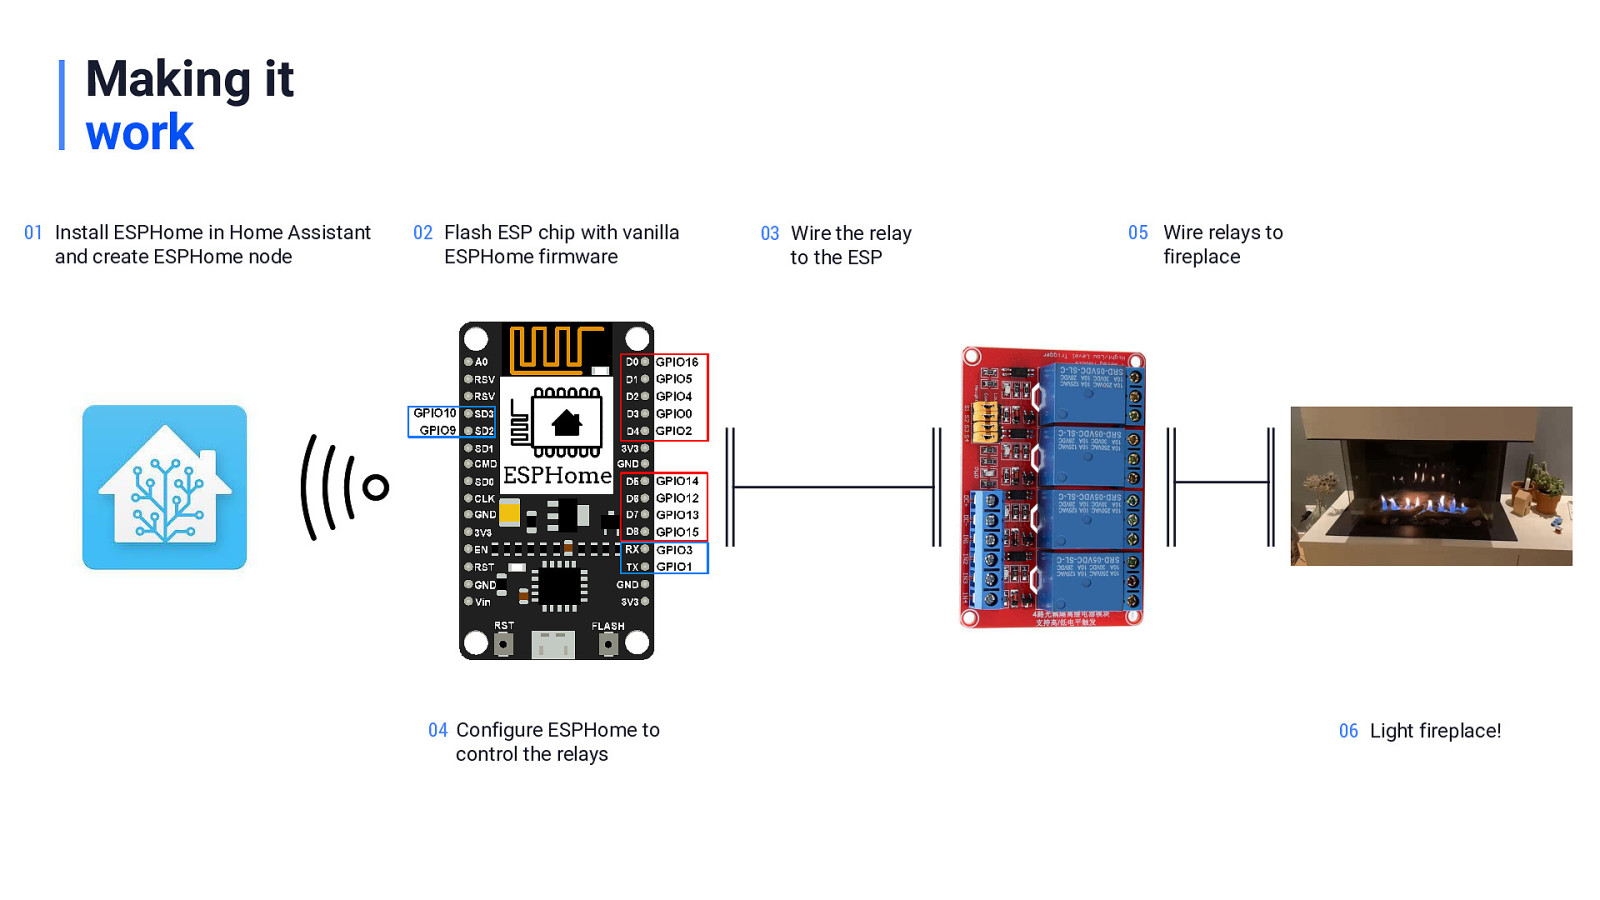
Making it work 01 Install ESPHome in Home Assistant and create ESPHome node 02 Flash ESP chip with vanilla ESPHome firmware 04 Configure ESPHome to control the relays 03 Wire the relay to the ESP 05 Wire relays to fireplace 06 Light fireplace!


Install ESPHome Install Supervise add-on 1 Create your first configuration Compile vanilla firmware Upload firmware to ESP Docker users tip: use the ESPHome flasher tool 2 ❑ Verify integration in Home Assistant ❑ ❑ ❑ ❑ References: 1. https://esphome.io Guide: “Getting Started with Home Assistant Add-on” 2. https://github.com/esphome/esphome-flasher/releases ESPHome flasher tool

THE WIRING
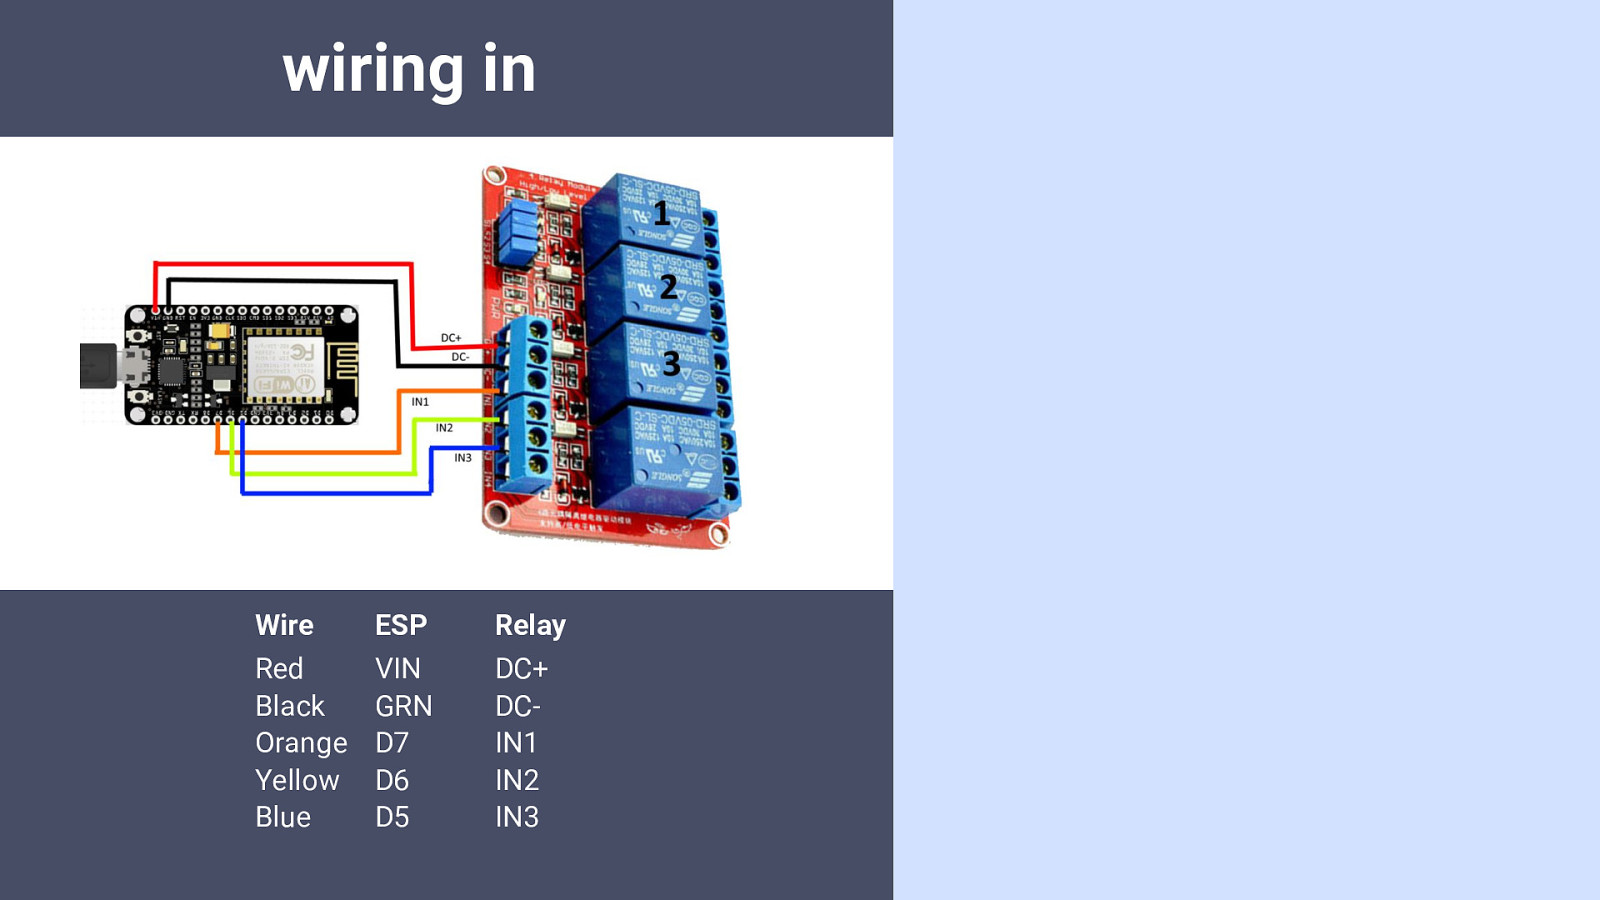
Red Red Wire ESP Relay Red Black Orange Yellow Blue VIN GRN D7 D6 D5 DC+ DCIN1 IN2 IN3

Configuration time Configure the ESP: ❑ Expose the individual relays as switches ❑ Verify in Home Assistant ❑ Add timing to control the fireplace o Ignition: Close relay 1 and 3 for two seconds o Turn Off: Close contacts 1,2 and 3 for 1 second ❑ Verify in Home Assistant References: 1. https://esphome.io Guide: “Getting Started with Home Assistant Add-on” 2. https://github.com/esphome/esphome-flasher/releases ESPHome flasher tool
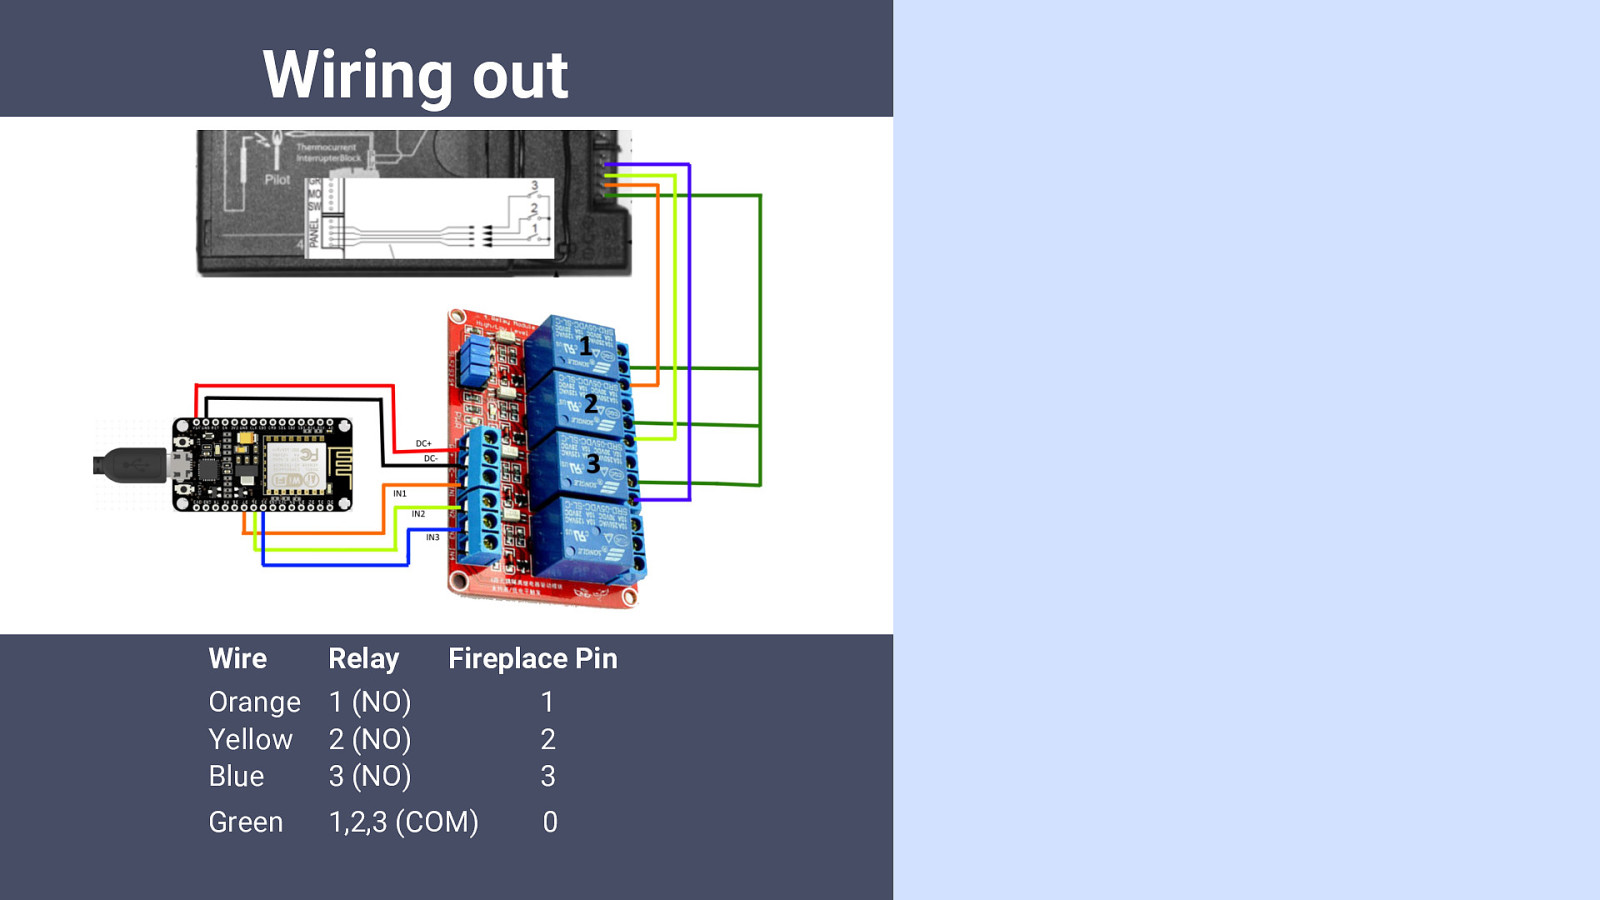
Wiring out Wire Relay Fireplace Pin Orange 1 (NO) Yellow 2 (NO) Blue 3 (NO) 1 2 3 Green 0 1,2,3 (COM)