Hi, my name is Kathleen McMahon and I’m here today to tell you how Gatsby and MDX helped us make our React component library documentation smoothly inclusive
Before we begin, let’s get some details out of the way

A presentation at Gatsby Days in February 2020 in Los Angeles, CA, USA by Kathleen McMahon
Hi, my name is Kathleen McMahon and I’m here today to tell you how Gatsby and MDX helped us make our React component library documentation smoothly inclusive
Before we begin, let’s get some details out of the way
Since time is compressed, and I’d love to talk at a reasonable pace for our live captioner…
My slide deck will be posted on Notist, including links to resources I briefly touch upon. The full URL will be available later today on Twitter.

You can follow me at. Resource11 on Twitter, Instagram, and GitHub.
Before we dig into Gatsby and MDX, let’s back up so I can introduce myself better…

I’m the Tech Lead for O’Reilly Media’s design system

And I race bikes… very badly.

Mostly you’ll see me in costume, racing two laps to your six, at the back of the pack, on a singlespeed.
So while racing in costume is exciting…

…working on a design system is even better! Especially if you’re rebooting your system.
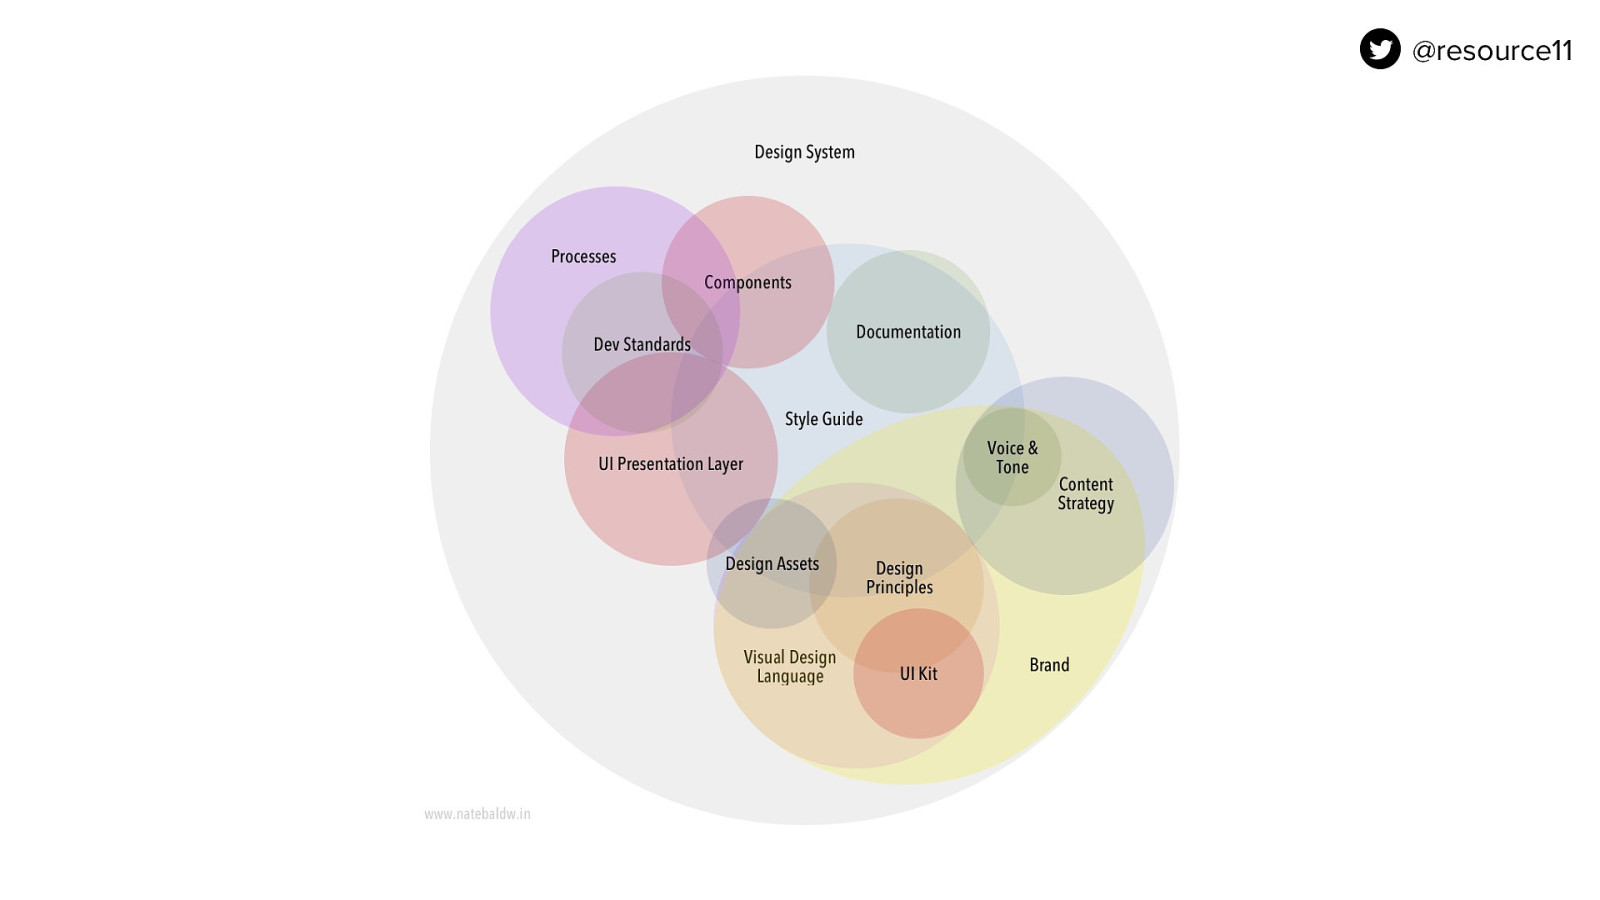
If you’ve never worked on a design system, let’s just say… There are a lot of moving parts.

If your core team is small like ours — around 3-4 people — you really have to choose your focus. And… rely on your contributors.

In our case, or focus was business logic out, accessibility in. We fixed our colors, our components, our patterns, and rebooted our docs.

Once we did that, we realized that a part of our system was becoming a hindrance for our team, and a barrier to entry for our contributors: our documentation.
Our process was spread across two projects: the design-system repo, and the design-system-docs repo.
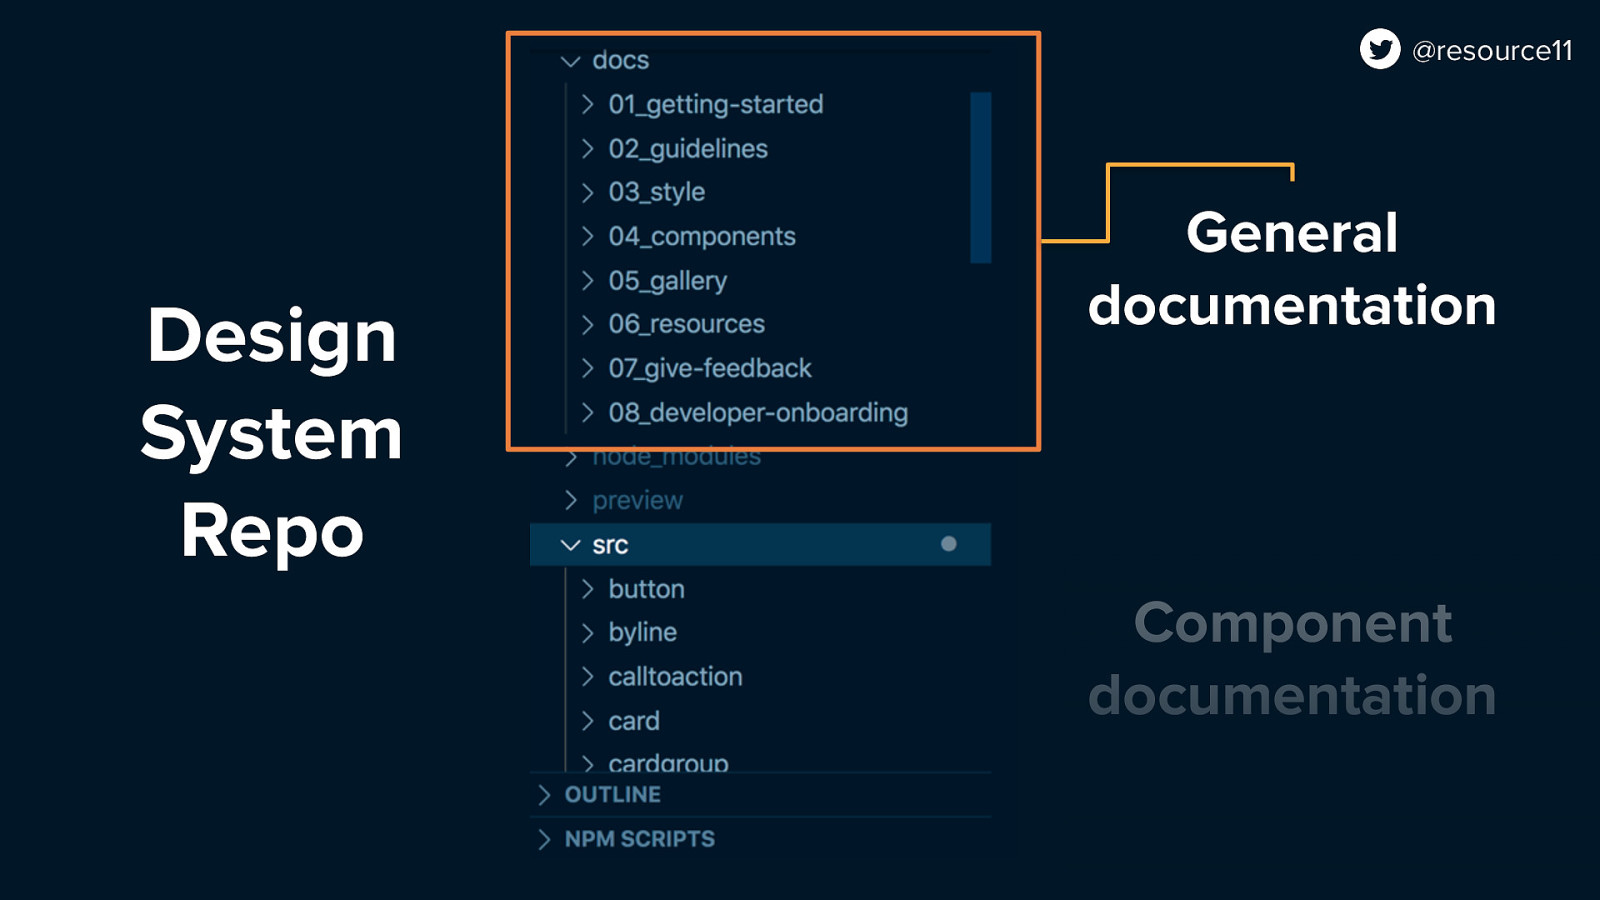
In the design-system repo, our documentation content was stored…
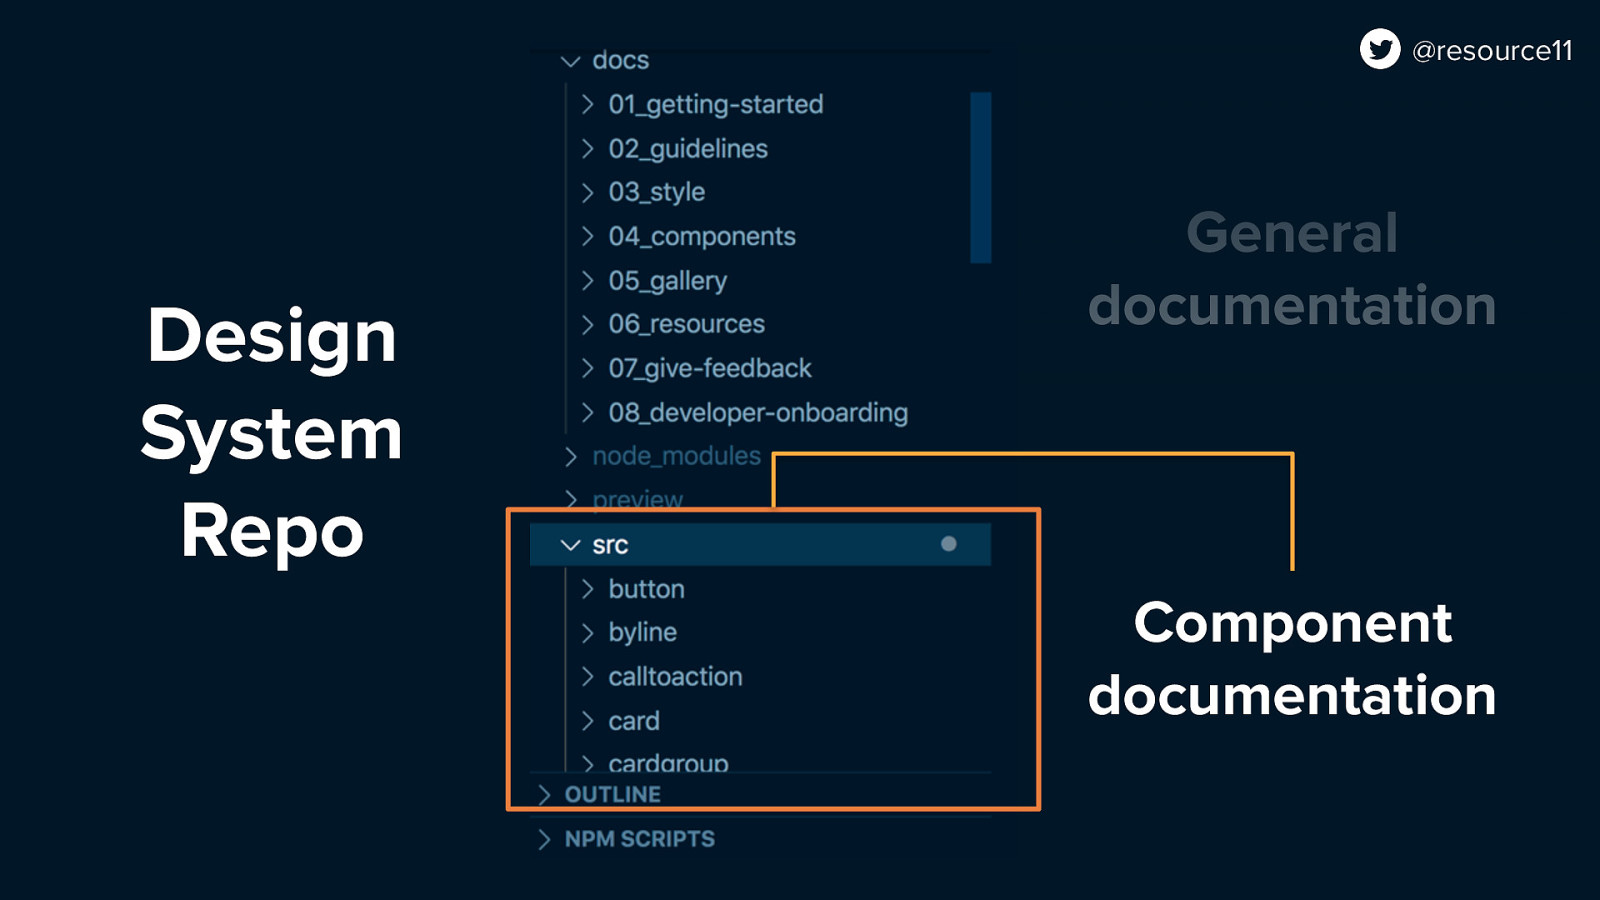
…in two locations…
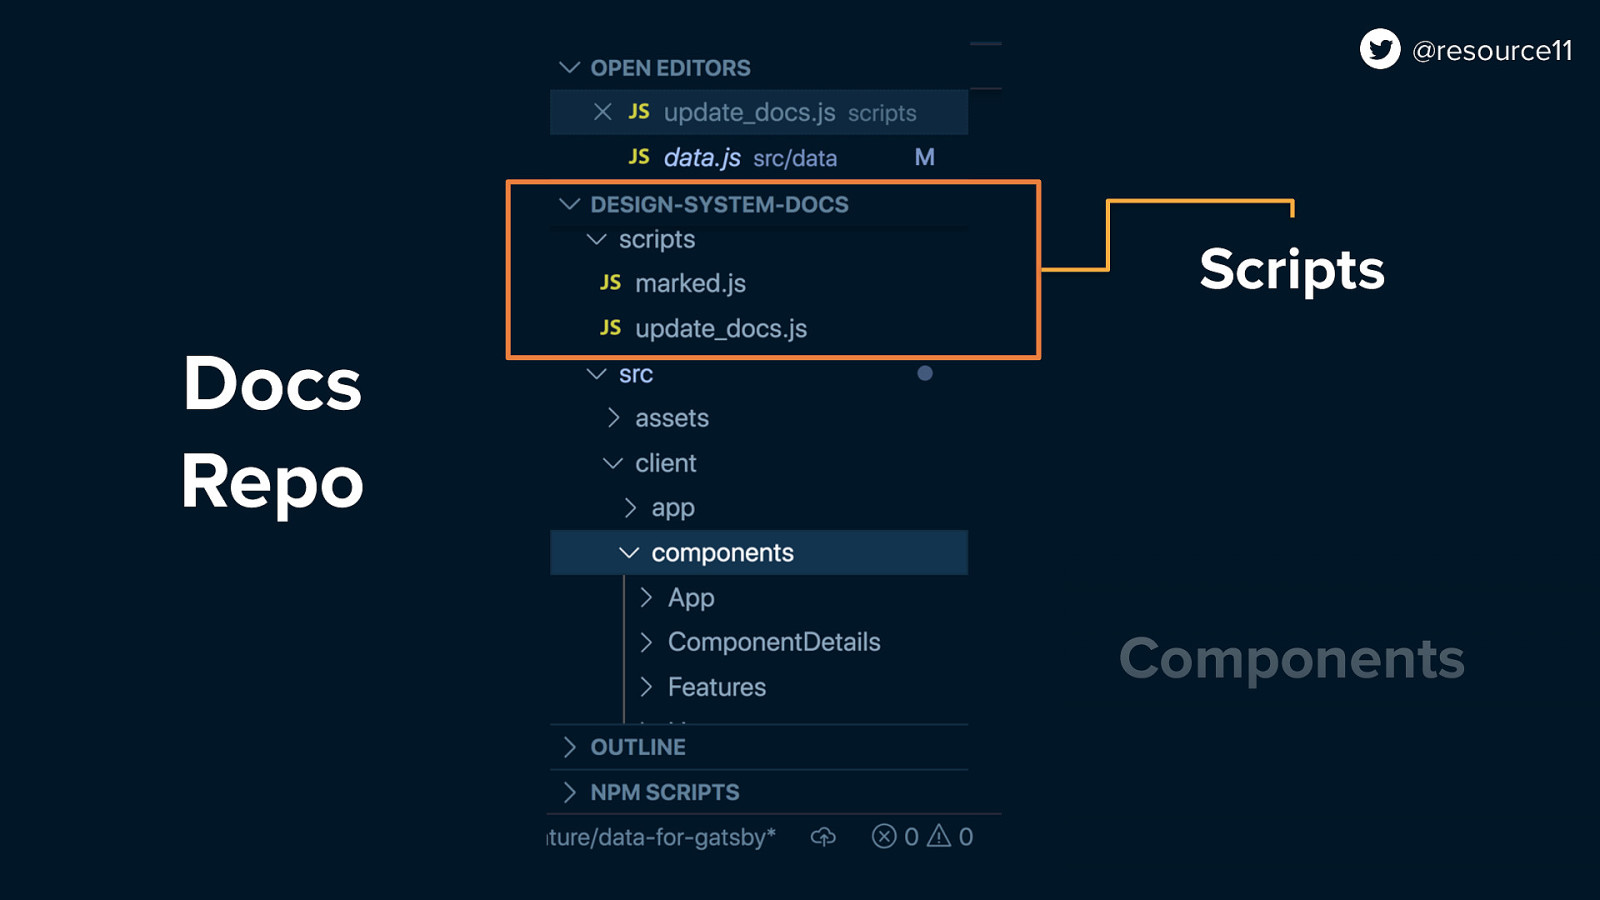
While docs repo held the site scaffolding…
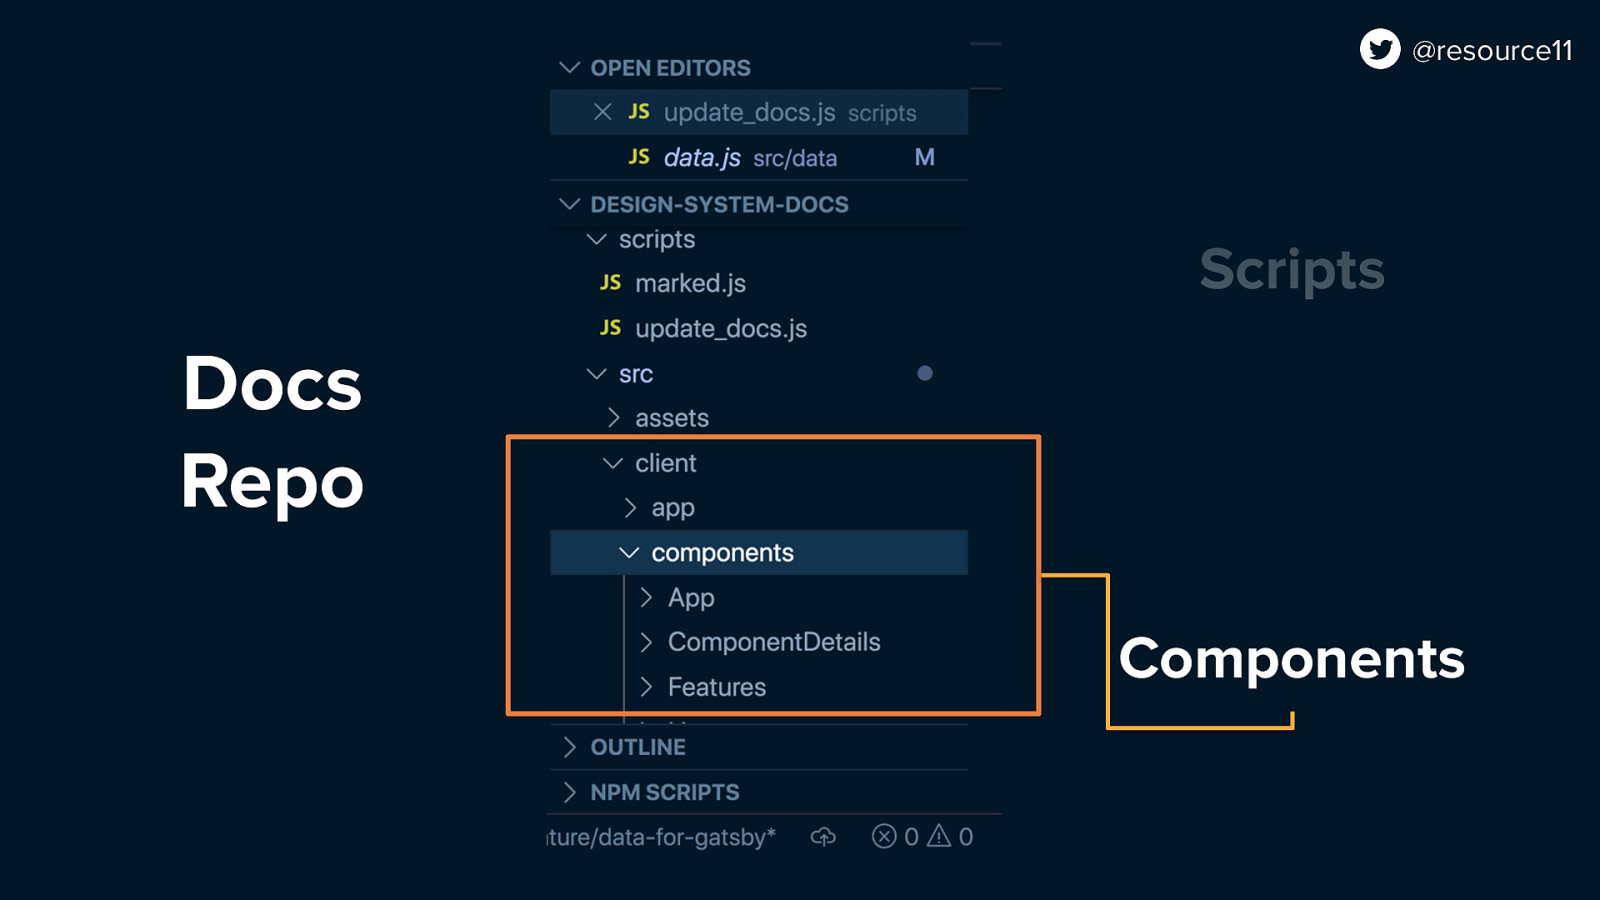
…and docs layout components.
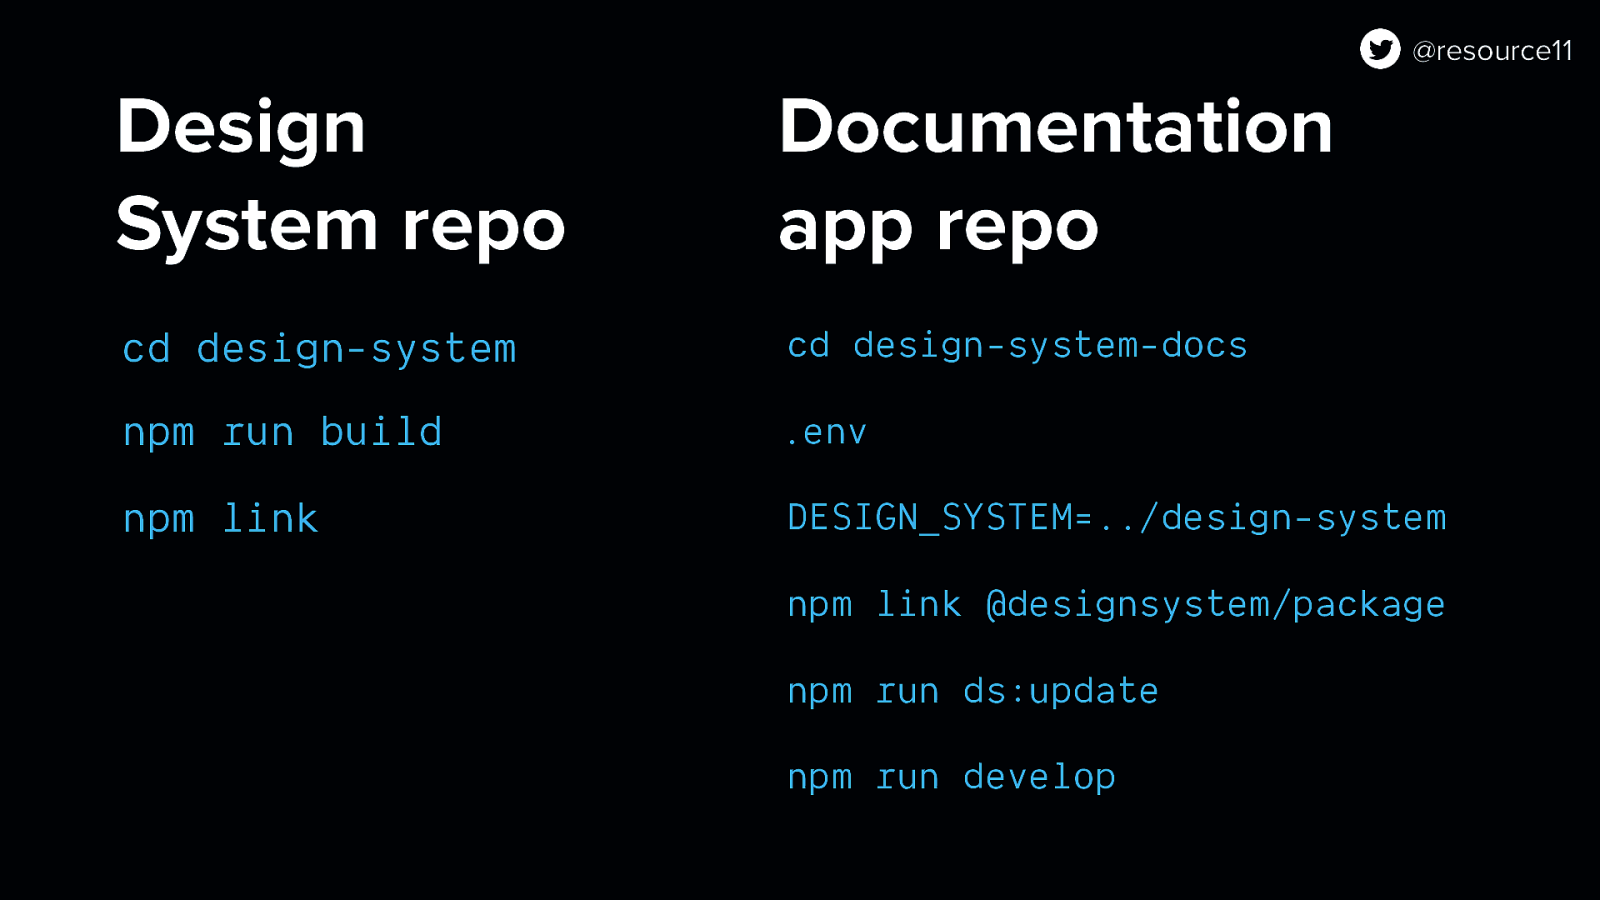
To get up and running, you had to follow a detailed series of steps to sync, run scripts, grab files, parse information, generate data, and render the docs to a React app. Phew!

Just getting starting working with our repos was overwhelming for new contributors to say the least…
But wait there’s more!
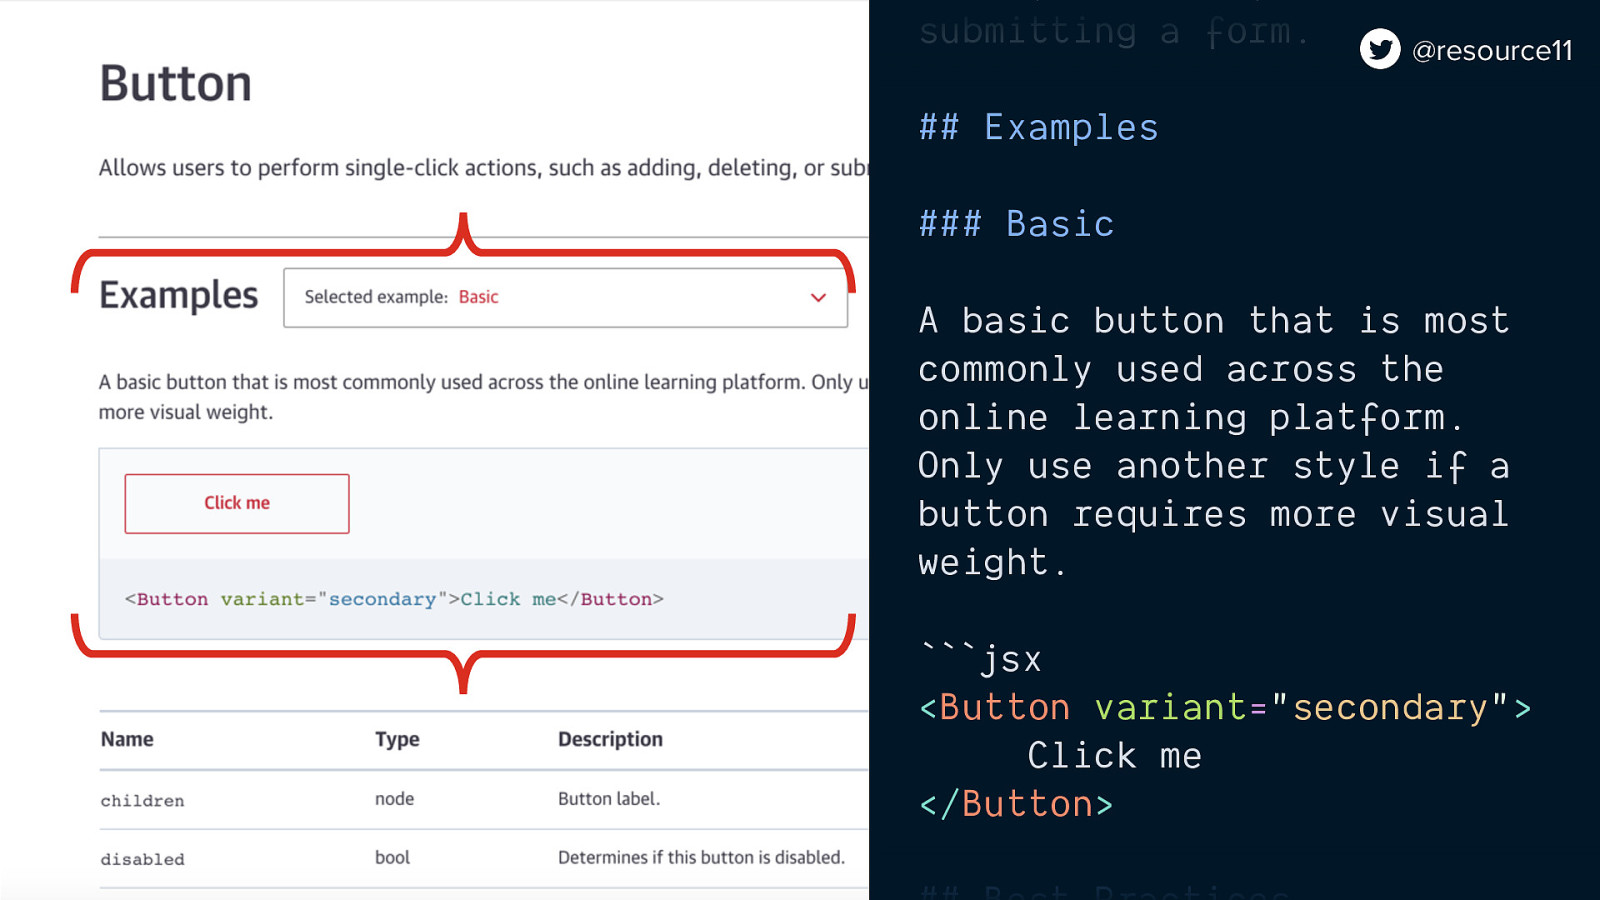
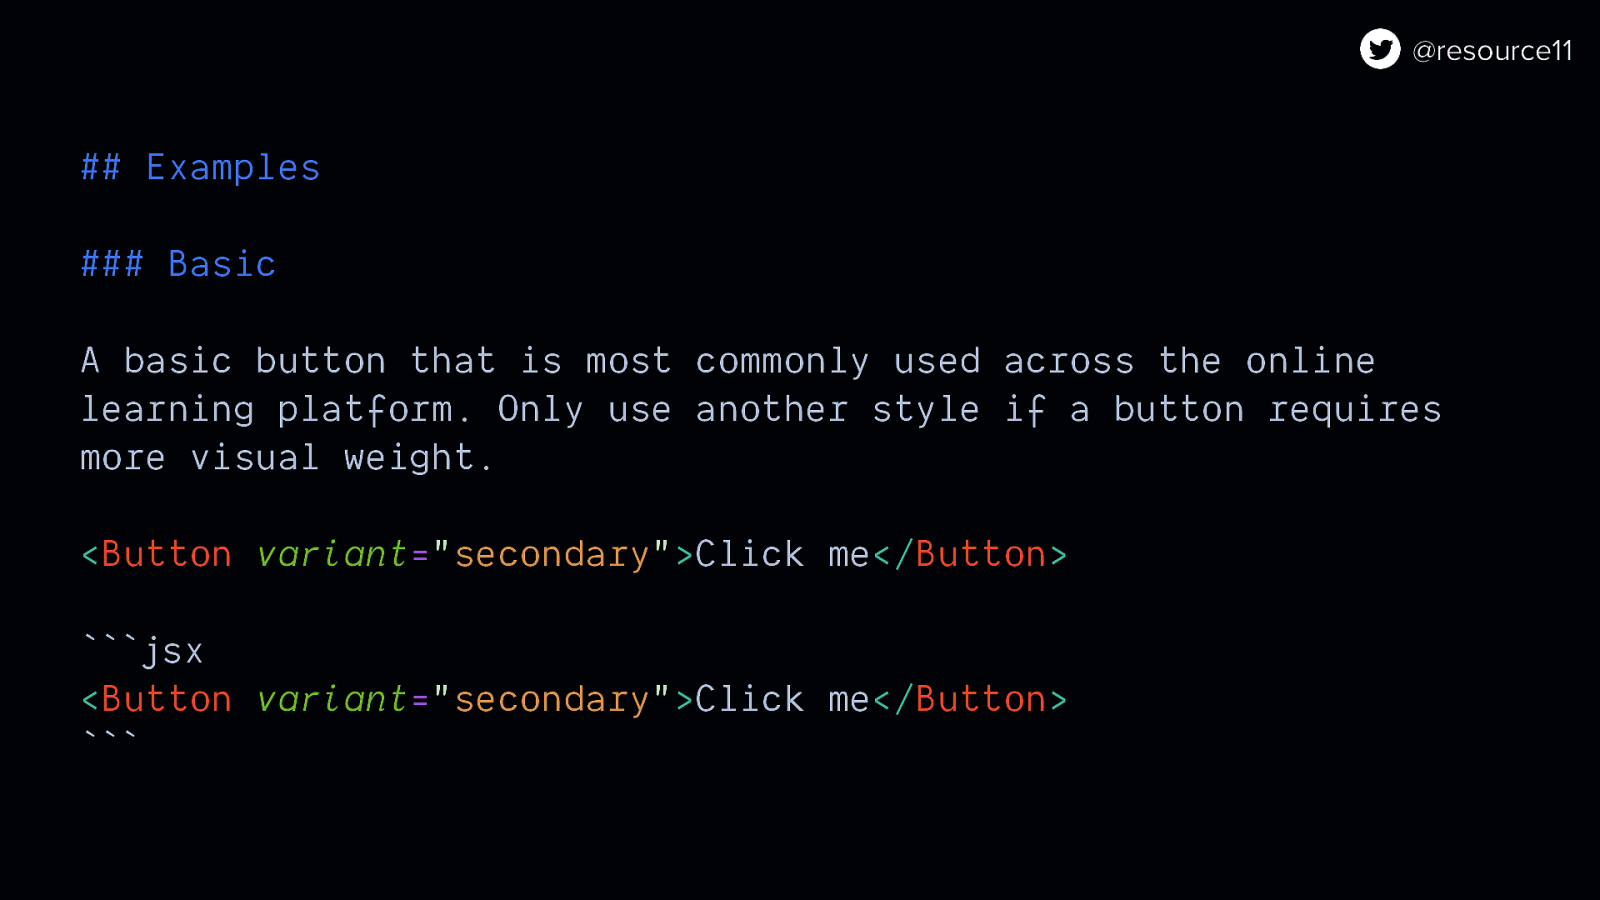
Our scripts were set up in such a way that you had to write your Markdown in a very specific order for your content to show up in the docs.
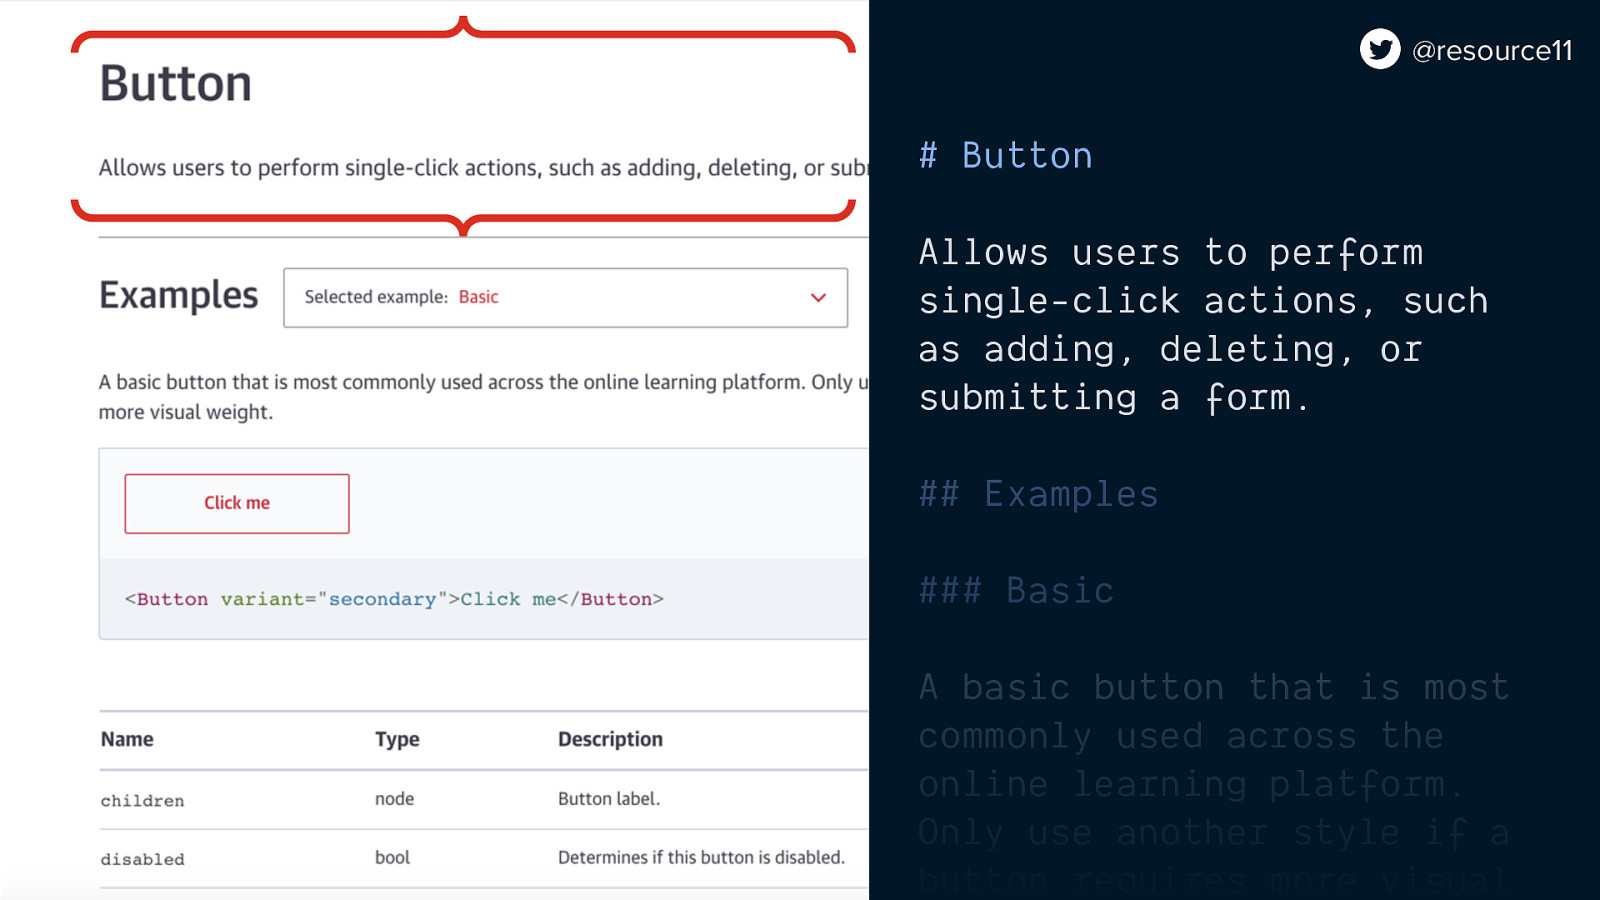
Your Button heading could be paired with an intro paragraph, but only one paragraph.

Same with your variants. Only one paragraph, and then a code block.
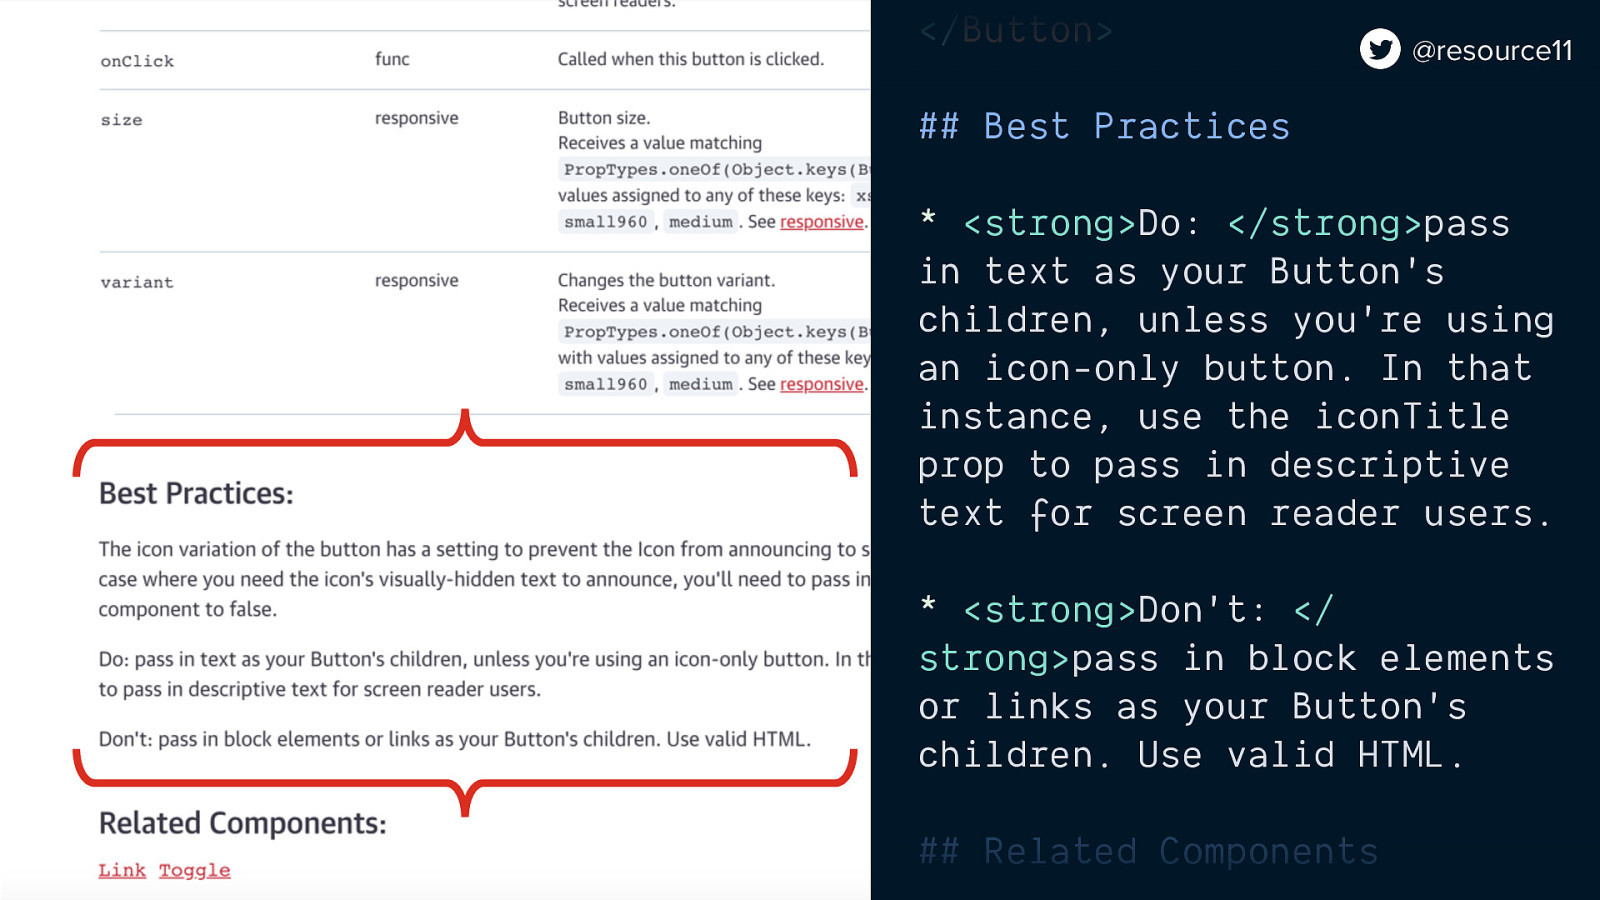
Best practices had to be written as an unordered list. Always.
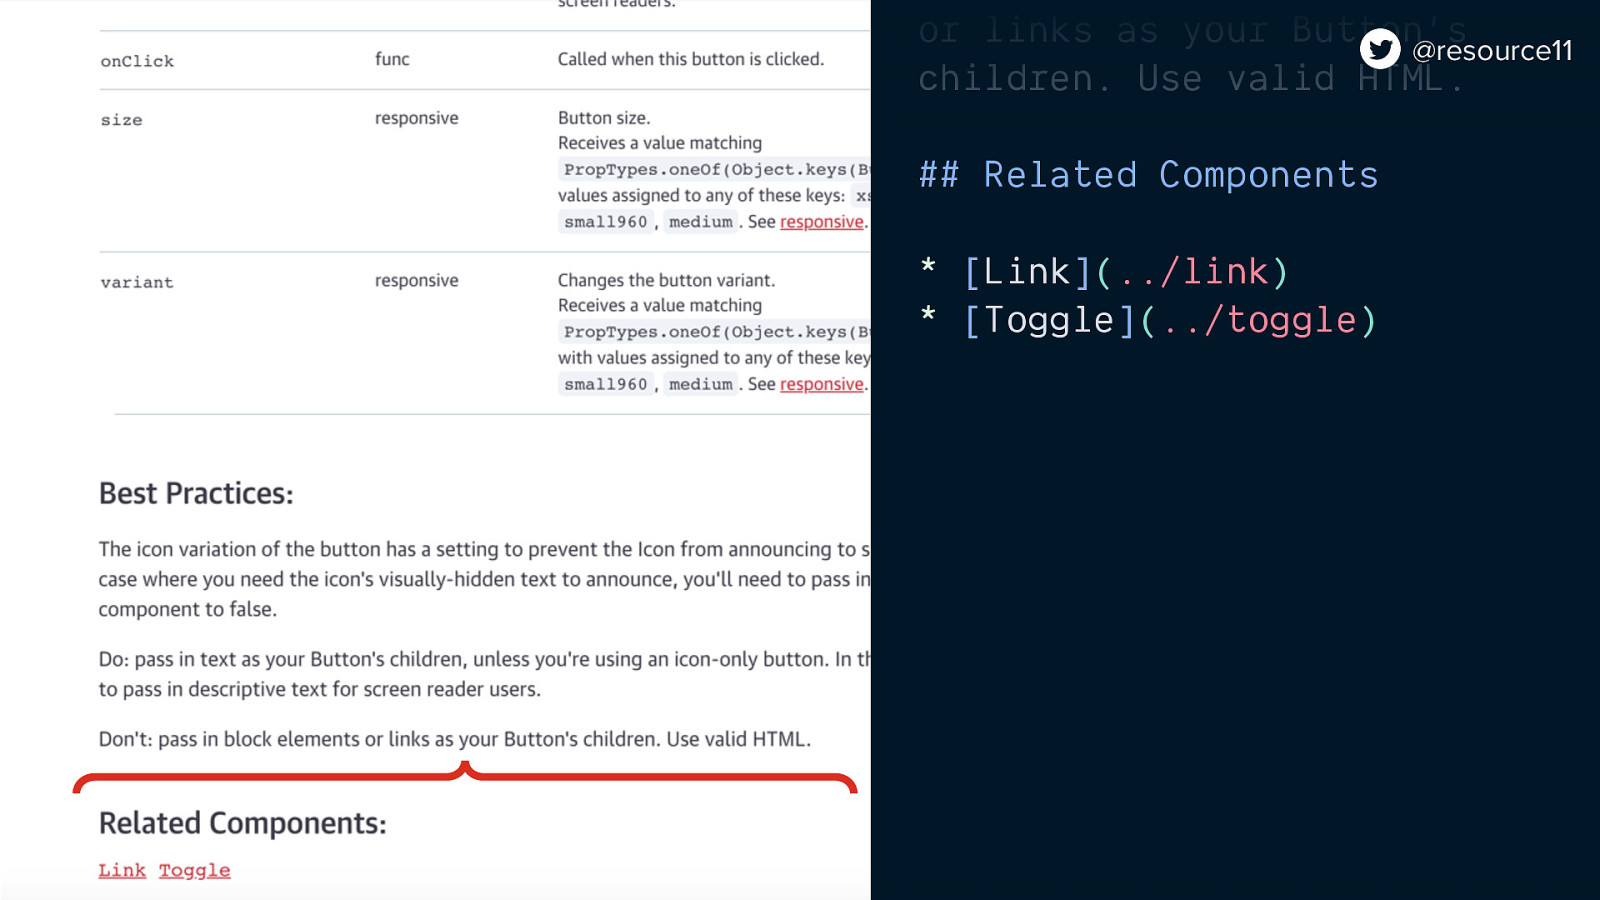
Same with the Related components section. Always an unordered list.

So while our docs scripts were great for of generating color swatches and details about which props were available in components…

The process was not great for creating our component documentation.

Which frustrated all of us.

One mistake, and parts if not whole chunks of documentation would be missing on the component pages. We had the freedom of using markdown, yet weren’t taking advantage of it.

This was a serious cognitive lift, even for someone who is very familiar with the codebase

Now imagine if you have a new contributor to your project…? Not exactly a welcoming experience.

We decided to review our process and see what wasn’t working.
One of our biggest issues: we chose to show one component variant at a time, rather than all at once. We forced our users to access a select menu over and over to compare variants, which increased the time they needed to look up information. It didn’t make sense.

In retrospect, that decision was about as questionable as a recipe that combines Jello with shellfish

We decided that it was time to make our docs contribution process more user friendly, in terms of the structure, and how we authored.
Especially the component example pages. We wanted the users to have confidence that whatever content they wrote in a docs page

…would make it into that docs page.

@resource11 If we made our docs more user friendly, we’d have more contributors rather than fewer.

We considered our options for making our docs better, and decided upon Gatsby for a few reasons.

Gatsby gave us a way to migrate all our main documentation pages right into the site without much fuss,
Gatsby provides a Webpack and Babel config similar to create-react-app, so we could start with a scaffolded project, and extend as needed.
And…


Semantic HTML. Which in, gives your site…

Improved accessibility. Better support for your users that rely on assistive technology to access your docs. Yuraima Estevez will be talking about general component accessibility later on today, and it’s a really good talk. That said, if your design system is promoting inclusivity in general, it follows that inclusive docs makes sense.
As a bonus, with Gatsby we could streamline our setup from two repos to one, and…

Reduce the amount of CLI commands
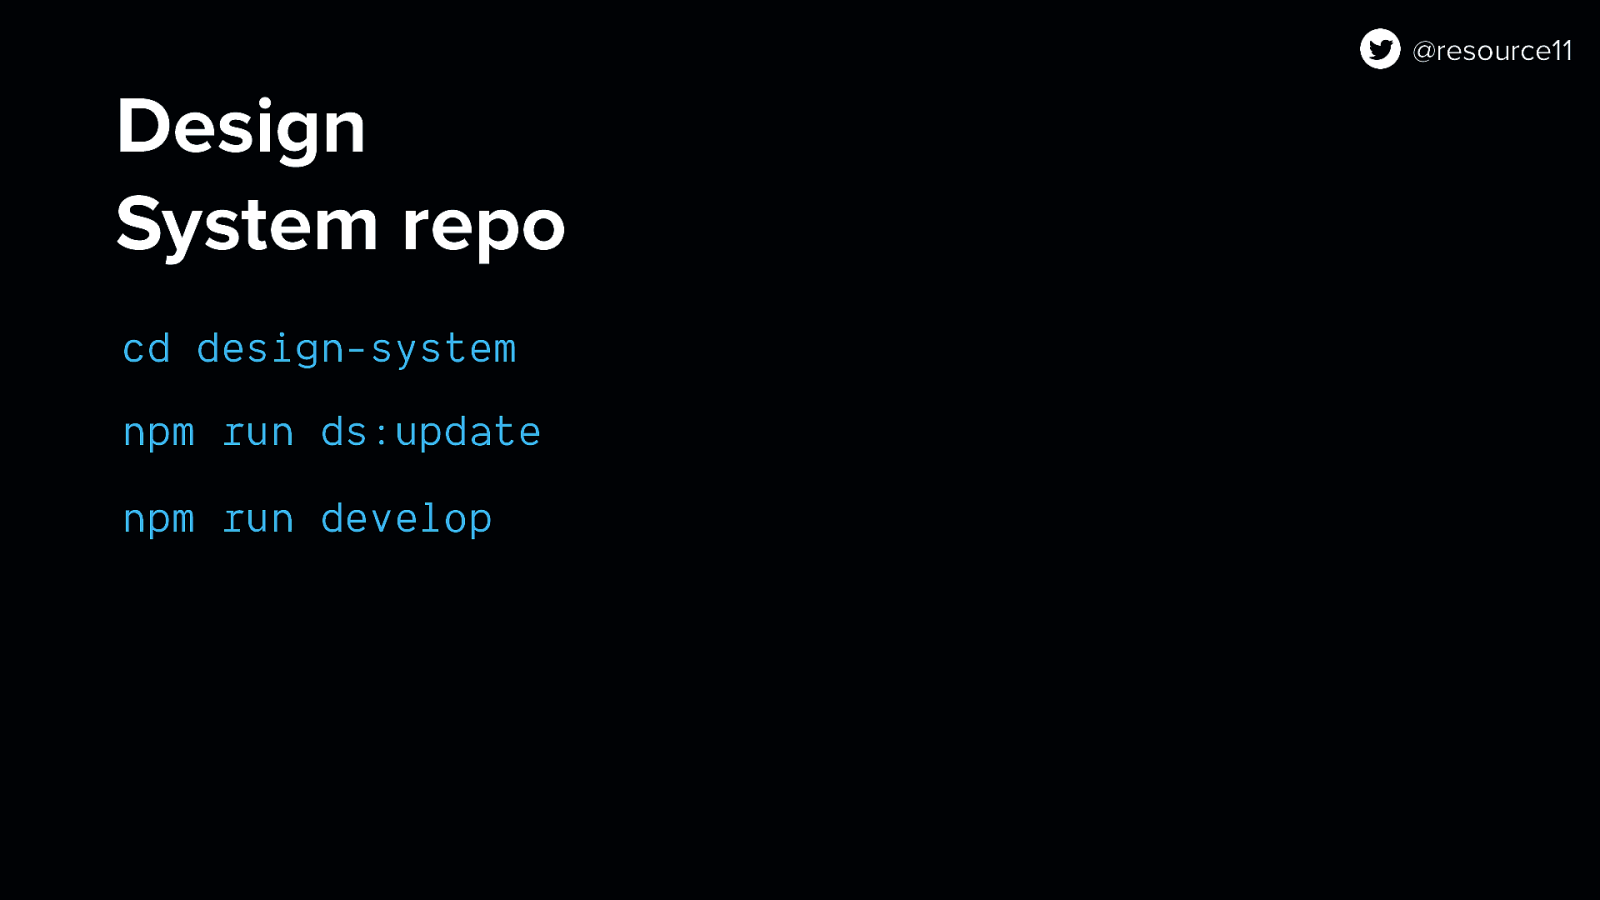
Dramatically.

The default setup for Gatsby is great, however, we’ll need to make some adjustments so Gatsby can work for our needs.

In the gatsby-config file…
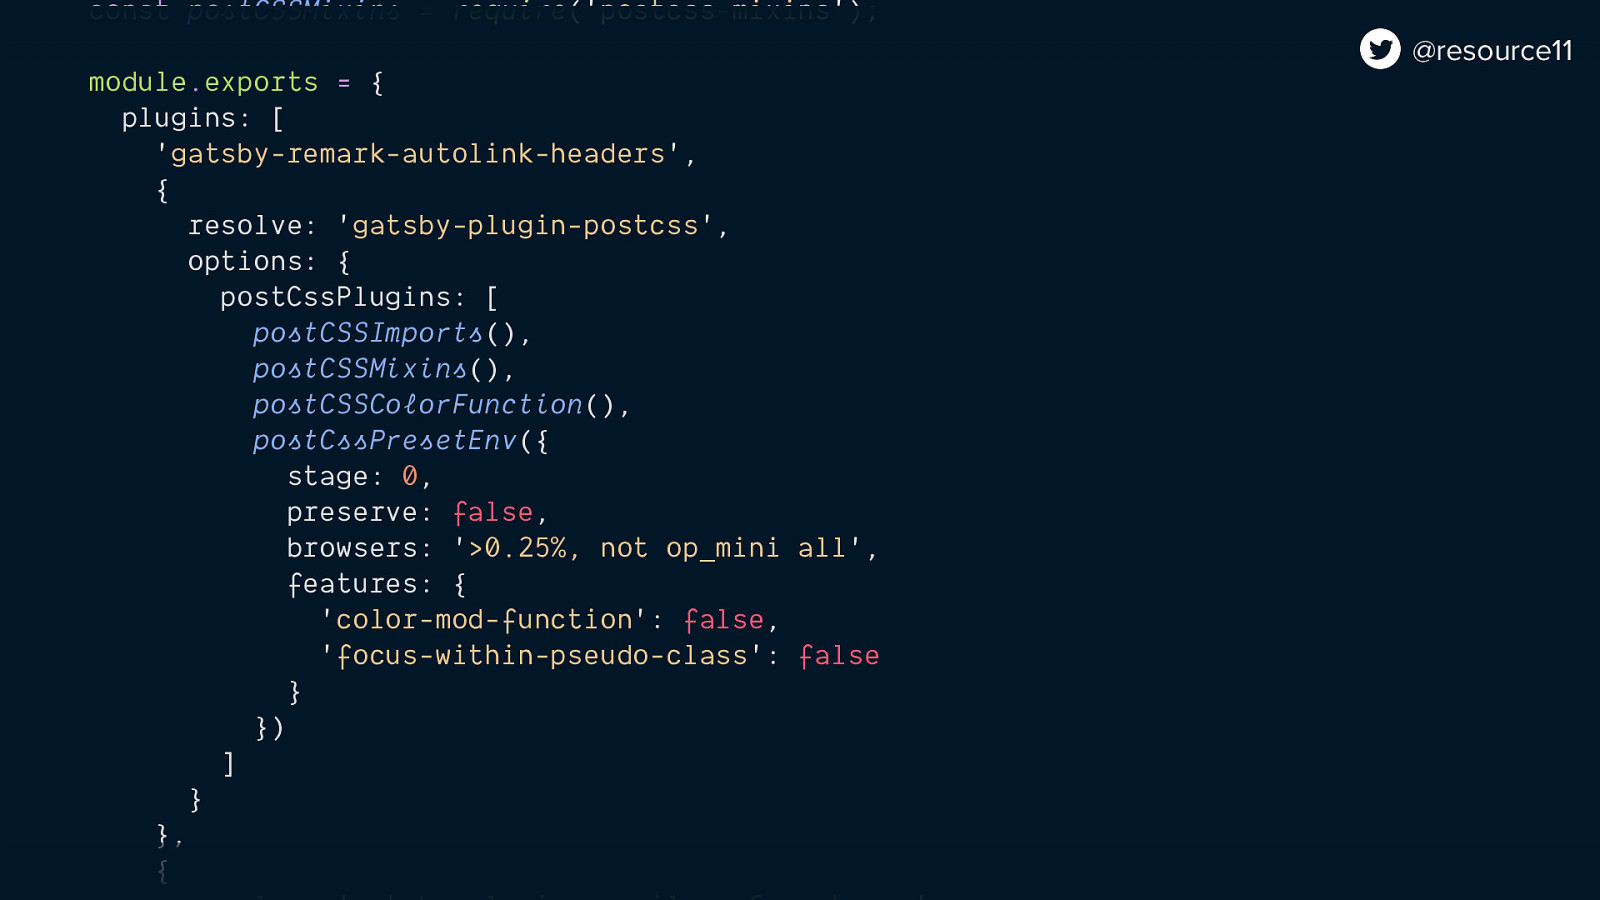
we add gatsby-plugin-postcss to support PostCSS…
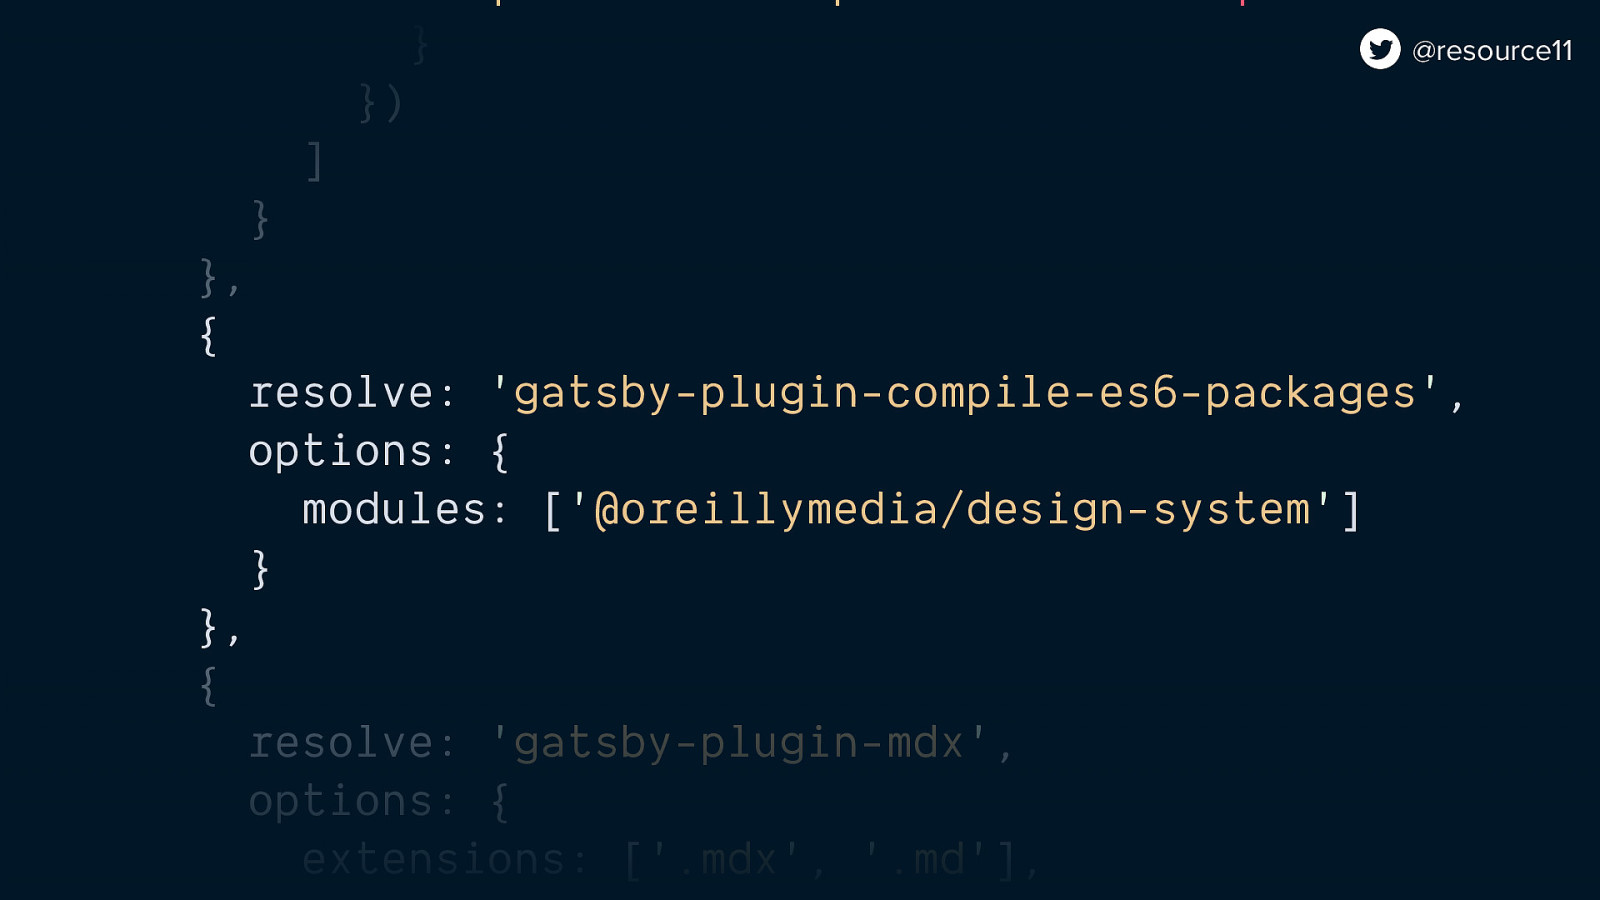
gatsby-plugin-compile-es6-packages to support our design system package…
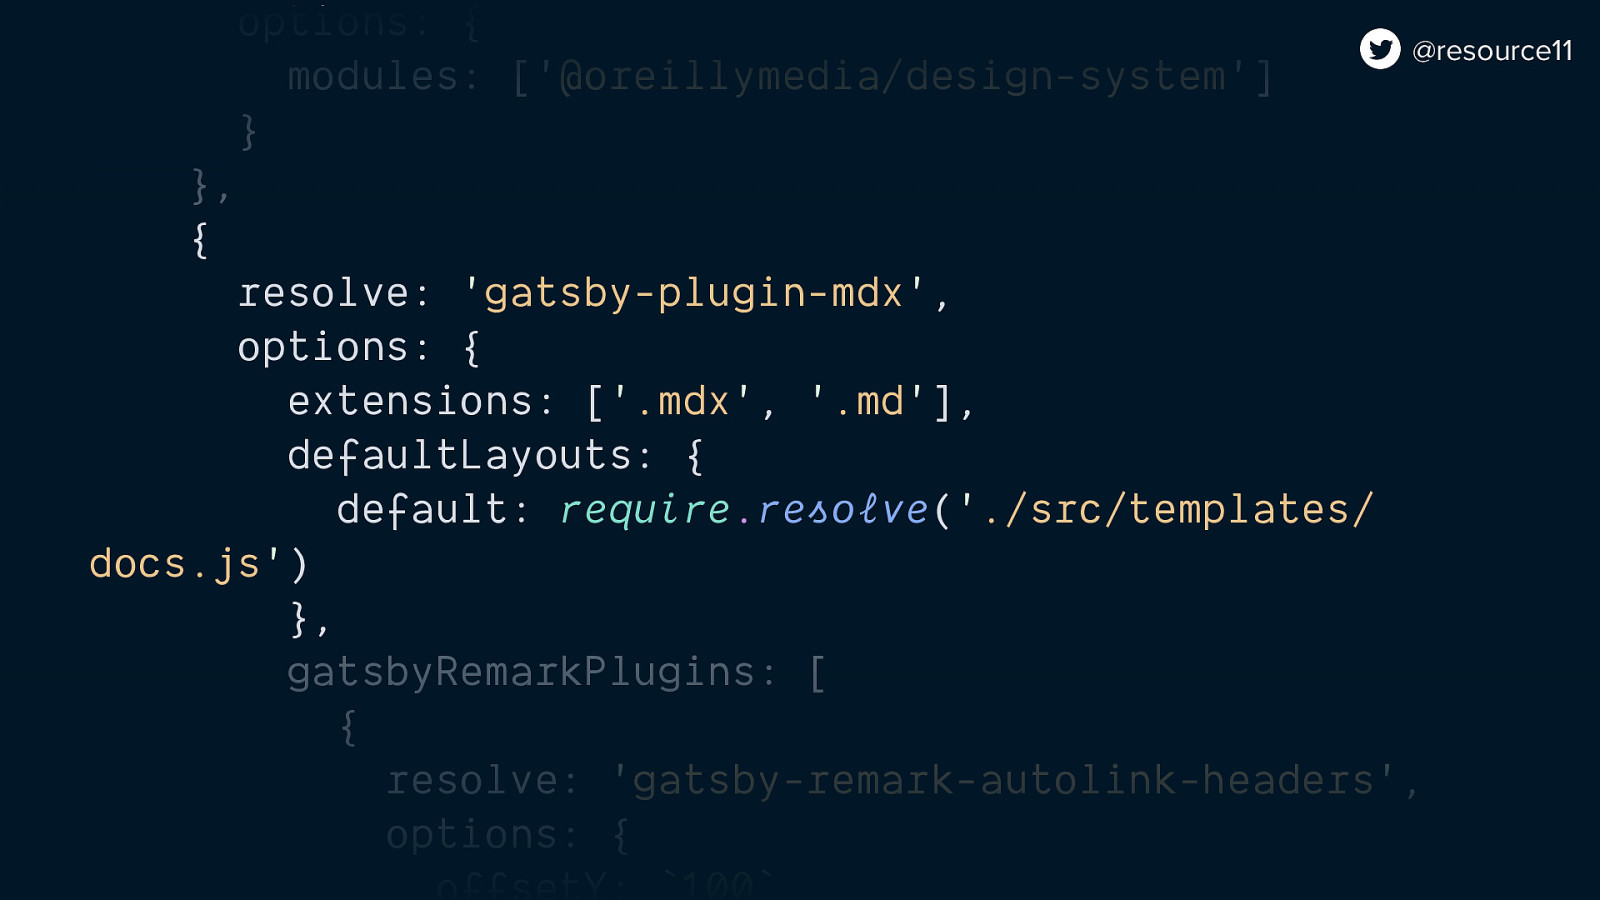
gatsby-plugin-mdx, so our site will recognize MDX files..
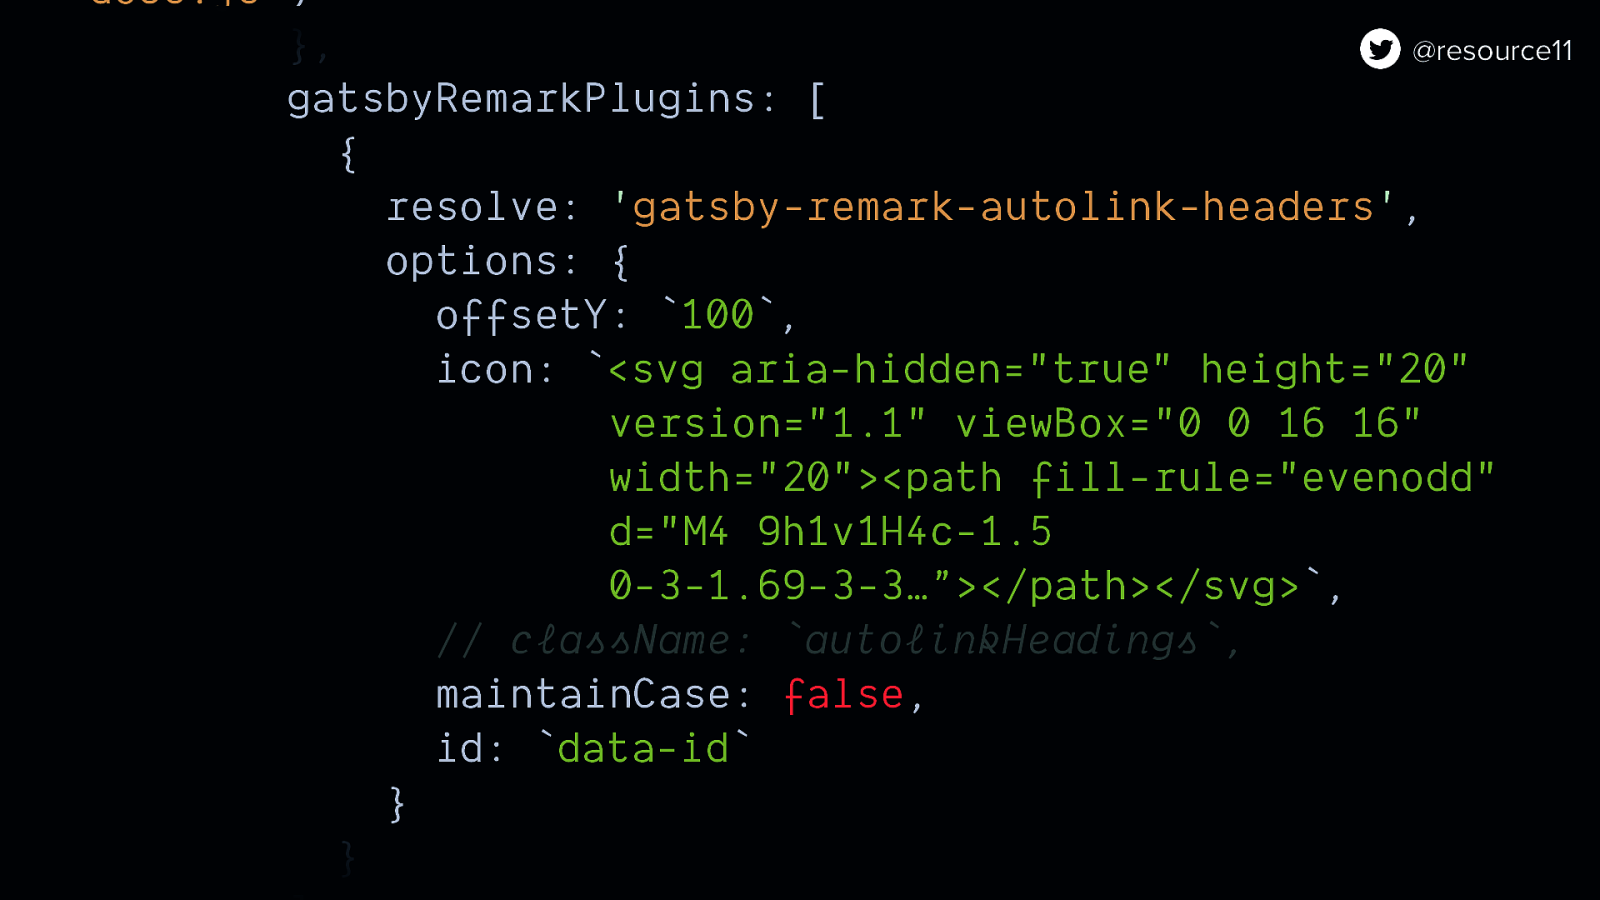
gatsby-remark-autolink-headers, to generate auto links for our headings for better screen reader and keyboard support…
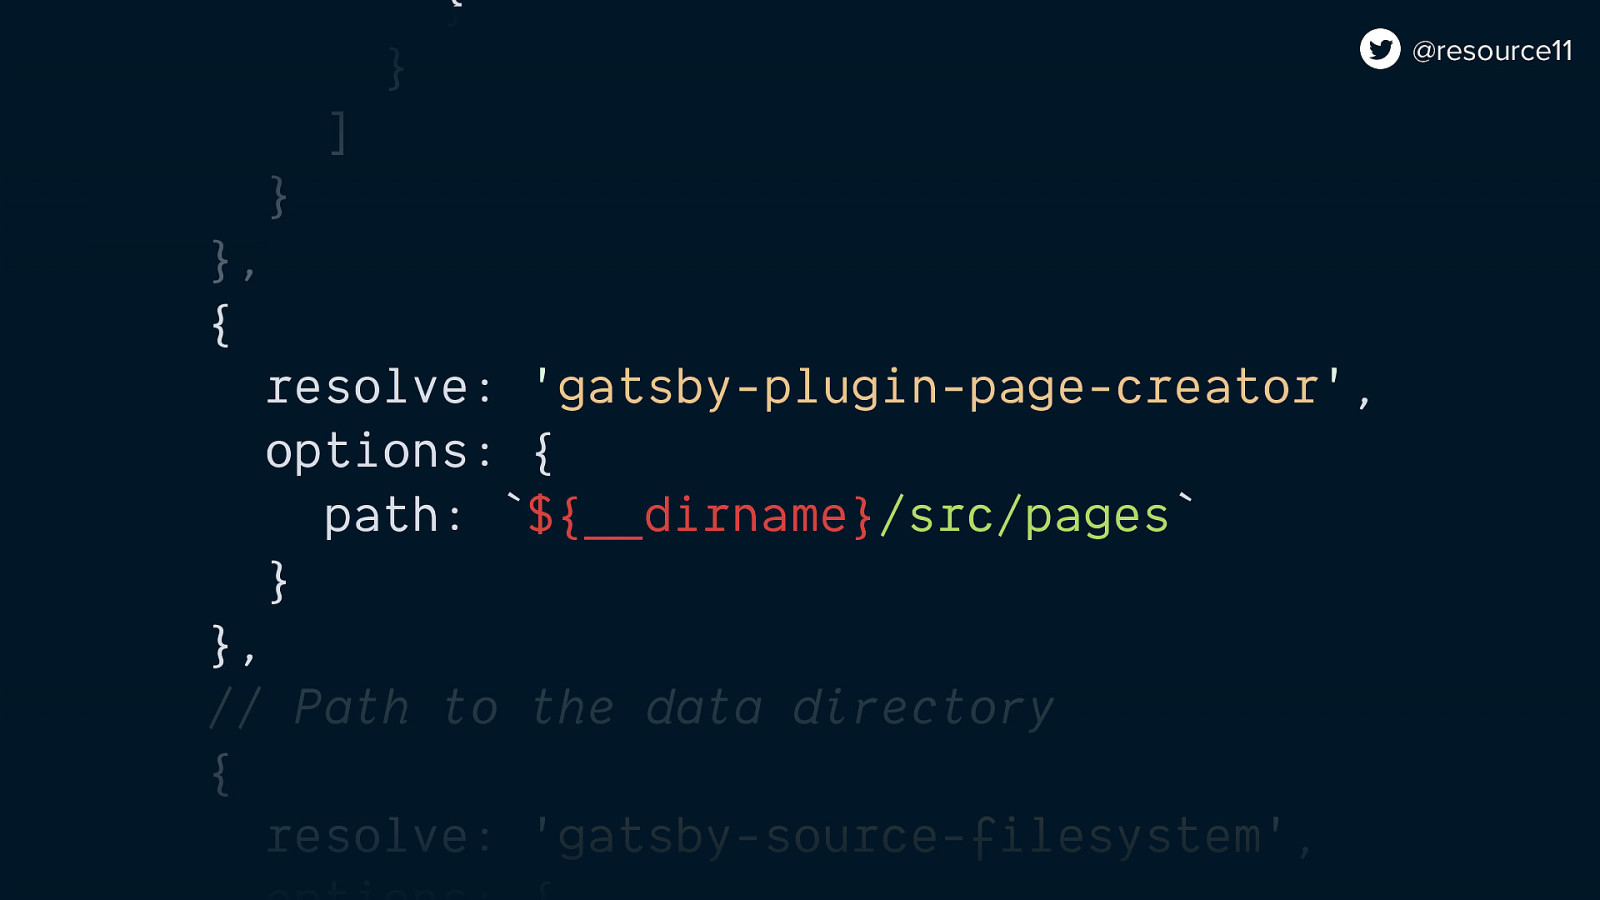
gatsby-plugin-page-creator to create pages from the src/pages folder…
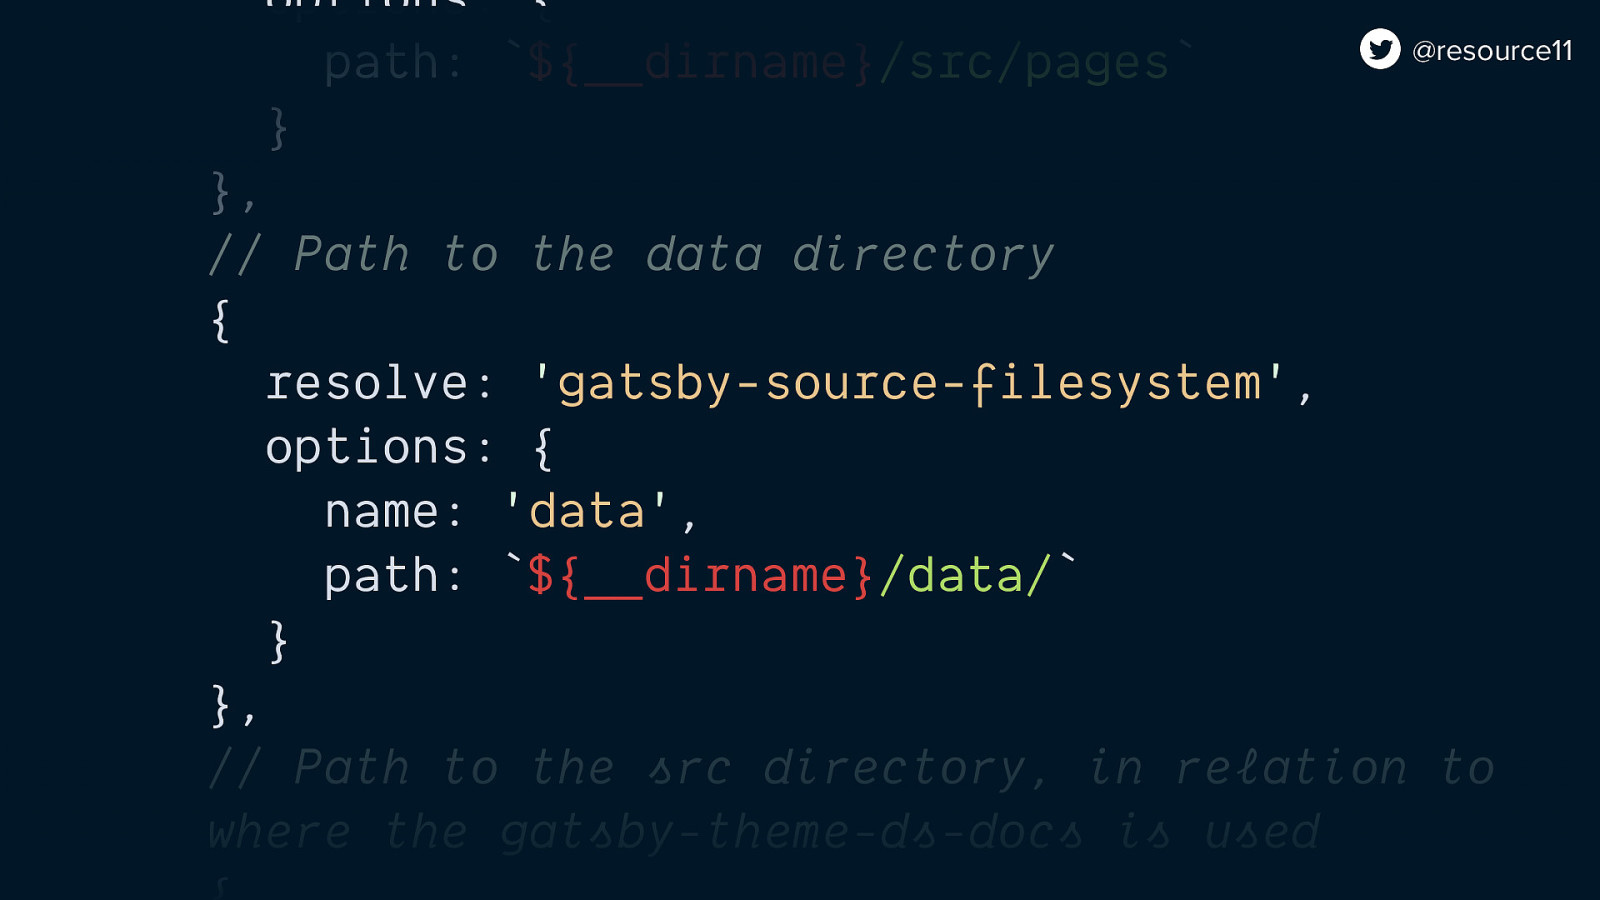
And gatsby-plugin-filesystem so we can pull in our data file, and…
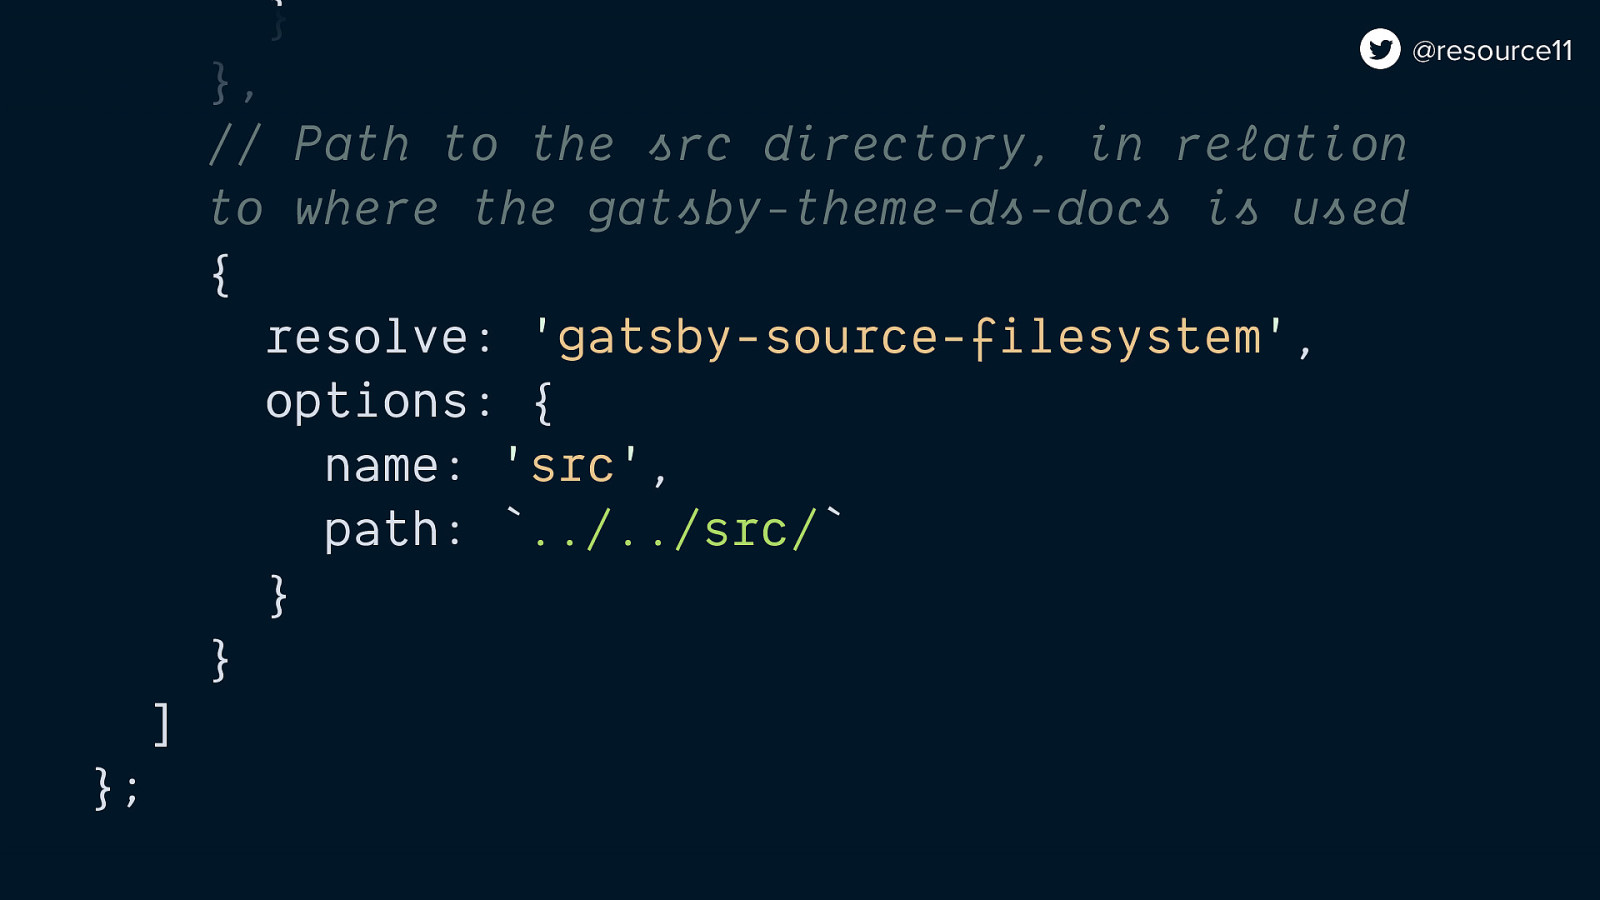
…point Gatsby to the folder where all our component MDX files live.

In the gatsby-node file…
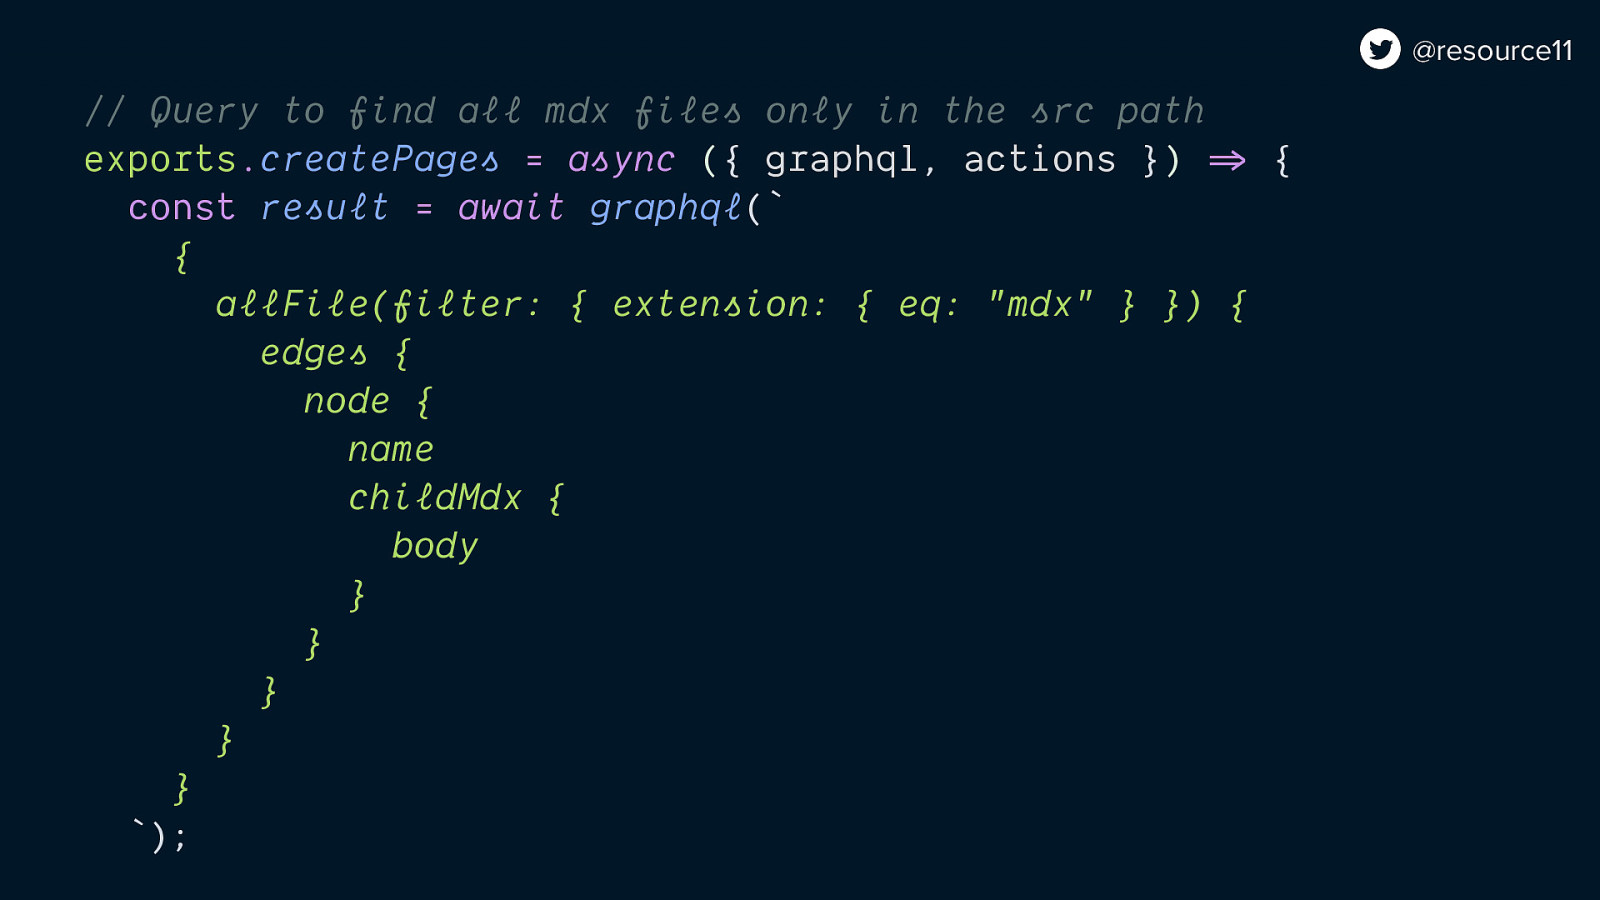
we add a GraphQL query to find the component MDX content
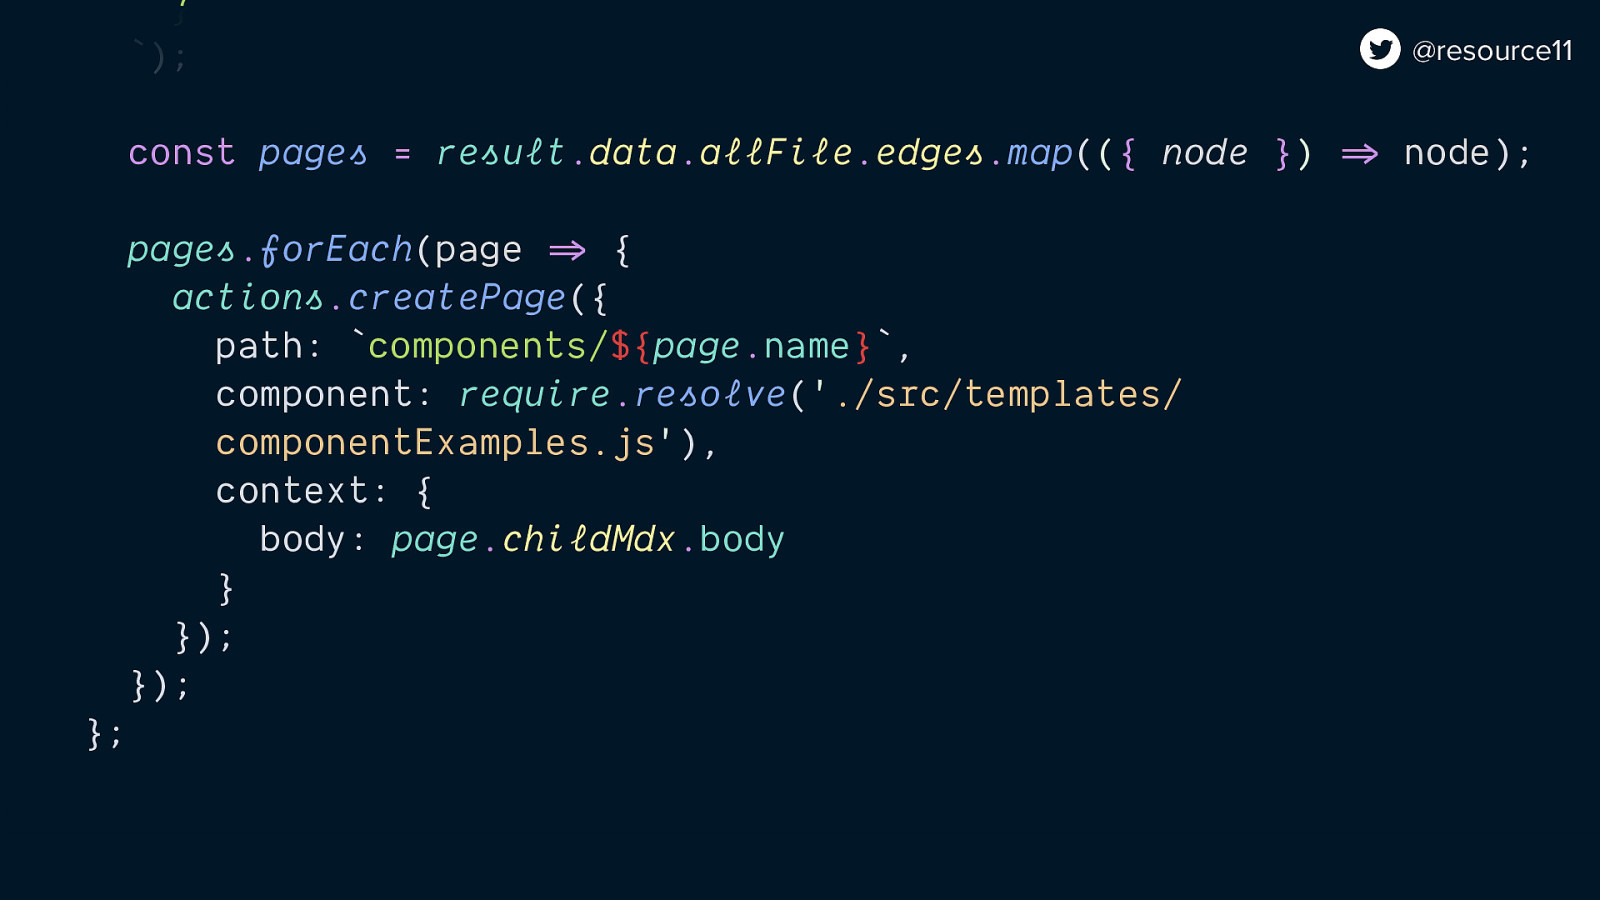
And a createPage action to generate routes and pages for the component docs.

…into the gatsby-browser file, since this file is used to make changes at the site-wide level.
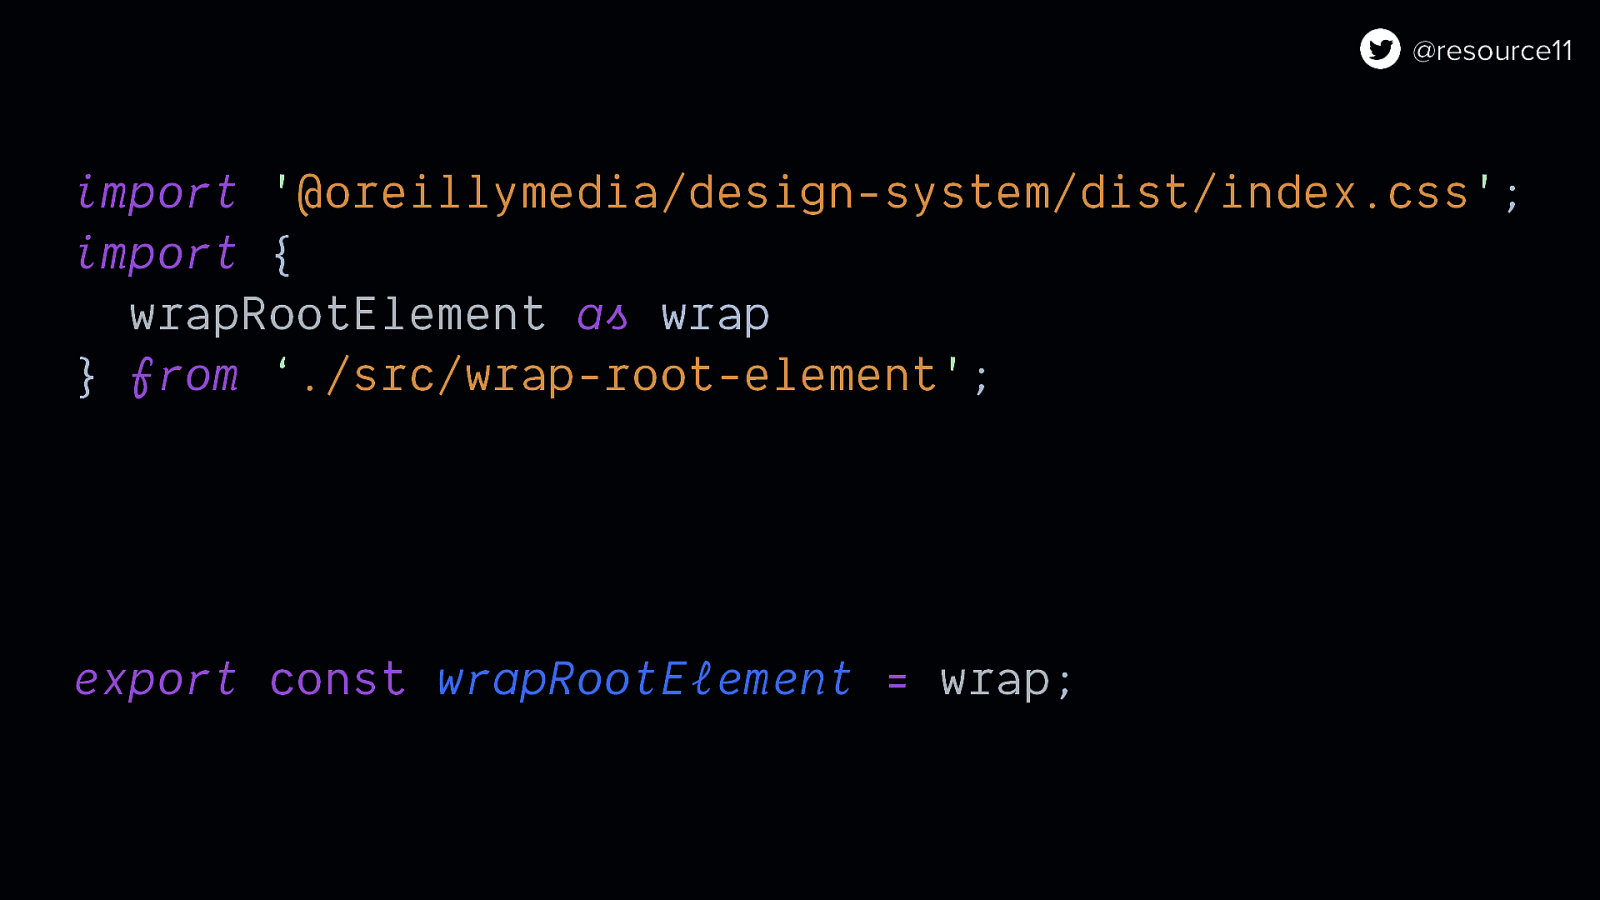
We add things we want to apply throughout the site, like our global CSS styles and the wrap-root-element component.

This wrap-root-element component will act as a wrapper around our site’s root element…
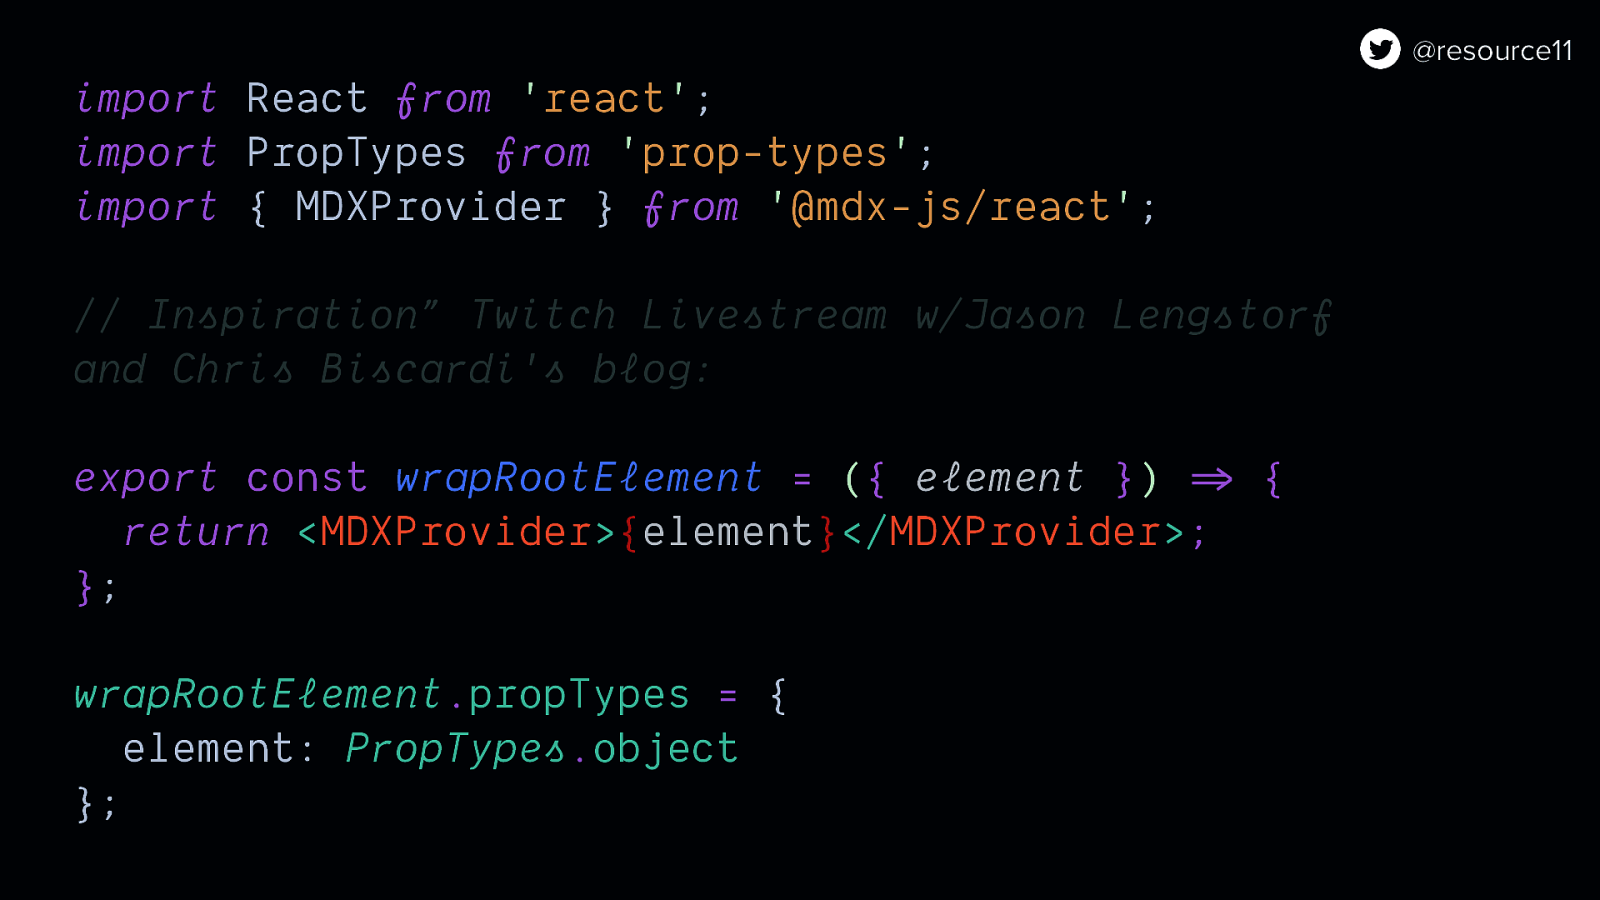
…And imports MDXProvider. This, way the entire site will recognize MDX content.

We have to do one extra thing for our component docs page template, though.
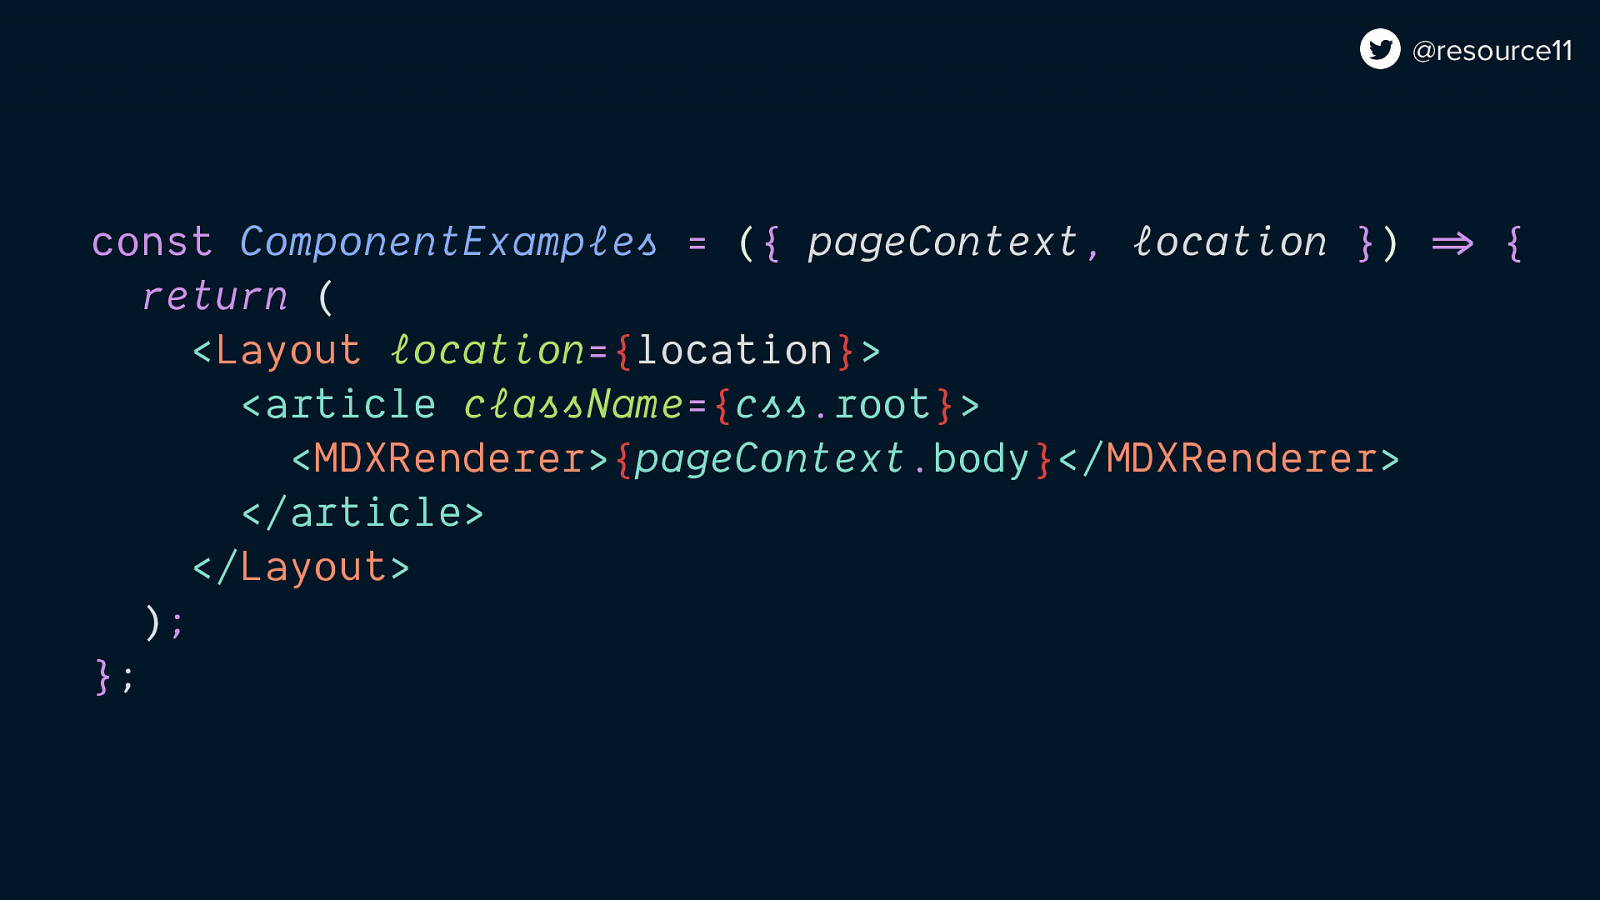
Since our component MDX files are located outside of the src/pages folder, MDXRenderer needs to wrap the contents of our component page template.
Otherwise, our MDXs file would render…
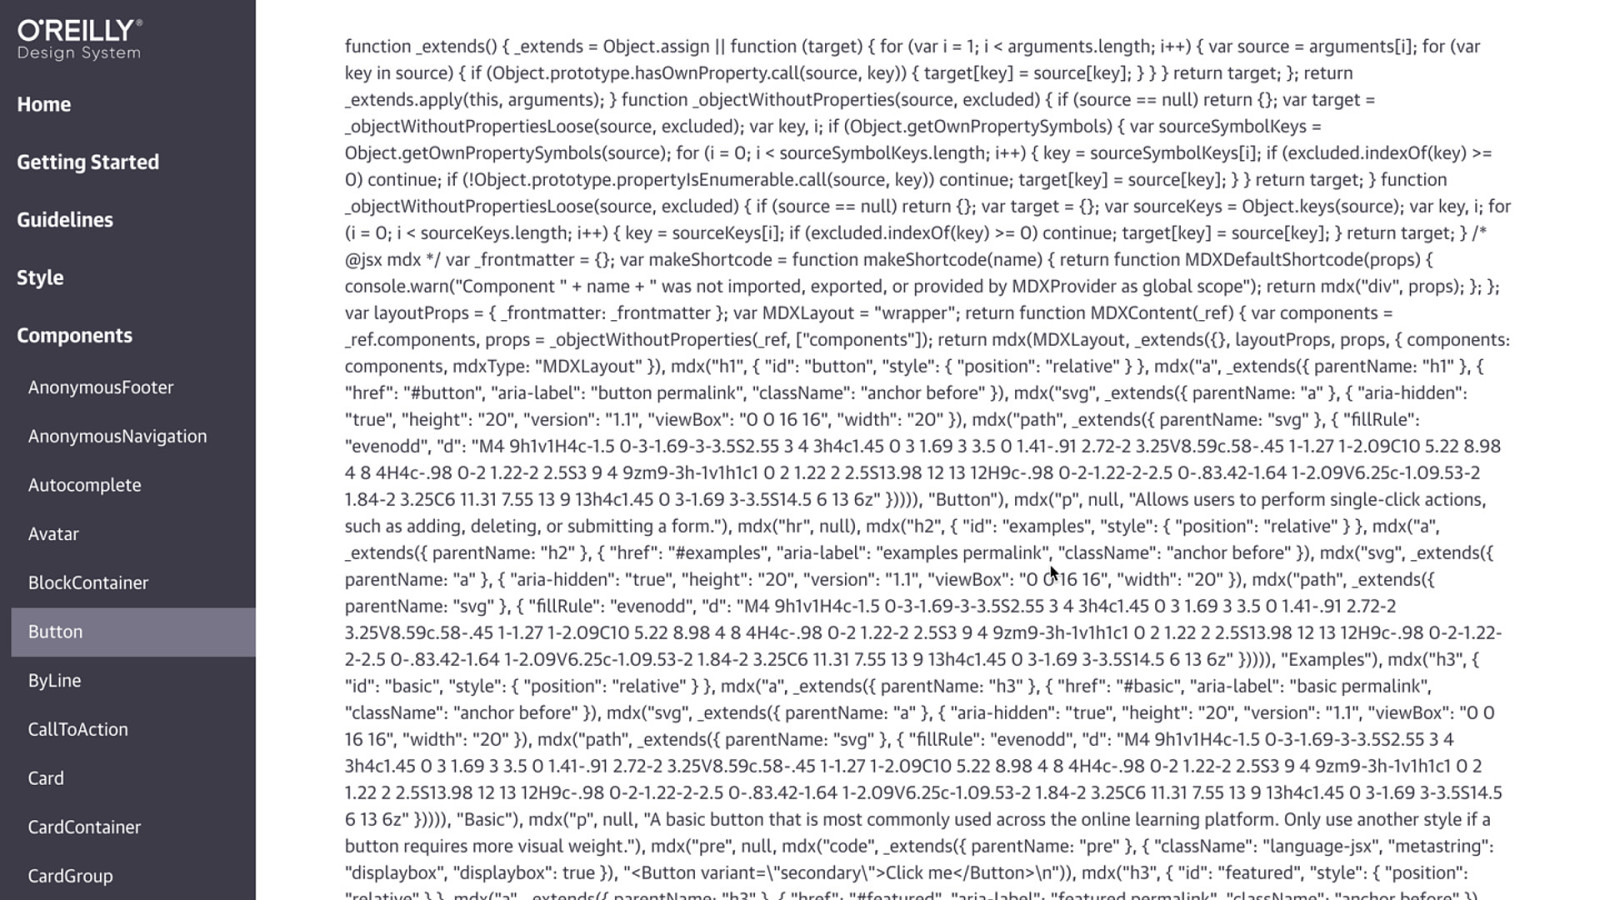
…like this in the browser…
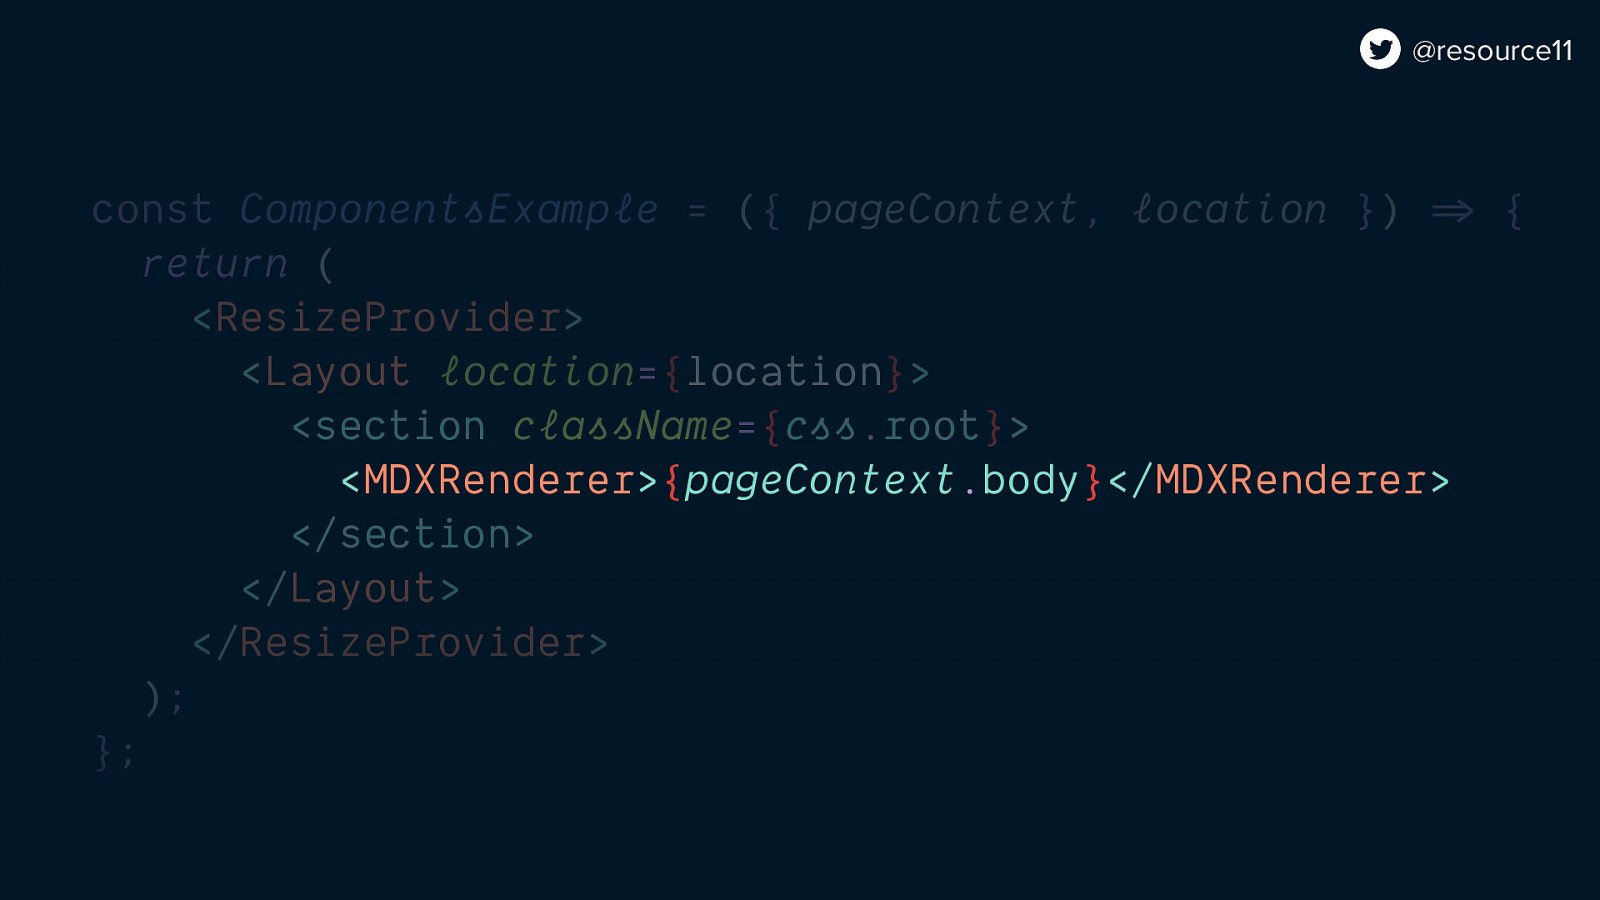
…Now that our template uses MDXRenderer, our component MDX pages…
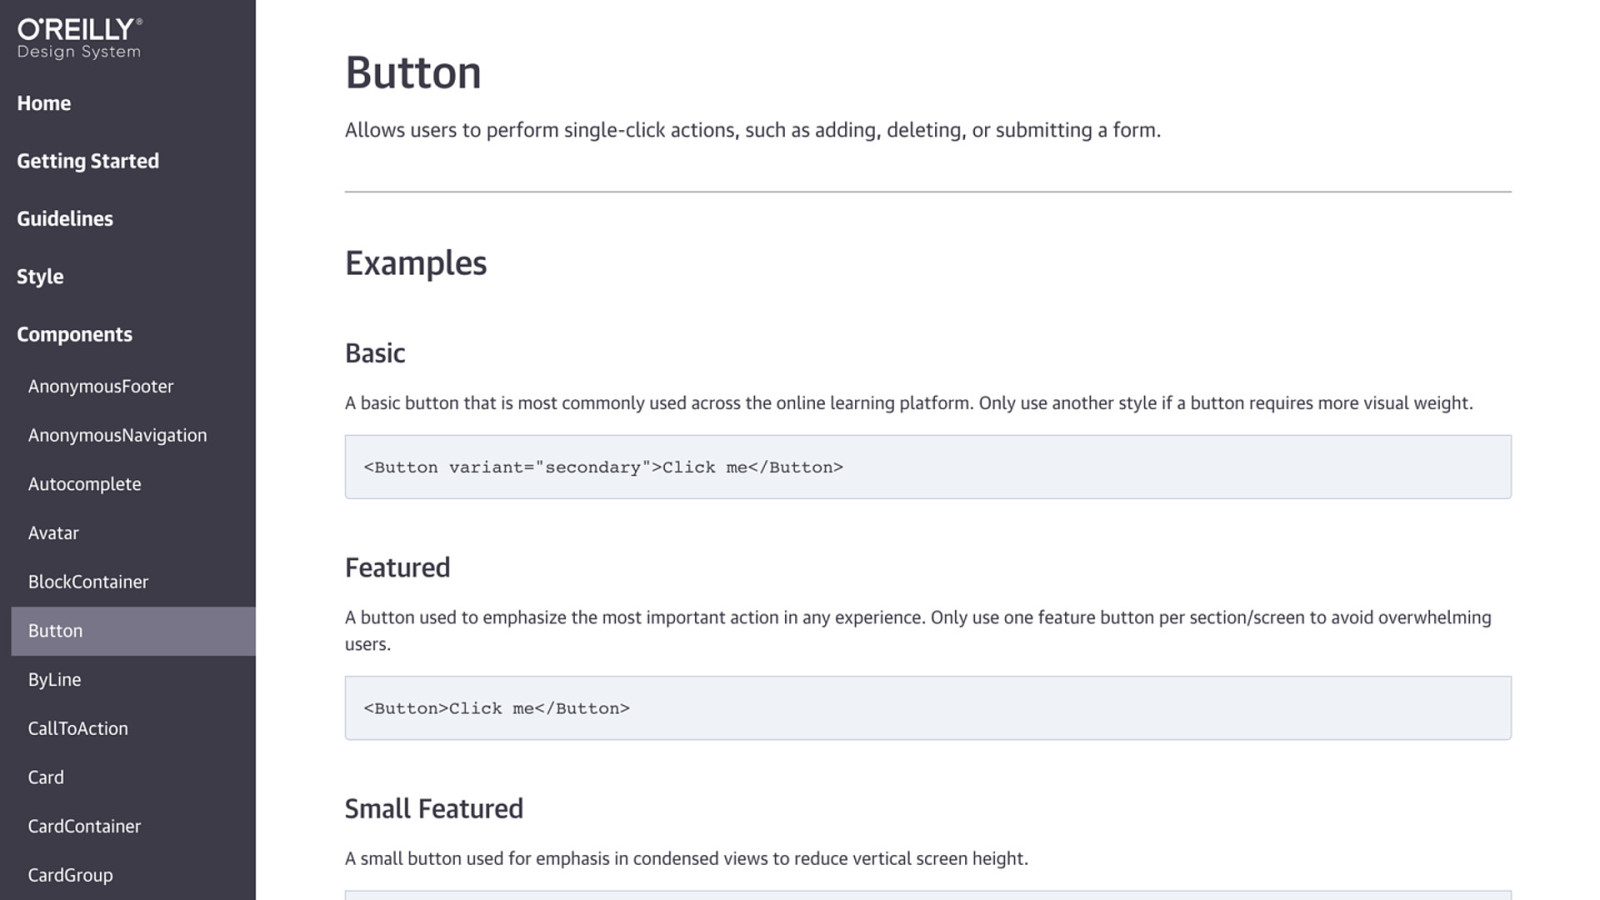
…will render as we want in the browser.
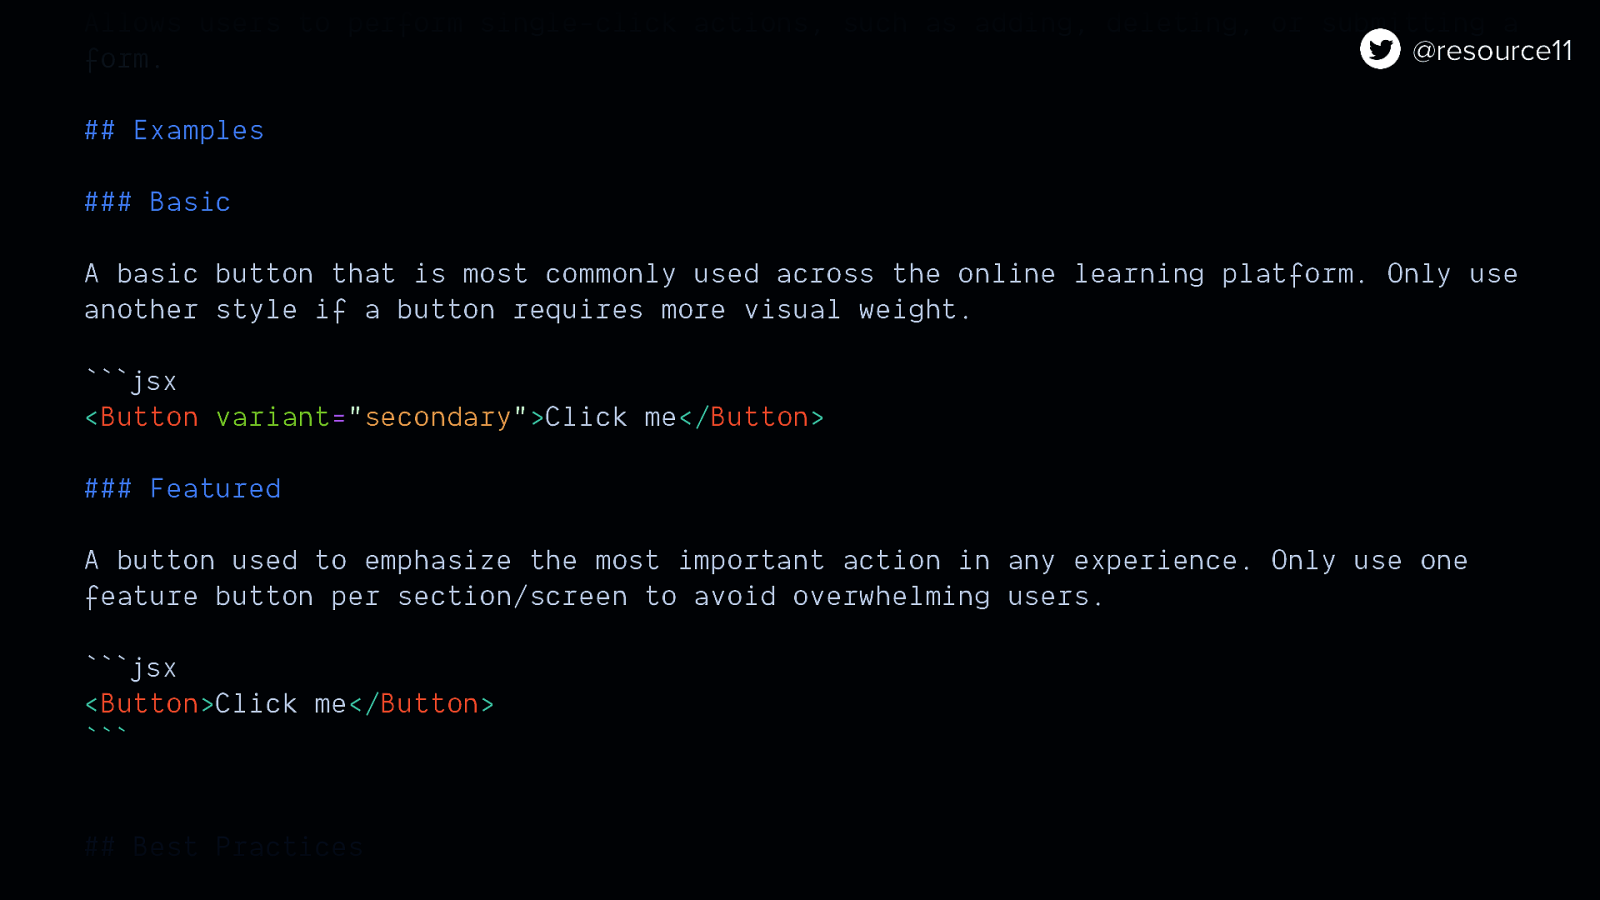
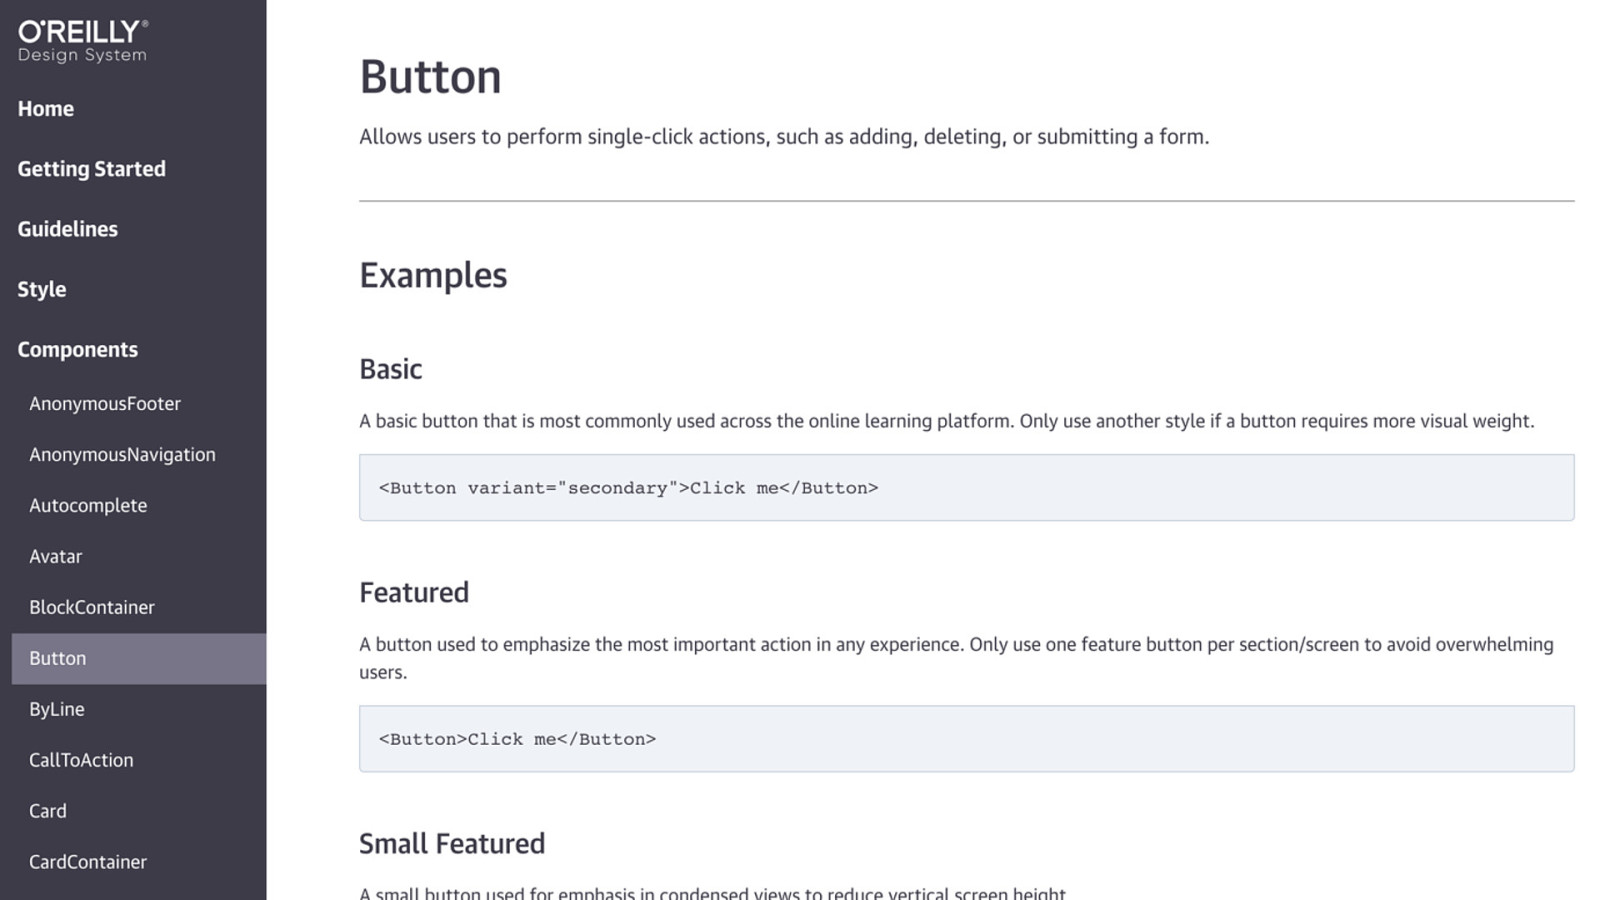
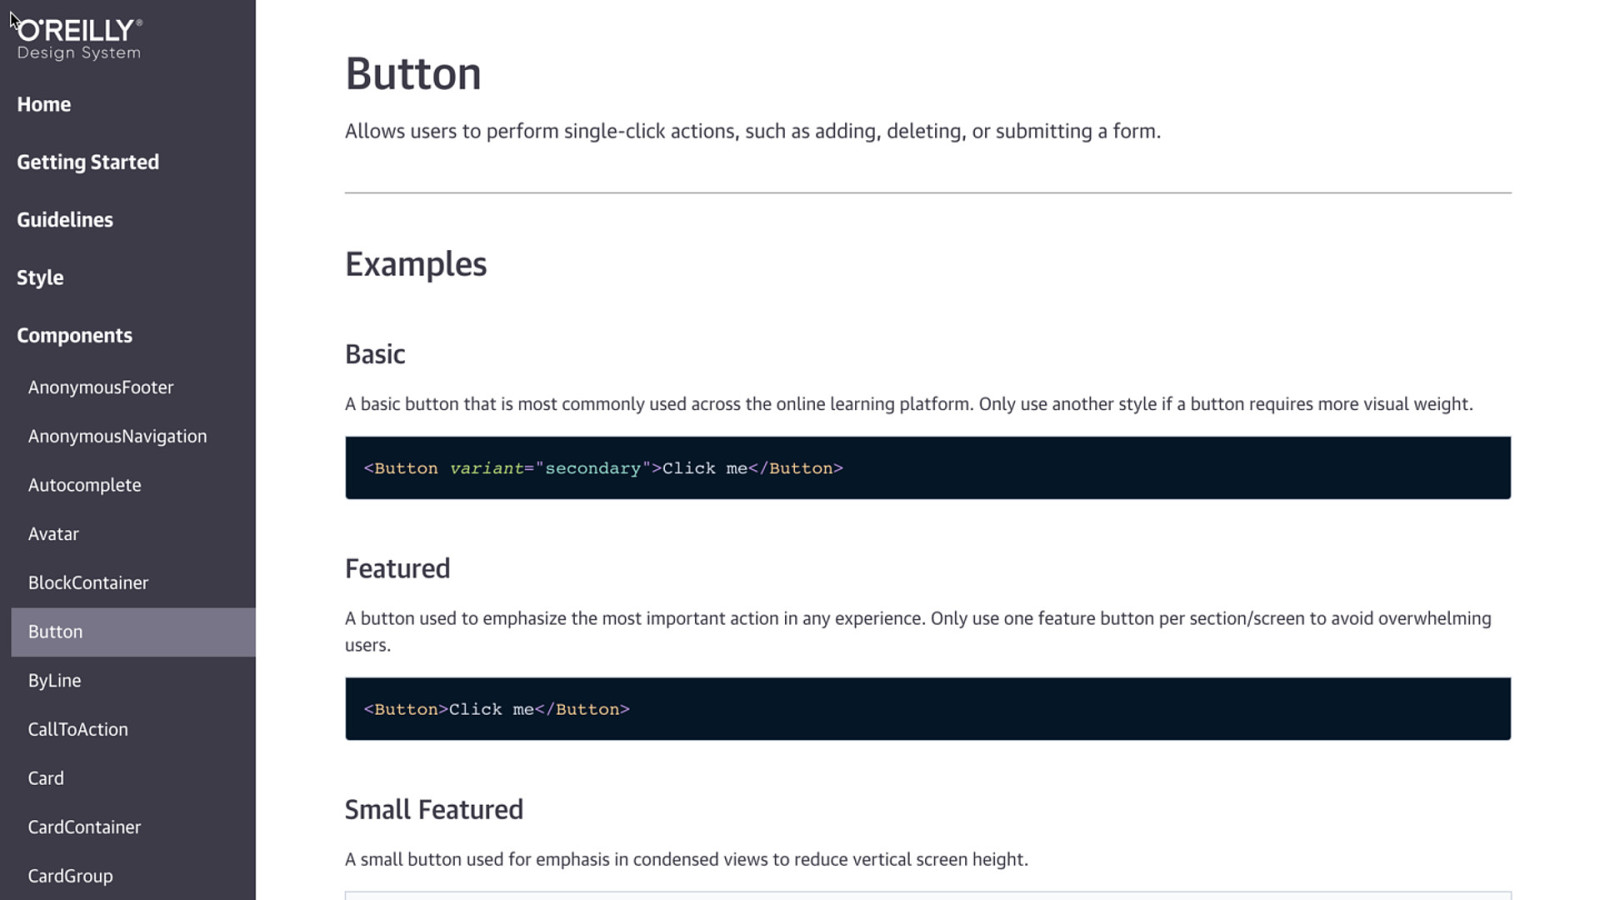
Now you can pop in React components next to your code blocks
And they will render, no problem.
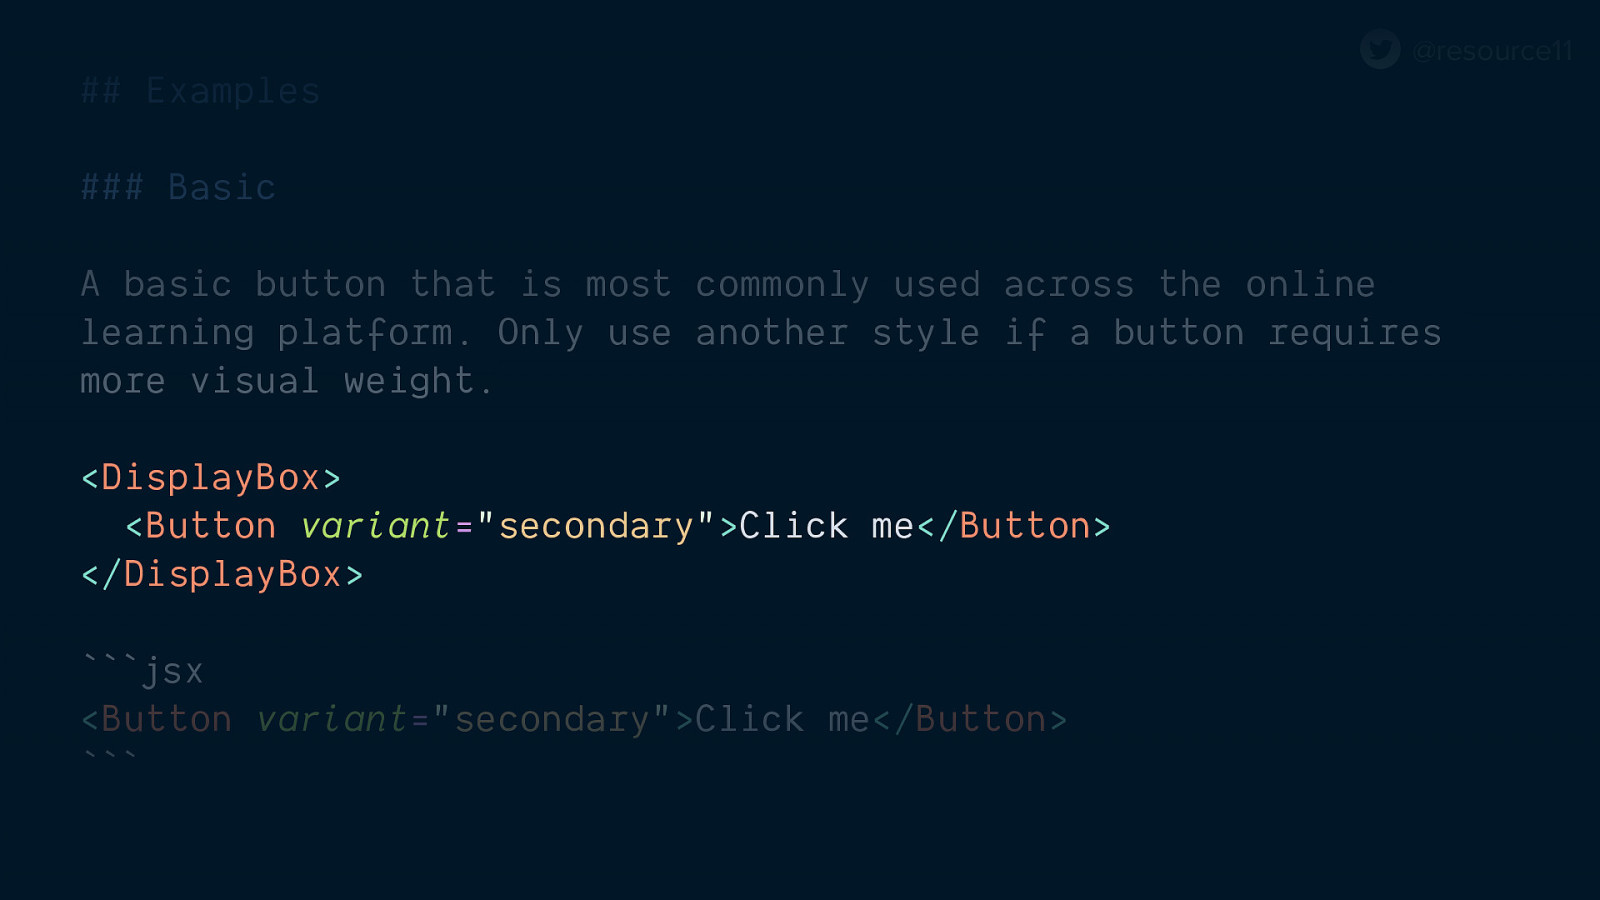
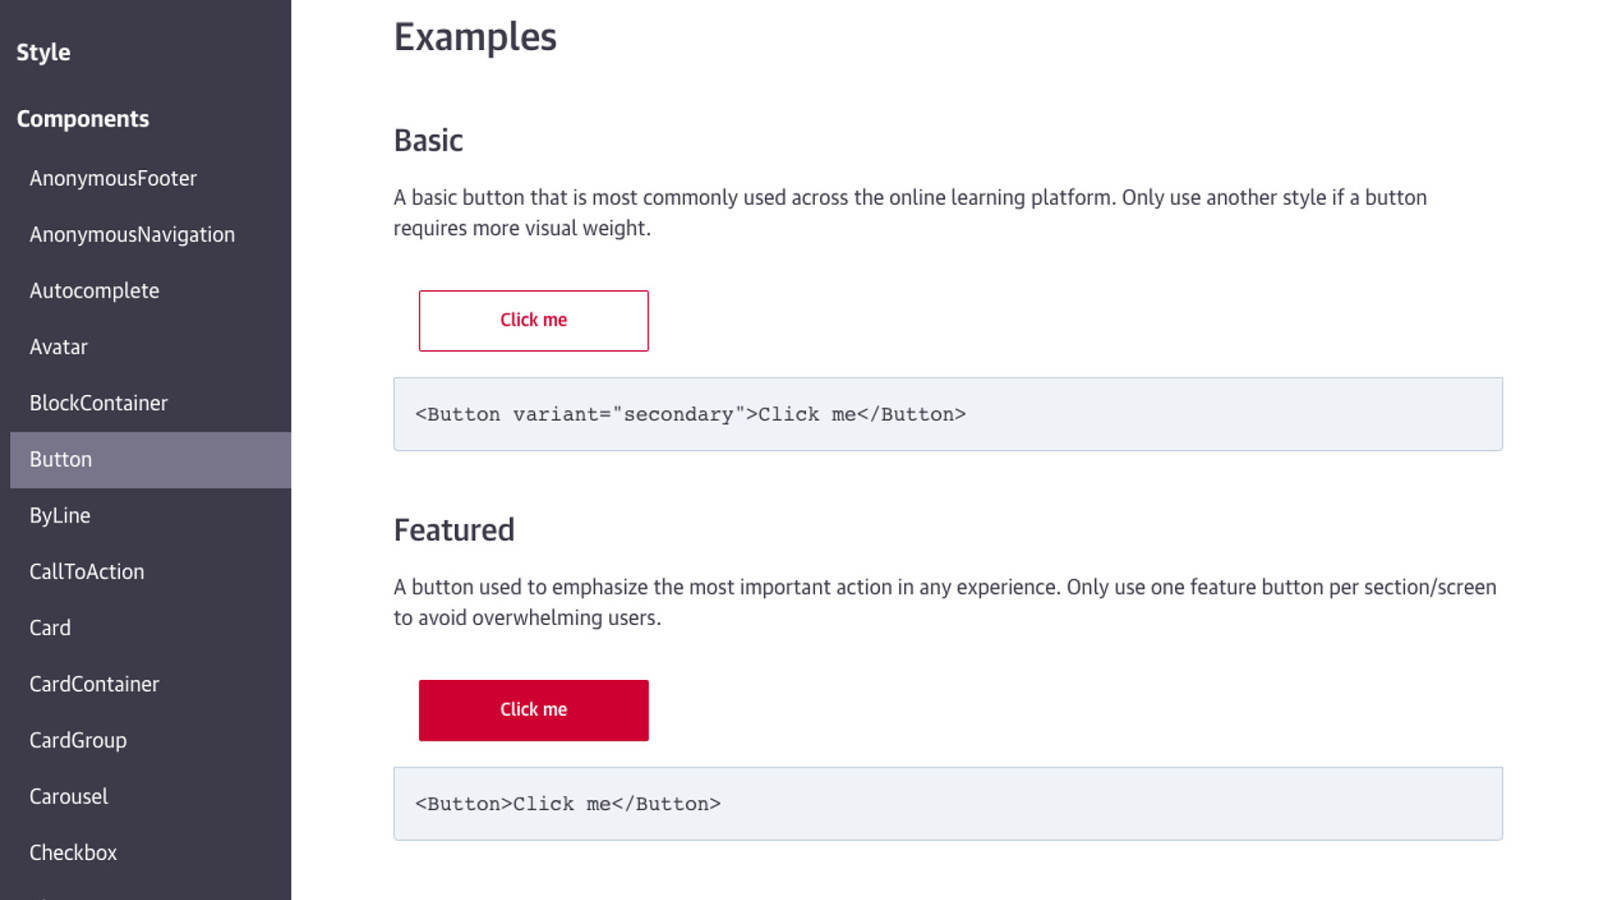
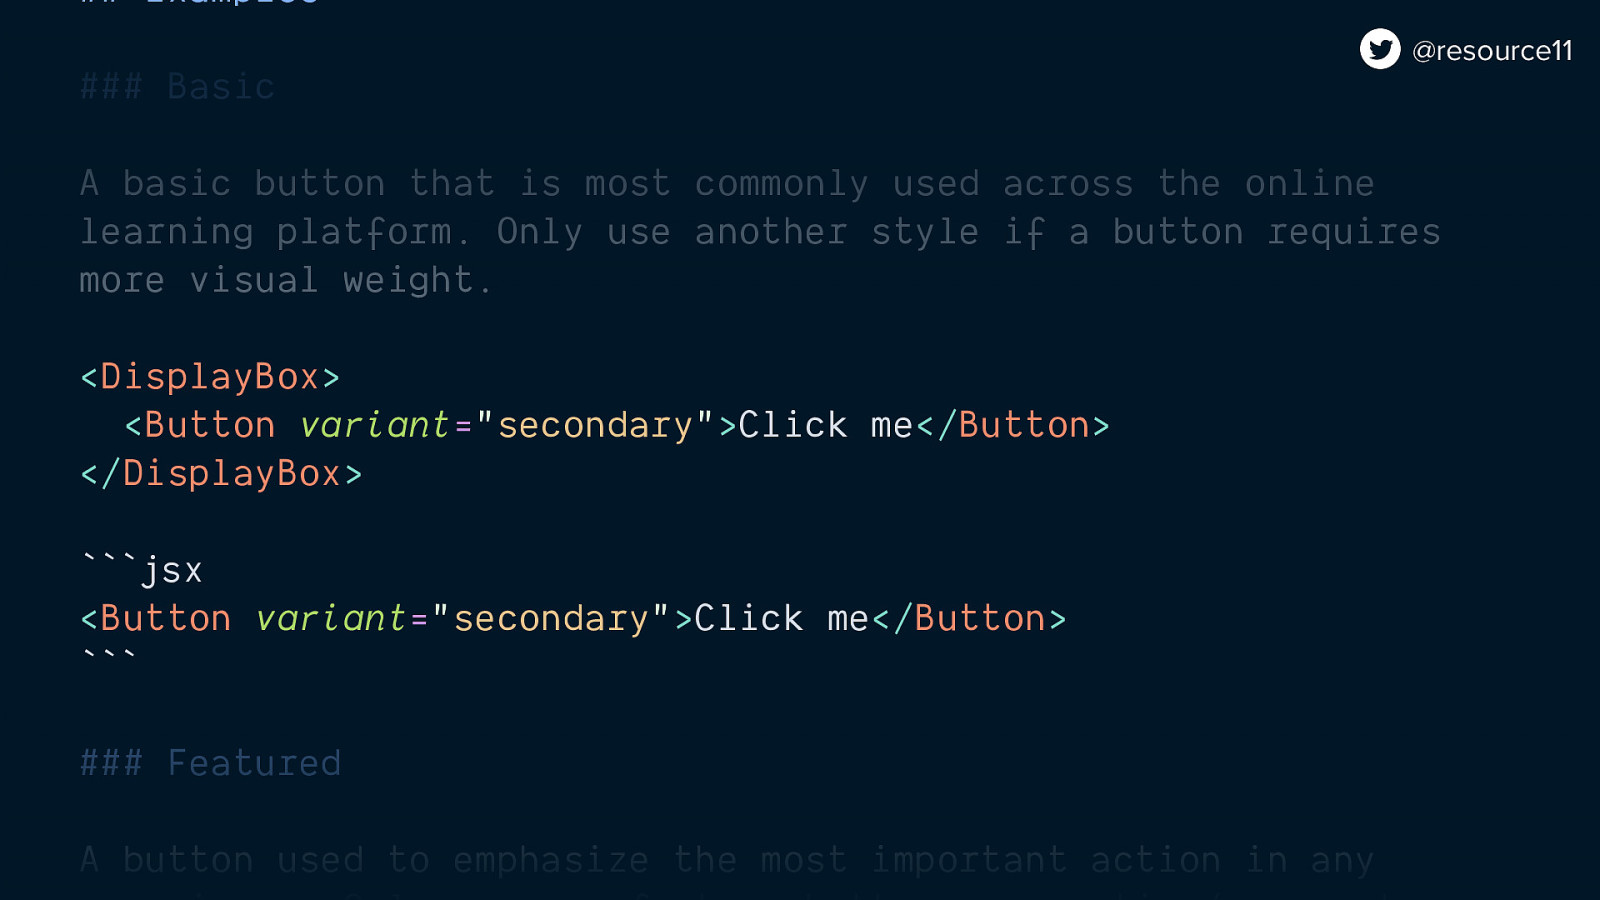
You can even wrap your Button component with a DisplayBox component

And add a more cohesive look to your component/code block pairing

If we want to add a props table to show which props can be uses with the component…
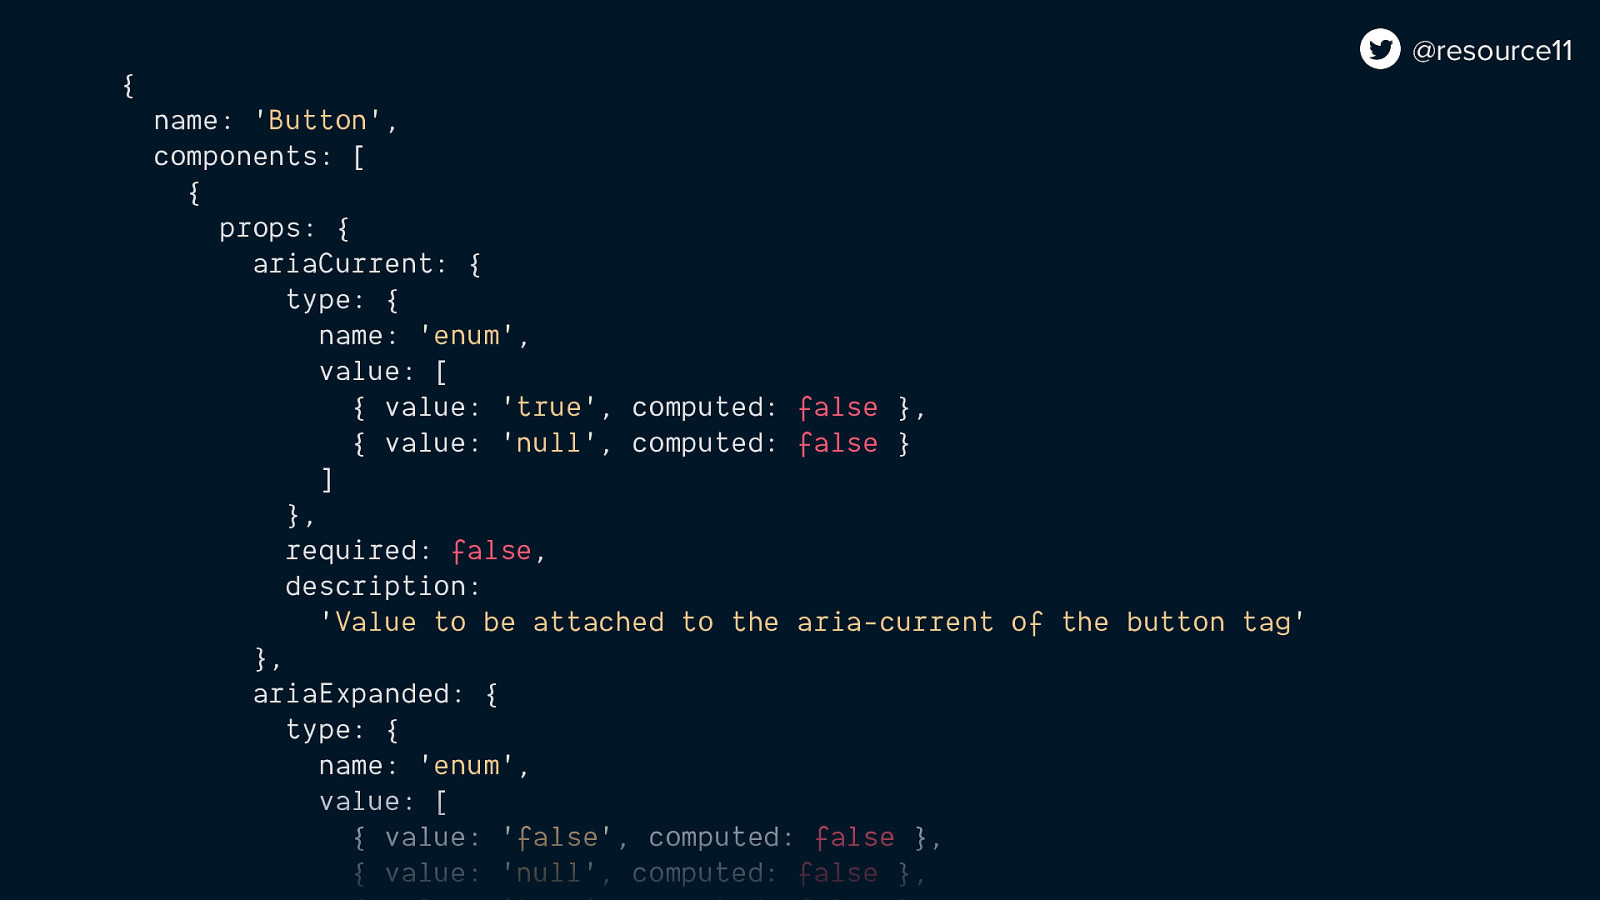
We can create a component that pulls in data, into a table component. Pass in the component to render…
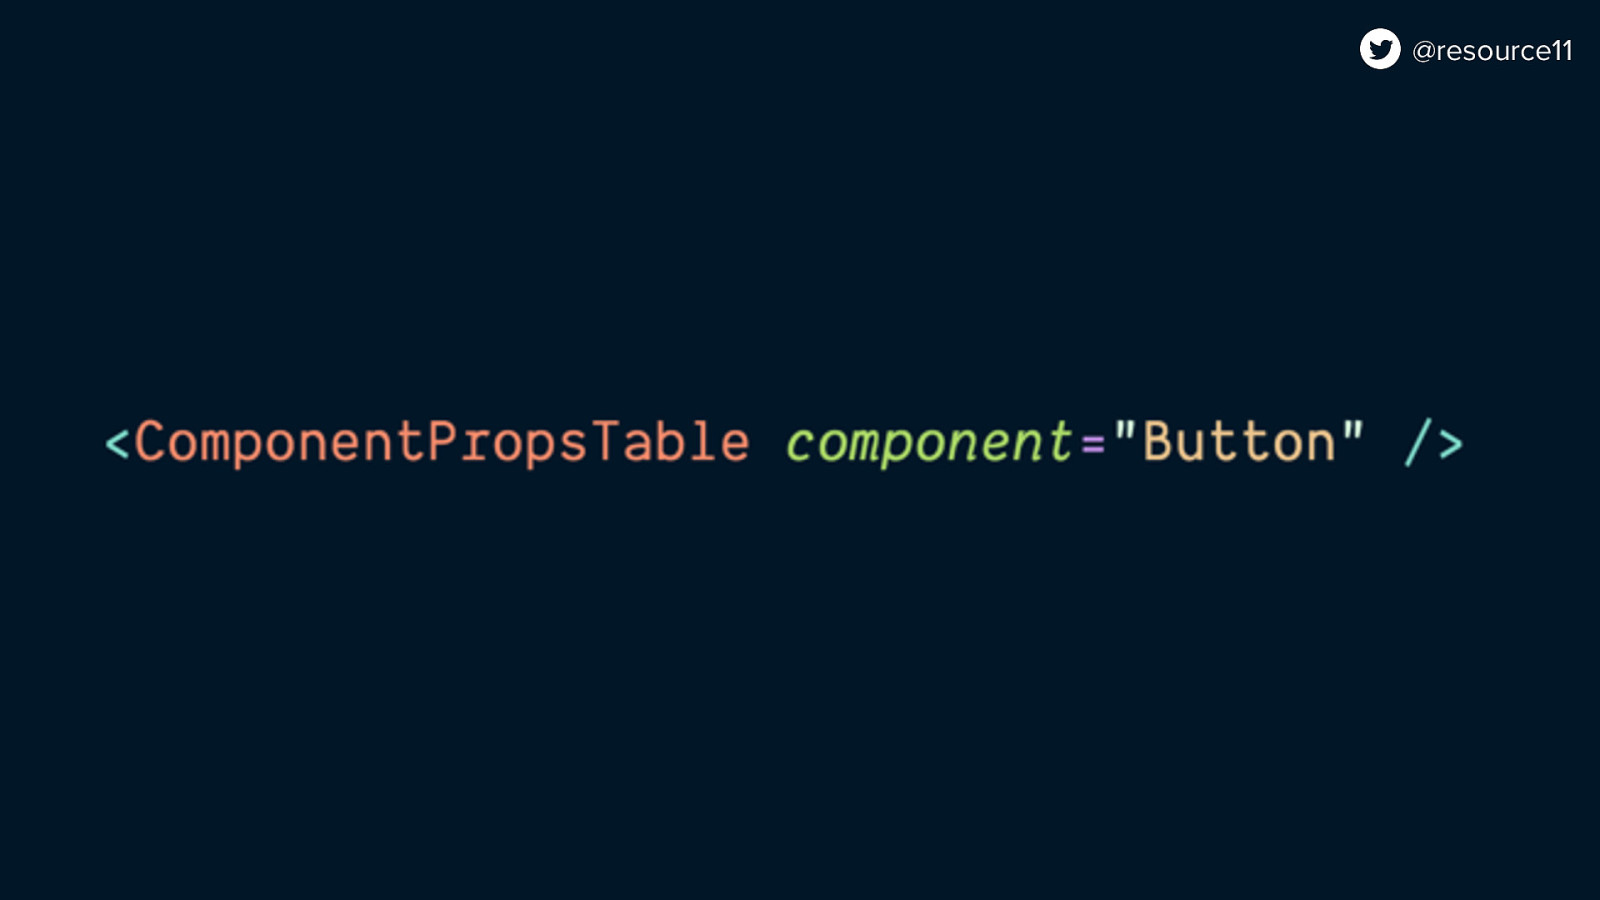
Pop that component into your docs MDX, pass in the name of the component to render…
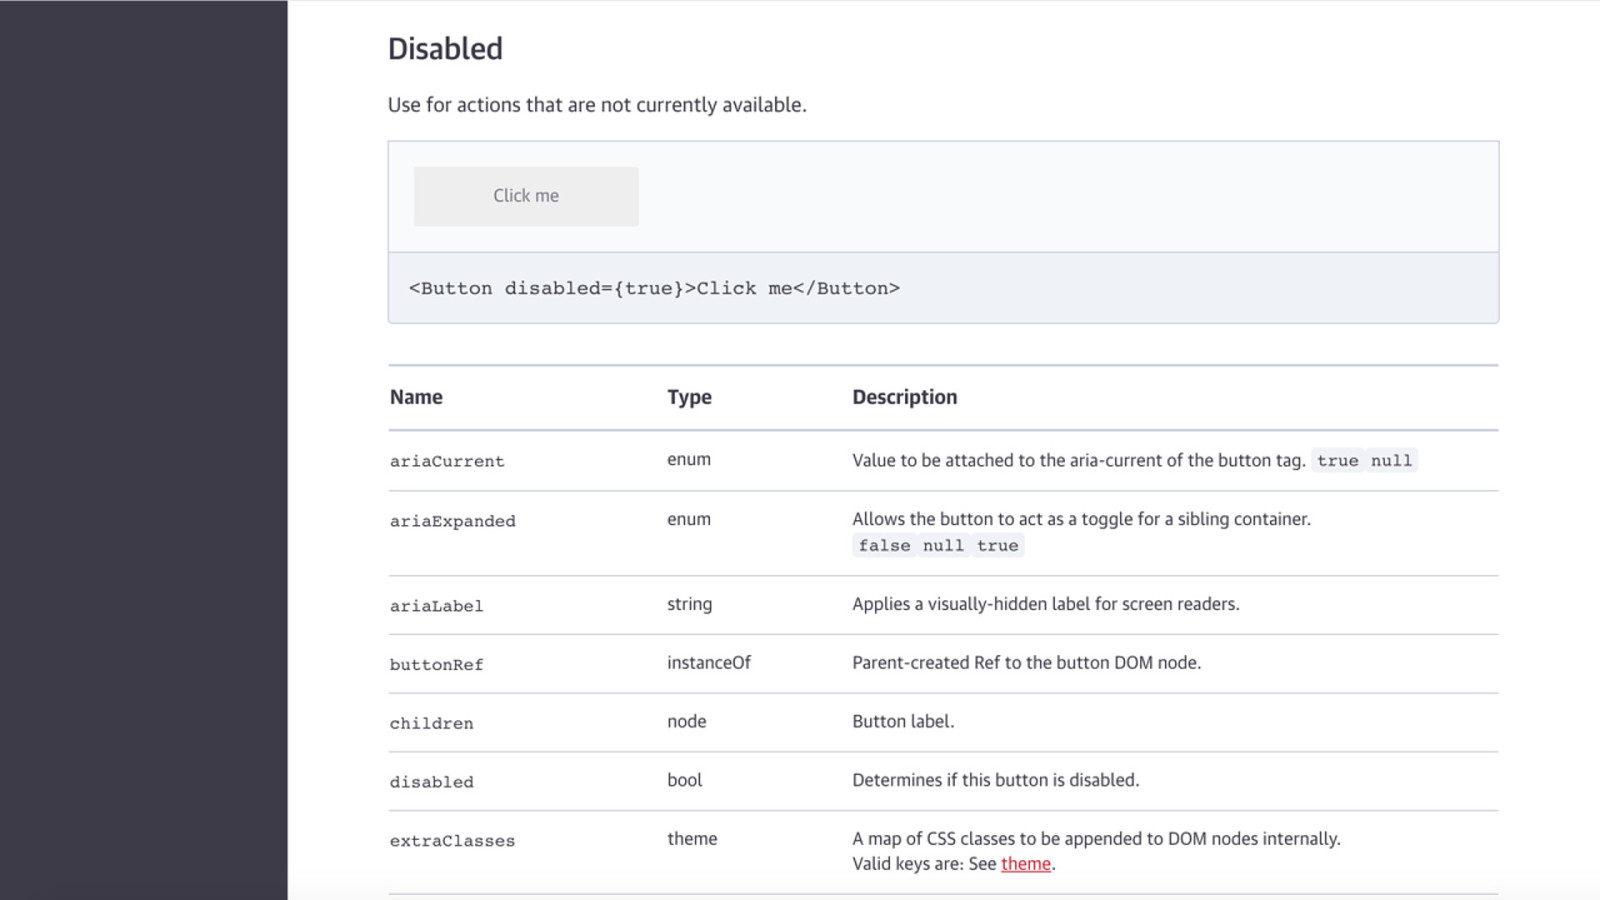
And your docs will show a props table.
For those component Dos and Don’ts
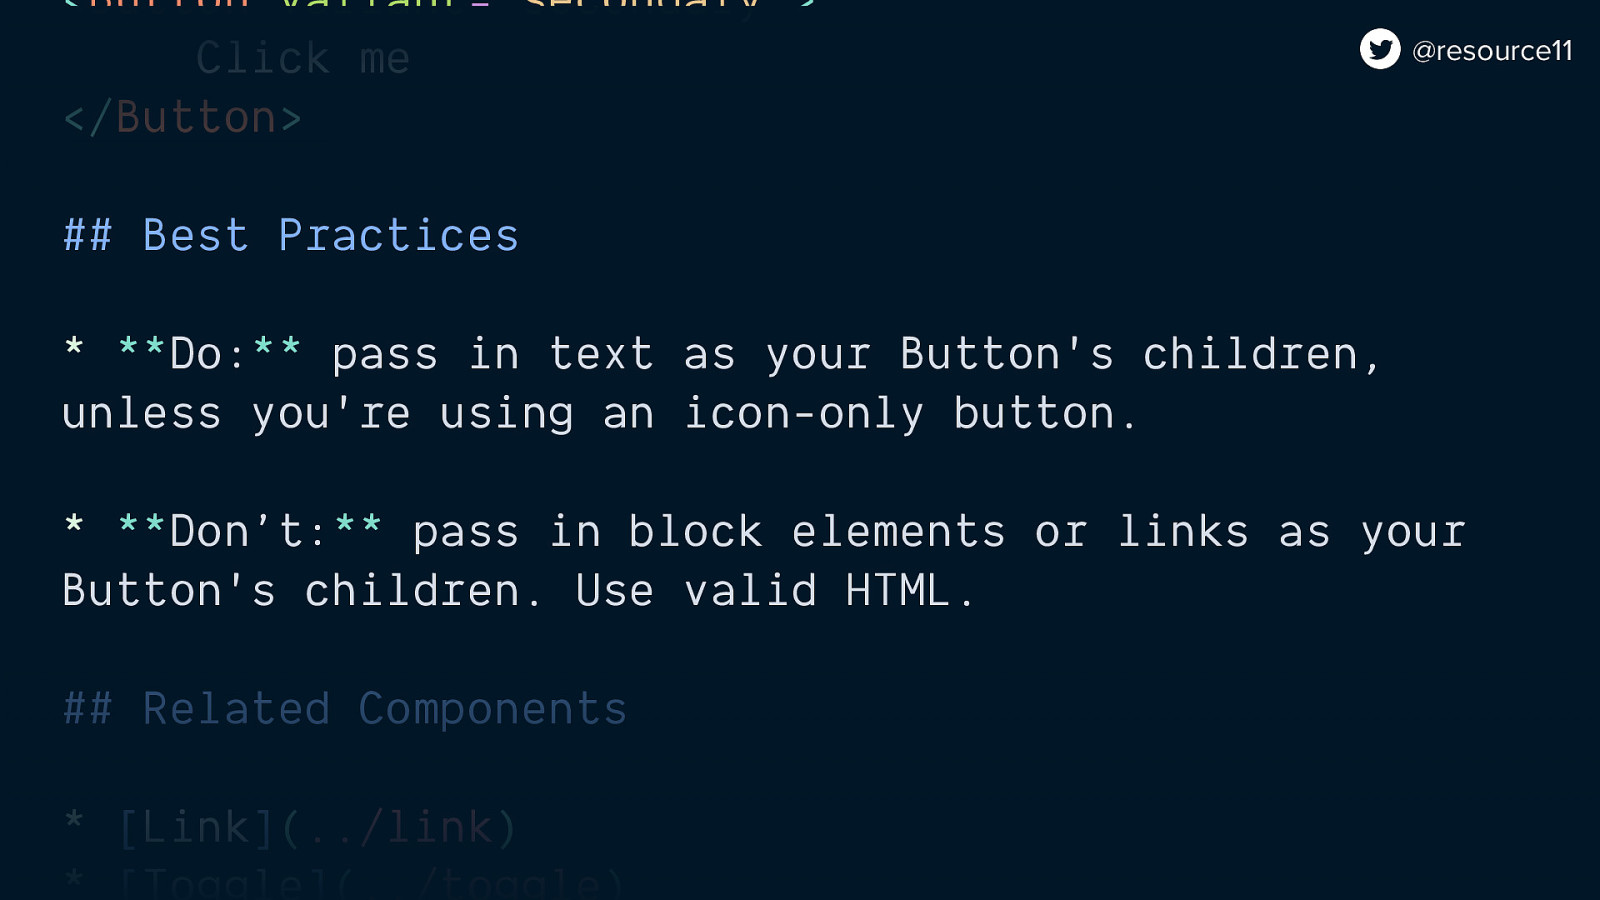
If you write out an unordered list in your MDX file
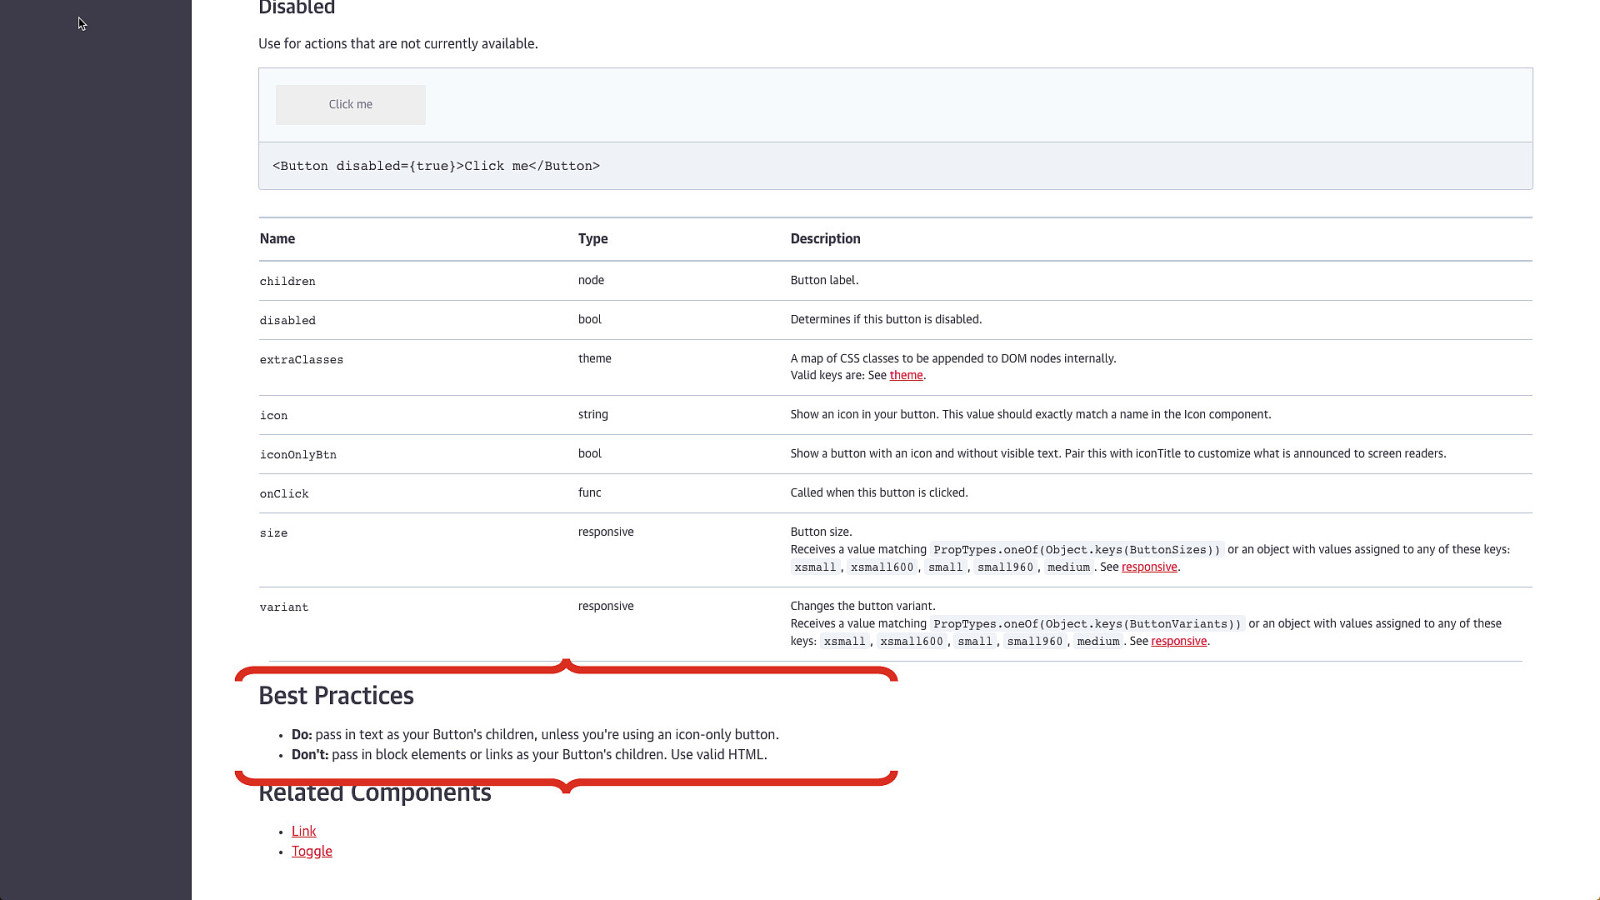
The list will render.
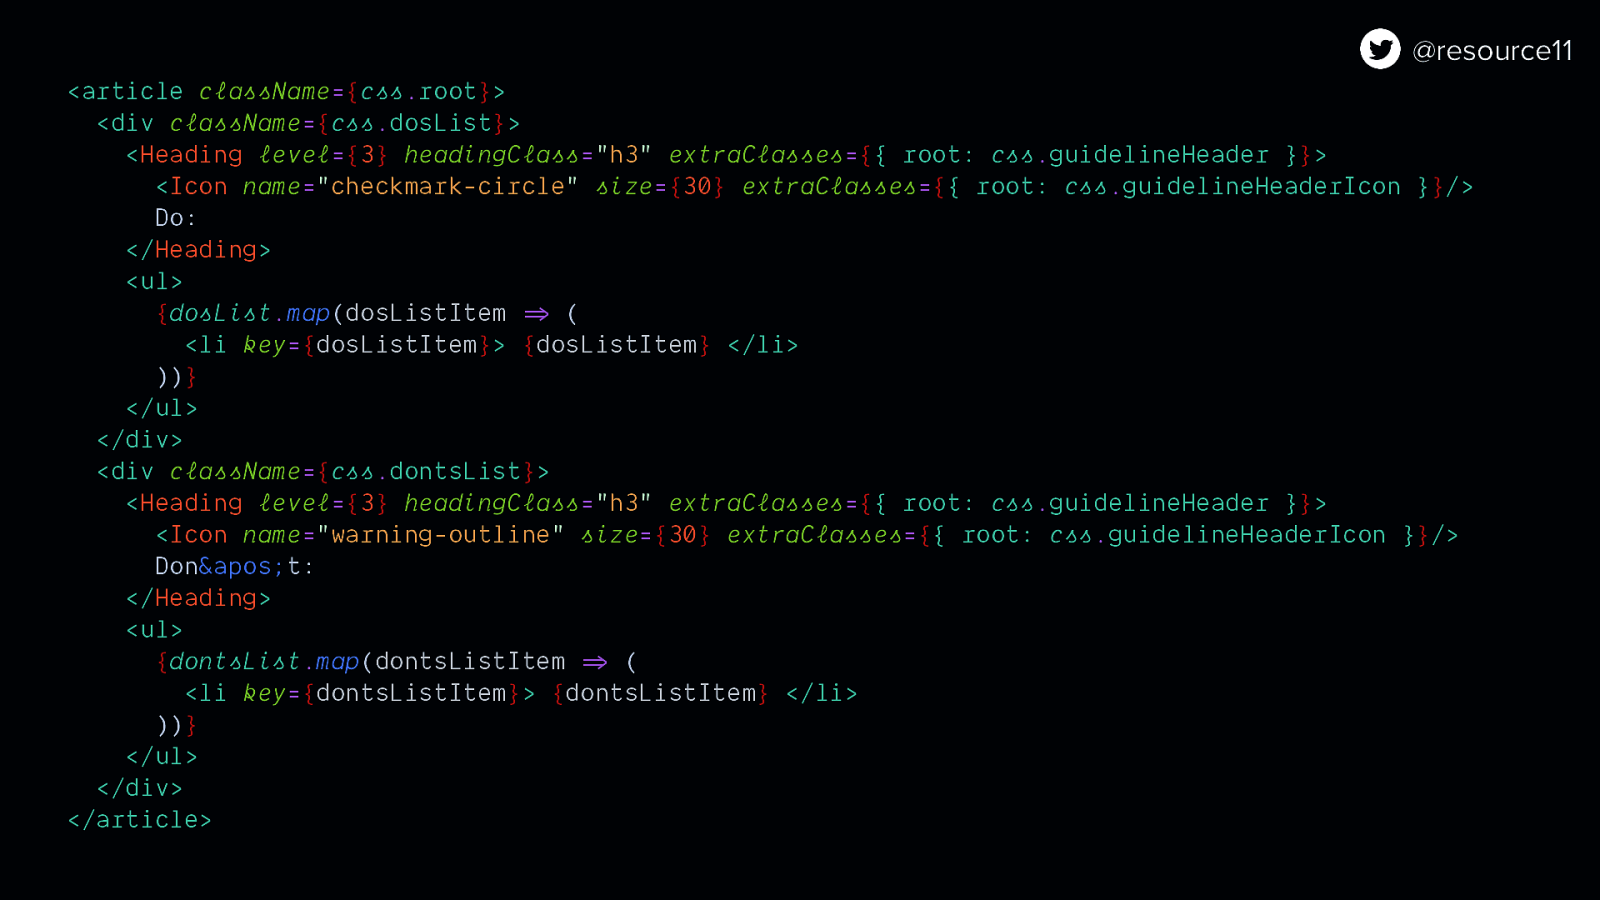
If you instead create a custom component that renders unordered lists for you
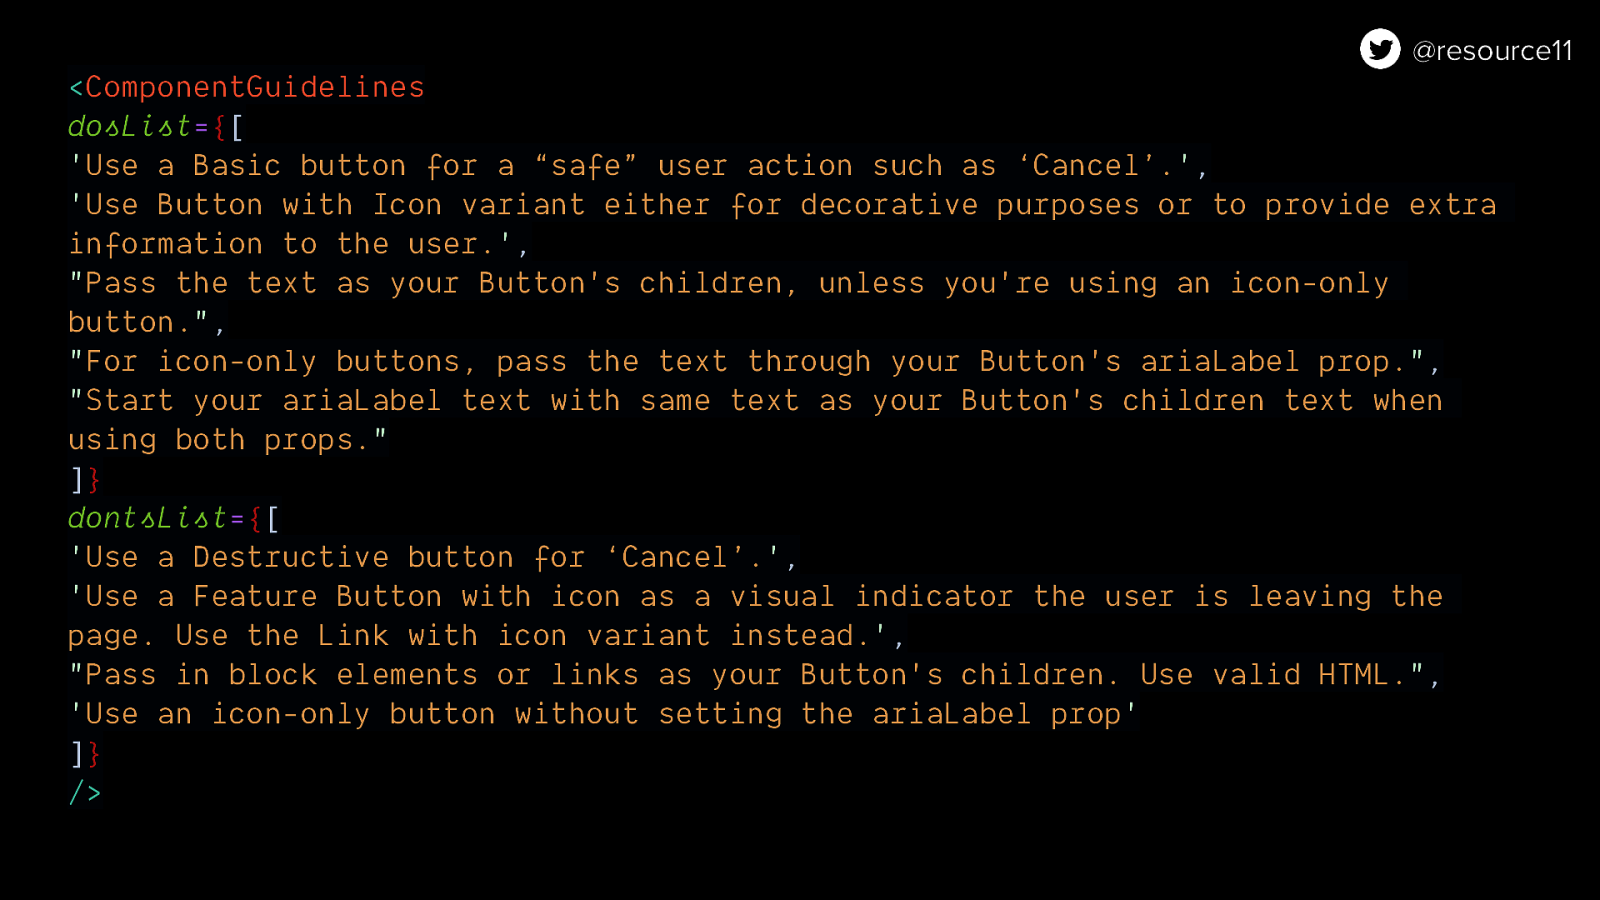
And send a dosList and a dontsList array into your component
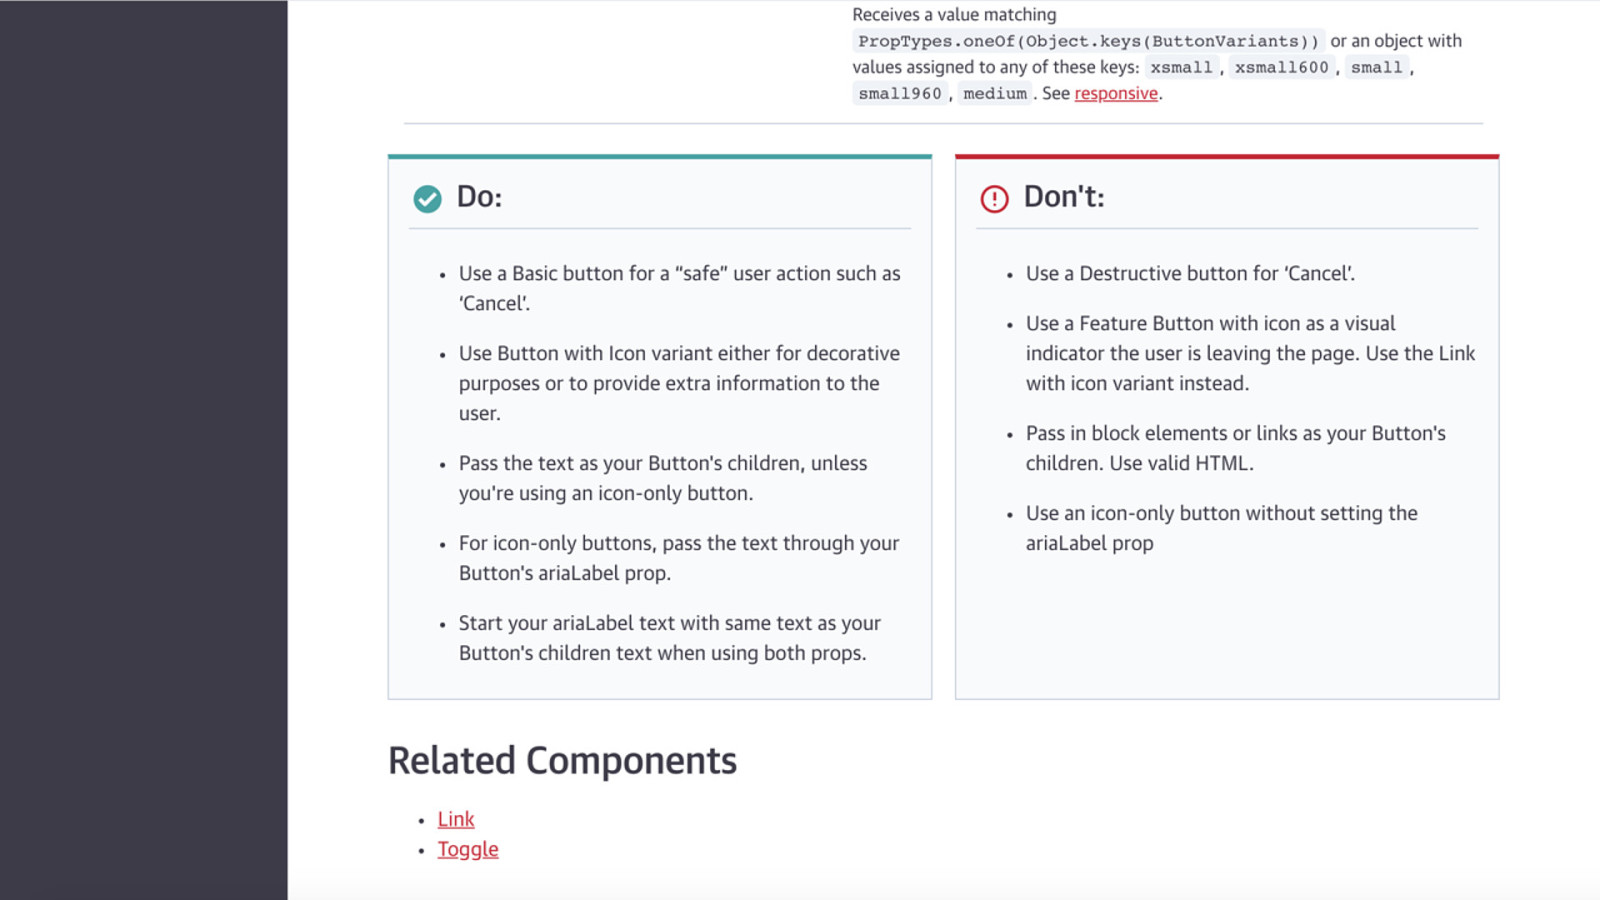
You can have a nicely styles dos/don’ts list

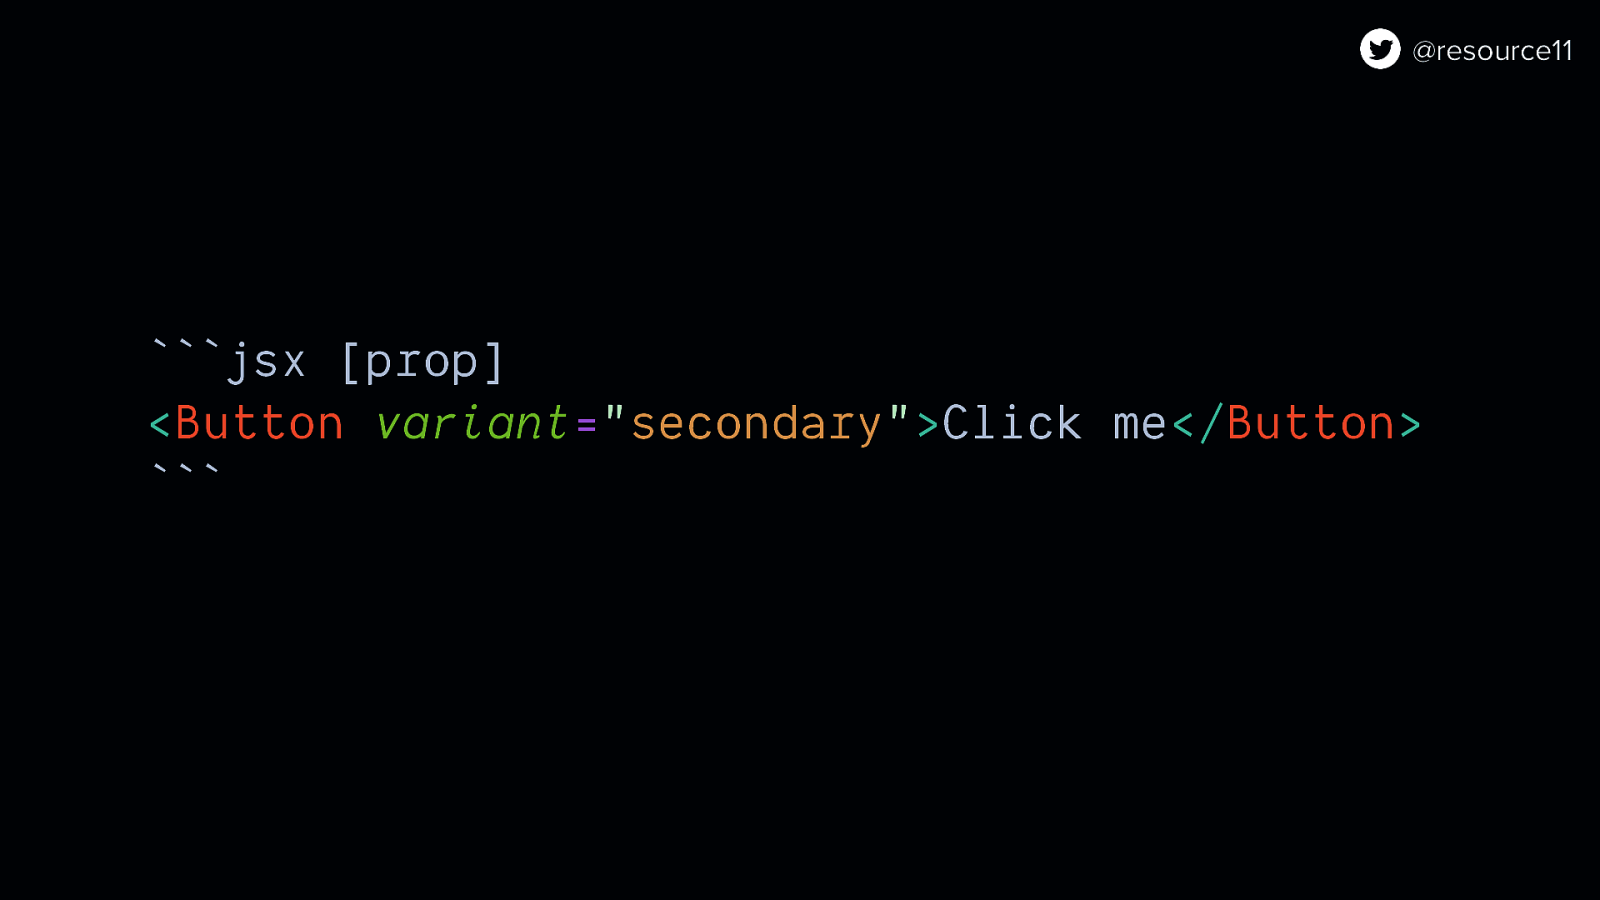
Code blocks. Markdown has great code block support. MDX makes those even more powerful.
You can override the styling of a code block in an MDX file with a custom code block, or even display different types of code blocks.
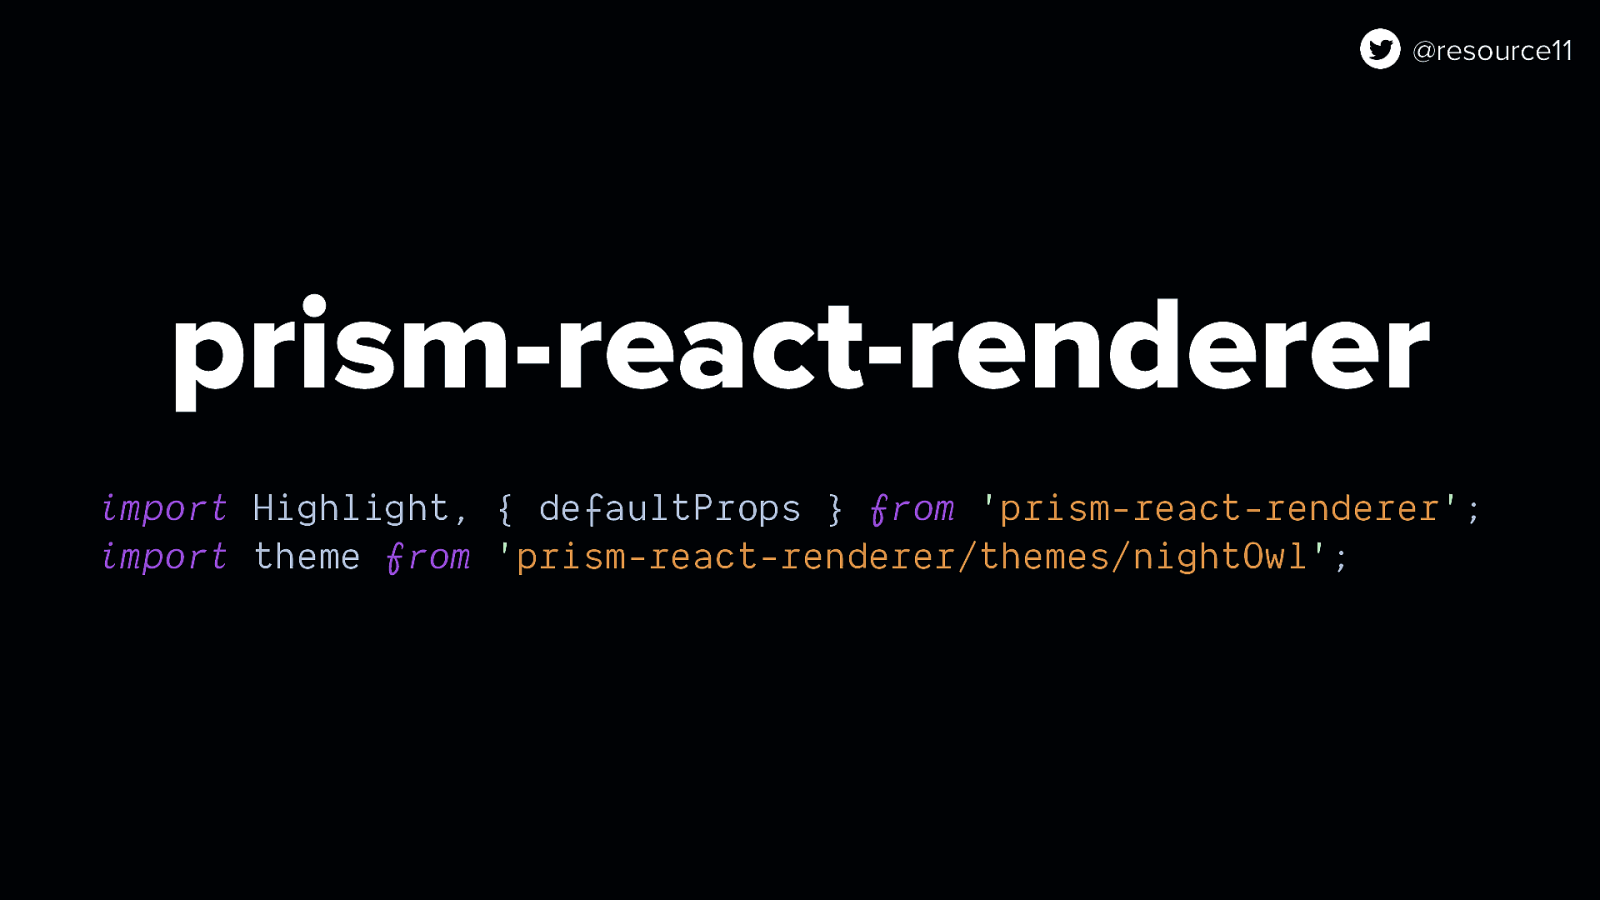
You could use prism-react-renderer in a custom CodeBlock component and import a theme with good color contrast
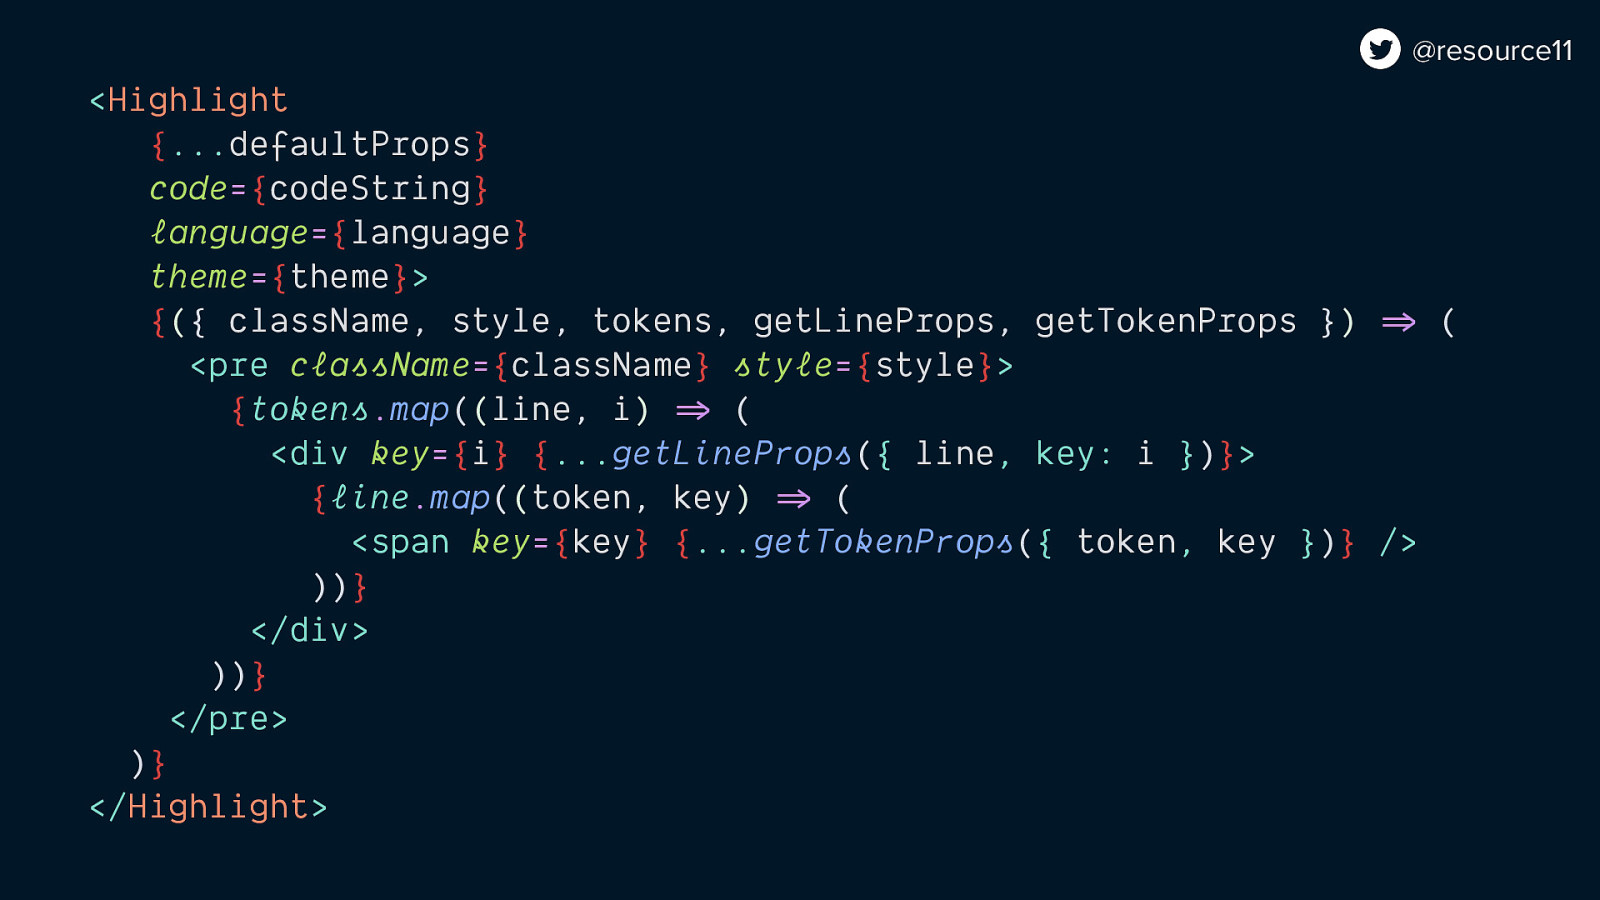
… wrap your code block and theme it…
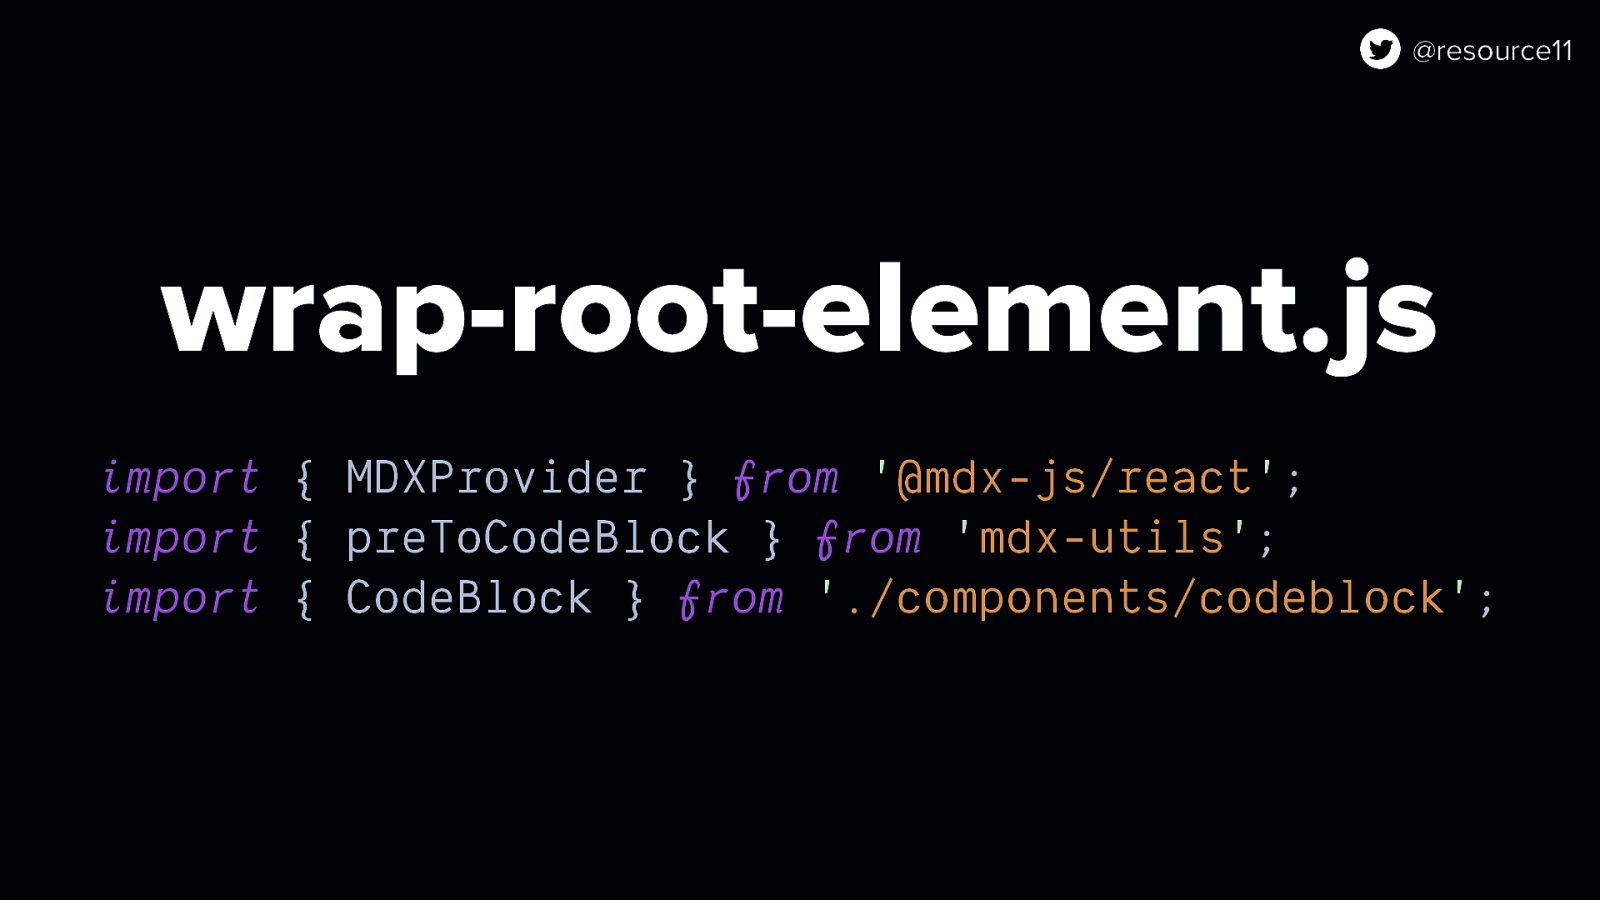
Import that into your wrap-root-element along with the preToCodeBlock util
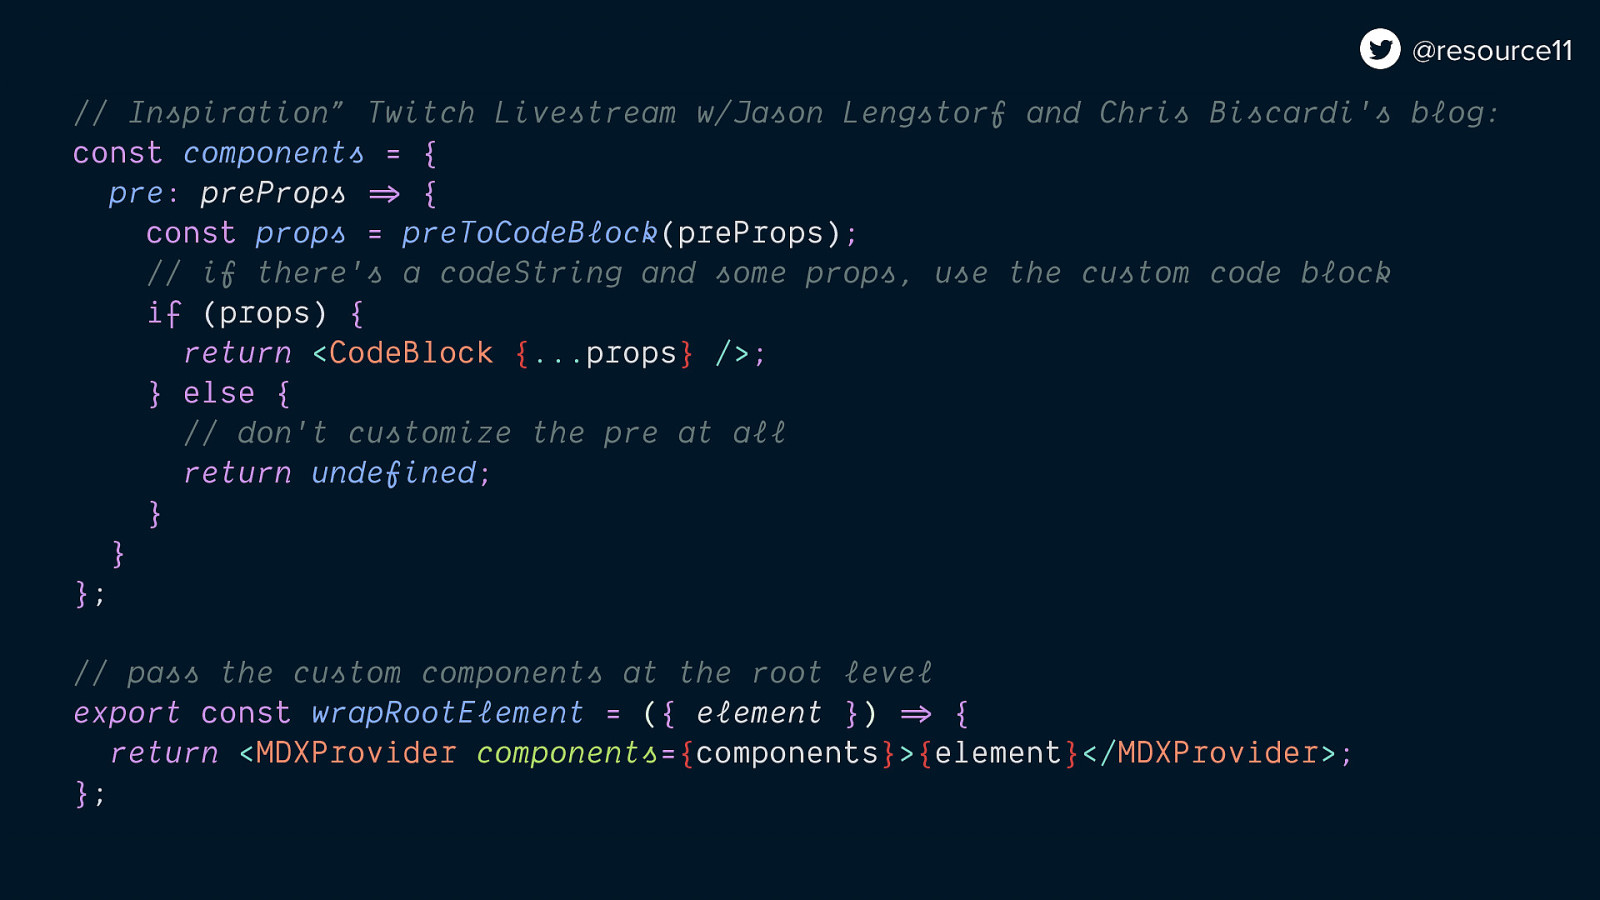
And override the default pre styling at the app level by passing it in as a component to the wrapRootElement.
So now when you write a code block in MDX
Instead of the baseline styling…
…the custom code block will render with syntax highligthing.
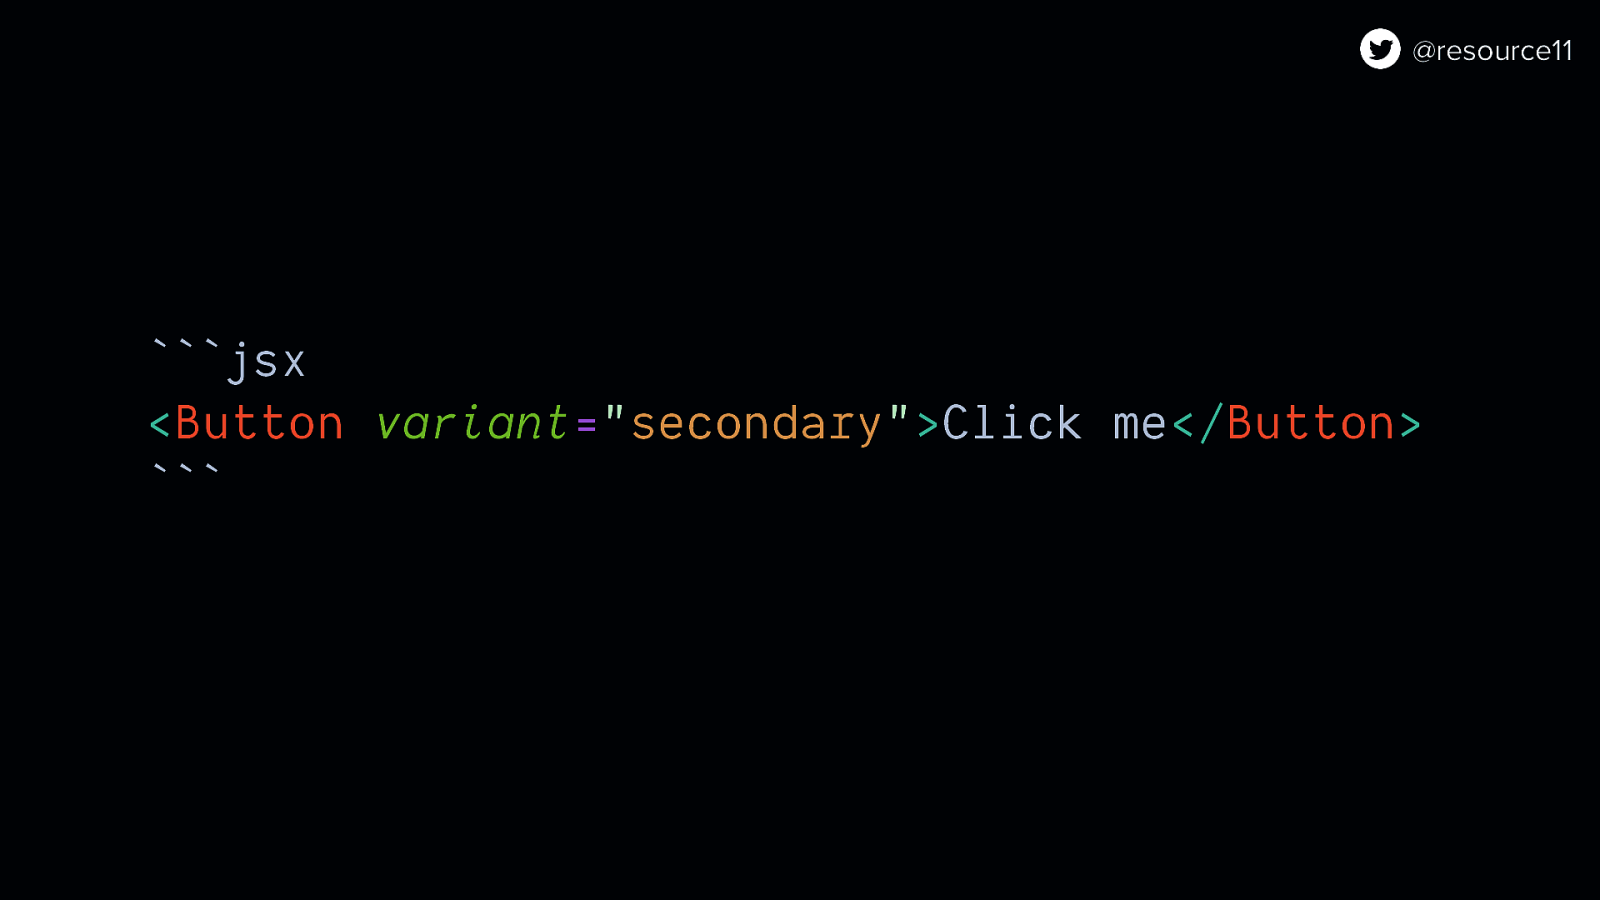
Fun fact: you can pass in a prop to that code block and do really cool things if you use custom code blocks!
For example, we can abstract this MDX into a DRYer pattern into custom our CodeBlock component…
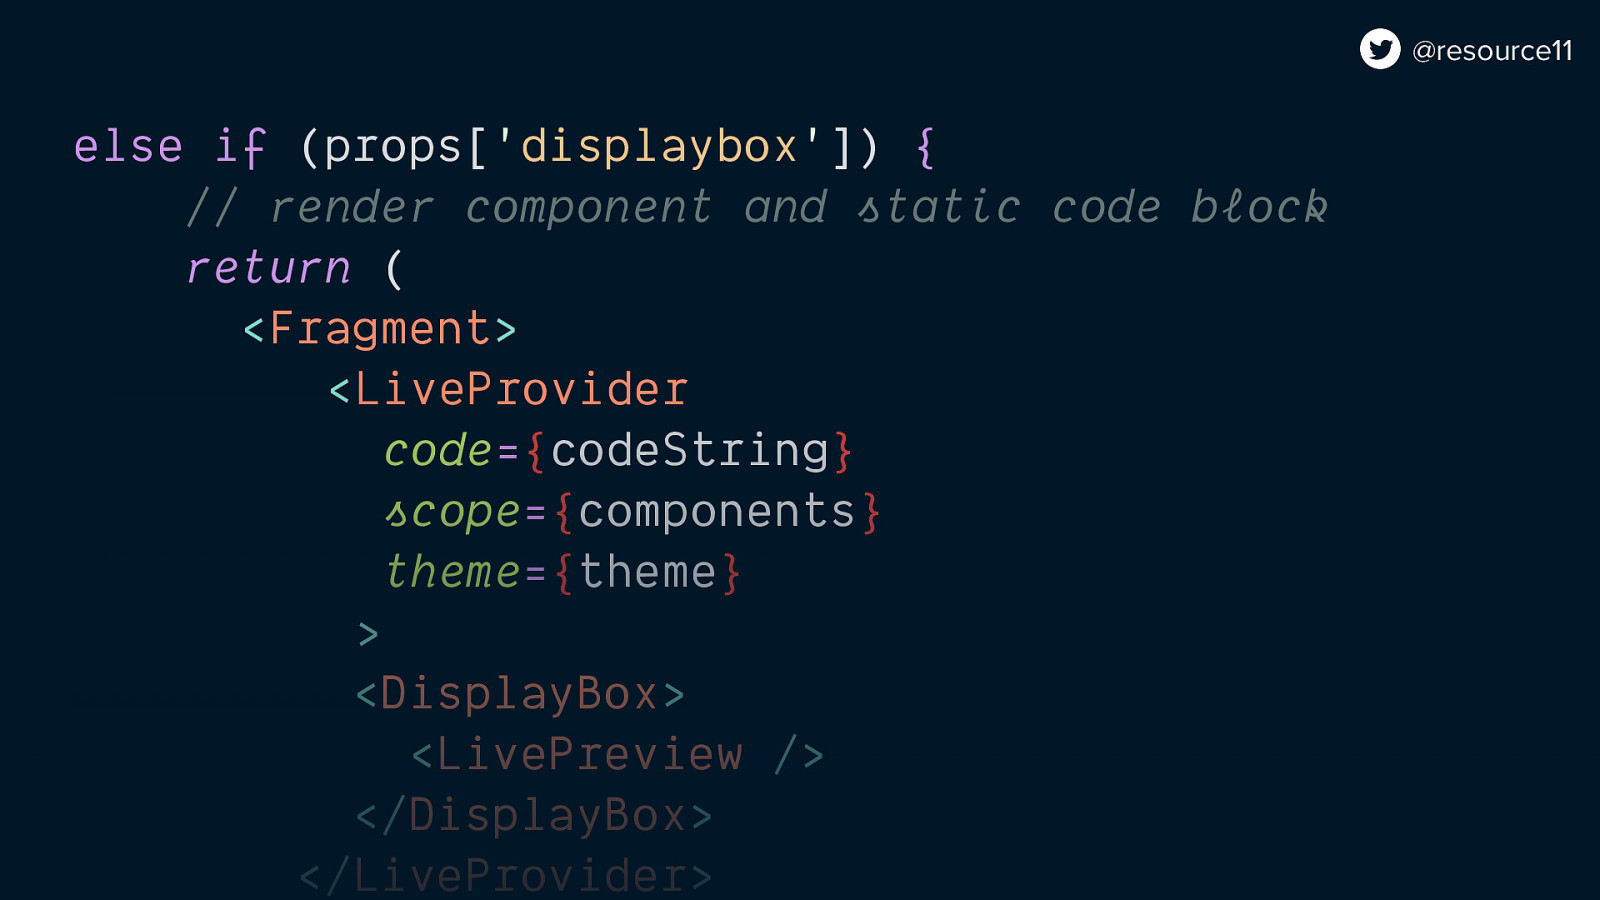
… and if the displaybox prop is passed in, show a. displayBox/code block pairing
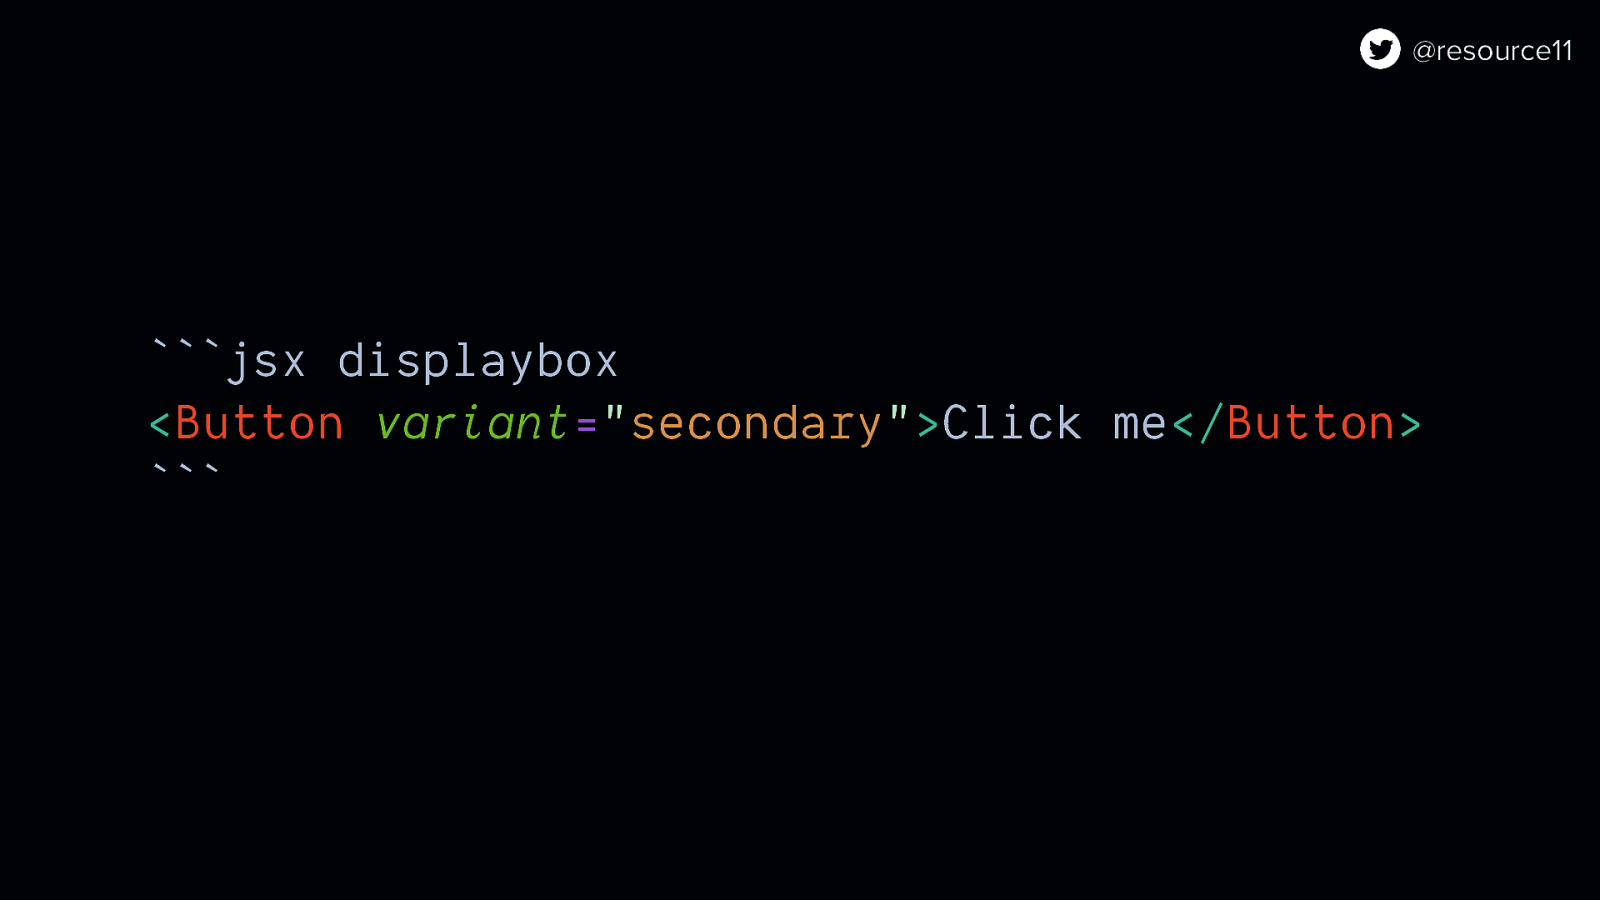
So if you add the displaybox prop to their code block in MDX…

You’ll get a display box paired with a code block. What about if you want your code block to be an editable code block?
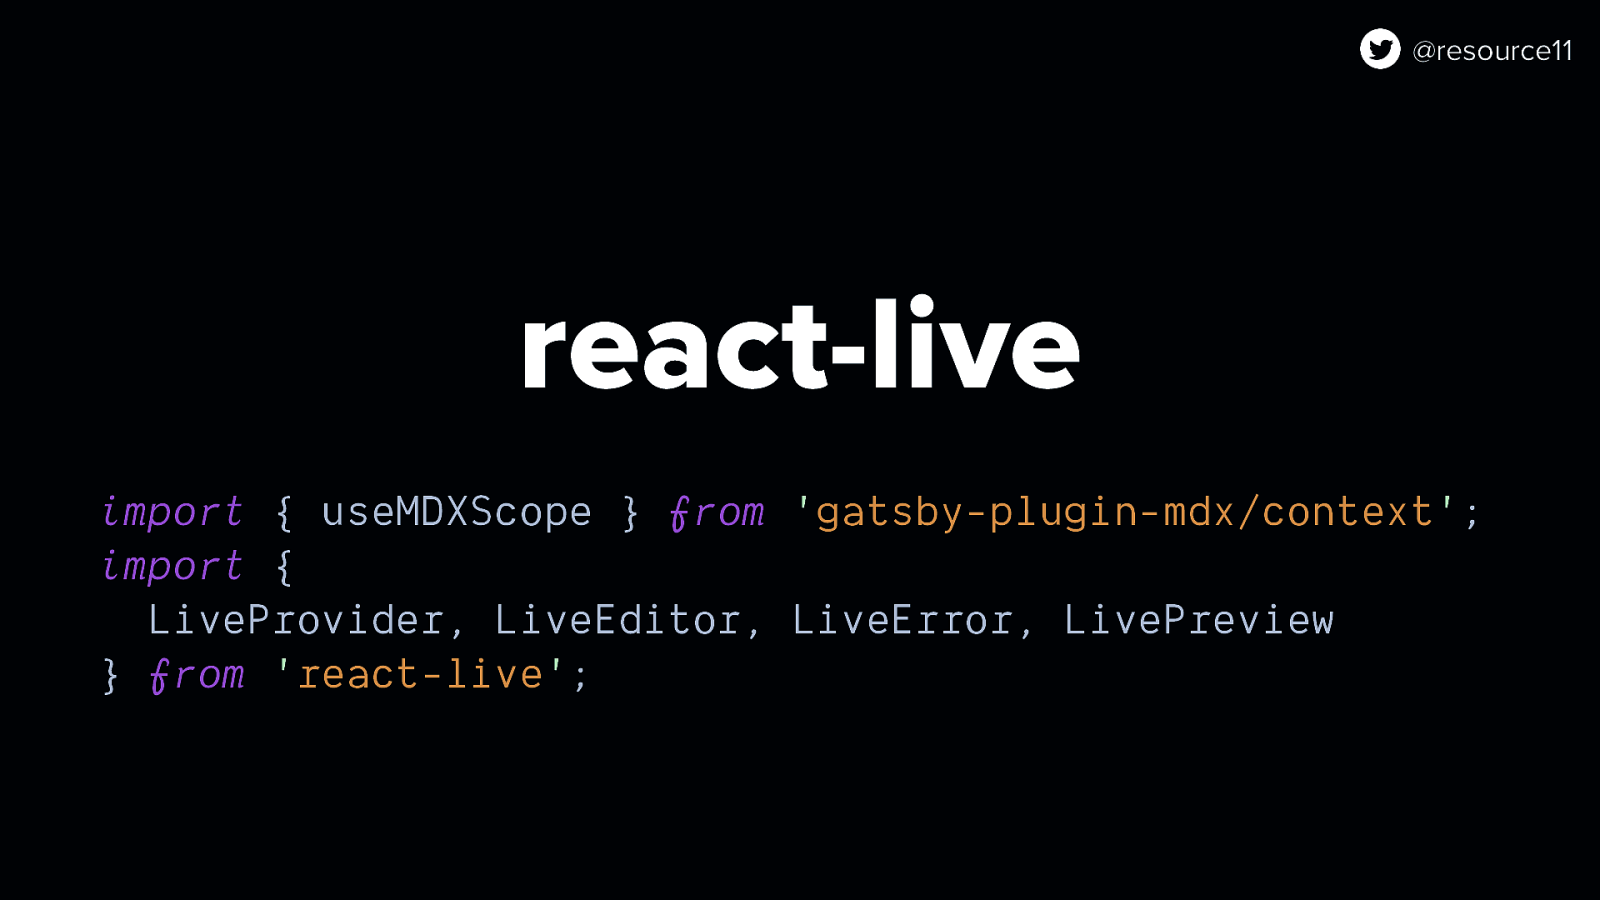
You can add a react-live option in our component.
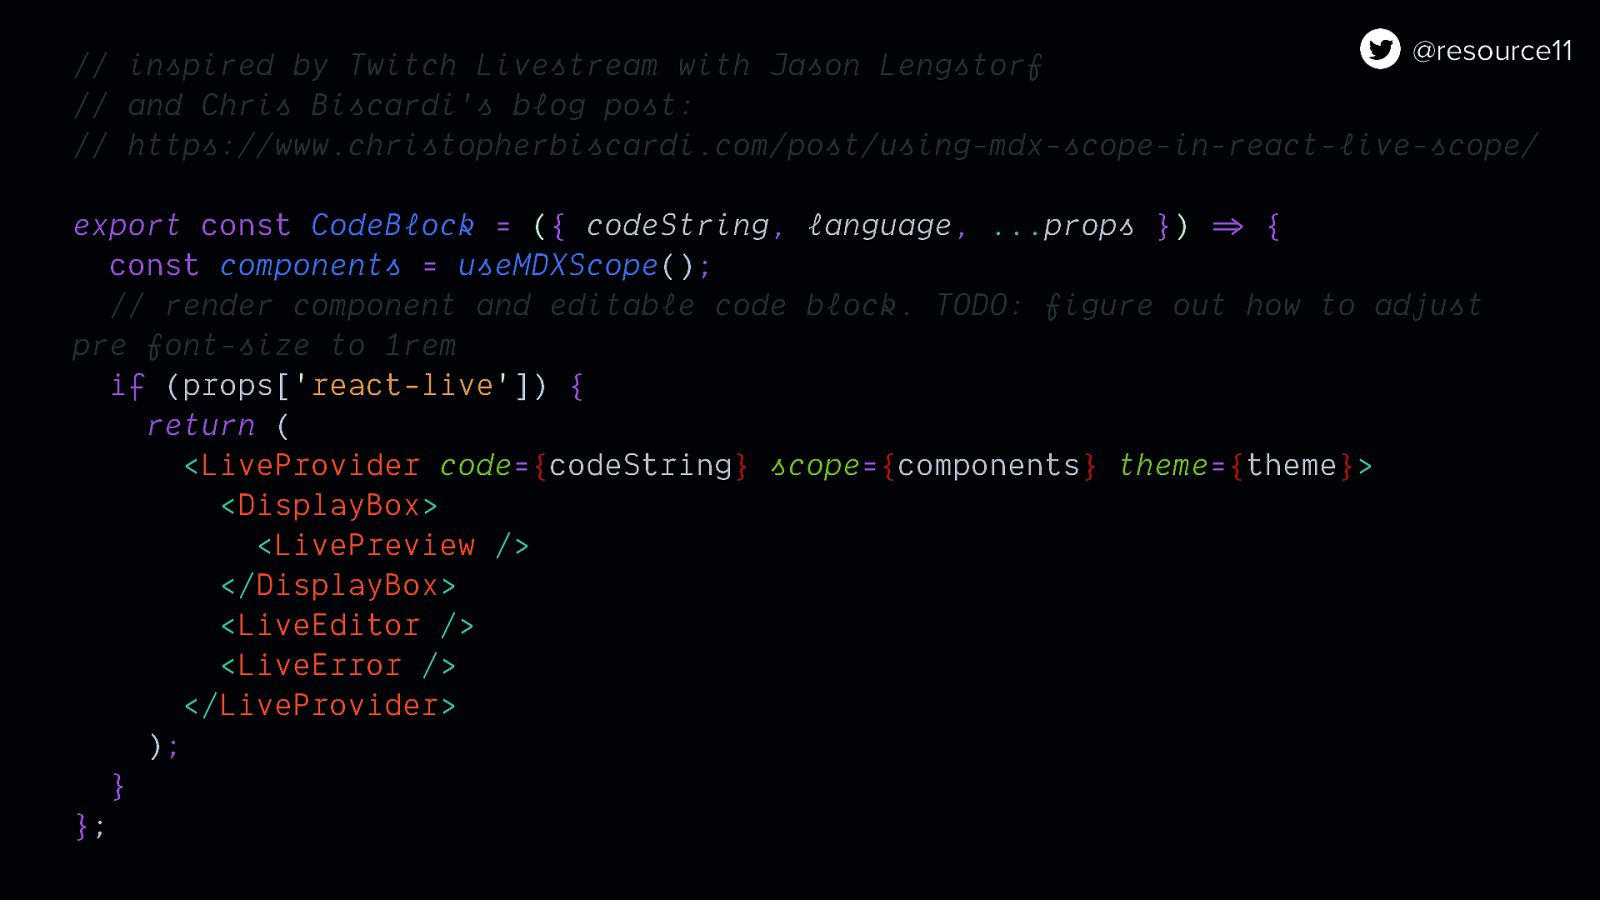
…and show component inside a displayBox pairing with an editable code block…
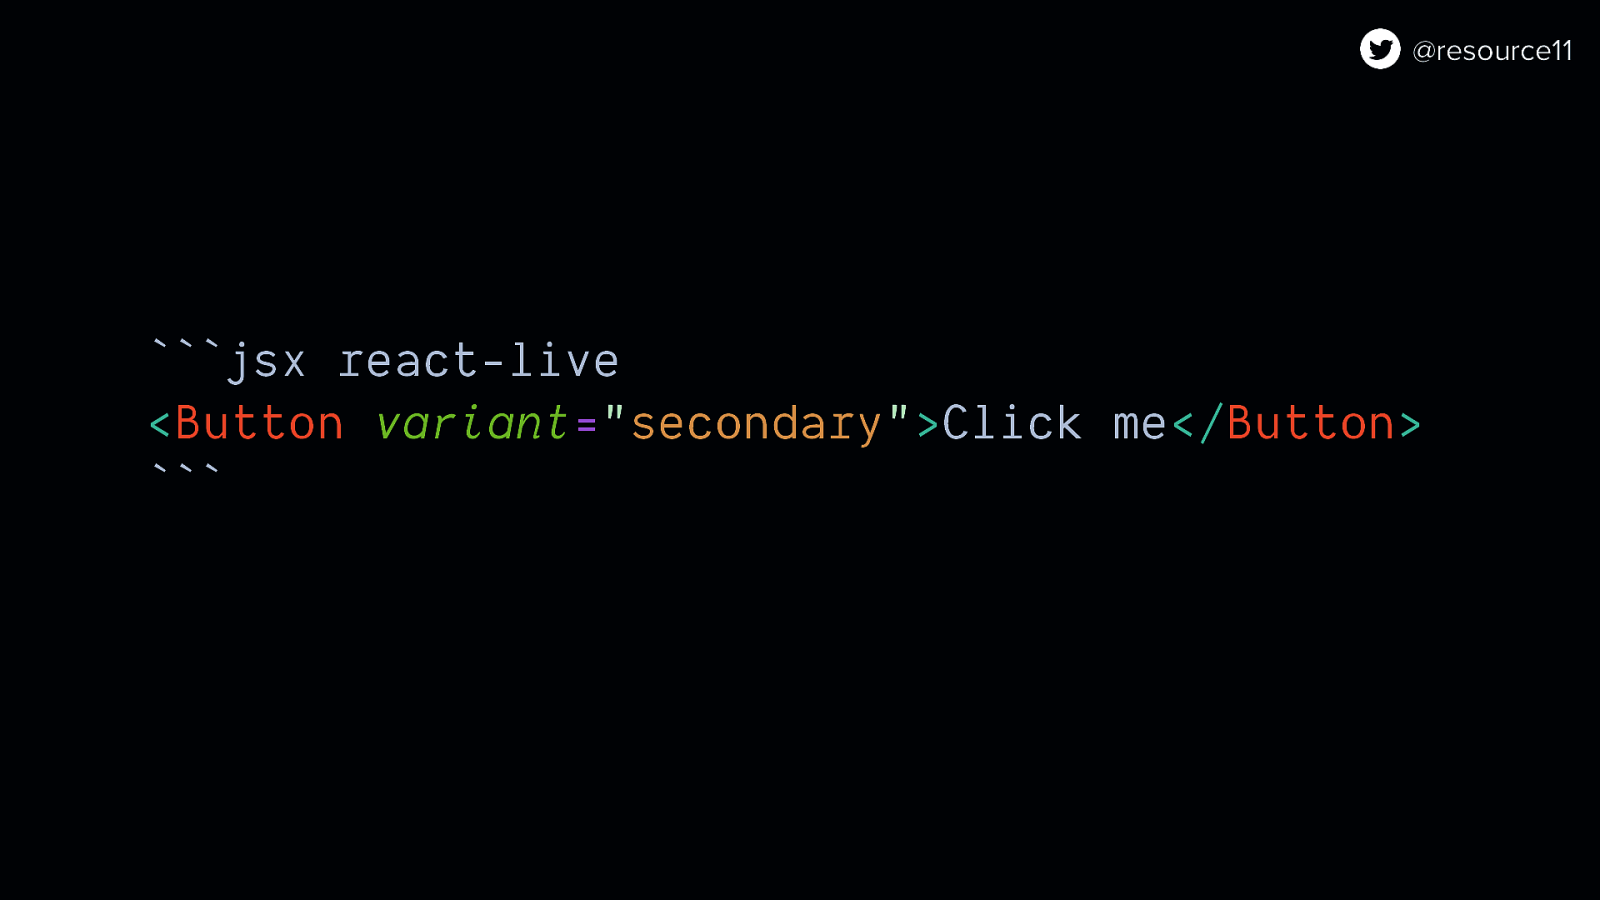
… so if you add the react-live prop to your MDX code block…

You’ll get an editable block, and see your changes in real time.
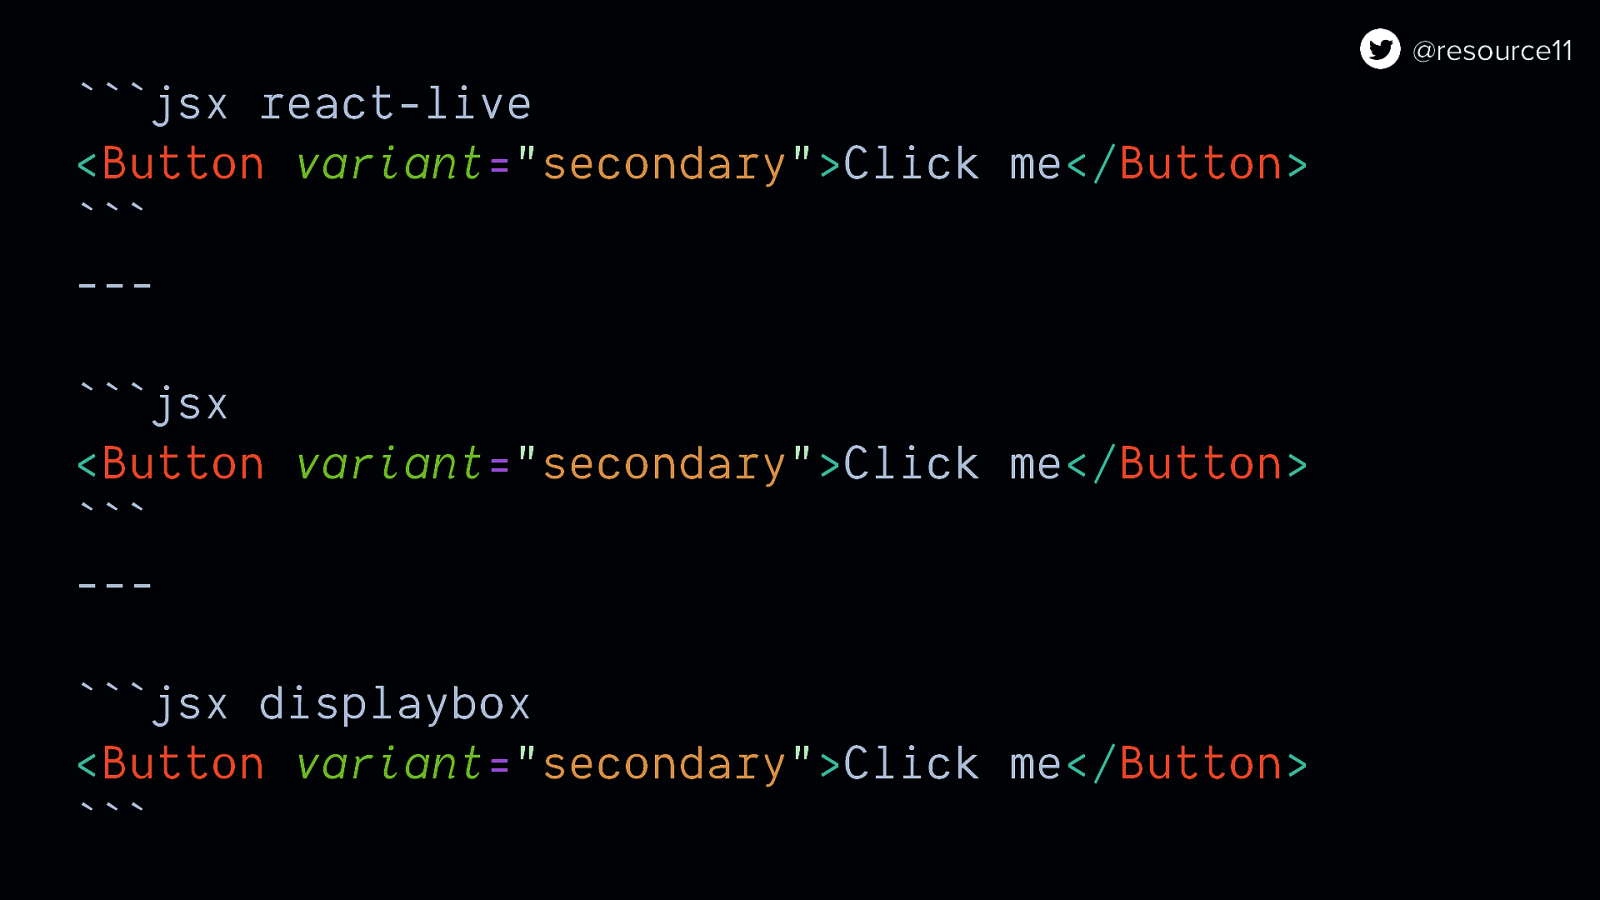
… So if we write something like this… this is what you see in the app
[open demo]
Here’s a side-by-side example of the three options, the live editable code block is the top block here.

So to wrap up…

If your documentation setup is brittle, your contributors will flee…

But Gatsby…

And MDX…

Can help make your docs inclusively smooth in both setup and execution.

Then your contributors will return…

…and will be happy to be part of your team.

Thank you
https://noti.st/resource11 Slide deck posted after the talk
@resource11 Twitter | Instagram | GitHub